Herunterladen Inhalt Inhalt Diese Seite drucken
Kaisai KWX HRBI Serie Bedienungsanleitung

Kaisai KWX HRBI Serie Bedienungsanleitung

Split-wandklimaanlage
Inhaltsverzeichnis

Werbung

Verfügbare Sprachen

Verfügbare Sprachen

INSTRUKCJA OBSŁUGI
PL
KLIMATYZATOR ŚCIENNY TYPU SPLIT
OWNER'S MANUAL
EN
SPLIT TYPE ROOM AIR CONDITIONER
BEDIENUNGSANLEITUNG
DE
SPLIT-WANDKLIMAANLAGE

Werbung

Kapitel

Inhaltsverzeichnis
loading

Inhaltszusammenfassung für Kaisai KWX HRBI Serie

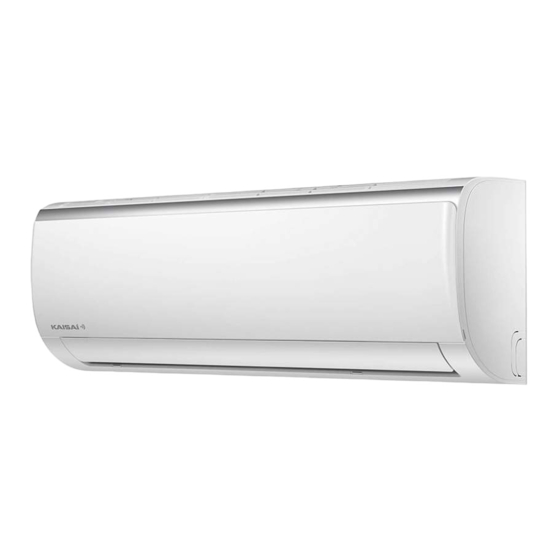
  • Seite 1 INSTRUKCJA OBSŁUGI KLIMATYZATOR ŚCIENNY TYPU SPLIT OWNER’S MANUAL SPLIT TYPE ROOM AIR CONDITIONER BEDIENUNGSANLEITUNG SPLIT-WANDKLIMAANLAGE...
  • Seite 3: Instrukcja Obsługi

    INSTRUKCJA OBSŁUGI KLIMATYZATOR ŚCIENNY TYPU SPLIT 05 PILOT ZDALNEGO STEROWANIA 23 ZESTAW SMART AC 38 OWNER’S MANUAL SPLIT TYPE ROOM AIR CONDITIONER 50 AIR CONDITIONER REMOTE CONTROLLER 68 SMART AC KIT 83 BEDIENUNGSANLEITUNG SPLIT-WANDKLIMAANLAGE 95 FERNBEDIENUNG 113 SMART AC 128...
  • Seite 5 Dla zapewnienia prawidłowej obsługi, zapoznaj się z instrukcją i przechowuj ją do wykorzystania w przyszłości. W przypadku zagubienia instrukcji obsługi, skontaktuj się z lokalnym dystrybutorem lub odwiedź stronę www.kaisai.com lub prześlij wiadomość email na adres: handlowy@kaisai.com, w celu uzyskania wersji elektronicznej instrukcji.
  • Seite 6 Spis treści Spis treści Instrukcja obsługi Instrukcja obsługi Środki bezpieczeństwa Środki bezpieczeństwa ........08 ........06 Specyfikacje i funkcje urządzenia Specyfikacje i funkcje urządzenia ..10 ..08 SAFETY SAFETY FIRST FIRST 2 Obsługa ręczna (bez pilota) Obsługa ręczna (bez pilota) ......15 ......13...
  • Seite 7 Utrzymanie i konserwacja ................16 Care and Maintenance .............12 Wykrywanie i usuwanie usterek ............18 Troubleshooting ..............14 5 Europejskie wytyczne w zakresie utylizacji ....22 European Disposal Guidelines ........18 UWAGA: Ryzyko pożaru/ Caution: Risk of fire/ flammable materials materiały łatwopalne OSTRZEŻENIE: Czynności serwisowe powinny być...
  • Seite 8: Środki Bezpieczeństwa

    Środki bezpieczeństwa Środki bezpieczeństwa Zapoznaj się ze środkami bezpieczeństwa przed przystąpieniem do montażu Zapoznaj się ze środkami bezpieczeństwa przed przystąpieniem do montażu Nieprawidłowy montaż wynikający z niezastosowania się do instrukcji może spowodować poważne Nieprawidłowy montaż wynikający z niezastosowania się do instrukcji może spowodować poważne uszkodzenia lub obrażenia.
  • Seite 9 OSTRZEŻENIA DOTYCZĄCE INSTALACJI ELEKTRYCZNEJ • Należy używać wyłącznie określone przewody zasilające. Jeśli przewód ulegnie uszkodzeniu, jego wymianę należy zlecić producentowi lub autoryzowanemu serwisowi. • Przewód zasilający należy utrzymywać w czystości. Usunąć pył i inne zanieczyszczenia, nagromadzone na przewodzie lub wokół wtyczki. Brudne wtyczki mogą spowodować wzniecenie ognia lub porażenie prądem.
  • Seite 10: Podzespoły Urządzenia

    Specy kacje i funkcje urządzenia Specy kacje i funkcje urządzenia Podzespoły urządzenia Podzespoły urządzenia Przedni panel Przedni panel Przewód zasilający (niektóre modele) Przewód zasilający (niektóre modele) Pilot zdalnego Pilot zdalnego Uchwyt pilota Uchwyt pilota sterowania sterowania (niektóre modele) (niektóre modele) Żaluzja Żaluzja Panel sygnalizacji (A)
  • Seite 11 Uzyskanie optymalnej wydajności Optymalną wydajność dla trybów CHŁODZENIA, GRZANIA i OSUSZANIA można uzyskać w następujących zakresach temperatury. Jeżeli klimatyzator będzie używany w warunkach spoza tych zakresów, zadziałają zabezpieczenia ograniczające optymalną wydajność urządzenia. Typ inwerterowy DLA JEDNOSTEK Tryb CHŁODZENIA Tryb GRZANIA Tryb OSUSZANIA Z DODATKOWĄ...
  • Seite 12 Funkcje przypomnienia dla ltra • Szczegółowy opis poszczególnych funkcji dostępny powietrza (niektóre modele) jest w instrukcji obsługi pilota. Funkcja przypomnienia o czyszczeniu ltra Po 240 godzinach pracy, na wyświetlaczu Pozostałe funkcje jednostki wewnętrznej zostanie wyświetlony pulsujący symbol „CL” (jeśli dotyczy) oraz •...
  • Seite 13 • Sterowanie kierunku przepływu powietrza Pionowa regulacja przepływu powietrza Kiedy urządzenie jest załączone, użyj przycisku SWING/DIRECT, aby ustawić kierunek (kąt piono- wy) przepływu powietrza. 1. Naciśnij przycisk SWING/DIRECT jeden raz aby uruchomić żaluzję. Każdorazowe naciśnięcie przycisku spowoduje zmianę kąta ustawienia żaluzji o 6 stopni.
  • Seite 14 Programator nocny (funkcja SLEEP) Programator nocny (funkcja SLEEP) • • Funkcja SLEEP służy do ograniczenia zużycia energii Funkcja SLEEP służy do ograniczenia zużycia energii Funkcja SLEEP służy do ograniczenia zużycia energii podczas snu (kiedy niepotrzebne sa te same usta- podczas snu (kiedy niepotrzebne są te same usta- podczas snu (kiedy niepotrzebne są...
  • Seite 15 Obsługa ręczna (bez pilota) Korzystanie z urządzenia bez pilota UWAGA W przypadku niesprawności pilota, klimatyzatorem Przycisk sterowania ręcznego przeznaczony jest można będzie sterować za pomocą przycisku wyłącznie do celów testowych i w sytuacjach MANUAL CONTROL, znajdującym się na przednim awaryjnych. Prosimy korzystać z tej funkcji tylko w panelu jednostki wewnętrznej.
  • Seite 16: Utrzymanie I Konserwacja

    Utrzymanie i konserwacja Utrzymanie i konserwacja 6. Wypłucz ltr pod czystą wodą, a następnie 6. Wypłucz ltr pod czystą wodą, a następnie Czyszczenie jednostki wewnętrznej Czyszczenie jednostki wewnętrznej usuń nadmiar wody. usuń nadmiar wody. PRZED PRZYSTĄPIENIEM DO PRZED PRZYSTĄPIENIEM DO 7.
  • Seite 17 Konserwacja – dłuższa przerwa UWAGA w użytkowaniu • Przed wymianą ltra lub czyszczeniem należy Jeżeli przewidujesz dłuższą przerwę w pracy urządze- wyłączyć jednostkę i odłączyć ją od źródła nia, wykonaj następujące czynności: zasilania. • Podczas wyjmowania ltra nie wolno dotykać metalowych części wewnątrz jednostki.
  • Seite 18: Wykrywanie I Usuwanie Usterek

    Wykrywanie i usuwanie usterek Wykrywanie i usuwanie usterek ŚRODKI BEZPIECZEŃSTWA ŚRODKI BEZPIECZEŃSTWA W przypadku wystąpienia KTÓREJKOLWIEK z poniższych sytuacji, należy natychmiast wyłączyć urządzenie! W przypadku wystąpienia KTÓREJKOLWIEK z poniższych sytuacji, należy natychmiast wyłączyć urządzenie! • • Przewód zasilający jest uszkodzony lub wyjątkowo gorący. Przewód zasilający jest uszkodzony lub wyjątkowo gorący.
  • Seite 19 Problem Możliwa przyczyna Żaluzje na wylocie powietrza powracające do swojego pierwotnego położenia generują dźwięk szumu powietrza. Jednostka wewnętrzna emituje hałas Po pracy w trybie GRZANIA, z urządzenia może dochodzić skrzypienie wywołane rozszerzaniem i kurczeniem się elementów jednostki wykonanych z tworzywa sztucznego. Ciche syczenie słyszalne podczas pracy: jest to normalne działanie, spowodowane przepływem czynnika chłodniczego w instalacji jednostki wewnętrznej i zewnętrznej.
  • Seite 20 Wykrywanie i usuwanie usterek Wykrywanie i usuwanie usterek W przypadku wystąpienia problemu, prosimy sprawdzić poniższe punkty przed skontaktowaniem się z serwi- W przypadku wystąpienia problemu, prosimy sprawdzić poniższe punkty przed skontaktowaniem się z serwi- sem. sem. Problem Problem Możliwa przyczyna Możliwa przyczyna Rozwiązanie Rozwiązanie...
  • Seite 21 Problem Możliwa przyczyna Rozwiązanie Poczekaj na przywrócenie Usterka zasilania zasilania Urządzenie jest wyłączone Włącz zasilanie Przepalony bezpiecznik Wymień bezpiecznik Urządzenie nie działa Zużyte baterie pilota Wymień baterie zdalnego sterowania Załączenie 3-minutowego Odczekaj trzy minuty zabezpieczenia jednostki po załączeniu jednostki Aktywny programator Wyłącz programator Sprawdź...
  • Seite 22 Europejskie wytyczne w zakresie utylizacji Urządzenie zawiera czynnik chłodniczy i inne potencjalnie niebezpieczne materiały. Prawnie wymagane jest specjalne postępowanie w zakresie zbiórki i przetwarzania tego typu urządzeń. Produkt ten nie może być usuwany jako odpad gospodarstwa domowego. W celu pozbycia się urządzenia można: •...
  • Seite 23: Pilot Zdalnego Sterowania

    PILOT ZDALNEGO STEROWANIA Instrukcja obsługi Dziękujemy za wybór naszego produktu. Dla zapewnienia prawidłowej obsługi, zapoznaj się z instrukcją i przechowuj ją do wykorzystania w przyszłości.
  • Seite 24: Inhaltsverzeichnis

    SPIS TREŚCI Spis treści Dane techniczne pilota zdalnego sterowania....24 Dane techniczne pilota zdalnego sterowania ........2 Przyciski funkcji ..........25 Przyciski funkcji ..................
  • Seite 25: Dane Techniczne Pilota Zdalnego Sterowania

    Przyciski funkcji Dane techniczne pilota zdalnego sterowania Należy bezwzględnie zapoznać się z działaniem pilota zdalnego sterowania przed rozpoczęciem korzystania z nowego klimatyzatora. Poniżej znajduje się krótkie wprowadzenie do obsługi pilota zdalnego sterowania. Instrukcja obsługi klimatyzatora znajduje się w rozdziale pt.Sposób korzystania z funkcji Model RG66A1/BGEF zaawansowanych niniejszej instrukcji obsługi.
  • Seite 26: Przyciski Funkcji

    Przyciski funkcji Przyciski funkcji Należy bezwzględnie zapoznać się z działaniem pilota zdalnego sterowania przed rozpoczęciem korzystania Należy bezwzględnie zapoznać się z działaniem pilota zdalnego sterowania przed rozpoczęciem korzystania z nowego klimatyzatora. Poniżej znajduje się krótkie wprowadzenie do obsługi pilota zdalnego sterowania. z nowego klimatyzatora.
  • Seite 27: Obsługa Pilota Zdalnego Sterowania

    OBSŁUGA PILOTA ZDALNEGO STEROWANIA OBSŁUGA PILOTA ZDALNEGO STEROWANIA WSKAZÓWKI DOTYCZĄCE KORZYSTANIA Z WSKAZÓWKI DOTYCZĄCE KORZYSTANIA Z NIE MASZ PEWNOŚCI DO CZEGO SŁUŻY DANA NIE MASZ PEWNOŚCI DO CZEGO SŁUŻY DANA PILOTA ZDALNEGO STEROWANIA PILOTA ZDALNEGO STEROWANIA FUNKCJA? Szczegółowy opis sposobu użytkowania FUNKCJA? Szczegółowy opis sposobu użytkowania Pilot zdalnego sterowania musi być...
  • Seite 28: Wskaźniki Na Ekranie Monitora Lcd Zdalnego Sterowania

    Wskaźniki na ekranie monitora LCD zdalnego sterowania Wskaźniki na ekranie monitora LCD zdalnego sterowania Informacje są wyświetlane tylko wtedy, gdy pilot jest włączony. Informacje są wyświetlane tylko wtedy, gdy pilot jest włączony. Włączanie/wyłączanie Włączanie/wyłączanie wyświetlacza wyświetlacza Wyświetlacz jest widoczny po Wyświetlacz jest widoczny po włączeniu urządzenia i znika po włączeniu urządzenia i znika po...
  • Seite 29 Sposób korzystania z funkcji podstawowych Sposób korzystania z funkcji podstawowych USTAWIENIA TEMPERATURY USTAWIENIA TEMPERATURY Zakres temperatur pracy urządzenia wynosi 17-30°C. Zakres temperatur pracy urządzenia wynosi 17-30°C. Ustawioną temperaturę można zwiększać lub Ustawioną temperaturę można zwiększać lub zmniejszać skokowo o 1°C. zmniejszać...
  • Seite 30: Sposób Korzystania Z Funkcji Podstawowych

    Sposób korzystania z funkcji podstawowych Sposób korzystania z funkcji podstawowych Praca w trybie osuszania/odwilżania (DRY) Praca w trybie osuszania/odwilżania (DRY) Naciśnij przycisk MODE, aby wybrać tryb osuszania Naciśnij przycisk MODE, aby wybrać tryb osuszania (DRY). (DRY). Ustaw żądaną temperaturę za pomocą przycisku Ustaw żądaną...
  • Seite 31 Sposób korzystania z funkcji podstawowych Sposób korzystania z funkcji podstawowych Praca w trybie ogrzewania (HEAT) Praca w trybie ogrzewania (HEAT) Naciśnij przycisk MODE, aby wybrać tryb Naciśnij przycisk MODE, aby wybrać tryb ogrzewania (HEAT). ogrzewania (HEAT). Ustaw żądaną temperaturę za pomocą Ustaw żądaną...
  • Seite 32 Ustawianie funkcji zegara (TIMER) Ustawianie funkcji zegara (TIMER) któ Twój klimatyzator ma dwie funkcje związane z zegarem: Twój klimatyzator ma dwie funkcje związane z zegarem: • • TIMER ON - ustawia czas, po którym urządzenie TIMER ON - ustawia czas, po którym urządzenie włącza się...
  • Seite 33 Funkcja wyłączenia zegara (TIMER OFF) Funkcja wyłączenia zegara (TIMER OFF) Funkcja TIMER OFF umożliwia ustawienie czasu, po Funkcja TIMER OFF umożliwia ustawienie czasu, po UWAGA: Każdorazowe naciśnięcie przycisku UWAGA: Każdorazowe naciśnięcie przycisku którym urządzenie wyłączy się automatycznie, np. po którym urządzenie wyłączy się automatycznie, np. po spowoduje przyrost wartości czasu o 30 minut spowoduje przyrost wartości czasu o 30 minut obudzeniu się.
  • Seite 34 Jednoczesna konfiguracja włączenia i wyłączenia zegara ustawienie(TIMER ON i TIMER OFF) Jednoczesna konfiguracja włączenia i wyłączenia zegara ustawienie(TIMER ON i TIMER OFF) Trzeba pamiętać, że przedziały czasowe ustawiane dla obu tych funkcji odnoszą się do ilości godzin, jakie Trzeba pamiętać, że przedziały czasowe ustawiane dla obu tych funkcji odnoszą się do ilości godzin, jakie upłyną...
  • Seite 35 Przykład: Ustawienie urządzenia w taki sposób, aby włączało się po 6 godzinach, pracowało przez 2 Przykład: Ustawienie urządzenia w taki sposób, aby włączało się po 6 godzinach, pracowało przez 2 godziny, a następnie wyłączyło się (patrz rysunek poniżej). godziny, a następnie wyłączyło się (patrz rysunek poniżej). Wyświetlacz na pilocie Wyświetlacz na pilocie zdalnego sterowania...
  • Seite 36 nsowanych Sposób korzystania z funkcji zaawansowanych Sposób korzystania z funkcji zaawansowanych Sposób korzystania z funkcji zaawansowanych Sposób korzystania z funkcji zaawansowanych Tryb c nkcji zaawansowanych Sposób korzystania z funkcji zaawansowan Funkcja SLEEP Funkcja ECO Funkcja SLEEP Funkcja SLEEP Przytrzy przez 2 Funkcja aktywuje tryb oszczędzania energii.
  • Seite 37 Sposób korzystania z funkcji zaawansowanych Funkcja SLEEP nych Funkcja SLEEP (sen) jest wykorzystywana do zmniejszania zużycia energii podczas snu (i Sposób korzystania z funkcji zaawansowanych Sposób korzystania z funkcji zaawansowanych Sposób korzystania z funkcji zaawansowanych nie wymaga tej samej konfiguracji Tryb cichej pracy temperatury, aby zachować...
  • Seite 38 ZESTAW SMART AC Instrukcja obsługi WAŻNA INFORMACJA: Przed przystąpieniem do instalacji lub podłączania urządzenia należy dokładnie zapoznać się z instrukcją. Instrukcję należy zachować do wykorzystania w przyszłości.
  • Seite 39: Specyfikacje

    S P I S T R E Ś C I 1. Specyfikacje............................. 39 2. Środki ostrożności..........................39 3. Pobieranie i instalowanie aplikacji....................40 4. Montaż zestawu smart.......................... 41 5. Rejestracja użytkownika........................41 6. Konfiguracja sieci............................ 42 7. Obsługa aplikacji............................ 47 8.
  • Seite 40: Pobieranie I Instalowanie Aplikacji

    Uwaga Więcej informacji dostępnych jest na internetowej stronie serwisowej. Dla prawidłowego odczy- tu kodu QR wymagany jest smartfon z kamerą o minimalnej rozdzielczości 5 milionów pikseli. • Ze względu na zmienny stan sieci, mogą wystąpić dłuższe przerwy w dostawie usługi, wyma- gające ponownej konfiguracji sieci.
  • Seite 41: Montaż Zestawu Smart

    4. MONTAŻ ZESTAWU SMART 1. Zdejmij ochronną nasadkę z zestawu SMART. 2. Otwórz przedni panel i podłącz zestaw SMART do wyznaczonego portu. 3. Naklej kod QR dostarczony z zestawem SMART na bocznym panelu urządzenia, upewnij się, że jego zeskanowanie za pomocą telefonu nie będzie utrudnione. Alternatywnie, użytkownik może zrobić...
  • Seite 42: Konfiguracja Sieci

    zarejestrowane konto klikając link. 1. Kliknij na „Create Account”. 2. Wprowadź adres e-mail i hasło, następnie naciśnij przycisk „Registration”. 6. KONFIGURACJA SIECI Uwaga: • Konieczne jest anulowanie („zapomnij sieć”) nawiązywania połączeń z innymi dostępny- mi sieciami i upewnienie się, że system Android lub IOS łączy się wyłącznie z siecią Wi-Fi, którą...
  • Seite 43 należy odczekać 8 minut na automatyczne wyjście klimatyzatora z trybu sterowania aplikacją. KONFIGURACJA SIECIOWA Z URZĄDZENIEM ANDROID 1. Upewnij się, że twoje urządzenie mobilne nawiązało połączenie z siecią Wi-Fi, której chcesz używać. Ponadto, należy „zapomnieć” pozostałe, nieużywane sieci Wi-Fi, ponieważ mogą zakłócić...
  • Seite 44 7. Wybierz własną sieć Wi-Fi, na przykład My 9. Jeżeli konfiguracja zakończy się powodze- Home (powyższy rysunek należy traktować niem, urządzenie będzie widoczne na liście. wyłącznie jako odniesienie). 8. Wprowadź hasło własnego routera Wi-Fi i naciśnij OK. KONFIGURACJA SIECIOWA Z URZĄDZENIEM IOS 1.
  • Seite 45 5. Naciśnij „+Add Device”. 6. Zeskakuj kod QR, dołączony do zestawu SMART. 7. Przeczytaj wyświetlone instrukcje i naciśnij 8. Naciśnij przycisk „Settings” aby przejść do przycisk „Home” aby powrócić do interfejsu strony z ustawieniami, wybierz WLAN/WIFI. urządzenia.
  • Seite 46 9. Wybierz net_ac_XXXX 10. Wpisz domyślne hasło: 12345678 i naciśnij przy- cisk „Join”. 11. Powróć do Aplikacji i naciśnij przycisk „Next”. 12. Wybierz własną sieć Wi-Fi, na przykład My Home (powyższy rysunek należy traktować wyłącznie jako odniesienie). 13. Wprowadź hasło własnego routera Wi-Fi i naci- śnij OK.
  • Seite 47: Obsługa Aplikacji

    14. Jeżeli konfiguracja zakończy się powodze- niem, urządzenie będzie widoczne na liście. UWAGA: • Ukończeniu konfiguracji sieciowej, aplikacja wyświetli komunikat potwierdzający powodze- nie operacji. • Ze względu na różny stan sieci, wyświetlany stan sieci może nadal offline. W takiej sytuacji należy odświeżyć...
  • Seite 48: Specjalne Funkcje

    8. SPECJALNE FUNKCJE Specjalne funkcje obejmują: programator czasu włączenia, programator czasu wyłączenia, funkcję 8°C HEAT, program nocny, tryb testowy. UWAGA: Jeżeli klimatyzator nie obsługuje którejś z wymienionych funkcji, funkcja ta będzie ukryta na liście dostępnych opcji. Programator czasu włączenia/wyłączenia Użytkownik może ustalić konkretne godziny załączenia lub wyłączenia klimatyzatora w ciągu tygodnia.
  • Seite 50 Owner’s Manual Thank you for choosing our product. For proper operation, please read and keep this manual carefully. If you have lost the Owner’s Manual, please contact the local agent or visit www.kaisai.com or sent email to: handlowy@kaisai.com, for electronic version.
  • Seite 51 Table of Contents Owner’s Manual Safety Precautions ............52 Unit Specifications and Features ......54 SAFETY FIRST Manual Operation (Without Remote) ....59...
  • Seite 52 Care and Maintenance .............60 Care and Maintenance .............12 Troubleshooting ..............62 Troubleshooting ..............14 opean Disposal Guidelines ........66 European Disposal Guidelines ........18 Caution: Risk of fire/ flammable materials WARNING: Servicing shall only be performed as recommended by the equipment manufacturer. Maintenance and repair requiring the assistance of other skilled personnel shall be carried out under the supervision of the person competent in the use of flammable refrigerants.
  • Seite 53: Safety Precautions

    Safety Precautions Read Safety Precautions Before Installation Incorrect installation due to ignoring instructions can cause serious damage or injury. The seriousness of potential damage or injuries is classified as either a WARNING or CAUTION. This symbol indicates that ignoring instructions may cause death or serious injury.
  • Seite 54 ELECTRICAL WARNINGS Only use the specified power cord. If the power cord is damaged, it must be replaced by the • manufacturer or certified service agent. Keep power plug clean. Remove any dust or grime that accumulates on or around the plug. Dirty •...
  • Seite 55: Unit Parts

    Unit Speci cations and Features Unit Speci cations and Features Unit Parts Unit Parts Front Panel Front Panel Power Cable (Some Units) Power Cable (Some Units) Remote Control Remote Control Remote Control Remote Control Holder Holder (Some Units) (Some Units) Louver Louver Display window(A)
  • Seite 56 Achieving Optimal Performance Optimal performance for the COOL, HEAT, and DRY modes can be achieved in the following temperature ranges. When your air conditioner is used outside of these ranges, certain safety protection features will activate and cause the unit to perform less than optimally. Inverter Split Type FOR OUTDOOR UNITS COOL mode...
  • Seite 57: Other Features

    For a detailed explanation of each function, Air Filter Reminders (some units) • refer to the Remote Control Manual. Air Filter Cleaning Reminder After 240 hours of use, the “run” & “timer” indicator lamps on the indoor Other Features unit will ash simultaneously and the display window on the indoor unit will •...
  • Seite 58 Setting Angle of Air Flow • Setting vertical angle of air ow While the unit is on, use the SWING/DIRECT button to set the direction (vertical angle) of airflow. Press the SWING/DIRECT button once to activate the louver. Each time you press the button, it will adjust the louver by 6°.
  • Seite 59: Sleep Operation

    Sleep Operation • The SLEEP function is used to decrease energy The SLEEP function is used to decrease energy use while you sleep (and don’t need the same use while you sleep (and don’t need the same temperature settings to stay comfortable). This temperature settings to stay comfortable).
  • Seite 60: Manual Operation (Without Remote)

    Manual Operation (Without Remote) How to operate your unit without CAUTION the remote control The manual button is intended for testing In the event that your remote control fails to purposes and emergency operation only. Please work, your unit can be operated manually with do not use this function unless the remote is the MANUAL CONTROL button located on...
  • Seite 61: Care And Maintenance

    Care and Maintenance Rinse the lter with fresh water, then shake Cleaning Your Indoor Unit o excess water. BEFORE CLEANING OR Dry it in a cool, dry place, and refrain from exposing it to direct sunlight. MAINTENANCE When dry, re-clip the air freshening lter to ALWAYS TURN OFF YOUR AIR CONDITIONER the larger lter, then slide it back into the SYSTEM AND DISCONNECT ITS POWER SUPPLY...
  • Seite 62 Maintenance – CAUTION Long Periods of Non-Use Before changing the lter or cleaning, • If you plan not to use your air conditioner for an turn o the unit and disconnect its power extended period of time, do the following: supply.
  • Seite 63 Troubleshooting SAFETY PRECAUTIONS If ANY of the following conditions occurs, turn o your unit immediately! The power cord is damaged or abnormally warm • You smell a burning odor • The unit emits loud or abnormal sounds • A power fuse blows or the circuit breaker frequently trips •...
  • Seite 64 Issue Possible Causes A rushing air sound may occur when the louver resets its position. The indoor unit makes noises A squeaking sound may occur after running the unit in HEAT mode due to expansion and contraction of the unit’ s plastic parts.
  • Seite 65 Troubleshooting When troubles occur, please check the following points before contacting a repair company. Problem Possible Causes Solution Temperature setting may be higher than ambient Lower the temperature setting room temperature The heat exchanger on the indoor or outdoor unit is Clean the a ected heat exchanger dirty Remove the filter and clean it...
  • Seite 66 Problem Possible Causes Solution Wait for the power to be Power failure restored The power is turned o Turn on the power The fuse is burned out Replace the fuse The unit is not working Remote control batteries are Replace batteries dead The Unit’...
  • Seite 67: European Disposal Guidelines

    European Disposal Guidelines This appliance contains refrigerant and other potentially hazardous materials. When disposing of this appliance, the law requires special collection and treatment. Do not dispose of this product as household waste or unsorted municipal waste. When disposing of this appliance, you have the following options: •...
  • Seite 68 AIR CONDITIONER REMOTE CONTROLLER Owner’s Manual Thank you for choosing our product. For proper operation, please read and keep this manual carefully.
  • Seite 69: Remote Controller Specifications

    Contents CONTENTS Befo contr Remote controller Specifications ......69 oper this m Function buttons .
  • Seite 70: Function Buttons

    Function Buttons Before you begin using your new air conditioner, make sure to familiarize yourself with its remote control. The following is a brief introduction to the remote control itself. For instructions on how to operate your air conditioner, refer to the How to Use The Basic/Advance Functions section of this manual.
  • Seite 71 Function Buttons Before you begin using your new air conditioner, make sure to familiarize yourself with its remote control. The following is a brief introduction to the remote control itself. For instructions on how to Refer operate your air conditioner, refer to the How to Use The Basic/Advance Functions section of and H this manual.
  • Seite 72: Handling The Remote Controller

    HANDLING THE REMOTE CONTROLLER TIPS FOR USING REMOTE CONTROL mote NOT SURE WHAT A FUNCTION DOES? ow to The remote control must be used within 8 Refer to the How to Use Basic Functions n of meters of the unit. and How to Use Advanced Functions The unit will beep when remote signal is sections of this manual for a detailed...
  • Seite 73: Remote Lcd Screen Indicators

    Remote LCD Screen Indicators Information are displayed when the remote controller is powered up. ON/OFF display Appears when the unit is turned on, and disappears when the it is turned off. Transmission Indicator (For RG66B6/BGEF only) Lights up when remote Displays when ECO sends signal to indoor feature is activated...
  • Seite 74: How To Use The Basic Functions

    How To Use The Basic Functions SETTING TEMPERATURE The operating temperature range for units is 17-30 C. You can increase or decrease the set temperature in 1 C increments. AUTO operation In AUTO mode, the unit will automatically F only) select the COOL, FAN, HEAT or DRY mode Mode ON/OFF...
  • Seite 75: Fan Operation

    How To Use The Basic Functions DRY operation(dehumidifying) 1. Press the MODE button to select DRY mode. 2. Set your desired temperature using the Temp or Temp button. 3. Press the ON/OFFbutton to start the unit. NOTE: FAN SPEED can t be changed in DRY mode.
  • Seite 76 How To Use The Basic Functions HEAT operation 1. Press the MODE button to select HEAT mode. 2. Set your desired temperature using the Temp or Temp button. 3. Press the FAN button to select the fan speed. unit. 4. Press the ON/OFF button to start the unit.
  • Seite 77: Setting The Timer Function

    Setting the TIMER function set a will Your air conditioning unit has two timer-related functions: TIMER ON- sets the amount of timer after Timer which the unit will automatically turn on. TIMER OFF- sets the amount of time after which the unit will automatically turn off. TIMER ON function The TIMER ON function allows you to set a period of time after which the unit will...
  • Seite 78 TIMER OFF function The TIMER OFF function allows you to NOTE: When setting the TIMER ON or set a period of time after which the unit TIMER OFF functions, up to 10 hours, will automatically turn off, such as when the time will increase in 30 minute you wake up.
  • Seite 79 Setting both TIMER ON and TIMER OFF at the same time (see Keep in mind that the time periods you set for both functions refer to hours after the current time. For example, say that the current time is 1:00 PM, and you want the unit to turn on automatically at 7:00 PM.
  • Seite 80 Example: Setting the unit to turn on after 6 hours, operate for 2 hours, then turn off (see the figure below) Your remote display Timer is set To turn ON 6 hours from current time Timer is set to turn OFF 8 hours from current time Unit turns Unit turns...
  • Seite 81: How To Use The Advanced Functions

    How To Use The Advanced Functions ECO function NOTE: This function is only available under COOL mode. Used to enter the energy efficient mode. Under cooling mode, press this button, the remote controller will adjust the temperature automatically to 24 C, fan speed of Auto to save energy(but only if the set temperature is less than 24 C).
  • Seite 82 How To Use The Advanced Functions Silence function Hold down Fan speed button for 2 seconds to activate/cancel Silent mode. Due to low frequency operation of compressor, it may result in insufficient cooling and heating Hold down Fan capacity. (Applicable to the air conditioner button for 2 with Silent feature only) seconds to activate...
  • Seite 83 SMART AC KIT Owner’s Manual IMPORTANT NOTE: Read the manual carefully before installing or connecting your Smart kit. Make sure to save this manual for future reference.
  • Seite 84: Declaration Of Conformity

    C O N T E N S 1. Specification............................84 2. Precautions.............................. 84 3. Download and install app........................85 4. Install the smart kit..........................85 5. User registration............................. 86 6. Network configuration......................... 87 7. How to use app............................91 8. Special functions............................. 92 9.
  • Seite 85: Download And Install App

    • Due to different network situation, control process may return time-out sometimes. If this situation occurs, the display between board and App may not be the same, please do not feel confused. NOTE: Company will not be liable for any issues and problems caused by Internet, Wi-Fi Router and Smart Devices.
  • Seite 86: User Registration

    3. Attach the QR code packed with SMART KIT to the side panel of the machine, ensure it is con- venience to be scanned by the mobile phone. Alternatively, user can take picture of the QR Code and save in into their own phone. WARNING: This interface is only compatible with SMART KIT provided by the manufacturer 5.
  • Seite 87: Network Configuration

    6. NETWORK CONFIGURATION Caution: • It is necessary to forget any other around network and make sure the Android or IOS device just connect to the WIFI network you want to configure. • Make sure the Android or IOS device WIFI function works well and can be connected back to your original WIFI network automatically.
  • Seite 88 7. Select your own WiFi network, for example 9. Configuration Success, you can see the My Home (the picture is only for reference). device on the list. 8. Enter your own WiFi router password and click OK. USING IOS DEVICE TO DO NETWORK CONFIGURATION 1.
  • Seite 89 5. Press “+Add Device”. 6. Scan QR Code which 9 is packed with smart kit. 7. Read the instruction above and press the 8. Click settings to enter the setting page, Home button to return to the device interface. select WLAN/WIFI.
  • Seite 90 10. Choose net_ac_XXXX. 10. Type defult password: 12345678 and click “Join”. 11. Return to APP and click Next. 12. Select your own WiFi network, for example My Home (the picture is only for reference). 13. Enter your own WiFi router password and click OK.
  • Seite 91: How To Use App

    14. Configuration Success, you can see the device on the list. NOTE: When finishing network configuration, APP will display success cue words on the screen. Due to different internet environment, it is possible that the device status still display offline. If this situation oc- curs, it is necessary to pull and refresh the device list on the APP and make sure the device status become online.
  • Seite 92: Special Functions

    3. Thus, user can control air conditioners on/off status, operation mode, temperature, fan speed and so on. NOTE: Not all the function of the APP is available on air con- ditioner. For example: ECO, Turbo, Left and Right Swing, Up and Down swing function, please check the user ma- nual to find more information 8.
  • Seite 93 8°C HEAT User can let the AC run under 8 C Heat by one-click. When people go outisde, this function can protect your furniture from frost damage.
  • Seite 95 Um es ordnungsgemäß zu bedienen, lesen Sie diese Bedienungsanleitung und bewahren sie zum späteren Nachschlagen auf. Falls Sie die Bedienungsanleitung verlieren, kontaktieren Sie bitte Ihren lokalen Händler oder besuchen Sie die Internetseite www.kaisai.com bzw. schreiben Sie an die E-Mail-Adresse: handlowy@kaisai.com, um eine elektronische Version der Bedi- enungsanleitung zu erhalten.
  • Seite 96 Inhalt Bedienungsanleitung 0 Sicherheitsvorkehrungen ...... 1 Parameter und Funktionen ....SAFETY FIRST 2 Handbedienung (ohne Fernbedienung)
  • Seite 97 3 Instandhaltung und Wartung ........4 Fehlerbehebung ............5 Europäische Richtlinien zur Entsorgung ....... ACHTUNG: Brandgefahr / brennbare Materialien WARNUNG: Die Wartung ist gemäß den Empfehlungen des Geräteherstellers durchzuführen. Mit Wartungs- und Reparaturarbeiten sind qualifizierte Servicetechniker zu beauftragen, die mit dem Umgang mit brennbaren Kältemitteln vertraut...
  • Seite 98: Sicherheitsvorkehrungen

    Sicherheitsvorkehrungen Lesen Sie die Sicherheitsvorkehrungen vor der Installation Eine fehlerhafte Installation durch Nichtbeachtung der Anweisungen kann zu schwerwiegenden Schäden oder Verletzungen führen. Die Schwere möglicher Schäden oder Verletzungen wird zweierlei klassifiziert: als WARNUNG oder ACHTUNG. Dieses Symbol zeigt an, dass eine Nichtbeachtung der Anweisungen zu schweren Verletzungen oder zum Tode führen kann WARNUNG Dieses Symbol bedeutet, dass die Nichtbeachtung der Anweisungen zu leichten...
  • Seite 99: Elektrische Warnungen

    ELEKTRISCHE WARNUNGEN • Verwenden Sie nur vorgegebene Versorgungskabel. Falls die Leitung beschädigt wird, muss sie vom Hersteller oder einem zertifizierten Servicetechniker ersetzt werden. • Halten Sie die Versorgungsleitung sauber. Entfernen Sie Staub und Schmutz, der sich am Kabel oder um den Stecker ansammelt. Verschmutzte Stecker können Brand oder elektrischen Schlag verursachen.
  • Seite 100: Parameter Und Funktionen

    Parameter und Funktionen Teile der Anlage Frontblende Versorgungskabel (je nach Version) Fernbedienung Halterung der Fernbedienung Lamellen (bei einigen Modellen) Anzeige (A) Anzeige (B) Anzeige (C) „fresh“ Funktion FRESH ein (bei einigen Moodellen). „defrost“ Abtauung ein „run“ Gerät ein, Betrieb. „timer“ aktiv, voreingestellter Timer.
  • Seite 101: Erzielung Der Optimalen Leistung

    Erzielung der optimalen Leistung Die optimale Leistung für KÜHLEN, HEIZEN und TROCKNEN ist in den folgenden Temperaturbereichen erreichbar. Beim Betrieb der Klimaanlage außerhalb dieser Bereiche werden verschiedene Schutzeinrichtungen aktiviert, die den optimalen Leistungsgrad der Anlage beeinträchtigen. Invertertyp FÜR ANLAGEN KÜHLEN HEIZEN TROCKNEN MIT ZUSATZ- Raumtemperatur 17°C - 32°C...
  • Seite 102: Weitere Funktionen

    • Erinnerungsfunktionen für Eine ausführliche Erklärung aller Funktionen finden Luftfilter (bei einigen Modellen) Sie im Handbuch der Fernbedienung. Erinnerungsfunktion für die Filterreinigung Nach 240 Betriebsstunden erscheint auf dem Weitere Funktionen Display der Inneneinheit das blinkende Symbol „CL“ (falls zutreffend) und die Kontrollleuchten •...
  • Seite 103: Lüfter, Die Mit Hoher Geschwindigkeit Im Inneren Des Gerätes

    • Steuerung der Luftstromrichtung Vertikale Luftstromregelung Wenn das Gerät eingeschaltet ist, verwenden Sie die Taste SWING/DIRECT, um die Richtung (den Vertikalwinkel) des Luftstroms einzustellen. 1. Drücken Sie die Taste SWING/DIRECT einmal, um die Lamellen zu starten. Jeder Tastendruck ändert den Lamellenwinkel um 6 Grad.
  • Seite 104: Betrieb Im Modus

    • Nachttimer (Funktion SLEEP) Die Funktion SLEEP wird verwendet, um den Die Funktion SLEEP wird verwendet, um den Energieverbrauch während des Schlafes zu Energieverbrauch während des Schlafes zu reduzieren (wenn die täglichen reduzieren (wenn die täglichen Temperatureinstellungen nicht für den Komfort Temperatureinstellungen nicht für den Komfort erforderlich sind).
  • Seite 105: Handbedienung (Ohne Fernbedienung)

    Handbedienung (ohne Fernbedienung) Verwendung des Geräts ohne Fernbedienung ACHTUNG Im Falle einer Fehlfunktion der Fernbedienung kann Die Handbedienungstaste ist nur für Test- und die Klimaanlage über die Taste MANUAL CONTROL Notfallzwecke vorgesehen. Bitte verwenden Sie auf der Frontplatte der Inneneinheit gesteuert diese Funktion Verlust...
  • Seite 106: Instandhaltung Und Wartung

    Instandhaltung und Wartung Reinigen der Inneneinheit 6. Spülen Sie den Filter unter sauberem Wasser und lassen Sie ihn im Freien VOR REINIGUNG ODER WARTUNG trocknen. 7. Trocknen Sie ihn an einem trockenen und SCHALTEN SIE DAS GERÄT VOR DER REINIGUNG ODER kühlen Ort;...
  • Seite 107: Wartung - Längerer Stillstand

    ACHTUNG Wartung – längerer Stillstand • Schalten Sie das Gerät aus und trennen Sie Wenn Sie einen längeren Stillstand der Anlage es von der Stromquelle, bevor Sie den Filter planen, gehen Sie wie folgt vor: austauschen oder reinigen. • Berühren Sie beim Ausbau des Filters keine Metallteile im Inneren des Gerätes.
  • Seite 108: Typische Probleme

    Fehlerbehebung SICHERHEITSVORKEHRUNGEN Wenn IRGENDEINE der folgenden Situationen eintritt, schalten Sie die Anlage sofort aus! Das Netzkabel ist beschädigt oder extrem heiß. Brandgeruch spürbar. Das Gerät gibt laute oder falsche Geräusche von sich. Sicherungen brennen oft aus oder es werden Schutzeinrichtungen ausgelöst. Aus dem Gerät tritt Wasser aus oder andere Gegenstände sind in das Gerät gelangt.
  • Seite 109 Problem Mögliche Ursache Lamellen am Luftaustritt, die in ihre Ausgangsposition zurückkehren, erzeugen das Geräusch von Luftschall. Die Inneneinheit erzeugt Lärm Nach dem Betrieb im Modus HEIZEN kann die Anlage knirschen, was durch das Dehnen und Schwinden von Kunststoffteilen des Gerätes verursacht wird. Leises Zischen während des Betriebs: Dieses Geräusch ist normal und wird durch den Kältemittelstrom in der Innen- und Außeneinheit verursacht.
  • Seite 110 Fehlerbehebung Überprüfen Sie beim Problem die folgenden Punkte, bevor Sie die Servicestelle kontaktieren. Problem Mögliche Ursache Lösung Temperatursollwert kann höher sein als die Niedrigere Temperatur einstellen Raumtemperatur Der Wärmetauscher der Innen- oder Außeneinheit ist Wärmetauscher reinigen verschmutzt Filter entfernen und gemäß Der Luftfilter ist verschmutzt Anweisungen reinigen.
  • Seite 111 Problem Mögliche Ursache Lösung Warten, bis Spannung wieder Stromausfall anliegt Gerät ist ausgeschaltet Spannungsversorgung einschalten Durchgebrannte Sicherung Sicherung ersetzen Das Gerät funktioniert Leere Batterien in der nicht Batterien ersetzen Fernbedienung Aktivierung der Einschaltsperre Nach dem Einschalten des für 3 Minuten Gerätes drei Minuten abwarten Aktiver Timer...
  • Seite 112: Europäische Richtlinien Zur Entsorgung

    Europäische Richtlinien zur Entsorgung Das Gerät enthält Kältemittel und andere potenziell gefährliche Stoffe. Für die Sammlung und Verarbeitung von Geräten dieser Art ist ein Sonderverfahren vorgeschrieben. Dieses Produkt darf nicht als Hausmüll entsorgt werden. Zur Entsorgung können Sie: • das Gerät an einer dafür vorgesehenen Sammelstelle für Elektroaltgeräte entsorgen; •...
  • Seite 113: Fernbedienung

    FERNBEDIENUNG FERNBEDIENUNG Bedienungsanleitung Bedienungsanleitung Vielen Dank, dass Sie sich für unser Produkt entschieden haben. Um es ordnungsgemäß zu bedienen, lesen Sie diese Bedienungsanleitung und bewahren sie zum späteren Nachschlagen auf.
  • Seite 114: Fun

    Spis treści CONTENTS CONTENTS Befo contr Fernbedienung-Spezifikationen ......114 oper this m Funktionstasten ..........115 Remote controller Specifications...........
  • Seite 115 Function Buttons Function Buttons Before you begin using your new air conditioner, make sure to familiarize yourself with its remote Before you begin using your new air conditioner, make sure to familiarize yourself with its remote control. The following is a brief introduction to the remote control itself. For instructions on how to control.
  • Seite 116 Function Buttons Function Buttons Before you begin using your new air conditioner, make sure to familiarize yourself with its remote Before you begin using your new air conditioner, make sure to familiarize yourself with its remote control. The following is a brief introduction to the remote control itself. For instructions on how to control.
  • Seite 117 HANDLING THE REMOTE CONTROLLER HANDLING THE REMOTE CONTROLLER TIPS FOR USING REMOTE CONTROL TIPS FOR USING REMOTE CONTROL mote NOT SURE WHAT A FUNCTION DOES? NOT SURE WHAT A FUNCTION DOES? ow to The remote control must be used within 8 The remote control must be used within 8 Refer to the How to Use Basic Functions Refer to the How to Use Basic Functions...
  • Seite 118 Remote LCD Screen Indicators Remote LCD Screen Indicators Information are displayed when the remote controller is powered up. Information are displayed when the remote controller is powered up. ON/OFF display ON/OFF display Appears when the unit Appears when the unit is turned on, and disappears is turned on, and disappears when the it is turned off.
  • Seite 119 How To Use The Basic Functions How To Use The Basic Functions SETTING TEMPERATURE SETTING TEMPERATURE The operating temperature range for units is The operating temperature range for units is 17-30 C. You can increase or decrease the 17-30 C. You can increase or decrease the set temperature in 1 C increments.
  • Seite 120 How To Use The Basic Functions How To Use The Basic Functions DRY operation(dehumidifying) DRY operation(dehumidifying) 1. Press the MODE button to select DRY 1. Press the MODE button to select DRY mode. mode. 2. Set your desired temperature using the 2.
  • Seite 121 How To Use The Basic Functions How To Use The Basic Functions HEAT operation HEAT operation 1. Press the MODE button to select 1. Press the MODE button to select HEAT mode. HEAT mode. 2. Set your desired temperature using 2.
  • Seite 122 Setting the TIMER function Setting the TIMER function set a will Your air conditioning unit has two Your air conditioning unit has two timer-related functions: timer-related functions: TIMER ON- sets the amount of timer after TIMER ON- sets the amount of timer after Timer Timer which the unit will automatically turn on.
  • Seite 123 TIMER OFF function TIMER OFF function The TIMER OFF function allows you to The TIMER OFF function allows you to NOTE: When setting the TIMER ON or NOTE: When setting the TIMER ON or set a period of time after which the unit set a period of time after which the unit TIMER OFF functions, up to 10 hours, TIMER OFF functions, up to 10 hours,...
  • Seite 124 Setting both TIMER ON and TIMER OFF at the same time Setting both TIMER ON and TIMER OFF at the same time Keep in mind that the time periods you set for both functions refer to hours after the current time. For example, say that the current time is 1:00 PM, and you want the unit Keep in mind that the time periods you set for both functions refer to hours after the to turn on automatically at 7:00 PM.
  • Seite 125 Example: Setting the unit to turn on after 6 hours, operate for 2 hours, then turn off (see the figure below) Example: Setting the unit to turn on after 6 hours, operate for 2 hours, then turn off (see the figure below) Your remote display Your remote display Timer is set To turn ON...
  • Seite 126 How To Use The Advanced Functions How To Use The Advanced Functions ECO function ECO function NOTE: This function is only available under NOTE: This function is only available under COOL mode. COOL mode. Used to enter the energy efficient mode. Used to enter the energy efficient mode.
  • Seite 127 How To Use The Advanced Functions How To Use The Advanced Functions Silence function Silence function Hold down Fan speed button for 2 seconds Hold down Fan speed button for 2 seconds to activate/cancel Silent mode. Due to low to activate/cancel Silent mode. Due to low frequency operation of compressor, it may frequency operation of compressor, it may result in insufficient cooling and heating...
  • Seite 128 SMART AC SMART AC Bedienungsanleitung Bedienungsanleitung WICHTIGER HINWEIS: Bitte lesen Sie diese Anleitung sorgfältig durch, bevor Sie das Gerät installieren oder anschließen. Bewahren Sie diese Anleitung zum späteren Nachschlagen auf.
  • Seite 129: Vorsichtsmassnahmen

    INHALT 1. Parameter ..........................129 2. Vorsichtsmaßnahmen ......................129 3. Herunterladen und Installieren der App ..................130 4. Installation des Smart-Kits ....................... 131 5. Nutzerregistrierung ......................... 131 6. Netzwerkkonfiguration ......................132 7. Bedienung der App ........................137 8. Sonderfunktionen ........................138 9.
  • Seite 130: Herunterladen Und Installieren Der App

    Hinweis Weitere Informationen finden Sie auf der Service-Website. Für das korrekte Lesen des QR-Codes ist ein Smartphone mit Kamera mit einer Mindestauflösung von 5 Millionen Pixel erforderlich. Aufgrund des variablen Zustands des Netzwerks können längere Unterbrechungen auftreten, die • eine Neukonfiguration des Netzwerks erfordern. Durch den veränderlichen Zustand des Netzwerks kann der Steuerungsprozess abgebrochen •...
  • Seite 131: Nutzerregistrierung

    4. MONTAGE DES SMART-KITS 1. Entfernen Sie die Schutzkappe vom SMART-Kit. 2. Öffnen Sie die Frontplatte und schließen Sie das SMART-Kit an den dafür vorgesehenen Anschluss an. 3. Kleben Sie den mit dem SMART-Kit gelieferten QR-Code auf die Seitenwand des Geräts und stellen Sie sicher, dass man diesen mit dem Handy scannen kann.
  • Seite 132: Netzwerkkonfiguration

    das registrierte Konto, indem Sie auf den zugesandten Link klicken. 2. Geben Sie Ihre E-Mail-Adresse und Ihr 1. Klicken Sie auf „Create Account“. Passwort ein und drücken Sie dann die Schaltfläche „Registration“. 6. NETZWERKKONFIGURATION Hinweis: Sie müssen die Herstellung der Verbindung mit anderen verfügbaren Netzwerken ausschließen •...
  • Seite 133: Netzwerkkonfiguration Mit Android-Geräten

    NETZWERKKONFIGURATION MIT ANDROID-GERÄTEN 1. Stellen Sie sicher, dass Ihr mobiles Gerät mit dem Wi-Fi-Netzwerk verbunden ist, das Sie verwenden möchten. Außerdem sollten Sie andere ungenutzte Wi-Fi-Netzwerke „vergessen“, da sie den Konfigurationsprozess stören können. 2. Trennen Sie die Stromversorgung der Klimaanlage. 3.
  • Seite 134: Netzwerkkonfiguration Mit Ios-Geräten

    7. Wählen Sie Ihr eigenes Wi-Fi-Netzwerk, z.B. 9. Wenn die Konfiguration erfolgreich war, wird My Home (die obige Abbildung sollte nur als das Gerät in der Liste angezeigt. Referenz dienen). 8. Geben Sie Ihr Passwort für den Wi-Fi-Router ein und klicken Sie auf OK. NETZWERKKONFIGURATION MIT IOS-GERÄTEN 1.
  • Seite 135 5. Drücken Sie „+Add Device“. 6. Scannen Sie den im SMART-Kit enthaltenen QR-Code. 7. Lesen Sie die angezeigten Anweisungen und 8. Drücken Sie die Taste „Settings“, um zur Seite drücken Sie die Taste „Home“, um zur mit den Einstellungen zu gelangen und wählen Schnittstelle des Gerätes zurückzukehren.
  • Seite 136 9. Wählen Sie 10. Geben Sie das Standardpasswort ein: 12345678 und net_ac_XXXX aus drücken Sie die Taste „Join“. 11. Kehren Sie zur App zurück und drücken Sie die Taste „Next“. 12. Wählen Sie Ihr eigenes Wi-Fi-Netzwerk, z.B. My Home (die obige Abbildung ist nur als Referenz zu verstehen). 13.
  • Seite 137: Unterstützung Der App

    14. Wenn die Konfiguration erfolgreich war, wird das Gerät in der Liste angezeigt. HINWEIS: Nachdem die Netzwerkkonfiguration abgeschlossen ist, zeigt die App eine Meldung an, die den • erfolgreichen Abschluss des Vorgangs bestätigt. Aufgrund des unterschiedlichen Netzwerkstatus kann es vorkommen, dass der angezeigte •...
  • Seite 138: Sonderfunktionen

    8. SONDERFUNKTIONEN Zu den Sonderfunktionen gehören: Timer On, Timer Off, 8°C HEAT, Nachtprogramm, Testbetrieb. HINWEIS: Wenn die Klimaanlage eine dieser Funktionen unterstützt, wird diese Funktion in der Liste der verfügbaren Optionen ausgeblendet. Timer On/Off Der Benutzer kann bestimmte Zeiten für das Ein- und Ausschalten der Klimaanlage innerhalb der Woche einstellen.
  • Seite 140 Pobierz dokumentację techniczną Dokumentacja techniczna w różnych językach do pobrania w formie elektronicznej w aplikacji: Download the technical documentation Technical Documentation in various languages to download in electronic form in the application: Laden Sie die technische Dokumentation herunter Die technische Dokumentation in verschieden Sprachen steht Ihnen zur Verfügung...

Inhaltsverzeichnis