
Verwandte Anleitungen für Nordpeis Cannes


Inhaltszusammenfassung für Nordpeis Cannes
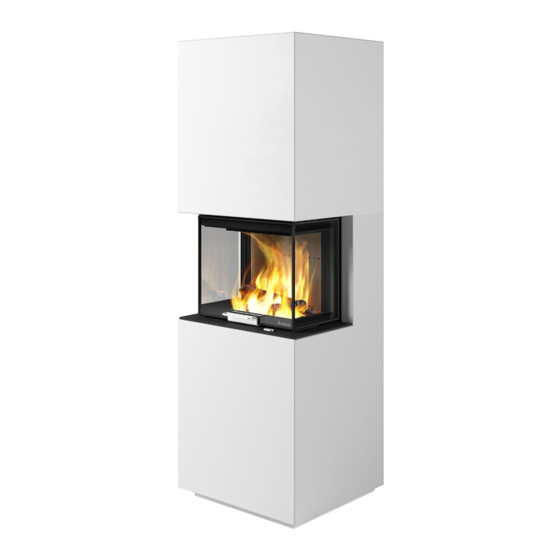
- Seite 1 Brukerveiledning Installation manual Installationsanvisning Asennusohje Montageanleitung Manuel d’installation Cannes Art.no: CC-CAN0X-100, FP-CAN00-100 Last updated: 12.04.2018 Test Report No: SPFR 20012-30...
-
Seite 2: Important Safety Precautions
2. Before use, please carefully read the user manual and follow the instructions. Nordpeis AS is not responsible for incorrect installation. never be reduced or partially obstructed. This may Important to check... - Seite 3 All safety distances are minimum distances. Fresh air supply (accessory) Installation of the insert must comply with the rules and regulations of the country where installed. Nordpeis AS ATTENTION! The product can only be connected to is not responsible for wrongly assembled inserts.
- Seite 4 Du trenger følgende verktøy You need the following tools SE Du behöver följande verktyg FI Tarvitset seuraavia työkaluja DE Folgende Werkzeuge sind notwendig. Vous avez besoin des outils suivants 10 mm 13 mm 17 mm 4 mm...
- Seite 5 FIG 1 - Cannes / N-20U =mm...
- Seite 6 Cannes / N-20U = Chimney connection mm FIG 1a Cannes / N-20U = AIR mm...
- Seite 7 Cannes/ N-20U FIG 2 =Firewall/ Hitzenschutzwand / Mur parfeu / Palomuuri / =Combustible material / Brennbarem Material / Matières combustibles/ Tulenarka materiaali (*)G = glass side / >700 mm 0 mm >700 mm >1000 mm...
- Seite 8 Cannes / N-20U FIG 3 CC-CAN00-010 x1 CO-CAN00-010 x1 FIG 3a NO: Viktig! Hvis du bruker bakmontering sørg for at den perforerte bakplaten og betong ring er på plass GB: Attention! If you utilize rear connection make sure that rear back plate is perforated and insula- tion ring is in place.
- Seite 9 Cannes / N-20U FIG 4 CC-CAN00-010 x1 CO-CAN00-010 x1 Cannes / N-20U FIG 5 NO: Fest stålbraket (2) til varmeskjoldsplaten (1). Ikke 22-CAN00-040 - x1 fest stålbrakettene helt, disse skal være justerbare. GB: Fasten steel bracket (2) (1). Do not tighten nuts completely leaving bracket adjust- able.
- Seite 10 Cannes / N-20U FIG 5b NO: Fest stålbrakett (3) til varmeskjoldet (1). NB! Hvis du skal bruke bakre lufttilkobling fjern den 22-CAN00-030 - x2 GB: Fasten steel bracket (3) (1). Attention! If you utilize rear air connection remove cover as marked in FIG 5b.
- Seite 11 Cannes / N-20U FIG 7 22-CAN00-010 - x2 NO: Monter hjørnestøtte fra deler som vist på FIG 7. NB! Ikke fest braketten ( 2) den skal være justerbar. GB: Assemble corner support from parts as shown 21-50005-006 - x4 on FIG 7. Attention! Do not fasten bracket (2) tightly to the support post leaving it adjustable.
-
Seite 12: Inhaltsverzeichnis
Cannes / N-20U FIG 8 21-40001-030 x4 (*) 21-50001-018 x4 CC-CAN00-03R x1 CO-CAN00-03R x1 CC-CAN00-03L x1 21-40001-030 x2 (*) CO-CAN00-03L x1 Cannes / N-20U FIG 8b 21-40001-030 - x4 (*) 21-40001-030 - x2 (*) 21-50001-018 - x4... -
Seite 13: Fig 9
Cannes / N-20U FIG 9 NO: Plasser på gulvet medfølgende avs- tandsstykker så de nederste kantene på side- veggene hviler på disse, se også FIG 9a. lower edge of side wall after assembling could rest on it, see also FIG 9a. - Seite 14 Cannes / N-20U FIG 10 NO: Når du har montert sidevegene, gjør klar nedre frontplate som vist på FIG 10a. GB: After initial assembling of side wall, before further proceeding, prepare lower front plates as shown on FIG 10a. SE: Efter montering av sidoplattorna, förbered för FI: Kun olet asentanut sivulevyt, valmistele alempi etulevy kuvan 10a mukaisesti.
- Seite 15 Cannes / N-20U FIG 11 NO: (1) Monter nedre frontplate. (2) Tilpass alle kanter og sider. GB: (1) Assemble lower front plate. (2) Adjust top edges of front and sides. SE: (1) Montera den nedre frontplattan. (2) Justera överkanten och sidokanterna.
-
Seite 16: 21-50001-018 X4
Attention ! La plaque avant doit être maintenue jusqu’à l’étape de la Fig. 18. 10 mm Cannes / N-20U FIG 12 ikke fast mutere helt. GB: Assemble support rails as shown in the draw- ing. - Seite 17 Cannes / N-20U FIG 13 21-50001-018 - x6 10 mm 21-00000-006 - x6 NO: (1) Monter bakveggen som vist på tegning - ikke stram mutrene helt. (2) Monter veggen med en avstand på GB: (1) Assemble backwall as shown on the drawing - do not tighten nuts completly. (2) Set distance 15 mm (FIG 13B) between back plate and adjacent wall.
- Seite 18 Cannes / N-20U FIG 13a NO: Hvis du skal bak montere ildstedet Må du ta hull igjennom perforeringen og plassere betong ring mellom plate og tilstøtende vegg som vist på tegning bruk medfølgende akryl lim for å feste den. GB: If you utilize rear chimney connection make a hole cutting out perforation and place a concrete ring between the plate and adjacet wall as shown on the drawing.
-
Seite 19: 21-40001-030 - X2 (*)
Cannes / N-20U FIG 14 21-40001-030 x4 (*) Cannes / N-20U FIG 15 21-40001-030 x4 (*) 21-50001-018 x4 CC-CAN00-040- 2x CO-CAN00-040- 2x... - Seite 20 Cannes / N-20U FIG 16 21-50001-018 - x4 0 mm 10 mm 21-00000-006 - x4 NO: Monter side plater. Bruk festebolter FIG 16C sett plasseringen av sidene, gjør den lik med nedre kant - FIG 16B. Når posisjonen av begge sidene er tilpasset ikke stram mutere. Mål avstand mellom sideveggene som vist på tegning drawing FIG16A.
- Seite 21 Cannes / N-20U FIG 17 GB: Tighten all nuts accordingly, starting from 1 to 10. If needed correct position of sides as shown on FIG 16B. FI: Kiristä kaikki mutterit järjestyksessä 1 – 10. Säädä tarvittaessa sivulevyjen asentoa kuvan 16B mukaan.
- Seite 22 Se egen monteringsanvisning for innsatsen / See separate instruction for the insert Se egen monteringsanvisning för insatsen / Voir le manuel d’installation séparé pour le foyer Beachten Sie die seperate Montageanleitung für den Kamineinsatz / Katso takkasydämen erillinen ohje Cannes / N-20U FIG 18 NO: Monter betong hylle for innsatsen og ta av nedre front plate.
- Seite 23 Cannes / N-20U FIG 18a NO: Monter betong hylle for innsatsen og ta av nedre front plate. GB: Assemble concrete base for insert and remove lower front plate. SE: Montera betongsockeln för insatsen och ta bort den nedre front- plattan.
- Seite 24 Cannes / N-20U FIG 19a 13 mm Cannes / N-20U FIG 20...
- Seite 25 Cannes / N-20U FIG 20a CO-PRA00-01B x2 Cannes / N-20U FIG 20b TORX 20 22-CAN00-120 - x1...
- Seite 26 FIG 21 Cannes / N-20U 6 mm 2 mm Cannes / N-20U FIG 22 CC-CAN00-06R x1 CC-CAN00-06L x1 CO-CAN00-06R x1 CO-CAN00-06L x1 04-26406-003 x1 04-26406-003 x1...
- Seite 27 Cannes / N-20U FIG 22a 22-CAN00-070 x1 CC-CAN00-06L x1 CO-CAN00-06L x1 21-40001-030 x5 (*) 21-50001-018 x5 21-50001-018 x2 21-50000-006 x2 Cannes / N-20U FIG 23 21-50001-018 - x6 21-00000-006 - x6...
- Seite 28 Cannes / N-20U FIG 23a 10 mm NO: Monter øvre sideplater og plasser kiler som vist på tegning FIG 22 -22a. Ikke stram til mutrene helt. Gjør klar for montering av øvre front plate- se FIG 23 og bruk medfølgende lim/fugemasse FIG 24.
- Seite 29 Cannes / N-20U FIG 24 21-30001-666 x4 9 mm CC-CAN00-050 - x1 CO-CAN00-050 - x1 Cannes / N-20U FIG 25 Fugue Water 200 g 1 kg 1,3 - 1,8 L / adhésif / liima (*) - Lim (*) - Vann / vatten / wasser / eau / vesi / acqua...
- Seite 30 Cannes / N-20U FIG 26 CC-CAN00-050 - x1 CO-CAN00-050 - x1 NO: Påfør fugemasse som vist på tegning FIG 26. Monter front plate og legg press på for å sammenføye åpnin- gen mellom front og sidene - FIG 27. Start med å stramme mutrene på front platen FIG 27D. Når alle platene er FIG 28.
- Seite 31 Cannes / N-20U FIG 27 Cannes / N-20U FIG 28 4 mm Water (*)
- Seite 32 Cannes / N-20U FIG 29 21-50001-018 - x6 22-CAN00-110 - x1 21-00000-006 - x6 10 mm Cannes / N-20U FIG 29a NO: Forbered og monter varmeskjoldet. Hvis du skal bak montere ildstedet skjær et hull etter per- 21-40009-013 - x2 foreringen i skjoldet.
- Seite 33 Cannes / N-20U FIG 30 Fugue Water 200 g 1 kg 1,3 - 1,8 L / adhésif / liima (*) - Lim (*) - Vann / vatten / wasser / eau / vesi / acqua Cannes / N-20U FIG 30a...
- Seite 34 Cannes / N-20U FIG 31 Cannes / N-20U FIG 32 22-CAN00-090 - x1...
- Seite 35 Cannes / N-20U FIG 32a NO: i tig For i re n dvendig onve on lu t an un originale gulv later ra Nord ei enytte . GB: Attention In order to ecure required convection o ening only original Nord ei Floor late ould e u ed.
- Seite 36 Mehrfachbelegung des Schornsteins ist zulässig Complies with / Test report / Prüfbericht Nr : Enspricht folgenden Standards: NS 3058 / 3059 SPFR- 20012-30 LRV of Switzerland Art. 15a B-VG BImSchV 1, 2 Nordpeis AS, Gjellebekkstubben 11, N-3420 LIERSKOGEN, Norway www.nordpeis.no...