JVC CH-X1500 Installationsanleitung
Inhaltsverzeichnis
Quicklinks
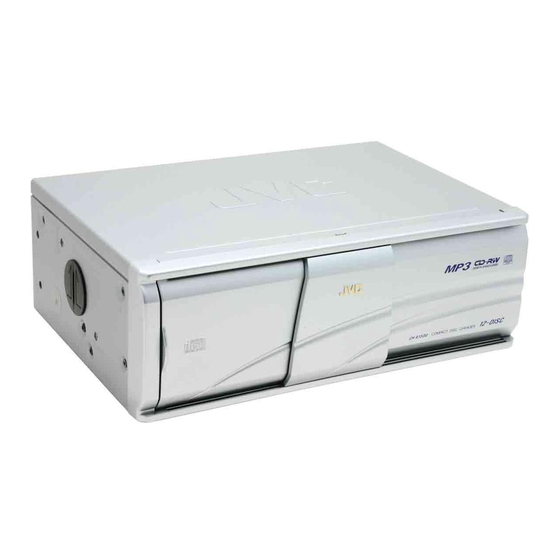
CH-X1500
CD CHANGER
CAMBIADOR CD
CHANGEUR CD
Instructions
Manual de instrucciones
LVT0975-001A
Manuel d'instructions
[J]
ENGLISH
Thank you for purchasing this JVC product. Please read these
instructions carefully before starting operation to be sure to obtain
optimum performance and a longer service life from the unit.
This unit has been designed to play CD, CD-Rs, and CD-RWs.
• You can also play back your original CD-Rs (Recordable) and
CD-RWs (Rewritable) either in audio CD format or MP3 format.
• You can also play back CD Text.
For Customer Use:
Enter below the Model No. and Serial
No. which are located either on the rear,
bottom or side of the cabinet. Retain this
information for future reference.
Model No.
Serial No.
IMPORTANT FOR LASER PRODUCTS
PRECAUTIONS
1. CLASS 1 LASER PRODUCT
2. CAUTION: Invisible laser radiation when open and interlock
failed or defeated. Avoid direct exposure to beam.
3. CAUTION: Do not open the top cover. There are no user
serviceable parts inside the unit, leave all servicing to
qualified service personnel.
4. CAUTION: The compact disc player uses invisible laser
radiation and is equipped with safety switches which prevent
emission of radiation when unloading the CD magazine and
the safety interlocks have failed or are defeated. It is
dangerous to defeat the safety switches.
5. CAUTION: Use of controls or adjustments or performance
of procedures other than those specified herein may result
in hazardous radiation exposure.
WARNING
• This unit is designed to operate with 12 volt DC, NEGATIVE
ground electrical systems.
• When replacing the fuse, use one with the specified rating for
this unit. If the fuse blows frequently, consult your nearest JVC
car audio dealer.
PRECAUTIONS
• Car's Internal Temperature
Before listening to CDs after your car has been parked for some
time in low or high temperatures, wait until the temperature
inside the car stabilizes.
• Condensation
In the following cases, moisture may condense on the lens, a
critical part of the CD player, making the CD signal unreadable:
– When the heater has just been turned on.
– When the humidity is high.
In these cases, unload the CD magazine and wait for 1 or 2
hours.
• Volume Setting
– CDs produce very little noise compared with analog sources.
If the volume level is adjusted for analog sources, the
speakers may be damaged by the sudden increase in the
output level. Therefore, lower the volume before operation
and adjust it as required during playback.
– Adjust the volume so that you can hear sounds occurring
outside the car.
INSTALLATION
• Avoid installing the unit in the following places
– Where it would be exposed to direct sunlight or direct heat
from the heater or in an extremely hot place.
– Where it would be subject to rain, water splashes or excessive
humidity.
– Where it would be subject to dust.
– Where it would be positioned in an unstable place.
– Above connection cords or on the floor under which there is
piping.
– Where it could damage the car's fittings (spare tire, etc.) in or
under the trunk.
• Before drilling holes in the trunk to install the unit, make sure
that there is a sufficient space under the trunk so that you do
not drill holes in the fuel tank, etc.
• Firmly install the unit using the provided screws.
Downloaded from
www.Manualslib.com
ESPAÑOL
Muchas gracias por haber comprado este producto de JVC.
Tenga a bien leer detenidamente este manual de instrucciones
antes de poner en funcionamiento la unidad a fin de obtener un
rendimiento óptimo y mayor duración.
Esta unidad ha sido diseñada para reproducir CD, CD-R y CD-
RW.
• Usted también podrá reproducir sus discos originales CD-R
(Regrabables) y CD-RW (Reescribibles) tanto en formato o
como en formato MP3.
• Usted también podrá reproducir sus discos originales CD Text.
INFORMATION (For U.S.A.)
This equipment has been tested and found to comply with the limits
for a Class B digital device, pursuant to Part 15 of the FCC Rules.
These limits are designed to provide reasonable protection against
harmful interference in a residential installation. This equipment
generates, uses, and can radiate radio frequency energy and, if not
installed and used in accordance with the instructions, may cause
harmful interference to radio communications. However, there is no
guarantee that interference will not occur in a particular installation.
IMPORTANTE PARA PRODUCTOS LASER
PRECAUCIONES
1. PRODUCTO LASER CLASE 1
2. ATENCION: Radiación láser invisible cuando se abre, falla o
se anula el seguro. Evite la exposición directa al rayo.
3. ATENCION: No abra la tapa posterior. No hay piezas
reparables por el usuario dentro de la unidad; acuda a
técnicos calificados para la reparación.
4. ATENCION: El reproductor de discos compactos emplea
radiación láser invisible y cuenta con interruptores de
seguridad que evitan la emisión de radiación cuando se
abre la tapa del CD. Es peligroso anular estos interruptores.
5. ATENCION: El empleo de controles para ajustes y la
ejecución de procedimientos diferentes a los especificados
aquí puede causar una exposición peligrosa a la radiación.
ADVERTENCIA
• Esta unidad ha sido diseñada para funcionar con 12 voltios
de CC, con sistemas eléctricos de masa NEGATIVA.
• Cambie el fusible por uno con la capacidad especificada. Si
éste se quema a menudo, consulte a su concesionario JVC
de equipos de audio para automóviles más cercano.
PRECAUCIONES
• Temperatura interna del automóvil
Antes de escuchar un CD después de que su automóvil haya
estado estacionado durante algún tiempo en bajas o altas
temperaturas, espere hasta que la temperatura dentro del
mismo se estabilice.
• Condensación
En los siguientes casos, la humedad puede condensarse en
la lente, que es un componente clave del reproductor de CD,
imposibilitando la lectura de la señal del mismo:
– Cuando se haya encendido un calentador.
– Cuando la humedad es alta.
En tales casos, extraiga el magazín y espere durante 1 o 2
horas.
• Ajuste del volumen
– El CD produce muy poco ruido en comparación con las
fuentes analógicas de sonido. Si el nivel de volumen está
ajustado para estas fuentes, se puede dañar los altavoces
debido al súbito incremento del nivel de salida. Por lo tanto,
reduzca el volumen antes de ponerlo en funcionamiento y
ajústelo como desee durante la reproducción.
– Ajuste el volumen de tal manera que usted pueda escuchar
los sonidos fuera del automóvil.
INSTALACION
• Evite instalar esta unidad en los siguientes lugares
– Donde esté directamente expuesta a la luz solar, al calor de
un calefactor o en un lugar con temperatura muy alta.
– Donde esté expuesta a la lluvia, salpicaduras de agua o
humedad excesiva.
– Donde haya polvo.
– Lugares donde quedaría en posición inestable.
– Sobre los cordones de conexión o en el piso debajo del
cual se encuentra la tubería.
– Donde podría dañar los accesorios del automóvil (neumático
de repuesto, etc.) en/o debajo del baúl.
• Antes de perforar orificios en el baúl para instalar la unidad,
asegúrese que haya suficiente espacio debajo del baúl ya
que podría llegar a perforar el depósito de combustible, etc.
• Instale firmemente la unidad utilizando los tornillos
suministrados.
manuals search engine
FRANÇAIS
Nous vous remercions d'avoir acheté cet appareil JVC. Veuillez
lire consciencieusement ce manual d'instructions avant de
commencer à faire fonctionner l'appareil de façon à être sûr
d'obtenir les performances optimales et la plus longue utilisation
de cet appareil.
Cet appareil a été conçu uniquement pour reproduire les CD, CD-
R et CD-RW.
• Vous pouvez aussi reproduire vos CD-R (enregistrable) et CD-
RW (réinscriptibles) originaux, soit au format audio ou au format
MP3.
• Vous pouvez aussi reproduire vos CD Text.
If this equipment does cause harmful interference to radio or television
reception, which can be determined by turning the equipment off
and on, the user is encouraged to try to correct the interference by
one or more of the following measures:
– Reorient or relocate the receiving antenna.
– Increase the separation between the equipment and receiver.
– Connect the equipment into an outlet on a circuit different from
that to which the receiver is connected.
– Consult the dealer or an experienced radio/TV technician for help.
IMPORTANT POUR PRODUITS LASER
PRECAUTIONS
1. PRODUIT LASER CLASSE 1
2. ATTENTION: Radiation laser invisible quand l'appareil est
ouvert ou que le verrouillage est en panne ou désactivé.
Éviter une exposition directe au rayon.
3. ATTENTION: Ne pas ouvrir le volet supérieur. Il n'y a pas de
pièce réparable par l'utilisateur à l'intérieur. Confier le service
après-vente à un personnel qualifié.
4. ATTENTION: Ce lecteur CD utilise une radiation laser
invisible, toutefois, il est équipé de commutateurs de sécurité
qui empêchent l'émission de radiation en retirant les disques.
Il est dangereux de désactiver les commutateurs de sécurité.
5. ATTENTION: L'utilisation des commandes des réglages et
effectuer des procédures autres que celles spécifiées dans
ce manuel peut provoquer une exposition aux radiations
dangereuses.
AVERTISSEMENT
• Cet appareil est conçu pour fonctionner sur courant continu de
12 volts, à systèmes électriques de masse NEGATIVE.
• En remplaçant le fusible, en utiliser un avec la valeur spécifiée
pour cet appareil. Si le fusible saute souvent, consulter votre
revendeur d'autoradios JVC le plus proche.
PRECAUTIONS A OBSERVER
• Température ambiante dans la voiture
Pour l'écoute de disques audionumériques après un
stationnement assez prolongé de la voiture à la chaleur ou au
froid, attendre que la température dans la voiture se stabilise.
• Condensation
Dans les cas suivants, de l'humidité peut se condenser sur la
lentille, une pièce vitale du lecteur CD, rendant impossible la
lecture du signal CD:
– Quand le chauffage vient juste d'être mis.
– Quand l'humidité est forte.
Dans ces cas, retirer le magasin CD et attendre environ 1 à 2
heures.
• Réglage du volume
– Les disques audionumériques produisent très peu de bruit
comparés avec des sources analogiques. Si le niveau du
volume est réglé comme pour ces sources, les haut-parleurs
peuvent être abîmés par une augmentation soudaine du
niveau de sortie. Par conséquent, baisser le volume avant
fonctionnement et le régler comme voulu pendant la lecture.
– Régler le volume pour pouvoir entendre les sons à l'extérieur
de la voiture.
MISE EN PLACE
• Eviter l'installation dans les endroits suivants
– Où il risque d'être exposer directement au soleil ou chauffé
directement par le chauffage ou dans un endroit très chaud.
– Où il risque d'être mouillé par la pluie, les flaques d'eau ou
dans une forte humidité.
– Dans les endroits poussiéreux.
– Où il peut être placé dans un endroit instable.
– Au-dessus des cordons de raccordements ou sur le plancher
sous lequel il y a une tuyauterie.
– Là où il pourrait endommager des accessoires de la voiture
(roue de secours, etc.) dans ou sous le coffre.
• Avant de percer des trous dans le coffre pour installer l'appareil,
s'assurer qu'il y a un espace suffisant sous le coffre pour ne
pas faire de trous dans le réservoir de carburant, etc.
• Installer fermement l'appareil en utilisant les vis fournies.
1
V
1002MNMMDWJEIN
J
C
EN, SP, FR
Inhaltsverzeichnis
Fehlerbehebung

Verwandte Anleitungen für JVC CH-X1500


Inhaltszusammenfassung für JVC CH-X1500
- Seite 1 • Cambie el fusible por uno con la capacidad especificada. Si • En remplaçant le fusible, en utiliser un avec la valeur spécifiée this unit. If the fuse blows frequently, consult your nearest JVC éste se quema a menudo, consulte a su concesionario JVC pour cet appareil.
- Seite 2 When installing the unit horizontally Instalación horizontal de la unidad Lors de l’installation de l’appareil horizontalement 1. Attach the mounting brackets on the side panels of the unit using 1. Fije las ménsulas de montaje a los paneles laterales de la 1.
-
Seite 3: Troubleshooting
0EJECT button for a few seconds to reset this unit. pulse y mantenga pulsado el botón 0EJECT durante algunos vérifié, maintenez pressée la touche 0 EJECT pendant quelques If the problem still persists, consult the JVC authorized dealer. segundos para reposicionar la unidad. secondes pour réinitialiser cet appareil. -
Seite 4: Electrical Connections
Si votre véhicule ne fournit pas une masse négative de need a voltage inverter which can be bought from a JVC car audio negativa de 12 voltios, necesitará un inversor de tensión que 12 volts, il vous faut un convertisseur de tension, que vous pouvez dealer. - Seite 5 HANDLING MAGAZINES AND MANIPULACION DE MAGAZINES Y MANIPULATION DES MAGASINS ET COMPACT DISCS DES CDS How to handle the magazines Cómo manipular los magazines Manipulation des magasins • Care in handling the magazines • Cuidado en la manipulación de magazines •...
- Seite 6 Orificio de expulsión forzosa y sello protector Le trou d’éjection forcé et l’autocollant protecteur Si le problème persiste, consultez un revendeur JVC autorisé. Should the problem still persists, consult the JVC authorized dealer. Si el problema persiste, consulte con su concesionario JVC autorizado.
-
Seite 7: Vorsichtsmassnahmen
(only for CH-X1500). • Sie können außerdem CD-Text (nur bei CH-X1500) • Vous pouvez aussi reproduire les CD Text (uniquement pour le • You can also play back CD Text (only for CH-X1500). wiedergeben. CH-X1500). • CH-X550 is not compatible with MP3 and CD Text. - Seite 8 When installing the unit horizontally Horizontale Installation des CD-Wechslers Lors de l’installation de l’appareil horizontalement 1. Bringen Sie die Montagehalterungen mit den Schrauben an 1. Fixer les supports de montage sur les panneaux latéraux de 1. Attach the mounting brackets on the side panels of the unit den Seitenwangen des CD-Wechslers an.
-
Seite 9: Fehlersuche
0EJECT button for a few seconds to reset this unit. Taste 0EJECT und halten Sie die Taste einige Sekunden lang vérifié, maintenez pressée la touche 0 EJECT pendant Should the problem still persists, consult the JVC authorized gedrückt, um das Gerät zurückzustellen. quelques secondes pour réinitialiser cet appareil. -
Seite 10: Elektrische Anschlüsse
CDs wiederzugeben. Der CD-Wiedergabebetrieb erfolgt controller, etc. connected to this unit. über das JVC-Steuergerät des CD-Wechslers usw., an das le contrôleur de changeur CD JVC, etc. raccordé à cet appareil. For CD operations, refer to the CD Changer Controller der CD-Wechsler angeschlossen ist. -
Seite 11: Handhabung Von Magazinen Und Cds
Disque Reste collant Playing a CD Text (only for CH-X1500)/Wiedergeben CD Text (nur bei CH-X1500)/ Reproduction d’un CD Text (seulement pour le CH-X1500) In a CD Text, some information about disc (its disc title, Auf einer CD mit CD-Text werden einige Informationen über die Dans un CD Text, certaines informations à... - Seite 12 Das Zwangsauswurfloch und der Schutzaufkleber Le trou d’éjection forcé et l’autocollant protecteur Should the problem still persists, consult the JVC authorized Setzen Sie sich mit Ihrem JVC-Händler in Verbindung, wenn das Si le problème persiste, consultez un revendeur JVC autorisé. dealer.
-
Seite 13: Installation
NEGATIVE • !"#$%&'()*+,-. JVC !"#$% • • When replacing the fuse, use one with the specified rating for this unit. If the fuse blows frequently, consult your nearest JVC car audio dealer. PRECAUTIONS !"#$ • Car’s Internal Temperature • •... - Seite 14 !"#$%& When installing the unit horizontally !"#$%&'()*+,-E =aF 1. Attach the mounting brackets on the side panels of the unit using !"#$%&'()*+,-./012E =bF screws. (Fig. a) 2. Install the unit on the floor of the trunk using self-tapping screws. (Fig. b) Tapping screw (M5 x 20 mm) (M5 x 20 mm)
-
Seite 15: Location Of Controls
* Are the units connected correctly? After checking, press and hold the 0EJECT button for a few seconds to reset this unit. !"#$%&'()*+,-./0123 0EJECT E0 EJECTF= !"#$%&'( If the problem still persists, consult the JVC authorized dealer. Indication Meaning RESET1 (or R1) Ejection error RESET1 ( ) RESET1 !"... - Seite 16 This unit is designed for 12 volt DC, negative ground. If your vehicle does not have a 12 volt negative ground electrical system, you need a voltage inverter which can be bought from a JVC car audio dealer. • Be sure to ground this unit to the car’s chassis.
-
Seite 17: Playing A Cd Text
HANDLING MAGAZINES AND !"# ! COMPACT DISCS !"#$ How to handle the magazines • Care in handling the magazines • • !"#$%&'()*+,-!"./0 – Do not carry the magazine with its inserting slot facing down, – – !"#$%& '()*+,- or the CDs may fall out. –... - Seite 18 ÆwÁ« uë r²)« lÄ Í —U³łô« ë dšô« VIŁ !"#$%&'( JVC !"#$%&'( Should the problem still persists, consult the JVC authorized dealer. Æhšd*« qOÂË dA²Ý« ¨WLzUÁ WKJA*« XOIÐ «–« !"#$% How to remove the disc trays W½«uDÝô« WOMO W½«uDÝô« WOMO W½«uDÝô«...
- Seite 19 ECAUCION / ATTENTION JVC car receivers/controllers equipped with MP3-CD to any other receiver/controller, this unit cannot work ente a los receptores/controladores para automóvil JVC el cambiador de MP3-CD. Esta unidad no podrá ctada a cualquier otro receptor/controlador (tampoco se necté aux autoradios/contrôleurs JVC munis d’une e CD MP3.