Herunterladen Inhalt Inhalt Diese Seite drucken

Werbung

Verfügbare Sprachen
  • DE

Verfügbare Sprachen

  • DEUTSCH, seite 15
Montaje y uso
Assembly and use
Montage et utilisation
Montage - und Gebrauchsanleltung
Montaggio e utilizzazione
Montagem e utillzação
Grifería / Fittings
ATAI
Robinetterie / Armaturen
Rubinetteria / Torneiras
Folleto para usuario
Booklet for the user
Brochure pour l'utilisateur
Broschüre für den verbraucher
Opuscolo per l'utente
Folheto para utilizador
Compañía Roca Radiadores, S.A. - Avda. Diagonal, 513 - 08029 Barcelona Teléfono 39 366 1200 Telefax 93 405 2773

Werbung

Inhaltsverzeichnis
loading

Inhaltszusammenfassung für Roca ATAI

  • Seite 1 Rubinetteria / Torneiras Folleto para usuario Booklet for the user Brochure pour l’utilisateur Broschüre für den verbraucher Opuscolo per l’utente Folheto para utilizador Compañía Roca Radiadores, S.A. - Avda. Diagonal, 513 - 08029 Barcelona Teléfono 39 366 1200 Telefax 93 405 2773...
  • Seite 2 ÍNDICE: A) Despiece ........2-3 B) Información técnica ......5 C) Montaje .
  • Seite 3 Fig. A...
  • Seite 4 Fig. B...
  • Seite 5: Inhaltsverzeichnis

    INHALT A) Bauteile des Artikels ......2-3 B) Technische Informationen ......14 C) Montage .
  • Seite 6: Información Técnica

    INFORMACIÓN TÉCNICA: Despiece: Palanca 13. Junta de estanquidad 24. Brida Tornillo de labio 25. Junta de estanquidad Disco deslizante 14. Junta de teflón 26. Tubos de suministro Junta de teflón 15. Caño Caperuza 16. Junta de teflón T uerca anular 17.
  • Seite 7: Localización De Averías

    Fig. F Abrir el agua y comprobar el correcto funcionamiento del mezclador así como la per- fecta estanquidad de todas sus partes. Tirando de la manecilla se obtiene la apertura del agua; orientándola a la izquierda se obtiene agua más caliente, y hacia la derecha más fria. Para cerrar es suficiente emputar la manecilla.
  • Seite 8 SUSTITUCION DEL CAÑO GIRATORIO Y LIMPIEZA DE LAS JUNTAS: (Fig. B) Desenroscar el tubo vertical -18-, quitar la junta tórica -17-, el anillo antifricción -16-, colocarel caño de salida -15- del anillo antifricción -14-. CUIDADO, las juntas de labio -13- son muy delicadas; por lo tanto, no intentar sacarlas a menos que deba proce- derse a su sustitución completa.
  • Seite 9: Conselhos De Instalação

    INFORMACIÓN TÉCNICA: Composição: Pega Vedante de lábio 25. Reforço Parafuso Anel de teflon 26. Tubos de fornecimento Disco deslizante Cano Anel de teflon Anel de teflon Capuz O-ring Porca anelar Tubo vertical O-ring Arejador O-ring O-ring Cartucho Flange de espessura Corpo da torneira Rebite Casquilhos...
  • Seite 10: Conselhos De Utilização

    (Caso seja necessário, utiliza a flange de espessura -21-). Ligue o tubo de alimentação -26- esquerdo à derivação de água quente, e o direito à da água fria. Fig. F Abra a água e verifique o correcto funcionamento do misturador bem como a perfei- ta estanquicidade de todas as suas peças.
  • Seite 11 ta os procedimentos, tendo o cuidado de limpiar as superfícies an contacto con O- Rings. (Fig. D) SUBSTITUIÇÃO DO CANO GIRATÓRIO E LIMPEZA DAS JUNTAS: Desenrosque o tubo vertical -18-, retine a junta tórica -17-, o anel antifricção -16-, coloque o cano de saida -15- do anel antifricção -14-. CUIDADO, as juntas de lábio -13- são muito delicadas, assim sendo, não tente retirá-las a menos que deva pro- cederse à...
  • Seite 12: Caractéristiques Techniques

    CARACTÉRISTIQUES TECHNIQUES: Composition de l'article: 1. Manette 13. Joint à lèvre 25. Tirant 2. Vis 14. Anneau Téflon 26. Conduites d'alimentation 3. Disque coulissant 25. Bouche de distribution 4. Anneau Téflon 16. Anneau Téflon 5. Capuchon 17. Joint torique 6. Bague de serrage 18.
  • Seite 13: Entretien De La Robinetterie

    (utiliser si nécessaire la flasque d'épaisseur -21-). Raccorder le tuyau d'alimentation -26- gauche à l'arrivée d'eau chaude et celui de droite à l'arrivée d'eau froide. Fig. F Ouvrir l'eau et vérifier le bon fonctionnement du mélangeur ainsi que l'étanchéité de toutes les pièces.
  • Seite 14 robinet -10-. Pour le montage, procéder en sens inverse en ayant soin de nettoyer la superficie où agissent les joints d'étanchéité. REMPLACEMENT DE LA BOUCHE PIVOTANTE ET NETTOYAGE DES JOINTS : (Fig. D) Dévisser le tuyau vertical -18-, retirer le joint torique -17-, l'anneau anti-friction -16-, retirer la bouche -15- et l'anneau anti-friction -14-.
  • Seite 15: A) Bauteile Des Artikels

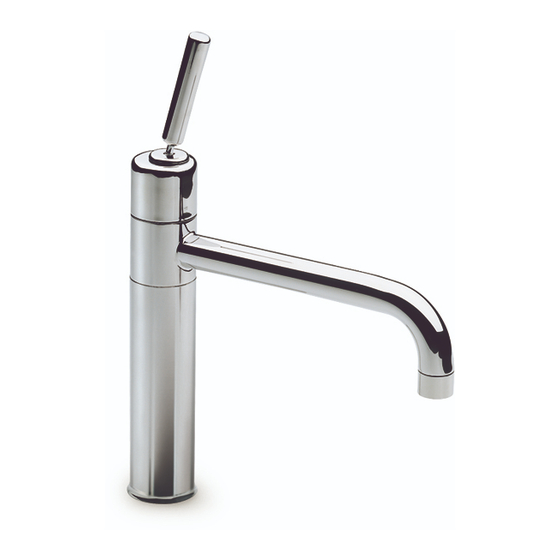
    TECHNISCHE INFORMATIONEN: Bauteile des Artikels Hebelgriff 13. Lippendichtungen 25. Zughülse Schraube 14. Teflonring 26. Anschlußleitungen Gleitscheibe 15. Perlator Teflonring 16. Teflonring Kappe 17. O-Ring Befestigungsmutter 18. Senkrechtes Rohr O-Ring 19. Luftsprudler O-Ring 20. O-Ring Kartusche 21. Scheibenflansch 10. Armaturenkorpus 22. Stiftschraube 11.
  • Seite 16: D) Hinweise Für Den Gebrauch

    (Bei Bedarf den Scheibenflansch (21) verwenden). Die linke Anschlussleitung (26) an die Warmwasserleitung und die rechte Anschlussleitung an die Kaltwasserleitung anschließen. Abb. F Die Wasserzufuhr anstellen und die einwandfreie Funktion der Armatur sowie die Dichtigkeit all ihrer Bestandteile kontrollieren. Wenn der Hebelgriff nach oben gezo- gen wird, läuft Wasser zu.
  • Seite 17 sämtliche Dichtungshülsen (11) und O-Ringe (8) gründlich gesäubert sind. Die Nutmutter (6) bis zum mechanischen Anschlag an den internen Korpus (10) anzie- hen. Zur Montage in umgekehrter Reihenfolge vorgehen und hierbei darauf achten, dass sämtliche Dichtungsflächen gründlich gesäubert sind. WECHSELN DES SCHWENKBAREN PERLATORS UND REINIGEN DER DICHTUNGEN : (Abb. D) Die senkrechte Stange (18) losschrauben, den O-Ring (17) und den Teflonring (16) entfernen.
  • Seite 18: A) Composition

    TECHNICAL INFORMATION: Composition: handle 13. lip seal 25. stay screw 14. Teflon ring 26. supply pipes sliding disc 15. nozzle Teflon ring 16. Teflon ring nipple 17. O ring ring nut 18. vertical pipe O ring 19. aerator O ring 20.
  • Seite 19: D) Tips On Use

    Fig. F Turn on the water and check that the mixer is operating properly and that no leaks are detected from any of its parts. Push the handle to turn on the water; to the left the water gets hotter, while to the right it gets colder. To turn it off just pull the handle. TIPS ON USE: The chrome parts or those with different finishes must only be cleaned with mild soap and water using a sponge or a soft cloth.
  • Seite 20 FITTING A NEW SWIVELLING NOZZLE AND CLEANING THE SEALS : (Fig. D) Undo the vertical pipe -18- remove the O ring -17- the anti-friction ring -16- lift off the nozzle -15- and the anti-friction ring -14-. WARNING the “GACO” lip seals -13- are very delicate, therefore do not attempt to remove them unless you have replace- ments.
  • Seite 21: A) Composizione Articolo

    INFORMAZIONI TECNICHE: Composizione articolo: maniglia 13. guarnizioni a labbro 25. tirante vite 14. anello teflon 26. tubi di alimentazione disco scorrevole 15. bocca di erogazione anello teflon 16. anello teflon cappuccio 17. oring ghiera serraggio 18. tubo verticale oring 19. areatore oring 20.
  • Seite 22: D) Consigli Per L'uso

    Fig. F Aprire l’acqua e verificare il corretto funzionamento del miscelatore nonché la perfet- ta tenuta di tutte le sue parti. Spingendo la maniglia si ottiene l’apertura dell’acqua; orientando la stessa verso sinistra si ottiene acqua piu` calda e verso destra acqua piu` fredda.
  • Seite 23 SOSTITUZIONE DELLA BOCCA GIREVOLE E PULIZIA DELLE GUARNIZIONI: (Fig. D) Svitare il tubo verticale -18- togliere l’oring -17- l’anello antifrizione -16- sfilare la bocca di erogazione -15- e l’anello antifrizione -14-. ATTENZIONE le guarnizioni a labbro “GACO” -13- sono molto delicate, pertanto non cercare di toglierle a meno di una loro completa sostituzione.
  • Seite 25 Fig. D Fig. E Fig. F...

Inhaltsverzeichnis