Inhaltsverzeichnis
Werbung
Verfügbare Sprachen
Verfügbare Sprachen
Quicklinks
Getting Started
Erste Schritte
Operazioni preliminari
Guía de iniciación
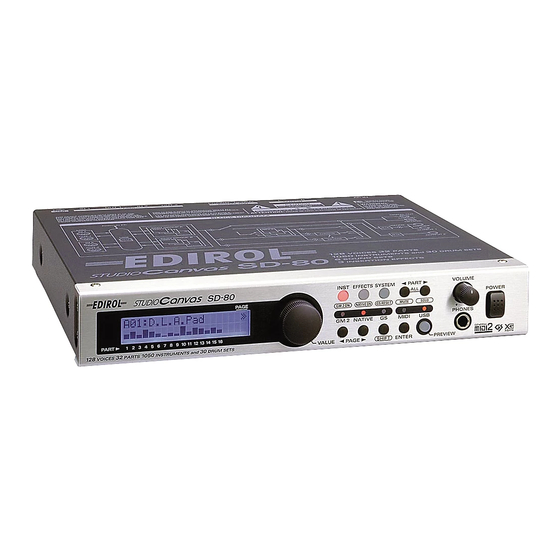
Thank you, and congratulations on your choice of the STUDIO Canvas SD-80.
Before using this unit, carefully read the sections entitled:
"IMPORTANT SAFETY INSTRUCTIONS" (Owner's manual p. 2),
"USING THE UNIT SAFELY" (Owner's manual pp. 3--4), and
"IMPORTANT NOTES" (Owner's manual p. 5). These sections provide
important information concerning the proper operation of the unit.
Additionally, in order to feel assured that you have gained a good grasp
of every feature provided by your new unit, Getting started and Owner's
manual should be read in its entirety. The manual should be saved and
kept on hand as a convenient reference.
Copyright © 2002 ROLAND CORPORATION
All rights reserved. No part of this publication may be reproduced in any form
without the written permission of ROLAND CORPORATION.
Démarrage
Werbung
Inhaltsverzeichnis
Fehlerbehebung

Verwandte Anleitungen für Roland Edirol StudioCanvas SD-80


Inhaltszusammenfassung für Roland Edirol StudioCanvas SD-80
- Seite 1 The manual should be saved and kept on hand as a convenient reference. Copyright © 2002 ROLAND CORPORATION All rights reserved. No part of this publication may be reproduced in any form without the written permission of ROLAND CORPORATION.
- Seite 2 For 230 V (English) This box contains continental and British power cables. Please select the correct type for your country. Für 230 V (Deutsch) Diese Packung beinhaltet europäische und britische Netzkabel. Bitte suchen Sie sich die richtige Variante für Ihr Land aus. Pour 230 V (Français) Cette boite contient des alimentations anglaises ou continentales.
-
Seite 3: Inhaltsverzeichnis
Contents Contents ................... 3 Contents of the Package ............6 Connections with audio equipment ........8 Installing & Setting Up the Driver (Windows)......9 Driver Installation ........................ 9 Settings ..........................21 Check whether there is sound..................24 Installing & Setting Up the Driver (Macintosh)....25 Connecting your Macintosh ..................... - Seite 4 Contents Français Contenu du carton ..............76 Connexions à des équipements audio ........ 78 Installation et configuration du pilote (Windows)....79 Installation du pilote......................79 Paramètres........................... 91 Vérifiez la présence de son ....................94 Installation et configuration du pilote (Macintosh)..... 95 Connexion du Macintosh....................
- Seite 5 * Apple and Macintosh are registered trademark of Apple Computer, Inc. * MacOS is a trademark of Apple Computer, Inc. * GS ( ) is a registered trademark of Roland Corporation. * XG ( ) and XGlite ( ) are trademarks of YAMAHA Corporation.
-
Seite 6: Contents Of The Package
Contents of the Package The box in which the SD-80 was shipped should contain the following items. After opening the box, first check to make sure that all the items are included. If any items are missing, please contact the store where you purchased the SD-80. - Seite 7 Contents of the Package Rack-mount adaptor Use this when you want to install the SD-80 in an audio rack. Two rack ears are included. Attaching the rack-mount adaptor fig.um550 1. Remove three screws (on each side) from the right and left panels of the SD-80.
-
Seite 8: Connections With Audio Equipment
Connections with audio equipment You will not hear any sound from the SD-80 unless you connect headphones to the Headphones jack, or connect the audio outputs (analog) of the SD-80 to your audio playback equipment as shown below. You will need the following items. •... -
Seite 9: Installing & Setting Up The Driver (Windows)
Installing & Setting Up the Driver (Windows) The following items are required for connections and installation. Remove them from the SD-80 package, and have them ready. • SD-80 • AC cable What is a driver? • USB cable • CD-ROM A “driver”... - Seite 10 Installing & Setting Up the Driver (Windows) fig.2-1 Open the Driver Signing Options dialog box. Click the Hardware tab, and then click [Driver Signing]. fig.2-2 Make sure that “What action do you want Windows to take?” is set to “Ignore”. If you changed “What If it is set to “Ignore”, simply click action do you want...
- Seite 11 Installing & Setting Up the Driver (Windows) fig.2-3_30 In this manual, the location In the dialog box that appears, input the of folders and files is given following into the “Open” field, and in terms of the file path, click [OK]. using \ as the delimiter.
- Seite 12 Installing & Setting Up the Driver (Windows) fig.2-7 The screen will indicate “Please choose your search and installation options”. Select “Don’t search. I will choose the driver to install”, and click [Next]. fig.2-8_20 Make sure that the “Model” field indicates “EDIROL SD-80”, and click [Next].
- Seite 13 Installing & Setting Up the Driver (Windows) fig.2-9_30 The Insert Disk dialog The Insert Disk dialog box will may not appear. In that appear. case, proceed to step 17. Click [OK]. fig.2-10_30 The Files Needed dialog box will appear. Input the following into the “Copy files from”...
- Seite 14 Installing & Setting Up the Driver (Windows) If you changed “What action do you want Windows to take?” If you changed the What action do you want Windows to take? setting, Depending on how your restore the original setting after Windows restarts. system is set up, the System icon may be If you are using Windows XP Professional, log on to Windows using...
- Seite 15 Installing & Setting Up the Driver (Windows) Windows 2000 users With the SD-80 disconnected, start up Windows. If you have already Disconnect all USB cables except for a USB keyboard and USB mouse (if connected the SD-80 to used). your computer but the “Add New Hardware Wizard”...
- Seite 16 Installing & Setting Up the Driver (Windows) Exit all currently running software (applications). Also close any open windows. If you are using virus checking or similar software, be sure to exit it as well. Prepare the CD-ROM. Insert the CD-ROM into the CD-ROM drive of your computer. Open the “Run...”...
- Seite 17 Installing & Setting Up the Driver (Windows) Set the SD-80’s power switch to the ON position. If the “File signature verification” setting was not set to “Ignore”, a “Digital Signature Not Found” dialog box will appear. fig.2-16_30 If “File signature verification” is set to “Warn,” 1.
- Seite 18 Installing & Setting Up the Driver (Windows) fig.2-17b_30 The “Found New Hardware Wizard” may be displayed. Verify that “EDIROL SD-80” is displayed, and click [Finish]. Restart Windows. The System Settings Change dialog box may appear. Click [Yes]. Windows will restart automatically. If you changed “File signature verification”...
-
Seite 19: Windows Me/98 Users
Installing & Setting Up the Driver (Windows) Windows Me/98 users With the SD-80 disconnected, start up Windows. If you have already connected the SD-80 to Disconnect all USB cables except for a USB keyboard and USB mouse (if your computer but the used). - Seite 20 Installing & Setting Up the Driver (Windows) Use the USB cable to connect the SD-80 to your computer. Once the connections have 1. With the power switch turned OFF, connect the AC cable to the SD-80. been completed, turn on power to your various 2.
-
Seite 21: Settings
Installing & Setting Up the Driver (Windows) Settings MIDI input and output destinations Windows XP/2000/Me users Open Control Panel. Click the Windows Start button, and from the menu that appears, select Settings | Control Panel. Windows XP Click the Windows start button, and from the menu that appears, select Control Panel. -
Seite 22: Windows 98 Users
Installing & Setting Up the Driver (Windows) Windows 98 users Open Control Panel. Click the Windows Start button, and from the menu that appears, select Settings | Control Panel. Open the Multimedia Properties dialog box. In Control Panel, double-click the Multimedia icon to open the “Multimedia Additional information Properties”... - Seite 23 Installing & Setting Up the Driver (Windows) Enabling background services In Windows XP, perform these settings to make MIDI processing occur more smoothly. These settings are unavailable in Windows 2000/Me/98. Click the Windows start button, and from the menu that appears, select Control Panel.
-
Seite 24: Check Whether There Is Sound
Installing & Setting Up the Driver (Windows) Check whether there is sound Next, play back the sample data to verify that the driver installation and settings were performed correctly. Use of the demo song supplied with this product Playing back the sample data (MIDI) for any purpose other than private, personal Here we will use standard Windows functionality to play back the sample... -
Seite 25: Installing & Setting Up The Driver (Macintosh)
Installing & Setting Up the Driver (Macintosh) The following items are required for connections and installation. Remove them from the SD-80 package, and have them ready. • SD-80 • AC cable • USB cable • CD-ROM Connecting your Macintosh Turn off the power of the Macintosh and all peripheral devices connected to the Macintosh. With the power switch turned OFF, connect the AC cable to the SD-80. -
Seite 26: Installing The Sd-80 Driver (Oms)
Installing & Setting Up the Driver (Macintosh) Installing the SD-80 driver (OMS) Use the following procedure to install the SD-80 driver. The included SD-80 OMS driver is an add-on module for using the SD-80 with OMS. In order for you to use it, OMS must already be installed on the OMS can be found in the hard disk from which you started up. - Seite 27 Installing & Setting Up the Driver (Macintosh) OMS settings fig.3-3 From the CD-ROM, drag the Driver E-OMS-Setting folder to the hard disk of your Macintosh to copy it. fig.3-4 In the Opcode-OMS Application folder where you installed OMS, double-click OMS Setup to start it up. fig.3-5_35 If a dialog box like the one shown here appears, click [Turn It Off].
- Seite 28 Installing & Setting Up the Driver (Macintosh) fig.3-9_35 From the Edit menu, select OMS MIDI Setup. In the OMS MIDI Setup dialog box that appears, check Run MIDI in background, and click [OK]. fig.3-10 From the File menu, choose Make Current. If you are unable to select Make Current, it has already been applied, and you may continue to the next step.
- Seite 29 Installing & Setting Up the Driver (Macintosh) Does the SD-80’s PART level meter move? If the SD-80 does not If the PART level meter in the SD-80’s display is moving but you do not hear produce sound, refer to No sound, check whether the volume of the SD-80 or your speaker system has sound (p.
-
Seite 30: Installing The Sd-80 Driver (Freemidi)
Installing & Setting Up the Driver (Macintosh) Installing the SD-80 driver (FreeMIDI) Use the following procedure to install the SD-80 driver. The included SD-80 FreeMIDI driver is an add-on module for using the SD-80 with FreeMIDI. In order to use it, FreeMIDI must be installed on the hard disk from which you started up. - Seite 31 Installing & Setting Up the Driver (Macintosh) When “OMS is installed on this computer...” appears, click [FreeMIDI]. Additional information about the ports The first time the software is started up, a dialog box saying “Welcome to FreeMIDI!” will appear. Click [Continue]. SD-80 Port A: Sends/receives data for SD-80 part group A...
-
Seite 32: Troubleshooting
Troubleshooting If an unexpected problem occurs while using the SD-80, read this chapter first. It contains numerous tips for resolving problems. If you are using Windows or Macintosh for the first time, and as a result find it difficult to follow the procedural explanations, please refer to the manuals that came with your computer or operating system. - Seite 33 Troubleshooting • Using the procedure for “Deleting the driver”(p. 39), delete the USB audio device driver installed in your computer, and then re-install the SD-80 driver as described in “Installing & Setting Up the Driver (Windows)”(p. 9). Also check whether there is any “Other devices” in “Device Manager”...
- Seite 34 Troubleshooting An “Unknown driver found” dialog box appears, and you are unable to install the driver “Find new hardware wizard” does not execute automatically “Find new hardware wizard” ends before the process is completed • It may take about 15 seconds (or more) after the USB cable is connected for the SD-80 to be detected.
-
Seite 35: Can't Install/Delete/Use The Driver In Windows Xp/2000
Troubleshooting Can’t install/delete/use the driver in Windows XP/2000 • Did you log on to Windows as a user with administrative privileges? In order to install/delete/re-install the driver in Windows XP/2000, you must be logged into Windows as a user with administrative privileges, such as Administrator. For details, please contact the system administrator for your computer system. -
Seite 36: Problems When Using The Sd-80
Troubleshooting 12. Restart Windows. Then install the driver once again. (->“Installing & Setting Up the Driver (Windows)”(p. 9)) * If the problem still occurs after you have taken the above measures, please refer also to the Readme file for the USB driver. The Readme file is on the CD-ROM. Problems when using the SD-80 Operating system becomes unstable •... - Seite 37 Troubleshooting • Is your computer in Suspend or Sleep mode? If so, get your computer to resume normal operation, then exit all applications that are using the SD-80. Next, turn the SD-80’s power off, then switch it on again. • Did you reconnect the USB cable or turn the power of the SD-80 off and on? Exit all applications that are using the SD-80, and turn the power of the SD-80 off and then on once again.
- Seite 38 Troubleshooting • Has the MIDI device you are using been selected correctly? Select either [SD-80 Port A] or [SD-80 Port B] as the MIDI output device. • Are the track outputs set correctly? MIDI tracks to which no MIDI playback device is assigned will not be heard. If you want to play back a MIDI track, you must make sure that the MIDI device you want to use is displayed in your software as the MIDI output port.
-
Seite 39: Deleting The Driver
Troubleshooting Deleting the driver If you were unable to install the driver according to the procedure given, the SD-80 may not be recognized correctly by the computer. In this case, use the following procedure to delete the driver, and then follow the procedure in “Installing & Setting Up the Driver” (Windows, p. 9; Macintosh, p. -
Seite 40: Windows Me/98 Users
Troubleshooting Windows Me/98 users 1. With all USB cables disconnected, start up Windows. (USB keyboard and USB mouse excepted) 2. After connecting the SD-80 to your computer via a USB cable, turn on the power of the SD-80. 3. Exit all applications before deleting the driver. 4. -
Seite 41: Inhalt Der Verpackung
Inhalt der Verpackung Die Verpackung, in der das SD-80 geliefert wurde, sollte folgende Artikel enthalten. Wenn Sie die Verpackung öffnen, sollten Sie als erstes prüfen, ob alle Artikel vorhanden sind. Wenn einer der aufgeführten Artikel fehlt, nehmen Sie bitte mit dem Händler Kontakt auf, von dem Sie das SD-80 bezogen haben. -
Seite 42: Adapter Für Die Rack-Montage
Inhalt der Verpackung Adapter für die Rack-Montage Verwenden Sie diesen Adapter, wenn Sie das SD-80 in einem Audio-Rack installieren möchten. Zwei Befestigungsklammern liegen bei. Installation des Adapters für die Rack-Montage fig.um550 1. Entfernen Sie von den rechten und linken Abdeckungen des SD-80 jeweils drei Schrauben (auf jeder Seite). -
Seite 43: Anschluss Von Audiogeräten
Anschluss von Audiogeräten Sie hören erst dann Sound aus dem SD-80, nachdem Sie die Kopfhörer an die Kopfhörerbuchsen angeschlossen haben bzw. die Audioausgänge (analog) des SD-80 wie unten dargestellt mit Ihren Audiowiedergabegeräten verbunden haben. Hierzu benötigen Sie Folgendes: • SD-80 •... -
Seite 44: Installieren Und Einrichten Des Treibers (Windows)
Installieren und Einrichten des Treibers (Windows) Folgende Komponenten sind für die Anschlüsse und die Installation erforderlich. Entnehmen Sie sie der Verpackung des SD-80 und halten Sie sie bereit. • SD-80 • Wechselstromkabel Was ist ein Treiber? • USB-Kabel • CD-ROM Ein "Treiber"... - Seite 45 Installieren und Einrichten des Treibers (Windows) fig.2-1 Öffnen Sie das Dialogfeld Treibersignaturoptionen. Klicken Sie auf die Registerkarte Hardware und klicken Sie anschließend auf [Treibersignierung]. fig.2- Stellen Sie sicher, dass für “Wie soll Windows vorgehen?” “Ignorieren” aktiviert ist. Wenn “Ignorieren” bereits Wenn Sie die Option für aktiviert ist, klicken Sie auf [OK].
- Seite 46 Installieren und Einrichten des Treibers (Windows) fig.2-3_30 In diesem Dokument wird Geben Sie im angezeigten Dialogfeld die Position der Ordner Folgendes in das Feld “Öffnen” ein und und Dateien als Dateipfad klicken Sie auf [OK]. mit \ als Trennzeichen angegeben. Beispiel: D:\Driver\USB_XP2K\SETUPINF.EXE USB_XP2K\SETUPINF.
- Seite 47 Installieren und Einrichten des Treibers (Windows) fig.2-6 Der Assistent für das Suchen neuer Hardware erscheint. Prüfen Sie, ob EDIROL SD-80 Vergewissern Sie sich stets, angezeigt wird, und klicken Sie dass die Lautstärke auf Wählen Sie “Software von reduziert wurde, bevor Sie den Netzschalter einer Liste oder bestimmten betätigen.
- Seite 48 Installieren und Einrichten des Treibers (Windows) Wenn die Einstellung “Wie soll Windows vorgehen?” nicht auf “Ignorieren” gesetzt wurde, wird ein Dialogfeld “Hardware-Installation” angezeigt. Wenn für Wie soll Windows vorgehen? “Warnen” aktiviert wurde, 1. klicken Sie auf [Trotzdem fortsetzen]. 2. Setzen Sie die Installation fort. Wenn für “Wie soll Windows vorgehen?”...
- Seite 49 Installieren und Einrichten des Treibers (Windows) fig.2-11_20 Der Assistent für das Suchen neuer Hardware erscheint. Prüfen Sie, ob EDIROL SD-80 angezeigt wird, und klicken Sie auf [Beenden]. Warten Sie, bis die Meldung “Neue Hardware gefunden” in der Nähe der Task-Leiste angezeigt wird.
-
Seite 50: Windows 2000-Anwender
Installieren und Einrichten des Treibers (Windows) Windows 2000-Anwender Starten Sie Windows, wobei das SD-80 ausgesteckt ist. Wenn Sie das SD-80 bereits Stecken Sie alle USB-Kabel außer der USB-Tastatur und der USB-Maus aus an Ihren Computer (falls vorhanden). angeschlossen haben und der “Hardware- Assistent”... - Seite 51 Installieren und Einrichten des Treibers (Windows) Beenden Sie alle aktuell ausgeführten Programme (Anwendungen). In diesem Dokument wird Schließen Sie außerdem alle noch geöffneten Programmfenster. Wenn Sie ein die Position der Ordner und Virenschutzprogramm oder ähnliche Software verwenden, müssen Sie diese Dateien als Dateipfad mit \ ebenfalls beenden.
- Seite 52 Installieren und Einrichten des Treibers (Windows) Bringen Sie den Netzschalter des SD-80 in die Position ON. Wenn in für “Dateisignaturverifizierung” nicht “Ignorieren” aktiviert wurde, erscheint die Meldung “Digitalsignatur nicht gefunden”. fig.2-16_30 Wenn für “Dateisignaturverifizierung” “Warnen” aktiviert ist, 1. klicken Sie auf [Ja]. 2.
-
Seite 53: Wenn Sie "Dateisignaturverifizierung" Geändert Haben
Installieren und Einrichten des Treibers (Windows) fig.2-17b_30 Möglicherweise wird der Assistent “Neue Hardware gefunden” angezeigt. Prüfen Sie, ob “EDIROL SD-80” angezeigt wird und klicken Sie auf [Beenden]. Starten Sie Windows neu. Anschließend wird eventuell das Dialogfeld Geänderte Systemeinstellungen angezeigt. Klicken Sie auf [Ja]. Windows wird automatisch neu gestartet. - Seite 54 Installieren und Einrichten des Treibers (Windows) Windows Me/98-Anwender Wenn Sie das SD-80 bereits Starten Sie Windows, wobei das SD-80 ausgesteckt ist. an Ihren Computer angeschlossen haben und Stecken Sie alle USB-Kabel außer der USB-Tastatur und der USB-Maus aus der “Hardware- (falls vorhanden).
- Seite 55 Installieren und Einrichten des Treibers (Windows) Verwenden Sie das USB-Kabel, um das SD-80 mit Ihrem Computer zu Nachdem die Anschlüsse verbinden. fertig gestellt wurden, 1. Verbinden Sie bei ausgeschaltetem Netzschalter das schalten Sie die Wechselstromkabel mit dem SD-80. verschiedenen Geräte in der angegebenen 2.
-
Seite 56: Einstellungen
Installieren und Einrichten des Treibers (Windows) Einstellungen Eingabe- und Ausgabeziele für MIDI Windows XP/2000/Me-Anwender Öffnen Sie die Systemsteuerung. Klicken Sie in Windows auf Start und wählen Sie im daraufhin angezeigten Menü Einstellungen - Systemsteuerung. Windows XP Klicken Sie in Windows auf Start und wählen Sie im daraufhin angezeigten Menü... - Seite 57 Installieren und Einrichten des Treibers (Windows) Wechseln Sie zum folgenden Abschnitt. •Windows XP-Anwender ..........S. 58 •Windows 2000- / Me-Anwender........ S. 59 Windows 98-Anwender Öffnen Sie die Systemsteuerung. Klicken Sie in Windows auf Start und wählen Sie im daraufhin angezeigten Menü...
-
Seite 58: Aktivierung Der Hintergrunddienste
Installieren und Einrichten des Treibers (Windows) Aktivierung der Hintergrunddienste Nehmen Sie unter Windows XP folgende Einstellungen vor, um eine reibungslose MIDI-Verarbeitung zu ermöglichen. Diese Einstellungen sind unter Windows 2000/Me/98 nicht verfügbar. Klicken Sie in Windows auf Start und wählen Sie im daraufhin angezeigten Menü... -
Seite 59: Prüfung, Ob Sound Zu Hören Ist
Installieren und Einrichten des Treibers (Windows) Prüfung, ob Sound zu hören ist Als nächstes spielen Sie die Beispieldaten ab, um sicherzustellen, dass die Treiber vorschriftsmäßig installiert wurden und die Einstellungen richtig Die Verwendung des vorgenommen wurden. Demosongs, das mit diesem Produkt Abspielen der Beispieldaten (MIDI) ausgeliefert wird, für andere als private Zwecke... -
Seite 60: Installieren Und Einrichten Des Treibers (Macintosh)
Installieren und Einrichten des Treibers (Macintosh) Folgende Komponenten sind für die Anschlüsse und die Installation erforderlich. Entnehmen Sie sie der Verpackung des SD-80 und halten Sie sie bereit. • SD-80 • Wechselstromkabel • USB-Kabel • CD-ROM Anschluss an Ihren Macintosh Schalten Sie den Macintosh und alle Peripheriegeräte aus, die mit dem Macintosh verbunden sind. -
Seite 61: Installation Des Sd-80-Treibers (Oms)
Installieren und Einrichten des Treibers (Macintosh) Installation des SD-80-Treibers (OMS) Installieren Sie den SD-80-Treiber wie anschließend beschrieben. Der SD-80 OMS-Treiber im Lieferumfang ist ein Add-On-Modul für die OMS befindet sich im Verwendung des SD-80 mit OMS. Damit Sie dieses Modul verwenden Ordner OMS 2.3.8 E, der können, muss OMS auf der Festplatte, von der der Computer gestartet sich im Ordner OMS der... -
Seite 62: Oms-Einstellungen
Installieren und Einrichten des Treibers (Macintosh) OMS-Einstellungen fig.3-3 Ziehen Sie den Ordner Driver E-OMS-Settings auf der CD-ROM auf die Festplatte Ihres Macintosh, um ihn zu kopieren. fig.3-4 Doppelklicken Sie im Ordner Opcode-OMS Application, in dem Sie OMS installiert haben, auf OMS Setup, um die Installation zu starten. - Seite 63 Installieren und Einrichten des Treibers (Macintosh) fig.3-9_35 Wählen Sie im Menü Edit die Option OMS MIDI Setup. Aktivieren Sie im daraufhin angezeigten Dialogfeld OMS MIDI Setup die Option Run MIDI in background und klicken Sie auf [OK]. fig.3-10 Wählen Sie im Menü File die Option Make Current.
-
Seite 64: Installation Des Sd-80-Treibers (Freemidi)
Installieren und Einrichten des Treibers (Macintosh) Bewegt sich die PART-Lautstärke-Messanzeige des SD-80? Wenn sich die PART-Lautstärke-Messanzeige in der Anzeige des SD-80 Wenn das SD-80 keinen bewegt, aber kein Sound zu hören ist, prüfen Sie, ob die Lautstärke des SD-80 Sound ausgibt, lesen Sie oder Ihres Lautsprechersystems zurückgedreht wurde. -
Seite 65: Einstellungen Für Freemidi
Installieren und Einrichten des Treibers (Macintosh) fig.3-2_40 Falls eine Meldung wie abgebildet Nachdem die Anschlüsse angezeigt wird, klicken Sie auf fertig gestellt wurden, [Continue]. schalten Sie die verschiedenen Geräte in Alle anderen aktuell ausgeführten der angegebenen Anwendungen werden Reihenfolge ein. Wenn Sie anschließend beendet und die die Geräte in der falschen Installation wird fortgesetzt. - Seite 66 Installieren und Einrichten des Treibers (Macintosh) Prüfen Sie, ob die MIDI-Übertragung und der MIDI-Empfang fehlerfrei Zusätzliche erfolgen.Wählen Sie im Menü MIDI die Option Check Connections. Informationen über die fig.3-13_40 Anschlüsse Der Mauszeiger nimmt die Gestalt SD-80 Port A: einer Note an. Klicken Sie auf die Sendet/empfängt Daten Soundgenerator-Symbole für jeden für SD-80 Part Group A...
-
Seite 67: Fehlerbehebung
Fehlerbehebung Wenn während der Verwendung des SD-80 unerwartete Probleme auftreten, lesen Sie bitte zunächst dieses Kapitel. Hier finden Sie eine Vielzahl von Tipps für die Lösung von Problemen. Wenn Sie mit Windows oder mit dem Macintosh zum ersten Mal arbeiten und daher Schwierigkeiten haben, die Erklärungen zu verstehen, lesen Sie bitte im Benutzerhandbuch Ihres Computers oder Ihres Betriebssystems nach. - Seite 68 Fehlerbehebung • Wurde das SD-80 eingeschaltet? Stellen Sie sicher, dass der POWER-Schalter des SD-80 nach innen gedrückt wurde. Überprüfen Sie das, und wenn Sie Windows verwenden, schließen Sie das Dialogfeld Eigenschaften von Sounds und Multimedia (Eigenschaften von Sounds und Audiogeräte in Windows XP und Eigenschaften für Multimedia in Windows 98), öffnen Sie dieses Dialogfeld danach erneut und geben Sie die Audio- und MIDI-Eingabe-/Ausgabeziele an.
- Seite 69 Fehlerbehebung Ein Dialogfeld “Unbekanntes Gerät gefunden” wird angezeigt, und Sie können den Treiber nicht installieren Der Assistent “Neue Hardware gefunden” startet nicht automatisch Der Assistent “Neue Hardware gefunden” endet, bevor der Prozess abgeschlossen ist • Nachdem das USB-Kabel angeschlossen wurde, kann es ca. 15 Sekunden (oder länger) dauern, bis das SD-80 erkannt wird.
- Seite 70 Fehlerbehebung “Unbekanntes Gerät gefunden” wird angezeigt, obwohl Sie den Treiber installiert haben Wenn Ihr Computer oder USB-Hub mit zwei oder mehr USB-Anschlüssen ausgerüstet ist und Sie das SD-80 an einen USB-Anschluss anschließen, an den das SD-80 zuvor niemals angeschlossen wurde, wird möglicherweise das Dialogfeld “Unbekanntes Gerät” angezeigt, selbst wenn der zugehörige Treiber bereits auf Ihrem Computer installiert ist.
-
Seite 71: Problems When Using The Sd-80
Fehlerbehebung 6. Klicken Sie auf die Registerkarte Geräte-Manager. In Windows XP öffnen Sie das Register Systemeigenschaften, Hardware, und klicken auf Geräte-Manager. 7. Prüfen Sie, ob “?USB-Verbundgerät”, “?USB-Gerät”, “!USB-Gerät”, oder “USB- Verbundgerät” unterhalb von “Audio-, Video- und Gamecontroller”, “Andere Geräte”, oder “Universeller Serieller Bus-Controller” angezeigt wird. Wenn Sie einen derartigen Eintrag finden, wählen Sie ihn aus und klicken auf [Entfernen]. - Seite 72 Fehlerbehebung • Was the driver installed correctly? In order for you to play back audio data via the SD-80, the driver must be installed. For installation and settings, refer to “Installing & Setting Up the Driver” (Windows, S. 44 / Macintosh, S. 60). •...
- Seite 73 Fehlerbehebung Can't play back MIDI • Has the MIDI device you are using been set correctly? In order to record/play MIDI tracks using the SD-80, you must correctly install the SD-80 driver (“Installieren und Einrichten des Treibers (Windows)” (S. 44)). Also make sure that the input port and output port are set as follows in your software.
-
Seite 74: Deleting The Driver
Fehlerbehebung Deleting the driver If you were unable to install the driver according to the procedure given, the SD-80 may not be recognized correctly by the computer. In this case, use the following procedure to delete the driver, and then follow the procedure in “Installing & Setting Up the Driver” (Windows, S. 44; Macintosh, S. -
Seite 75: Windows Me/98 Users
Fehlerbehebung Windows Me/98 users 1. With all USB cables disconnected, start up Windows. (USB keyboard and USB mouse excepted) 2. After connecting the SD-80 to your computer via a USB cable, turn on the power of the SD-80. 3. Exit all applications before deleting the driver. 4. -
Seite 76: Contenu Du Carton
Contenu du carton Le carton de livraison du SD-80 doit contenir les éléments suivants. Après avoir ouvert le carton, vérifiez la présence de tous les éléments. S’il en manque, veuillez contacter le magasin qui vous a vendu le SC-D80. SD-80 Câble secteur N’utilisez que ce cordon secteur avec le SD-80. - Seite 77 Contenu du carton Adaptateur de montage en rack Utilisez cet équipement si vous voulez monter le SD-80 en rack. Deux pattes de montage sont fournies. Fixation de l’adaptateur de montage en rack fig.um550 1. Retirez les trois vis (de chaque côté) des panneaux droit et gauche du SD-80.
-
Seite 78: Connexions À Des Équipements Audio
Connexions à des équipements audio Pour entendre les sons du SD-80, vous devez brancher un casque sur la prise casque ou relier les sorties audio (analogiques) du SD-80 à votre équipement audio, comme illustré ci-dessous. Pour cela, vous aurez besoin des éléments suivants : •... -
Seite 79: Installation Et Configuration Du Pilote (Windows)
Installation et configuration du pilote (Windows) Vous aurez besoin des éléments suivants pour l'installation et les connexions. Sortez-les de l'emballage du SD-80. • SD-80 • Cordon d'alimentation secteur Qu'est-ce qu'un pilote ? • Câble USB • CD-ROM Un “pilote” est un logiciel qui sert à... - Seite 80 Installation et configuration du pilote (Windows) fig.2-1 Ouvrez la boîte de dialogue Options de signature des pilotes. Cliquez sur l’onglet Matériel, puis cliquez sur [Signature du pilote]. fig.2-2 Assurez-vous que l’option “Que voulez-vous faire ?” est définie sur “Ignorer”. Si vous avez modifié “Que Si c'est le cas (“Ignorer”), cliquez voulez-vous faire ?”...
- Seite 81 Installation et configuration du pilote (Windows) fig.2-3_30 Dans ce document, Dans la boîte de dialogue qui s’affiche, l’emplacement des tapez ce qui suit dans le champ dossiers et des fichiers est “Ouvrir”, puis cliquez sur [OK]. donné en termes de chemin, avec \ comme délimiteur.
- Seite 82 Installation et configuration du pilote (Windows) fig.2-7 L’écran indiquera “Veuillez choisir vos options de recherche et d’installation”. Sélectionnez “Ne pas rechercher. Je vais choisir le pilote à installer” puis cliquez sur [Suivant]. fig.2-8_20 Vérifiez que le champ “Modèle” indique “EDIROL SD-80” puis cliquez sur [Suivant].
- Seite 83 Installation et configuration du pilote (Windows) fig.2-9_30 La boîte de dialogue Insérez le La boîte de dialogue disque s'affiche. Insérez le disque ne s'affiche pas. Dans ce cas, Cliquez sur [OK]. passez à l’étape 17. fig.2-10_30 La boîte de dialogue Fichiers nécessaires s'affiche.
- Seite 84 Installation et configuration du pilote (Windows) Si vous avez modifié “Que voulez-vous faire ?” Si vous avez modifié “Que voulez-vous faire ?”, restaurez le paramètre Selon la configuration de d’origine après le redémarrage de Windows. votre ordinateur, l’icône Système s’affiche peut- Si vous utilisez Windows XP Professional, vous devez ouvrir une être dans le Panneau de session avec un nom d’utilisateur disposant des droits...
-
Seite 85: Windows 2000
Installation et configuration du pilote (Windows) Windows 2000 Le SD-80 déconnecté, démarrez l’ordinateur. Si vous avez déjà connecté Débranchez tous les câbles USB, à l’exception de ceux du clavier et de la le SD-80 à votre ordinateur souris (le cas échéant). mais que la boîte “Assistant ajout de nouveau matériel”... - Seite 86 Installation et configuration du pilote (Windows) Fermez la boîte de dialogue Propriétés Système. Cliquez sur [OK]. Quittez tous les logiciels (applications) actifs. Dans ce document, Fermez également toutes les fenêtres éventuellement ouvertes. Si vous l’emplacement des utilisez un anti-virus, quittez-le également. dossiers et des fichiers est donné...
- Seite 87 Installation et configuration du pilote (Windows) Placez l’interrupteur d’alimentation du SD-80 sur ON. Si l’option “Vérification de la signature des pilotes” n’a pas été définie sur “Ignorer”, une boîte de dialogue “Signature numérique introuvable” s’affiche. fig.2-16_30 Si “Vérification des signatures des fichiers” est défini sur “Avertir”...
- Seite 88 Installation et configuration du pilote (Windows) fig.2-17b_30 La boîte de dialogue “Assistant Nouveau matériel détecté” peut s'afficher. Vérifiez que “EDIROL SD-80” est affiché, puis cliquez sur [Terminer]. Redémarrez Windows. La boîte de dialogue Modification des paramètres système peut s'afficher. Cliquez sur [Oui]. Windows redémarre automatiquement. Si vous avez modifié...
-
Seite 89: Windows Me
Installation et configuration du pilote (Windows) Windows Me/98 Le SD-80 déconnecté, démarrez l’ordinateur. Si vous avez déjà connecté le SD-80 à votre ordinateur Débranchez tous les câbles USB, à l’exception de ceux du clavier et de la mais que la boîte souris (le cas échéant). - Seite 90 Installation et configuration du pilote (Windows) Utilisez le câble USB pour relier le SD-80 à votre ordinateur. Une fois les connexions 1. L’interrupteur d’alimentation sur OFF, reliez le cordon secteur sur le effectuées, mettez sous SD-80. tension les différents appareils dans l’ordre 2.
-
Seite 91: Paramètres
Installation et configuration du pilote (Windows) Paramètres Paramètres d'entrée et de sortie MIDI Windows XP/2000/Me : Ouvrez le Panneau de configuration. Cliquez sur le bouton Démarrer de Windows, puis dans le menu qui s’affiche, choisissez Paramètres | Panneau de configuration. Windows XP Cliquez sur le bouton Démarrer de Windows, puis dans le menu qui s’affiche, choisissez Panneau de configuration. - Seite 92 Installation et configuration du pilote (Windows) Windows 98 Ouvrez le Panneau de configuration. Cliquez sur le bouton Démarrer de Windows, puis dans le menu qui s’affiche, choisissez Paramètres | Panneau de configuration. Ouvrez la boîte de dialogue Propriétés de Multimédia. Dans le Panneau de configuration, cliquez deux fois sur l'icône Multimédia Informations pour ouvrir la boîte de dialogue Propriétés de multimédia.
- Seite 93 Installation et configuration du pilote (Windows) Activation des services en tâche de fond Avec Windows XP, appliquez ces paramètres pour un meilleur traitement MIDI. Ces paramètres ne sont pas disponibles avec Windows 2000/Me/98. Cliquez sur le bouton Démarrer de Windows, puis dans le menu qui s’affiche, choisissez Panneau de configuration.
-
Seite 94: Vérifiez La Présence De Son
Installation et configuration du pilote (Windows) Vérifiez la présence de son Pour vérifier que les connexions ont été correctement effectuées, jouez l'exemple de données fourni. L’utilisation des données Lecture de l'exemple de données (MIDI) musicales fournies avec ce produit à des fins autres Vous allez ici utiliser les fonctionnalités Windows standard pour lire que personnelles et privées l'exemple de données (MIDI). -
Seite 95: Installation Et Configuration Du Pilote (Macintosh)
Installation et configuration du pilote (Macintosh) Vous aurez besoin des éléments suivants pour l'installation et les connexions. Sortez-les de l'emballage du SD-80. • SD-80 ; • cordon d'alimentation secteur ; • câble USB ; • CD-ROM. Connexion du Macintosh Eteignez le Macintosh, ainsi que tous les périphériques qui y sont connectés. L’interrupteur d’alimentation sur OFF, reliez le cordon secteur sur le SD-80. -
Seite 96: Installation Du Pilote Sd-80 (Oms)
Installation et configuration du pilote (Macintosh) Installation du pilote SD-80 (OMS) Procédez comme suit pour installer le pilote SD-80. Le pilote OMS SD-80 est un module supplémentaire fourni pour pouvoir faire fonctionner le SD-80 avec OMS. Pour pouvoir l'utiliser, OMS doit déjà OMS se trouve dans le être installé... - Seite 97 Installation et configuration du pilote (Macintosh) Paramètres OMS fig.3-3 Depuis le CD-ROM, faites glisser le dossier Driver E-OMS-Settings vers le disque dur du Macintosh pour le copier. fig.3-4 Dans le dossier Opcode-OMS Application où vous avez installé OMS, cliquez deux fois sur OMS Setup pour le lancer.
- Seite 98 Installation et configuration du pilote (Macintosh) fig.3-9_35 Dans le menu Edit, sélectionnez OMS MIDI Setup. Dans la boîte de dialogue OMS MIDI Setup qui s'affiche, sélectionnez Run MIDI in background (Lancer MIDI en tâche de fond), puis cliquez sur [OK]. fig.3-10 Dans le menu File, sélectionnez Make Current (Rendre actif).
- Seite 99 Installation et configuration du pilote (Macintosh) Le vumètre PART du SD-80 est-il actif ? Si le SD-80 ne produit Si le vumètre PART du SD-80 est actif mais que vous n'entendez rien, vérifiez aucun son, reportez-vous à que le volume est bien réglé sur le SD-80 ou votre système audio. Si le la section No sound vumètre PART n'est pas actif, vérifiez à...
-
Seite 100: Installation Du Pilote Sd-80 (Freemidi)
Installation et configuration du pilote (Macintosh) Installation du pilote SD-80 (FreeMIDI) Procédez comme suit pour installer le pilote SD-80. Le pilote SD-80 FreeMIDI est un module supplémentaire fourni pour pouvoir faire fonctionner le SD-80 avec FreeMIDI. Pour pouvoir l'utiliser, FreeMIDI doit déjà être installé sur le disque de démarrage. * Débranchez le SD-80 du Macintosh avant de démarrer l’installation. - Seite 101 Installation et configuration du pilote (Macintosh) Quand le message suivant apparaît : “OMS is installed on this computer...”, cliquez sur [FreeMIDI]. Informations complémentaires sur les Au premier lancement de FreeMIDI, une boîte de dialogue “Welcome to ports FreeMIDI!” s’affiche. Cliquez sur [Continue]. SD-80 Port A : Envoie/reçoit les données Quand la boîte de dialogue FreeMIDI Preferences s'affiche, cliquez sur [Cancel].
-
Seite 102: En Cas De Problème
En cas de problème Si un problème inattendu se produit avec le SD-80, veuillez lire ce chapitre. Il contient de nombreuses solutions aux problèmes les plus courants. Si vous utilisez un PC sous Windows ou un Macintosh pour la première fois et que vous avez du mal à... - Seite 103 En cas de problème • A l'aide de la procédure décrite à la section “Deleting the driver” (p. 109), supprimez le pilote de périphérique audio USB installé sur votre ordinateur et réinstallez le pilote SD-80 comme décrit à la section “Installation et configuration du pilote (Windows)” (p. 79). Vérifiez également la présence de “Autres périphériques”...
- Seite 104 En cas de problème Une boîte de dialogue “Pilote inconnu détecté” s’affiche et vous empêche d’installer le pilote L’“Assistant ajout de nouveau matériel” ne s’exécute pas automatiquement L’“Assistant ajout de nouveau matériel” s’interrompt avant la fin du processus • 15 secondes (ou plus) s’écoulent entre le branchement du câble ISB et la détection du SD-80. •...
- Seite 105 En cas de problème Impossible d’installer/désinstaller/utiliser le pilote avec Windows XP/2000 • Avez-vous ouvert une session Windows en tant qu’utilisateur doté de privilèges d’administration ? Pour pouvoir installer, supprimer ou réinstaller le pilote sous Windows XP/2000, vous devez avoir ouvert une session en tant qu’utilisateur doté...
-
Seite 106: Problems When Using The Sd-80
En cas de problème 9. Si vous voyez le pilote USB EDIROL SD-80 précédé d’un “!” jaune ou d’un “?” rouge, supprimez-le également. 10. Lorsque vous avez fini de supprimer les périphériques indésirables, cliquez sur [OK] dans la boîte de dialogue Propriétés Système. 11. - Seite 107 En cas de problème • Is your computer in Suspend or Sleep mode? If so, get your computer to resume normal operation, then exit all applications that are using the SD-80. Next, turn the SD-80’s power off, then switch it on again. •...
- Seite 108 En cas de problème • Has the MIDI device you are using been selected correctly? Select either [SD-80 Port A] or [SD-80 Port B] as the MIDI output device. • Are the track outputs set correctly? MIDI tracks to which no MIDI playback device is assigned will not be heard. If you want to play back a MIDI track, you must make sure that the MIDI device you want to use is displayed in your software as the MIDI output port.
-
Seite 109: Deleting The Driver
En cas de problème Deleting the driver If you were unable to install the driver according to the procedure given, the SD-80 may not be recognized correctly by the computer. In this case, use the following procedure to delete the driver, and then follow the procedure in “Installing &... -
Seite 110: Windows Me/98 Users
En cas de problème Windows Me/98 users 1. With all USB cables disconnected, start up Windows. (USB keyboard and USB mouse excepted) 2. After connecting the SD-80 to your computer via a USB cable, turn on the power of the SD-80. 3. -
Seite 111: Contenuto Della Scatola
Contenuto della scatola Nella scatola dell’SD-80 si troveranno gli elementi sotto elencati. Una volta aperta, controllare che tutti i componenti siano presenti. Se ne mancano alcuni, contattare il rivenditore presso il quale è stato acquistato l’apparecchio. SD-80 Cavo AC Questo è l’unico cavo AC che può essere utilizzato con l’SD-80. Non utilizzare cavi diversi da quello fornito in dotazione per evitare di provocare malfunzionamenti. - Seite 112 Contenuto della scatola Adattatore per montaggio su rack Da utilizzare per l’eventuale installazione dell’SD-80 in un rack audio. È fornito con due ripiani per rack. Montaggio dell’adattatore per montaggio su rack fig.um550 1. Svitare le tre viti da ogni lato dai pannelli destro e sinistro dell’SD-80.
-
Seite 113: Collegamento Degli Apparecchi Audio
Collegamento degli apparecchi audio L’SD-80 non emetterà alcun suono fino a quando non verranno collegate le cuffie alla presa corrispondente o le uscite audio analogiche dell’SD-80 alla periferica audio di riproduzione come sotto illustrato. È necessario disporre di quanto segue: •... -
Seite 114: Installazione E Configurazione Del Driver (Windows)
Installazione e configurazione del driver (Windows) Per i collegamenti e l’installazione, è necessario disporre dei seguenti elementi. Estrarli dalla confezione dell’SD-80 e tenerli pronti. • SD-80 • Cavo di alimentazione AC Definizione di un driver • Cavo USB • CD-ROM Un “driver”... - Seite 115 Installazione e configurazione del driver (Windows) fig.2-1 Aprire la finestra di dialogo Opzioni firma driver. Fare clic sulla scheda Hardware e poi sul pulsante [Firma driver]. fig.2-2 Accertarsi che “Scegliere una delle seguenti opzioni” sia impostato su “Ignora”. Se al passo 4 il parametro Se è...
- Seite 116 Installazione e configurazione del driver (Windows) fig.2-3_30 In questo manuale, la Nella finestra di dialogo che appare, posizione delle cartelle e immettere quanto segue nel campo dei file è indicata nel “Apri” e fare clic su [OK]. percorso del file utilizzando il carattere \ come delimitatore.
- Seite 117 Installazione e configurazione del driver (Windows) fig.2-7 La finestra visualizzerà il seguente messaggio “Selezionare le opzioni di ricerca e di installazione”. Selezionare “Non effettuare la ricerca. La scelta del driver da installare verrà effettuata manualmente”, e fare clic su [Avanti]. fig.2-8_20 Accertarsi che il campo “Modello”...
- Seite 118 Installazione e configurazione del driver (Windows) fig.2-9_30 Viene visualizzata la finestra di Viene visualizzata la dialogo Inserire il disco finestra di dialogo Inserire il disco. In questo caso Fare clic su [OK]. passare al passo 17. fig.2-10_30 Viene visualizzata la finestra di dialogo Richiesta file Immettere quanto segue nel campo “Copia file da”...
- Seite 119 Installazione e configurazione del driver (Windows) Modifica del parametro “Scegliere una delle seguenti opzioni” Se l’impostazione Scegliere una delle seguenti opzioni è stata modificata, A seconda di come il ripristinare il parametro d’origine dopo aver riavviato Windows. sistema è configurato, l’icona Sistema potrebbe Se si utilizza Windows XP Professional, collegarsi con un nome utente essere visualizzata...
- Seite 120 Installazione e configurazione del driver (Windows) Utenti Windows 2000 Dopo aver scollegato l’SD-80, avviare Windows. Se il computer è già stato Scollegare tutti i cavi USB, ad eccezione della tastiera e del mouse USB, se collegato all’SD-80 ma utilizzati. appare la finestra “Installazione guidata hardware”...
- Seite 121 Installazione e configurazione del driver (Windows) Chiudere tutti i programmi in corso di esecuzione. Chiudere anche le altre finestre aperte. Se si utilizza un programma antivirus o simile, accertarsi che sia anch’esso chiuso. Preparare il CD-ROM. Inserire il CD nell’unità CD-ROM del computer. In questo manuale, la posizione delle cartelle e dei file è...
- Seite 122 Installazione e configurazione del driver (Windows) Spostare l’interruttore di alimentazione dell’SD-80 in posizione ON. Se l’impostazione “Verifica firma file” non è stata impostata su “Ignora”, verrà visualizzato il messaggio “Firma digitale non trovata”. fig.2-16_30 Se “Verifica firma file” è impostato su Avvisa,” 1.
- Seite 123 Installazione e configurazione del driver (Windows) fig.2-17b_30 Potrebbe venire visualizzata la finestra di dialogo “Installazione guidata nuovo hardware”. Accertarsi che “EDIROL SD-80” sia visualizzato e fare clic su [Fine]. Riavviare Windows. Viene visualizzata la finestra di dialogo Modifica impostazioni di sistema. Fare clic su [Sì].
- Seite 124 Installazione e configurazione del driver (Windows) Utenti Windows Me/98 Dopo aver scollegato l’SD-80, avviare Windows. Se il computer è già stato collegato all’SD-80 ma Scollegare tutti i cavi USB, ad eccezione della tastiera e del mouse USB, se appare la finestra utilizzati.
- Seite 125 Installazione e configurazione del driver (Windows) Utilizzare il cavo USB per collegare l’SD-80 al computer. Una volta terminati i 1. Dopo aver spostato l’interruttore di alimentazione su OFF, collegare il collegamenti, accendere i cavo AC all’SD-80. vari dispositivi nell’ordine indicato. Se i dispositivi 2.
-
Seite 126: Impostazioni
Installazione e configurazione del driver (Windows) Impostazioni Destinazioni input e output MIDI Utenti Windows XP/2000/Me Aprire il Pannello di controllo. In Windows, fare clic sul pulsante Start e nel menu selezionare Impostazioni | Pannello di controllo. Windows XP In Windows, fare clic sul pulsante Start e nel menu selezionare Pannello di controllo. - Seite 127 Installazione e configurazione del driver (Windows) Utenti Windows 98 Aprire il Pannello di controllo. In Windows, fare clic sul pulsante Start e nel menu selezionare Impostazioni | Pannello di controllo. Aprire la finestra di dialogo Proprietà multimediali. Nel Pannello di controllo, fare doppio clic sull’icona Multimedia per aprire Informazioni aggiuntive la finestra Proprietà...
-
Seite 128: Abilitazione Dei Servizi In Background
Installazione e configurazione del driver (Windows) Abilitazione dei servizi in background In Windows XP, seguire la procedura di configurazione sotto indicata per un’elaborazione MIDI più fluida. Queste impostazioni non sono disponibili in Windows 2000/Me/98. In Windows, fare clic sul pulsante Start e nel menu selezionare Pannello di controllo. -
Seite 129: Verificare Se L'audio Viene Riprodotto
Installazione e configurazione del driver (Windows) Verificare se l’audio viene riprodotto. Riprodurre quindi i dati esempio per controllare che l’installazione dei driver e le impostazioni sono corrette. L’uso dei dati musicali Riproduzione dei dati esempio (MIDI) forniti con questo prodotto per scopi diversi dalla Nel nostro caso verranno utilizzate le normali funzionalità... -
Seite 130: Installazione E Configurazione Del Driver (Macintosh)
Installazione e configurazione del driver (Macintosh) Per i collegamenti e l’installazione, è necessario disporre dei seguenti elementi. Estrarli dalla confezione dell’SD-80 e tenerli pronti. • SD-80 • Cavo di alimentazione AC • Cavo USB • CD-ROM Collegamento del Macintosh Spegnere il Macintosh e tutte le periferiche eventualmente collegate al computer. Dopo aver spostato l’interruttore di alimentazione su OFF, collegare il cavo AC all’SD-80. -
Seite 131: Installazione Del Driver Sd-80 (Oms)
Installazione e configurazione del driver (Macintosh) Installazione del driver SD-80 (OMS) Seguire la procedura sotto indicata per installare il driver SD-80. Il driver SD-80 OMS è un modulo aggiuntivo che permette di utilizzare l’SD-80 con OMS. Per poterlo utilizzare, OMS deve essere già stato L’applicazione OMS si installato sul disco fisso di avvio. - Seite 132 Installazione e configurazione del driver (Macintosh) Impostazioni OMS fig.3-3 Dal CD-ROM, selezionare e trascinare la cartella Driver E-OMS-Settings sul disco fisso del Macintosh per copiarvela. fig.3-4 Nella cartella Opcode-OMS Application dove è stato installato OMS, fare doppio clic su OMS Setup per avviarlo.
- Seite 133 Installazione e configurazione del driver (Macintosh) fig.3-9_35 Nel menu Edit selezionare OMS MIDI Setup. Nella finestra di dialogo OMS MIDI Setup visualizzata, selezionare Run MIDI in background e fare clic su [OK]. fig.3-10 Nel menu File selezionare Make Current. Se non è possibile selezionare Make Current, vuol dire che è...
- Seite 134 Installazione e configurazione del driver (Macintosh) L’indicatore di livello PART dell’SD-80 si sposta? Se l’SD-80 non emette Se l’indicatore di livello PART nel display dell’SD-80 si sposta ma non viene alcun suono, fare emesso alcun suono, controllare se il volume dell’SD-80 o degli altoparlanti è riferimento alla sezione No al minimo.
-
Seite 135: Installazione Del Driver Sd-80 (Freemidi)
Installazione e configurazione del driver (Macintosh) Installazione del driver SD-80 (FreeMIDI) Seguire la procedura sotto indicata per installare il driver SD-80. Il driver SD-80 FreeMIDI in dotazione è un modulo aggiuntivo che permette di utilizzare l’SD-80 con FreeMIDI. Per poterlo utilizzare, FreeMIDI deve essere già... - Seite 136 Installazione e configurazione del driver (Macintosh) Quando appare il messaggio “OMS is installed on this computer...”, fare clic su [FreeMIDI]. Informazioni aggiuntive sulle porte Al primo avvio di FreeMIDI, comparirà la finestra di dialogo “Welcome to FreeMIDI!”. Fare clic su [Continue]. SD-80 Port A: Invia/riceve i dati per SD-80 part group A...
-
Seite 137: Ricerca E Soluzione Dei Problemi
Ricerca e soluzione dei problemi Se nell’usare l’SD-80 si dovessero incontrare dei problemi, leggere questo capitolo. Contiene vari consigli per la risoluzione dei problemi. Se si utilizza Windows o Macintosh per la prima volta, e si incontrano dei problemi per capire le spiegazioni, fare riferimento al manuale fornito con il computer o il sistema operativo. - Seite 138 Ricerca e soluzione dei problemi • Seguendo la procedura illustrata nella sezione “Deleting the driver” (pag. 144), cancellare il driver per il dispositivo audio USB installato sul computer e reinstallare il driver SD-80 come descritto nella sezione “Installazione e configurazione del driver (Windows)” (pag. 114). Verificare inoltre se appare il messaggio “Periferica sconosciuta”...
- Seite 139 Ricerca e soluzione dei problemi Viene visualizzato un messaggio di tipo “Trovato driver sconosciuto” e non si riesce ad installare il driver “Installazione guidata nuovo hardware” non si avvia automaticamente “Installazione guidata nuovo hardware” termina prima che la procedura venga conclusa completamente •...
- Seite 140 Ricerca e soluzione dei problemi Impossibile installare/cancellare/usare il driver sotto Windows XP/2000 • Ci si è collegati a Windows come utenti dotati di privilegi di amministratore? Per poter installare, cancellare o reinstallare il driver sotto Windows XP/2000, è necessario essere collegati a Windows con i privilegi di un amministratore.
-
Seite 141: Problems When Using The Sd-80
Ricerca e soluzione dei problemi 9. Se accanto al driver USB EDIROL SD-80 appare un “!” giallo o un “?” rosso, cancellare la periferica. 10. Dopo aver cancellato tutte le periferiche che presentano dei problemi, fare clic su [OK] nella finestra Proprietà... - Seite 142 Ricerca e soluzione dei problemi • Are the various volume settings of the SD-80 set appropriately? The front panel of the SD-80 has separate knobs that adjust the MIDI volumes. Use the Volume knob located on the front panel of the SD-80 to adjust the volume. •...
- Seite 143 Ricerca e soluzione dei problemi • Has the MIDI device you are using been selected correctly? Select either [SD-80 Port A] or [SD-80 Port B] as the MIDI output device. • Are the track outputs set correctly? MIDI tracks to which no MIDI playback device is assigned will not be heard. If you want to play back a MIDI track, you must make sure that the MIDI device you want to use is displayed in your software as the MIDI output port.
-
Seite 144: Deleting The Driver
Ricerca e soluzione dei problemi Deleting the driver If you were unable to install the driver according to the procedure given, the SD-80 may not be recognized correctly by the computer. In this case, use the following procedure to delete the driver, and then follow the procedure in “Installing &... -
Seite 145: Windows Me/98 Users
Ricerca e soluzione dei problemi Windows Me/98 users 1. With all USB cables disconnected, start up Windows. (USB keyboard and USB mouse excepted) 2. After connecting the SD-80 to your computer via a USB cable, turn on the power of the SD-80. 3. -
Seite 146: Contenido Del Paquete
Contenido del paquete La caja en la que se comercializa el SD-80 debe contener los siguientes elementos. Cuando abra la caja, compruebe que no falte ningún elemento. Si falta alguno, póngase en contacto con la tienda donde haya adquirido el SD-80. SD-80 Cable de CA Se trata del único cable de CA que debe utilizar con el SD-80. - Seite 147 Contenido del paquete Adaptador de montaje en bastidor Utilícelo para instalar el SD-80 en un bastidor de audio. Se proporcionan dos orejas de bastidor. Fijación del adaptador de montaje en bastidor fig.um550 1. Extraiga tres tornillos por lado en los paneles derecho e izquierdo del SD-80 .
-
Seite 148: Conexiones Con El Equipo De Audio
Conexiones con el equipo de audio No oirá ningún sonido del SD-80 a no ser que conecte unos auriculares al jack de auriculares o las salidas de audio (analógicas) del SD-80 a su equipo de reproducción de audio como se indica a continuación. -
Seite 149: Instalación Y Configuración Del Controlador (Windows)
Instalación y configuración del controlador (Windows) Para la conexión e instalación, necesita los siguientes elementos. Sáquelos del paquete del SD-80 y téngalos a mano. • SD-80 • Cable de CA ¿Qué es un • Cable USB • CD-ROM controlador? Un “controlador” es software que transfiere Para poder utilizar el SD-80, primero debe instalar el controlador MIDI datos entre el SD-80 y el... - Seite 150 Instalación y configuración del controlador (Windows) fig.2-1 Abra el cuadro de diálogo Opciones de firma del controlador. Haga clic en la ficha Hardware y, a continuación, en [Firma del controlador]. fig.2-2 Asegúrese de que “¿Que acción desea que realice Windows?” esté...
- Seite 151 Instalación y configuración del controlador (Windows) fig.2-3_30 En este manual, la En el cuadro de diálogo que aparece, ubicación de las carpetas y escriba lo siguiente en el campo “Abrir” archivos se da en términos y haga clic en [Aceptar]. de la ruta del archivo y se utiliza \ como delimitador.
- Seite 152 Instalación y configuración del controlador (Windows) fig.2-7 La pantalla indicará “Elija sus opciones de búsqueda e instalación”. Seleccione “No buscar. Elegiré el controlador que deseo instalar” y haga clic en [Siguiente]. fig.2-8_20 Asegúrese de que el campo “Modelo” indique “EDIROL SD-80”...
- Seite 153 Instalación y configuración del controlador (Windows) fig.2-9_30 Aparecerá el cuadro de diálogo Puede que el cuadro de Insertar disco. diálogo Insertar disco no aparezca. En ese caso, Haga clic en [Aceptar]. prosiga con el paso 17. fig.2-10_30 Aparecerá el cuadro de diálogo Archivos necesarios.
- Seite 154 Instalación y configuración del controlador (Windows) Si ha modificado “¿Qué acción desea que realice Windows?” Si ha modificado el valor para “¿Qué acción desea que realice En función de cómo tenga Windows?”, restaure la configuración original después de reiniciar configurado el sistema, puede que el icono Windows.
- Seite 155 Instalación y configuración del controlador (Windows) Usuarios de Windows 2000 Con el SD-80 desconectado, inicie Windows. Si ya ha conectado el SD-80 Desconecte todos los cables USB, excepto el del teclado USB y el ratón USB (si a su PC, pero aparece el se utilizan).
- Seite 156 Instalación y configuración del controlador (Windows) Salga de todo el software que se esté ejecutando (aplicaciones). Cierre cualquier ventana que esté abierta. Si utiliza un programa antivirus o software similar, también debe cerrarlo. Prepare el CD-ROM. En este manual, la Inserte el CD-ROM en la unidad de CD-ROM del sistema.
- Seite 157 Instalación y configuración del controlador (Windows) Disponga el interruptor de alimentación del SD-80 en la posición ON. Si la configuración de “Verificación de la firma del archivo” no se ha establecido en “Ignorar”, aparecerá el cuadro de diálogo “No se ha encontrado la firma digital”. fig.2-16_30 Si “Verificación de la firma del archivo”...
- Seite 158 Instalación y configuración del controlador (Windows) fig.2-17b_30 Es posible que aparezca el “Asistente para hardware nuevo encontrado”. Compruebe que “EDIROL SD-80” aparezca en pantalla y haga clic en [Finalizar]. Reinicie Windows. Puede que aparezca el cuadro de diálogo Cambio de configuración del sistema.
- Seite 159 Instalación y configuración del controlador (Windows) Usuarios de Windows Me/98 Con el SD-80 desconectado, inicie Windows. Si ya ha conectado el SD-80 a su PC, pero aparece el Desconecte todos los cables USB excepto el del teclado USB y del ratón USB “Asistente para agregar (si se utilizan).
- Seite 160 Instalación y configuración del controlador (Windows) Utilice el cable USB para conectar el SD-80 al PC. Establecidas las 1. Con el interruptor de alimentación en OFF, conecte el cable de CA al conexiones, encienda los SD-80. diferentes dispositivos en el orden especificado. Si 2.
-
Seite 161: Configuración
Instalación y configuración del controlador (Windows) Configuración Destinos de entrada y salida MIDI Usuarios de Windows XP/2000/Me Abra el Panel de control. Haga clic en el botón Inicio y, en el menú que aparece, seleccione Configuración | Panel de control. Windows XP Haga clic en el botón Inicio de Windows y, en el menú... - Seite 162 Instalación y configuración del controlador (Windows) Usuarios de Windows 98 Abra el Panel de control. Haga clic en el botón Inicio y, en el menú que aparece, seleccione Configuración | Panel de control. Abra el cuadro de diálogo Propiedades de Multimedia. En Panel de control, haga doble clic en el icono Multimedia para abrir el Información adicional cuadro de diálogo “Propiedades de Multimedia”.
- Seite 163 Instalación y configuración del controlador (Windows) Habilitación de servicios en segundo plano En Windows XP, efectúe la siguiente configuración para que el proceso de MIDI se lleve a cabo de forma óptima. Esta configuración no está disponible para Windows 2000, Me o 98. Haga clic en el botón Inicio de Windows y, en el menú...
-
Seite 164: Comprobar Si Hay Sonido
Instalación y configuración del controlador (Windows) Comprobar si hay sonido A continuación, reproduzca los datos de muestra para comprobar que la instalación y la configuración del controlador se han realizado correctamente. El uso de la canción de demostración Reproducción de los datos de muestra (MIDI) proporcionada con este producto para cualquier Para reproducir los datos de muestra (MIDI) utilizaremos las funciones... -
Seite 165: Instalación Y Configuración Del Controlador (Macintosh)
Instalación y configuración del controlador (Macintosh) Para la conexión e instalación, necesita los siguientes elementos. Sáquelos del paquete del SD-80 y téngalos a mano. • SD-80 • Cable de CA • Cable USB • CD-ROM Conexión del Macintosh Apague el Macintosh y todos los dispositivos periféricos conectados a éste. Con el interruptor de alimentación en OFF, conecte el cable de CA al SD-80. -
Seite 166: Instalación Del Controlador Del Sd-80 (Oms)
Instalación y configuración del controlador (Macintosh) Instalación del controlador del SD-80 (OMS) Siga este procedimiento para instalar el controlador del SD-80. El controlador OMS del SD-80 que se incluye es un módulo adicional para utilizar el SD-80 con OMS. Para poder utilizarlo, OMS ya debe estar OMS se encuentra en la instalado en el disco duro desde el que haya iniciado la sesión. - Seite 167 Instalación y configuración del controlador (Macintosh) Configuración de OMS fig.3-3 En el CD-ROM, arrastre la carpeta Driver E-OMS- Setting al disco duro del Macintosh para copiarla. fig.3-4 En la carpeta Opcode-OMS Application donde ha instalado OMS, haga doble clic en OMS Setup para iniciarlo.
- Seite 168 Instalación y configuración del controlador (Macintosh) fig.3-9_35 En el menú Edit, seleccione OMS MIDI Setup. En el cuadro de diálogo OMS MIDI Setup que aparece, marque Run MIDI in background y haga clic en [OK]. fig.3-10 En el menú File, elija Make Current. Si no puede seleccionar Make Current, significa que ya se ha aplicado y puede continuar por el siguiente paso.
- Seite 169 Instalación y configuración del controlador (Macintosh) ¿Se mueve el medidor de nivel PART del SD-80? Si el SD-80 no emite Si el medidor de nivel PART de la pantalla del SD-80 se mueve pero no oye ningún sonido, consulte el ningún sonido, compruebe si se ha bajado el volumen del SD-80 o de los apartado No sound altavoces.
-
Seite 170: Instalación Del Controlador Del Sd-80 (Freemidi)
Instalación y configuración del controlador (Macintosh) Instalación del controlador del SD-80 (FreeMIDI) Siga este procedimiento para instalar el controlador del SD-80. El controlador FreeMIDI del SD-80 que se incluye es un módulo adicional para utilizar el SD-80 con FreeMIDI. Para poder utilizarlo, FreeMIDI ya debe estar instalado en el disco duro desde el que haya iniciado la sesión. - Seite 171 Instalación y configuración del controlador (Macintosh) Cuando aparezca “OMS is installed on this computer...”, haga clic en [FreeMIDI]. Información adicional La primera vez que inicie el software, aparecerá el cuadro de diálogo sobre los puertos “Welcome to FreeMIDI!”. Haga clic en [Continue]. Puerto A del SD-80: Envía o recibe datos para Cuando aparezca el cuadro de diálogo FreeMIDI Preferences, haga clic en...
-
Seite 172: Resolución De Problemas
Resolución de problemas Si sucede un problema inesperado mientras utiliza el SD-80, examine este capítulo antes de nada. Contiene numerosos consejos para solucionar problemas. Si utiliza Windows o Macintosh por primera vez y, en consecuencia, tiene dificultades para seguir las explicaciones de procedimiento, consulte los manuales de su PC o sistema operativo. El apartado de resolución de problemas está... - Seite 173 Resolución de problemas • ¿Está encendido el SD-80? Asegúrese de que el interruptor POWER del SD-80 esté activado. Tras comprobar esto y si es usuario de Windows, cierre el cuadro de diálogo Propiedades de sonido y multimedia (Sound and Multimedia Properties) (Propiedades de sonidos y dispositivos de audio(Sounds and Audio Device Properties) en Windows XP y Propiedades de multimedia (Multimedia Properties) en Windows 98), abra de nuevo el mismo cuadro de diálogo y especifique los destinos de entrada y salida de audio y MIDI.
- Seite 174 Resolución de problemas Aparece el cuadro de diálogo “Se ha encontrado un controlador desconocido” y no puede instalar el controlador El “Asistente para encontrar nuevo hardware” no se ejecuta automáticamente El “Asistente para encontrar nuevo hardware” finaliza antes de que se complete el proceso •...
- Seite 175 Resolución de problemas No se puede instalar, eliminar o utilizar el controlador en Windows XP o 2000 • ¿Ha iniciado Windows como usuario con privilegios administrativos? Para poder instalar, eliminar o reinstalar el controlador en Windows XP o 2000, debe iniciar Windows como usuario con privilegios administrativos, por ejemplo, Administrador.
-
Seite 176: Problems When Using The Sd-80
Resolución de problemas 9. Si aparece el controlador USB de EDIROL SD-80 con un signo “!” amarillo o un signo “?” rojo al lado, elimínelo del mismo modo. 10. Cuando haya terminado de eliminar los dispositivos no deseados, haga clic en [Aceptar] en el cuadro de diálogo Propiedades del sistema. - Seite 177 Resolución de problemas • Are the various volume settings of the SD-80 set appropriately? The front panel of the SD-80 has separate knobs that adjust the MIDI volumes. Use the Volume knob located on the front panel of the SD-80 to adjust the volume. •...
- Seite 178 Resolución de problemas • Has the MIDI device you are using been selected correctly? Select either [SD-80 Port A] or [SD-80 Port B] as the MIDI output device. • Are the track outputs set correctly? MIDI tracks to which no MIDI playback device is assigned will not be heard. If you want to play back a MIDI track, you must make sure that the MIDI device you want to use is displayed in your software as the MIDI output port.
-
Seite 179: Deleting The Driver
Resolución de problemas Deleting the driver If you were unable to install the driver according to the procedure given, the SD-80 may not be recognized correctly by the computer. In this case, use the following procedure to delete the driver, and then follow the procedure in “Installing &... - Seite 180 Resolución de problemas Windows Me/98 users 1. With all USB cables disconnected, start up Windows. (USB keyboard and USB mouse excepted) 2. After connecting the SD-80 to your computer via a USB cable, turn on the power of the SD-80. 3.
- Seite 184 03011123 ’02-6-xx-11N...