Instar IN-8015 Bedienungsanleitung
Vorschau ausblenden
Andere Handbücher für IN-8015:
- Bedienungsanleitung (32 Seiten) ,
- Schnellinstallation (6 Seiten) ,
- Bedienungsanleitung (10 Seiten)
Inhaltsverzeichnis
Verfügbare Sprachen
Verfügbare Sprachen
Bedienungsanleitung
IN-8015 Full HD
Innenkamera
www.instar.de
- Panasonic Wide-Dynamic-Range (WDR) Full-HD-Bildsensor
- Benutzerfreundliche und moderne HTML5-Weboberfläche (WebUI)
- Unterstützt alle modernen Webbrowser (IE 11, Edge, Firefox, Chrome, Safari, etc.)
- Unterstützt MicroSD (max 128GB) für Alarm- und manuelle Aufnahmen
- Alarmbenachrichtigung per Email, Push (Textmitteilung) und / oder Alarmserver
- Speicherung von Bildern, Videos und / oder Fotoserien per FTP(S)
- TLS- / SSL-Verschlüsselung für sichere HTTPS- und FTPS-Verbindungen
- Sichere Archivierung der Alarmvideos in der INSTAR Cloud (optional)
Kapitel
Inhaltsverzeichnis

Verwandte Anleitungen für Instar IN-8015


Inhaltszusammenfassung für Instar IN-8015
- Seite 1 - Alarmbenachrichtigung per Email, Push (Textmitteilung) und / oder Alarmserver - Speicherung von Bildern, Videos und / oder Fotoserien per FTP(S) - TLS- / SSL-Verschlüsselung für sichere HTTPS- und FTPS-Verbindungen - Sichere Archivierung der Alarmvideos in der INSTAR Cloud (optional)
-
Seite 2: Inhaltsverzeichnis
6. Smartphone Apps 8-DE 7. Fernzugriff 9-DE 8. Zurücksetzen der Kamera 10-DE 9. Objektivjustage 10-DE 10. Online-Material 11-DE 11. INSTAR Cloud 12-DE 12. Technische Daten 13-DE 13. Garantie & Entsorgung 14-DE 14. Rechtliche Informationen 15-DE 1-DE Gehen Sie auf http://install.instar.de... -
Seite 3: Vorstellung Der Kamera
Bitte beachten Sie, dass diese Anleitung sowohl die WLAN- als auch die PoE-Version der IN-8015 beschreibt. Daher kann es sein, dass einige Punkte nur die WLAN-Variante und andere Punkte nur die PoE-Variante beschreiben. So bezieht sich z.B. die WPS-Funktion für die WLAN-Verbindung einzig auf die WLAN-Variante. -
Seite 4: Sicherheitsvorschriften
Benutzen Sie die Kamera bitte nicht für einen anderen als den vorgesehenen Zweck. • Installieren Sie das Gerät bitte nicht in der Nähe von leicht entzündlichen Ge- genständen. • Der Hersteller INSTAR haftet für keinerlei Schäden, die durch Zubehör oder Firmware von Drittanbietern entstehen. 3-DE Gehen Sie auf http://install.instar.de... -
Seite 5: Produktmerkmale
Kostenfreier Point-2-Point-Zugriff mit InstarVision, unterstüzt IPv6 DDNS Kostenfreie DDNS-Adresse für die Verbindung über das Internet Cloud Opt. Speicherung / Verwaltung der Alarmvideos in der INSTAR Cloud FTP-Upload Übertragung von Alarmbildern / Videos per FTP(S) WiFi Protected Setup (WPS) zur einfachen WLAN-Einrichtung WLAN / WiFi 2,4Ghz Wlan, IEEE 802.11b/g/n mit einer 3dB Antenne... -
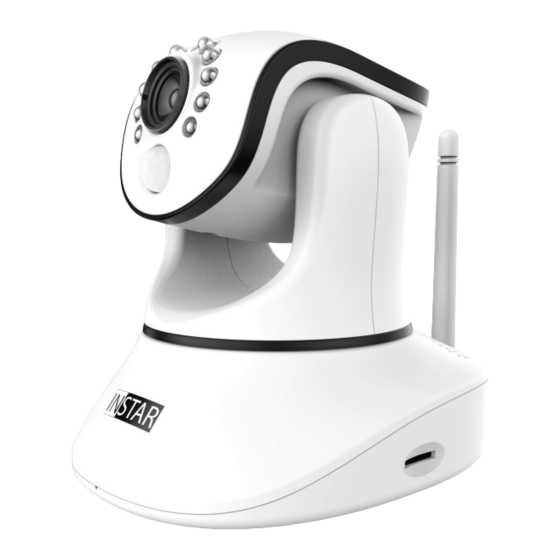
Seite 6: Aufbau Der Kamera
4. Aufbau der Kamera 4.1. Verpackungsinhalt 4.2. Kameraaufbau Modell Nr: IN-8015HD 100-240VAC / 50-60Hz / 5VDC - 1.5A P2P UID: FAP99MR28WYRBN6MSR21 Mac LAN: 10D1DCXXXXXX SerienNr: 601400001 5-DE Gehen Sie auf http://install.instar.de... -
Seite 7: Status-Leds
Rote LED Durchgehend an Mit WLAN verbunden Blinkt langsam Verbindet per WPS Kamera ist eingeschaltet Blinkt schnell Firmware-Upgrade im Gange LED ausgeschaltet oder keine LED ausgeschaltet oder keine Verbindung mit dem Strom Verbindung mit dem Strom 6-DE Gehen Sie auf http://install.instar.de... -
Seite 8: Installation
Bitte öffnen Sie den Webbrowser und gehen Sie auf: http://install.instar.de um den Kamera-Installations-Assistenten zu öffnen. Schritt 2. Wählen Sie Ihre Sprache und das Kameramodell IN-8015 Schritt 3. Entscheiden Sie, auf welche Art Sie sich für die Ersteinrichtung verbinden möchten: a) Verbindung per LAN-Kabel (empfohlen) b) Verbindung direkt per WLAN mit WPS (nicht für PoE-Version) -
Seite 9: Smartphone Apps
Weboberfläche (WebUI): Sie können die Weboberfläche in jedem aktuellen Webbrowser öffnen, der HTML5 unterstützt. Nutzen Sie einfach das INSTAR Camera Tool, um die IP-Adresse der Kamera zu finden und diese im Webbrowser zu öffnen. Die WebUI erlaubt es Ihnen, die Kamera nach Ihren Wünschen zu konfigurieren. -
Seite 10: Fernzugriff
LTE / mobiler Verbindung testen. Beachten Sie bitte, dass eine Portweiterleitung nur bei einem öffentlichen IPv4-Internetanschluss funktioniert. Für Informationen zur Portweiterleitung bei Ihrem Router und dem DDNS-Service im Allgemeinen schauen Sie bitte auf: http://remote.instar.de 9-DE Gehen Sie auf http://install.instar.de... -
Seite 11: Zurücksetzen Der Kamera
Für 15-20s gedrückt halten 9. Objektivjustage Das Objektiv der IN-8015 Full HD hat eine Tiefenschärfe (auch Schärfentiefe ge- nannt), die werksseitig auf ca. 5-10m eingestellt wurde. Sofern der Bereich, den Sie überwachen möchten, unscharf ist, müssten Sie das Objektiv justieren. -
Seite 12: Online-Material
Für die Installation können Sie sich auch unsere Videoanleitungen anschauen, in denen wir Portweiterleitung, FTP(S)-Übertragung, Bewegungserkennung und vieles mehr erklären. Einfach auf YouTube nach INSTARTV suchen oder auf: https://www.youtube.com/INSTARTV 10.4. Wiki, Kundenforum & Social Media INSTAR bietet ein ausführliches Wiki, Kundenforum und einen Facebook Kanal. https://wiki.instar.de https://forum.instar.de https://www.facebook.com/instar.deutschland 11-DE... -
Seite 13: Instar Cloud
Aufnahmen sicher aufzubewahren. Testen Sie die INSTAR Cloud jetzt kostenfrei für 30 Tage unter https://cloud.instar.de. Die INSTAR Cloud kostet in etwa 1/3 von dem, was andere Anbieter verlangen. Wenn man mit einer Speichereinheit von 10GB für eine Kamera plant (es lassen sich ca. -
Seite 14: Technische Daten
350° horizontal / 100° vertikal Stromversorgung 5V DC 2A (110-240V), 1,35mm / 3,5mm Stromverbrauch max. 8W (im Normalbetrieb 4W) Betriebstemperatur - 5°C bis 55°C Anforderungen Webbrowser Webbrowser mit HTML5-Unterstützung CPU / Grafikkarte Dual Core (min. 2Ghz) / 256MB+ Grafikkarte 13-DE Gehen Sie auf http://install.instar.de... -
Seite 15: Garantie Entsorgung
Sie bitte support@instar.de, um eine RMA-Num- mer zu beantragen. Mit dieser RMA können Sie dann das Gerät zur Reparatur einsenden. Das INSTAR SERVICE CENTER finden Sie aktuell an folgendem Standort: Firma: INSTAR Deutschland GmbH Hotline: +49 (6438) 9198992 Raiffeisenstraße 12... -
Seite 16: Rechtliche Informationen
Störungen, die einen uner- wünschten Betrieb verursachen können. Das FCC Compliance Statement finden Sie auf folgender Internetseite: http://www.instar.de/legal/fcc © INSTAR ist eine geschützte Marke der INSTAR Deutschland GmbH. INSTAR Deutschland GmbH Ihr Spezialist für Netzwerk- und Sicherheitstechnik 15-DE...