Herunterladen Inhalt Inhalt Diese Seite drucken
Inhaltsverzeichnis

Werbung

Verfügbare Sprachen
  • DE

Verfügbare Sprachen

  • DEUTSCH, seite 31
LCD Monitor
LCD Farbmonitor
Moniteur LCD
Monitor LCD
Monitor LCD
LL-T17A4
LL-T17D4
OPERATION MANUAL
BEDIENUNGSANLEITUNG
MODE D'EMPLOI
MANUALE D'USO
MANUAL DE FUNCIONAMIENTO
LL-T17D4

Werbung

Inhaltsverzeichnis
loading

Inhaltszusammenfassung für Sharp LL-T17A4

  • Seite 1 LCD Monitor LCD Farbmonitor Moniteur LCD Monitor LCD Monitor LCD LL-T17A4 LL-T17D4 OPERATION MANUAL BEDIENUNGSANLEITUNG MODE D'EMPLOI MANUALE D'USO MANUAL DE FUNCIONAMIENTO LL-T17D4...
  • Seite 2 Table of Contents/Inhaltsverzeichnis/Table des matières/Indice/Índice Notice for Users in Europe ............3 Notice for Users in the UK .
  • Seite 3 Notice for Users in Europe This equipment complies with the requirements of Directives 89/336/EEC and 73/23/EEC as amended by 93/68/EEC. Dieses Gerät entspricht den Anforderungen der EG-Richtlinien 89/336/EWG und 73/23/EWG mit Änderung 93/68/EWG. Ce matériel répond aux exigences contenues dans les directives 89/336/CEE et 73/23/CEE modifiées par la directive 93/68/CEE.
  • Seite 4 "WARNING: THIS APPARATUS MUST BE EARTHED." Notice for Users in Australia Service Inquiries Please contact your dealer for service if required or contact Sharp Corporation of Australia on 1 300 13 50 22 for referral to your nearest Sharp authorized Service Center.
  • Seite 5: Fcc Statement

    Sharp Plaza, Mahwah, New Jersey 07430 TEL :1-800-BE-SHARP * As an ENERGY STAR Partner, SHARP has determined that this product meets the ENERGY STAR guidelines for energy efficiency. This product utilizes tin-lead solder, and fluorescent lamp containing a small amount of mercury.
  • Seite 6 TCO Development SE-114 94 Stockholm, Sweden Fax: +46 8 782 92 07 Email (Internet): development@tco.se Current information regarding TCO'99 approved and labelled products may also be obtained via the Internet, using the address: http://www.tco-info.com/ Environmental requirements Congratulations! You have just purchased a TCO'99 approved and Flame retardants labelled product! Your choice has provided you with a Flame retardants are present in printed circuit boards,...
  • Seite 7: Inhaltsverzeichnis

    Table of Contents Tips and safety precautions ............. 8 Product description .
  • Seite 8: Tips And Safety Precautions

    Manual Scope - Ensure that the monitor does not come into - This manual is written for use with the LL-T17A4 contact with water or other fluids. Ensure that no and the LL-T17D4. When describing a different objects such as paper clips or pins enter the...
  • Seite 9: Product Description

    Product description [LL-T17A4] [LL-T17D4] 1. INPUT button ......[LL-T17D4] To switch between the signal's input terminals. 2. MENU button ......This button is used to pop-up, select and close the OSD (On Screen Display) Menu. / MODE button ..... When the OSD Menu is displayed: This button is used to select menu options.
  • Seite 10: Height Adjustment, Angle Adjustment

    Height adjustment, angle adjustment CAUTION! - Pressure from hands on the LCD panel could cause damage. - Do not attempt to move the monitor beyond its movement range. Applying excessive force to move the monitor may damage the product. - Be careful not to allow your fingers to be pinched.
  • Seite 11: Connecting The Monitor And Turning The Monitor On And Off

    Connecting the monitor and turning the monitor on and off When connecting using separately sold CAUTION! digital or analog signal cables [LL-T17D4] - When connecting, ensure that both the monitor The separately sold display cable enables and computer are switched off. connection between the DVI-I input terminal on the - Be careful not to overly bend the cable or add monitor and the digital or analog RGB output...
  • Seite 12: Connection Of Headphones (Commercially Available)

    Connecting the monitor and turning the monitor on and off Connection of headphones Set the monitor as follows when establishing a (commercially available) digital connection with a Power Mac using an ADC- DVI adapter made by Belkin. (Operation has been checked with the Power Mac G4 M7627J/A.) Headphones (commercially available) can be - Perform settings with the Power Mac power...
  • Seite 13: Turning The Power On

    Connecting the monitor and turning the monitor on and off Turning the power on Changing between input terminals [LL-T17D4] 1. Turn on the main power of the monitor. Use the INPUT button to switch between signal Main power switch input terminals. Analog RGB input DVI-I input terminal...
  • Seite 14: Adjusting The Screen Display And Speaker Volume

    Adjusting the screen display and speaker volume For analog signal Adjustment lock function 1. First perform an automatic adjustment. (p.16) By disabling the control buttons (i.e. setting the 2. Perform manual adjustment where necessary. lock) any attempted changes to adjusted values (p.17) will be voided.
  • Seite 15: Adjusting The Speaker Volume

    Adjusting the screen display and speaker volume Adjusting the speaker volume Setting display mode 1. Without the OSD Menu being displayed, press Color tone or brightness can be changed with one command. or the button. 2. Check that [VOLUME] is selected. If it is not selected, press the / MODE button Displays image with the color tone results from...
  • Seite 16: Adjusting The Screen Display (When Using An Analog Signal)

    Adjusting the screen display (When using an analog signal) Adjusting the screen automatically Automatic screen adjustment 1. Press the MENU button. The ADJUSTMENT Menu will be displayed. Options in the ADJUSTMENT Menu can be (Example: Displayed screen of the LL-T17D4) adjusted automatically (CLOCK, PHASE, H-POS, V-POS).
  • Seite 17: Manual Screen Adjustment

    Adjusting the screen display (When using an analog signal) ADJUSTMENT Menu Manual screen adjustment Adjustments can be made using OSD (On Screen Display) Menu provided. On Screen Display for adjustment If you are using Windows, open the Adjustment Pattern on the accompanying Utility Disk. (p.16) MANUAL: Individual menu options are manually If your system is not Windows, you can not use the adjusted.
  • Seite 18 Adjusting the screen display (When using an analog signal) GAIN CONTROL Menu WHITE BALANCE Menu Notes: MANUAL: Individual menu options are manually - On settings other than [STD] not all gradations adjusted. can be displayed. To display all gradations, set to AUTO: Every menu option is automatically [STD].
  • Seite 19 Adjusting the screen display (When using an analog signal) MODE SELECT Menu Notes: - Depending on the resolution of the input signal, even if menu options can be selected, the display may not change. - To choose a menu option: / MODE button - To complete adjustment: MENU button OSD H-POSITION (OSD horizontal position)
  • Seite 20: Adjusting The Screen Display (When Using A Digital Signal) [Ll-T17D4]

    Adjusting the screen display (When using a digital signal) [LL-T17D4] WHITE BALANCE Menu Adjustments can be made using On Screen Display (OSD) Menu provided. On Screen Display for adjustment If you are using Windows, open the Adjustment Pattern on the accompanying Utility Disk. (p.16) If your system is not Windows, you can not use the Adjustment Pattern.
  • Seite 21 Adjusting the screen display (When using a digital signal) [LL-T17D4] MODE SELECT Menu Notes: - To choose a menu option: / MODE button - To complete adjustment: MENU button OSD H-POSITION (OSD horizontal position) The position of the OSD Menu can be moved to the left and right.
  • Seite 22: Monitor Care And Repair

    LCD panel. (A soft or your nearest Sharp authorized Service cloth such as gauze or that used for lens cleaning Center. (Never attempt this replacement on is suitable.)
  • Seite 23: Product Specifications

    (contrast ratio > 5) Screen display size Horizontal 337.9 mm x Vertical 270.3 mm Video signal [LL-T17A4] Analog RGB (0.7 Vp-p) [75Ω] [LL-T17D4] Analog: Analog RGB (0.7 Vp-p) [75Ω] Digital: DVI standard based on 1.0 Sync signal Separate Sync (TTL level: +/-), Sync on...
  • Seite 24 Specifications Relevant signal timings (analog) Relevant signal timings (digital) [LL-T17D4] Display mode Display mode Hsync Vsync Hsync Vsync frequency frequency VESA VESA US text - Recommended resolution is 1280 x 1024. US text - All are compliant only with non-interlaced. Power - A computer with an output terminal conforming to Macintosh...
  • Seite 25: Power Management

    The analog RGB input connector pin Power management (Mini D-sub connector with 15 pins) The LL-T17A4 is based on VESA DPMS. The LL- T17D4 is based on both VESA DPMS and DVI DMPM. To activate the power management function, the video card and the computer used with it must also conform to these standards.
  • Seite 26: Installing Set-Up Information And The Icc Profile (For Windows)

    Installing set-up information and the ICC profile (For Windows) For Windows 98 Depending on the type of computer or OS, you may need to install the monitor set-up information Installing monitor set-up information into on your system. If so, follow the steps below to Windows 98, and setting the monitor's ICC profile install the monitor set-up information.
  • Seite 27 Installing set-up information and the ICC profile (For Windows) For Windows 2000 For Windows Me Installing monitor set-up information into Installing monitor set-up information into Windows Windows 2000, and setting the monitor's ICC Me, and setting the monitor's ICC profile as a profile as a predetermined value.
  • Seite 28 Installing set-up information and the ICC profile (For Windows) For Windows XP Installing the ICC profile Installing the monitor's ICC profile. (If the set-up Installing monitor set-up information into Windows information has already been installed, so too has XP, and setting the monitor's ICC profile as a the profile, and there is no need to install it.) predetermined value.
  • Seite 29: Information About The Colorsync Profile (For Macos)

    Information about the ColorSync profile (For MacOS) About the ColorSync profile ColorSync is Apple Computer's color management system and enables color reproduction characteristics to be realized when used with a compatible application. A ColorSync profile describes the color characteristics of the LCD monitor.
  • Seite 30: Instructions For Attaching A Vesa Compliant Arm

    Instructions for attaching a VESA compliant arm An arm or stand based on the VESA standard 5. Remove the six screws and then remove the (commercially available) can be attached to the stand from the monitor. monitor. Procurement of the arm or stand is at the customer's discretion.
  • Seite 31 Inhaltsverzeichnis Tipp und Sicherheitsvorkehrungen ............32 Produktbeschreibung .
  • Seite 32: Tipp Und Sicherheitsvorkehrungen

    - Der Monitor darf niemals mit harten Gegenständen erworben werden können. - [LL-T17D4] Das Digitalsignalkabel (DVI-D24polig – abgerieben oder berührt werden. - Wir bitten um Ihr Verständnis, dass Sharp Corporation DVI-D24polig) muß separat gekauft werden. über die gesetzlich anerkannte Leistungshaftung (Modellbezeichnung: NL-C04J) - [LL-T17D4] Das Analogsignalkabel (DVI-I29polig –...
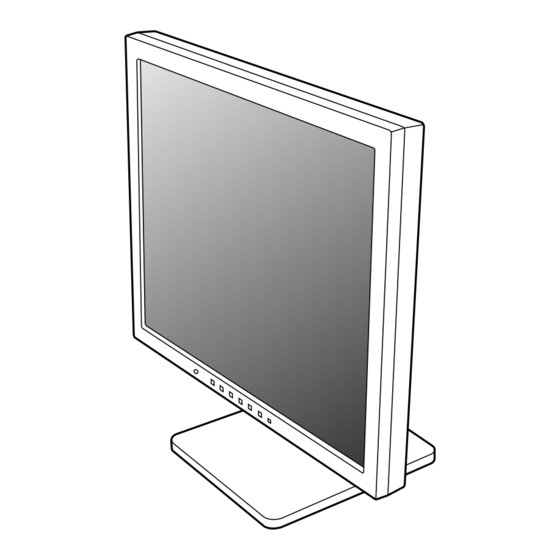
  • Seite 33: Produktbeschreibung

    Produktbeschreibung [LL-T17A4] [LL-T17D4] 1. Taste INPUT ......[LL-T17D4] Für die Umschaltung zwischen den Signaleingangsanschlüssen. 2. Taste MENU ......Mit dieser Taste öffnen, wählen und schließen Sie das OSD (On Screen Display) -Menü. 3. Taste / MODE ...... Wenn das OSD-Menü angezeigt wird: Diese Taste wird zum Wählen der Menüoptionen verwendet.
  • Seite 34: Höheneinstellung, Winkeleinstellung

    Höheneinstellung, Winkeleinstellung ACHTUNG! - Wenn Sie mit der Hand auf den LCD-Bildschirm drücken, kann dieser beschädigt werden. - Nicht versuchen, den Monitor über seinen Bewegungsbereich hinaus zu bewegen. Wenn zu starke Kraft zum Bewegen des Monitors angewendet wird, kann das Produkt beschädigt werden.
  • Seite 35: Anschließen Des Monitors Und Ein- Und Ausschalten Des Monitors

    Anschließen des Monitors und Ein- und Ausschalten des Monitors ACHTUNG! Beim Anschluß unter Verwendung eines separat erhältlichen Digital- oder - Bevor Sie den Monitor anschließen, müssen Sie Analogsignalkabels [LL-T17D4] den Monitor und den Computer ausschalten. Das getrennt erhältliche Displaykabel erlaubt - Achten Sie darauf, dass Sie das Kabel nicht Verbindung zwischen dem DVI-I- überdehnen, und schließen Sie kein...
  • Seite 36: Anschluss Von Kopfhörern (Im Handel Erhältlich)

    Anschließen des Monitors und Ein- und Ausschalten des Monitors Anschluss von Kopfhörern Den Monitor folgendermassen einstellen, wenn (im Handel erhältlich) ein digitaler Anschluss mit einem Power Macintosh unter Verwendung eines ADC-DVI- Adapters des Herstellers Belkin ausgeführt wird. Kopfhörer (im Handel erhältlich) können (Der Betrieb wurde mit dem Power Macintosh G4 angeschlossen werden.
  • Seite 37: Einschalten Des Monitors

    Anschließen des Monitors und Ein- und Ausschalten des Monitors Einschalten des Monitors Umschalten zwischen Eingangsanschlüssen [LL-T17D4] 1. Den Monitor mit dem Hauptschalter einschalten. Hauptschalter Mit der Taste INPUT schalten Sie die Signaleingangsanschlüsse um. Analogen DVI-I-Eingangsanschluss RGB-Eingangsanschluss - Beim Aus- und Einschalten des Monitors mit INPUT INPUT-1 INPUT-2...
  • Seite 38: Einstellen Der Bildschirmanzeige Und Der Einstellen Der Bildschirmanzeige Lautsprecher-Lautstärke

    Einstellen der Bildschirmanzeige und der Einstellen der Bildschirmanzeige Lautsprecher-Lautstärke Analogsignal Einstellsperrfunktion 1. Führen Sie zunächst eine automatische Wenn Sie die Steuertasten deaktivieren (d. h. die Einstellung durch. (S.40) Sperre setzen), können keine Werte eingestellt 2. Führen Sie bei Bedarf eine manuelle Einstellung werden.
  • Seite 39: Einstellen Der Lautsprecher-Lautstärke

    Einstellen der Bildschirmanzeige und der Lautsprecher-Lautstärke Einstellen der Lautsprecher-Lautstärke Einstellen des Displaymodus 1. Wenn das OSD-Menü nicht angezeigt wird, Der Farbton oder die Helligkeit kann mit einem Befehl geändert werden. drücken Sie die Taste oder die Taste 2. Sicherstellen, dass [VOLUME] gewählt ist. Wenn es nicht gewählt ist, drücken Sie die Taste Der Farbton stammt vom Originalschema des / MODE und wählen [VOLUME].
  • Seite 40: Einstellen Der Bildschirmanzeige (Bei Verwendung Eines Analogsignals)

    Einstellen der Bildschirmanzeige (bei Verwendung eines Analogsignals) Automatisches Einstellen des Bildschirms Automatische Bildschirmeinstellung 1. Drücken Sie die Taste MENU. Das Menü ADJUSTMENT wird angezeigt. Die Optionen im Menü ADJUSTMENT können (Beispiel: Dargestellter Bildschirm des LL-T17D4) automatisch eingestellt werden (CLOCK, PHASE, H-POS, V-POS).
  • Seite 41: Manuelle Bildschirmeinstellung

    Einstellen der Bildschirmanzeige (bei Verwendung eines Analogsignals) Menü ADJUSTMENT Manuelle Bildschirmeinstellung Die Einstellungen können über das OSD (On Screen Display)-Menü vorgenommen werden. OSD für die Einstellung Wenn Sie mit Windows arbeiten, öffnen Sie das Einstellmuster auf der mitgelieferten Utility Disk. MANUAL: Einzelne Menüoptionen werden (S.40) manuell eingestellt.
  • Seite 42 Einstellen der Bildschirmanzeige (bei Verwendung eines Analogsignals) Menü GAIN CONTROL Menü WHITE BALANCE Hinweise: MANUAL: Einzelne Menüoptionen werden - Bei einer anderen Einstellung als [STD] können manuell eingestellt. nicht alle Abstufungen angezeigt werden. Um AUTO: Alle Menüoptionen werden mit der alle Abstufungen anzuzeigen, stellen Sie [STD] Funktion Auto Gain Control* automatisch ein.
  • Seite 43 Einstellen der Bildschirmanzeige (bei Verwendung eines Analogsignals) Menü MODE SELECT Hinweise: - Abhängig von der Auflösung des Eingangssignals ändert sich die Anzeige eventuell selbst dann nicht, wenn die Menüoptionen ausgewählt werden können. - So wählen Sie eine Menüoption: Taste / MODE - Nach Abschluss der Einstellung: Taste MENU OSD H-POSITION (OSD horizontale Position) Die Position der Menü...
  • Seite 44: Einstellen Der Bildschirmanzeige (Bei Verwendung Eines Digitalsignals) [Ll-T17D4]

    Einstellen der Bildschirmanzeige Einstellen der Bildschirmanzeige (bei Verwendung eines Digitalsignals) [LL-T17D4] (bei Verwendung eines Digitalsignals) Menü WHITE BALANCE Die Einstellungen können über das OSD-Menü vorgenommen werden. OSD für die Einstellung Wenn Sie mit Windows arbeiten, öffnen Sie das Einstellmuster auf der mitgelieferten Utility Disk. (S.40) Falls Ihr System nicht unter Windows arbeitet, können Sie das Einstellmuster nicht verwenden.
  • Seite 45 Einstellen der Bildschirmanzeige Einstellen der Bildschirmanzeige (bei Verwendung eines Digitalsignals)[LL-T17D4] (bei Verwendung eines Digitalsignals) Menü MODE SELECT Hinweise: - So wählen Sie eine Menüoption: Taste / MODE - Nach Abschluss der Einstellung: Taste MENU OSD H-POSITION (OSD horizontale Position) Die Position der Menü OSD kann nach links und rechts verschoben werden.
  • Seite 46: Pflege Des Monitors Und Reparaturen

    Wenden Sie sich an das Geschäft, in Gehäuse und Bedienfeld dem Sie den Monitor gekauft haben, oder an das nächste autorisierte Sharp- Wischen Sie das Gehäuse und das Bedienfeld mit Kundendienstzentrum. (Nehmen Sie diesen einem weichen, trockenen Tuch vorsichtig sauber.
  • Seite 47: Produktspezifikationen

    Abmessungen (Einheiten: mm) (Kontrastverhältnis > 5) Bildschirmanzeigegröße Horizontal 337,9 mm x vertikal 270,3 mm Videosignal [LL-T17A4] Analog RGB (0,7 Vp-p) [75Ω] [LL-T17D4] Analog: Analog RGB (0,7 Vp-p) [75Ω] Digital: DVI-Standard basiert auf 1.0 Sync-Signal Separate Sync (TTL-Pegel: +/-), Sync on...
  • Seite 48 Technische Daten Relevante Signaltakte (analog) Relevante Signaltakte (digital) [LL-T17D4] Anzeigemodus Hsync Vsync Punktfrequenz Anzeigemodus Hsync Vsync Punktfrequenz VESA VESA US-Text US-Text Power - Die empfohlene Auflösung ist 1280 x 1024. Macintosh- - Alle nur mit Non-Interlace. Serie - Ein Computer mit einem Ausgangsanschluss gemäß...
  • Seite 49: Pinbelegung Des Analogsignal-Eingangsanschlusses

    Technische Daten Pinbelegung des Analogsignal- Power Management Eingangsanschlusses Der LL-T17A4 basiert auf VESA DPMS. Der LL- T17D4 basiert auf sowohl VESA DPMS und DVI (15poliger Mini-D-Sub-Stecker) DMPM. Zum Aktivieren der Energiesparfunktion müssen die Videokarte und der verwendete Computer ebenfalls diesen Normen entsprechen.
  • Seite 50: Installieren Der Setup-Informationen Und Des Icc-Profils (Für Windows)

    Installieren der Setup-Informationen und des ICC-Profils (Für Windows) Für Windows 98 Je nach dem verwendeten Computer oder Betriebssystem muss die Installation der Monitor- Installieren der Monitor-Setup-Informationen unter Setup-Informationen usw. eventuell über den Windows 98 und Festlegen des Monitor-ICC- Computer erfolgen. Führen Sie in diesem Fall die Profils als vorbestimmter Wert.
  • Seite 51 Installieren der Setup-Informationen und des ICC-Profils (Für Windows) Für Windows 2000 Für Windows Me Installieren der Monitor-Setup-Informationen unter Installieren der Monitor-Setup-Informationen unter Windows 2000 und Festlegen des Monitor-ICC- Windows Me und Festlegen des Monitor-ICC- Profils als vorbestimmter Wert. Die in den Profils als vorbestimmter Wert.
  • Seite 52: Installieren Des Icc-Profils

    Installieren der Setup-Informationen und des ICC-Profils (Für Windows) Für Windows XP Installieren des ICC-Profils Installieren des Monitor-ICC-Profils. (Wenn die Installieren der Monitor-Setup-Informationen unter Setup-Informationen bereits installiert wurden, ist Windows XP und Festlegen des Monitor-ICC- auch das Profil bereits installiert. Es braucht dann Profils als vorbestimmter Wert.
  • Seite 53: Informationen Zum Profil Colorsync (Für Macos)

    Informationen zum Profil ColorSync (Für MacOS) Informationen zum Profil ColorSync ColorSync ist das Farbverwaltungssystem von Apple Computers. Mit dieser Funktion erkennt das System die Farbwiedergabeeigenschaften bei Verwendung mit einer kompatiblen Anwendung. Ein ColorSync-Profil beschreibt die Farbeigenschaften des LCD-Monitors. Hinweise: - Das ColorSync-Profil dieses Monitors kann zusammen mit MacOS 8.5 oder höher eingesetzt werden.
  • Seite 54: Anweisungen Zum Anbringen Eines Vesa-Kompatiblen Monitorarms

    Anweisungen zum Anbringen eines VESA- kompatiblen Monitorarms Ein Arm oder Fuß basierend auf dem VESA- 5. Lösen Sie die sechs Schrauben, und nehmen Standard (im Handel erhältlich) kann am Monitor Sie den Ständer vom Monitor ab. angebracht werden. Der Arm oder Fuß muss vom Kunden gesondert erworben werden.
  • Seite 55 Table des matières Conseils et mesures de sécurité ............56 Description du produit .
  • Seite 56: Conseils Et Mesures De Sécurité

    - Ne jamais heurter ou taper sur l'ordinateur avec des objets durs. DVI-D24 - broche DVI-D24) est à acheter - Il faut savoir que la société Sharp décline toute séparément. (nom du modèle : NL-C04J) - [LL-T17D4] Le câble de signal analogique (broche responsabilité...
  • Seite 57: Description Du Produit

    Description du produit [LL-T17A4] [LL-T17D4] 1. Bouton INPUT ......[LL-T17D4] Pour passer d'une borne d'entrée du signal à l'autre. 2. Bouton MENU ......Ce bouton est utilisé pour faire apparaître, sélectionner et refermer le menu OSD (On Screen Display). 3. Bouton / MODE ....
  • Seite 58: Réglage De La Hauteur Et De L'inclinaison

    Réglage de la hauteur et de l'inclinaison ATTENTION ! - Appuyer les mains sur l'écran LCD peut provoquer son endommagement. - Ne pas essayer de faire bouger le moniteur au delà de sa plage de mouvement. Forcer pour faire bouger le moniteur risque d'endommager cet appareil.
  • Seite 59: Raccordement, Activation Et Désactivation Du Moniteur

    Raccordement, activation et désactivation du moniteur Lors du raccordement au moyen de câbles ATTENTION ! pour signaux numériques ou analogiques - Lors du raccordement, s'assurer que vendus séparément [LL-T17D4] l'alimentation tant du moniteur que de Le câble d'affichage vendu séparément permet de l'ordinateur est désactivée.
  • Seite 60: Raccordement D'un Casque D'écoute (En Vente Dans Le Commerce)

    Raccordement, activation et désactivation du moniteur Raccordement d'un casque d'écoute Configurer le moniteur comme suit lors de (en vente dans le commerce) l'établissement d'un raccordement numérique avec un Power Mac au moyen d'un adaptateur ADC-DVI fabriqué par Belkin. (Le fonctionnement Un casque d'écoute (en vente dans le commerce) a été...
  • Seite 61: Activation De L'alimentation

    Raccordement, activation et désactivation du moniteur Activation de l'alimentation Inversion entre les bornes d'entrée [LL-T17D4] 1. Activer la source d'alimentation principale du moniteur. Utiliser le bouton INPUT pour basculer entre les bornes d'entrée. Interrupteur principal Borne d'entrée RVB analogique Borne d'entrée DVI-I INPUT INPUT-1 INPUT-2...
  • Seite 62: Réglage De L'image Sur Le Moniteur Et Du Volume Des Haut-Parleurs

    Réglage de l'image sur le moniteur et du volume des haut-parleurs Pour le signal analogique Fonction de verrouillage des réglages 1. Effectuer tout d'abord un réglage automatique. En désactivant les boutons de commande (c'est-à- (p.64) dire en les verrouillant), toute tentative de 2.Effectuer au besoin un réglage manuel.
  • Seite 63: Réglage Du Volume Des Haut-Parleurs

    Réglage de l'image sur le moniteur et du volume des haut-parleurs Réglage du volume des haut-parleurs Réglage du mode d'affichage 1. Sans que le menu OSD ne soit affiché, appuyer Le ton de couleur ou la luminosité peut être changée avec une seule commande. sur le bouton ou le bouton 2.
  • Seite 64: Réglage De L'image Du Moniteur (Avec Un Signal Analogique)

    Réglage de l'image du moniteur (avec un signal analogique) Réglage automatique du moniteur Réglage automatique de l'image 1. Appuyer sur le bouton MENU. Le menu ADJUSTMENT apparaît. Les options CLOCK, PHASE, H-POS, V-POS du (Exemple : Ecran affiché sur le modèle LL-T17D4) menu ADJUSTMENT peuvent être ajustées automatiquement.
  • Seite 65: Réglage Manuel De L'image

    Réglage de l'image du moniteur (avec un signal analogique) Menu ADJUSTMENT (REGLAGE) Réglage manuel de l'image Des réglages peuvent être effectués au moyen du menu du moniteur actif (OSD) proposé. Affichage à l'écran pour le réglage Si l'on se trouve sous un environnement Windows, ouvrir le Modèle de réglage se trouvant sur le MANUAL : Les options individuelles du menu disque utilitaire.
  • Seite 66 Réglage de l'image du moniteur (avec un signal analogique) Menu GAIN CONTROL Menu WHITE BALANCE (REGLAGE DES COULEURS) (EQUILIBRE DU BLANC) Remarques : MANUAL : Les options individuelles du menu - En ce qui concerne les paramètres autres que sont réglées manuellement. les [STD], toutes les gradations ne peuvent pas AUTO : Chaque option du menu est...
  • Seite 67 Réglage de l'image du moniteur (avec un signal analogique) Menu MODE SELECT (SELECTION DU MODE) Remarques : - En fonction de la résolution du signal d'entrée, même si les options peuvent être sélectionnées, l'affichage ne peut pas être modifié. - Pour choisir une option du menu : Bouton / MODE - Lorsque le réglage est terminé...
  • Seite 68: Réglage De L'image Du Moniteur (Avec Un Signal Numérique) [Ll-T17D4]

    Réglage de l'image du moniteur (avec un signal numérique) [LL-T17D4] Menu WHITE BALANCE Des réglages peuvent être effectués au moyen du (EQUILIBRE DU BLANC) menu interactif (OSD) proposé. Affichage à l'écran pour le réglage Si l'on se trouve sous un environnement Windows, ouvrir le Modèle de réglage se trouvant sur le disque utilitaire.
  • Seite 69 Réglage de l'image du moniteur (avec un signal numérique) [LL-T17D4] Menu MODE SELECT (SELECTION DU MODE) Remarques : - Pour choisir une option du menu : Bouton / MODE - Lorsque le réglage est terminé : Bouton MENU OSD H-POSITION (positionnement horizontal OSD) Le positionnement du menu OSD peut être modifié...
  • Seite 70: Entretien Et Réparation Du Moniteur

    - Exécutez la procédure de réglage du volume. correctement, contacter le magasin où il a été (p.63) acheté ou votre réparateur agréé Sharp le plus - Les casques audio sont-ils branchés? proche. - Aucun son ne sort des haut-parleurs quand le...
  • Seite 71: Caractéristiques Techniques

    - Câble de signal analogique : approx. 1,8 m VESA : DDC2B compatible - Câble audio : approx. 1,8 m Gestion de l'alimentation [LL-T17A4] VESA : basé sur le DPMS [LL-T17D4] [LL-T17D4] VESA : basé sur le DPMS - Câble de signal numérique, NL-C04J (à...
  • Seite 72 Caractéristiques techniques Fréquences des signaux (analogique) Fréquences des signaux (numérique) [LL-T17D4] Bande Bande Mode affichage Hsync Hsync Vsync Vsync Mode affichage passante passante VESA VESA Saisie de texte US - La résolution recommandée est 1280 x 1024. Saisie de texte US - Toutes les fréquences sont non entrelacées.
  • Seite 73: Gestion De L'alimentation

    La broche du connecteur d'entrée du Gestion de l'alimentation signal analogique Le modèle LL-T17A4 est basé sur le système VESA DPMS. Le modèle LL-T17D4 est basé sur (Mini connecteur de type D-sub 15 broches) les deux systèmes VESA DPMS et DVI DMPM.
  • Seite 74: Installation Des Fichiers Relatifs Au Paramétrage Du Moniteur Et Au Profil Icc (Pour Windows)

    Installation des fichiers relatifs au paramétrage du moniteur et au profil ICC (Pour Windows) En fonction du type d'ordinateur ou du système Pour Windows 98 d'exploitation, il peut parfois s'avérer nécessaire Installation des fichiers relatifs au paramétrage du d'utiliser l'ordinateur pour consulter les paramètres moniteur sous Windows 98, et au réglage du profil relatifs à...
  • Seite 75 Installation des fichiers relatifs au paramétrage du moniteur et au profil ICC (Pour Windows) Pour Windows 2000 Pour Windows Me Installation des fichiers relatifs au paramétrage du Installation des fichiers relatifs au paramétrage du moniteur sous Windows 2000, et au réglage du moniteur sous Windows Me, et au réglage du profil profil ICC du moniteur en tant que valeur par ICC du moniteur en tant que valeur par défaut.
  • Seite 76 Installation des fichiers relatifs au paramétrage du moniteur et au profil ICC (Pour Windows) Pour Windows XP Installation du profil ICC Installation du profil ICC du moniteur. (Si Installation des fichiers relatifs au paramétrage du l'information relative à l'installation a déjà été moniteur sous Windows XP, et au réglage du profil installée, alors le profil l'a été...
  • Seite 77: Informations Sur Le Profil Colorsync (Pour Macos)

    Informations sur le profil ColorSync (Pour MacOS) A propos du profil ColorSync ColorSync est le système de gestion des couleurs de Apple Computer et il permet de réaliser les caractéristiques de l'affichage de couleurs lors d'une utilisation avec une application compatible. Un profil ColorSync décrit les caractéristiques de couleur du moniteur LCD.
  • Seite 78: Instructions Relatives À L'installation D'un Bras Conforme Vesa

    Instructions relatives à l'installation d'un bras conforme VESA Un bras ou un support conforme à la norme VESA 5. Retirer les six vis et ensuite le support du (en vente dans le commerce) peut servir de moniteur. support au moniteur. L'acquisition du bras ou du support est laissée à...
  • Seite 79 Indice Suggerimenti e precauzioni per la sicurezza ..........80 Descrizione del prodotto .
  • Seite 80: Suggerimenti E Precauzioni Per La Sicurezza

    - Non utilizzate il monitor in luoghi nei quali la ventilazione è scadente, vi è molta polvere, l'umidità è elevata e nei - Questo manuale è relativo ai modelli LL-T17A4 e LL- quali il monitor può venire a contatto con olio o vapore, T17D4.
  • Seite 81: Descrizione Del Prodotto

    Descrizione del prodotto [LL-T17A4] [LL-T17D4] 1. Tasto INPUT ......[LL-T17D4] Per commutare tra i terminali di ingresso del segnale. 2. Tasto MENU ......Questo tasto si usa per visualizzare, selezionare e chiudere il menu OSD (On Screen Display). 3. Tasto / MODE ......
  • Seite 82: Regolazione Dell'altezza, Regolazione Dell'angolazione

    Regolazione dell'altezza, regolazione dell'angolazione ATTENZIONE! - La pressione con le mani sul pannello LCD può produrre dei danni. - Non tentare di spostare il monitor oltre la relativa gamma del movimento. Applicando una forza eccessiva per spostare il monitor, si può danneggiare il prodotto.
  • Seite 83: Collegamento Del Monitor Ed Accensione E Spegnimento Del Monitor

    Collegamento del monitor ed accensione e spegnimento del monitor ATTENZIONE! Per il collegamento usare cavi per segnali digitali o analogici, venduti a parte [LL-T17D4] - Quando eseguite i collegamenti, assicuratevi che Il cavo del display, venduto separatamente, sia il monitor che il computer siano spenti. consente il collegamento tra il terminale di - Fate attenzione a non piegare eccessivamente il ingresso DVI-I del monitor e il terminale di uscita...
  • Seite 84: Collegamento Di Una Cuffia (Da Acquistare In Commercio)

    Collegamento del monitor ed accensione e spegnimento del monitor Collegamento di una cuffia Impostare il monitor come segue allorché si (da acquistare in commercio) stabilisce un collegamento digitale con un Power Mac usando un adattatore ADC-DVI fabbricato da Belkin. (Il funzionamento è stato controllato con il La cuffia (da acquistare in commercio) può...
  • Seite 85: Accensione

    Collegamento del monitor ed accensione e spegnimento del monitor Accensione Commutare tra i terminali di ingresso [LL-T17D4] 1. Posizionate su acceso l'interruttore principale rete del monitor. Utilizzate il pulsante INPUT per commutare tra i Interruttore principale rete terminali di ingresso del segnale. Terminale di ingresso DVI-I terminale RGB analogico...
  • Seite 86: Regolazione Della Visualizzazione Sullo Schermo E Volume Dell'altoparlante

    Regolazione della visualizzazione sullo schermo e volume dell'altoparlante Per il segnale analogico Funzione di blocco delle regolazioni 1. Prima di tutto eseguite una regolazione Disattivando i tasti di controllo (cioè settando il automatica. (p.88) blocco) si impedirà ogni tentativo di cambiare i 2.
  • Seite 87: Regolazione Del Volume Dell'altoparlante

    Regolazione della visualizzazione sullo schermo e volume dell'altoparlante Regolazione del volume dell'altoparlante Impostazione della modalità del display 1. Senza che il menu OSD sia visualizzato premete La tonalità del colore o la luminosità si può impostare come segue. il tasto oppure il tasto 2.
  • Seite 88: Regolazione Della Visualizzazione Sullo Schermo (Quando Si Usa Un Segnale Analogico)

    Regolazione della visualizzazione sullo schermo (quando si usa un segnale analogico) Regolazione automatica dello schermo Regolazione automatica dello schermo 1. Premete il tasto MENU. Il menu ADJUSTMENT verrà visualizzato. Le opzioni nel menu ADJUSTMENT si possono (Esempio: schermo del modello LL-T17D4) regolare automaticamente (CLOCK, PHASE (FASE), H-POS, V-POS).
  • Seite 89: Regolazione Manuale Dello Schermo

    Regolazione della visualizzazione sullo schermo (quando si usa un segnale analogico) Menu ADJUSTMENT (REGOLAZIONE) Regolazione manuale dello schermo Le regolazioni si possono fare mediante il menu OSD (On Screen Display) fornito. On Screen Display per la regolazione Se usate Windows, aprite il monoscopio sul Disco delle Utilità...
  • Seite 90 Regolazione della visualizzazione sullo schermo (quando si usa un segnale analogico) Menu GAIN CONTROL Menu WHITE BALANCE (CONTROLLO DEL GUADAGNO) (BILANCIAMENTO DEL BIANCO) Note: MANUAL: le singole opzioni del menu vengono regolate manualmente. - Nelle impostazioni diverse da [STD] non tutte le AUTO: ogni opzione del menu viene regolata gradazioni possono essere visualizzate.
  • Seite 91 Regolazione della visualizzazione sullo schermo (quando si usa un segnale analogico) Menu MODE SELECT Note: - A seconda della risoluzione del segnale di input, anche se si possono selezionare delle opzioni di menu, il display potrebbe non cambiare. - Per selezionare un'opzione di menu: Tasto / MODE - Quando la regolazione è...
  • Seite 92: Regolazione Della Visualizzazione Sullo Schermo (Quando Si Usa Un Segnale Digitale) [Ll-T17D4]

    Regolazione della visualizzazione sullo schermo (quando si usa un segnale digitale) [LL-T17D4] Menu WHITE BALANCE Le regolazioni si possono fare mediante il menu (BILANCIAMENTO DEL BIANCO) On Screen Display (OSD) fornito. On Screen Display per la regolazione Se usate Windows, aprite il monoscopio sul Disco delle Utilità...
  • Seite 93 Regolazione della visualizzazione sullo schermo (quando si usa un segnale digitale) [LL-T17D4] Menu MODE SELECT Note: - Per selezionare un'opzione di menu: Tasto / MODE - Quando la regolazione è stata completata: Tasto MENU OSD H-POSITION (posizione orizzontale dell'OSD) La posizione del menu dell'OSD può essere spostata verso sinistra e verso destra.
  • Seite 94: Cura E Riparazione Del Monitor

    Usate un panno morbido ed asciutto per portare monitor oppure dal Centro del Servizio via ogni sporcizia dalla carrozzeria e dal pannello Tecnico Assistenza Clienti della Sharp più di controllo. vicino a voi. (Non tentate mai di eseguire la Se sono molto sporchi, applicate del detersivo sostituzione da voi.)
  • Seite 95: Specifiche Del Prodotto

    2,0 m Uscita altoparlanti 1 W + 1 W Terminale del segnale di ingresso [LL-T17A4] 15 pin mini D-sub (3 file) [LL-T17D4] Analogico: 15 pin mini D-sub (3 file) Digitale/Analogico: 29 pin DVI-I Terminale audio Jack stereo mini...
  • Seite 96 Specifiche Sincronizzazioni rilevanti del segnale Sincronizzazioni rilevanti del segnale (analogico) (digitale) [LL-T17D4] Modalità di Modalità di Sincronismo Sincronismo Frequenza Sincronismo Sincronismo Frequenza visualizzazione orizzontale verticale punti visualizzazione orizzontale verticale punti VESA VESA Testo US - La risoluzione consigliata è 1280 x 1024. Testo US - Tutti sono conformi solo al non interlacciamento.
  • Seite 97 Pin del connettore di ingresso del segnale Gestione dell'energia analogico Il modello LL-T17A4 si basa sul VESA DPMS. Il modello LL-T17D4 si basa sia sul VESA DPMS (Connettore D sub mini a 15 pin) che sul DVI DMPM. Per attivare la funzione di gestione energetica, è...
  • Seite 98: Installazione Delle Informazioni Per Il Setup E Del Profilo Icc (Per Windows)

    Installazione delle informazioni per il setup e del profilo ICC (Per Windows) Per Windows 98 A seconda del computer oppure del sistema operativo può essere necessario usare il computer Installazione delle informazioni di setup del per eseguire l'installazione delle informazioni di monitor in Windows 98, e impostazione del profilo setup del monitor, ecc.
  • Seite 99 Installazione delle informazioni per il setup e del profilo ICC (Per Windows) Per Windows 2000 Per Windows Me Installazione delle imformazioni di setup del Installazione delle informazioni di setup del monitor in Windows 2000, e impostazione del monitor in Windows Me, e impostazione del profilo profilo ICC del monitor come valore ICC del monitor come valore predeterminato.
  • Seite 100 Installazione delle informazioni per il setup e del profilo ICC (Per Windows) Per Windows XP Installazione del profilo ICC Installazione del profilo ICC del monitor. (Se le Installazione delle imformazioni di setup del informazioni di setup sono già installate, lo è anche monitor in Windows XP, e impostazione del profilo il profilo e non occorre installarlo.) ICC del monitor come valore predeterminato.
  • Seite 101: Informazioni Sul Profilo Colorsync (Per Macos)

    Informazioni sul profilo ColorSync (Per MacOS) Il profilo ColorSync ColorSync è il sistema di gestione dei colori della Apple Computer e consente di realizzare la riproduzione dei colori, quando lo si usa con un'applicazione compatibile. Un profilo ColorSync descrive le caratteristiche cromatiche del monitor LCD.
  • Seite 102: Istruzioni Per Collegare Un Braccio Compatibile Vesa

    Istruzioni per collegare un braccio compatibile VESA E' possibile collegare al monitor un braccio 5. Rimuovete le sei viti e rimuovete quindi il oppure un supporto basati sullo standard VESA supporto dal monitor. (da acquistare in commercio). L'acquisto del braccio oppure del supporto è a discrezione del cliente.
  • Seite 103 Índice Sugerencias y precauciones de seguridad ..........104 Descripción del producto .
  • Seite 104: Sugerencias Y Precauciones De Seguridad

    - El presente monitor y sus accesorios pueden - Sharp Corporation es titular de los derechos de autor actualizarse sin previo aviso. del programa del Disquete de utilidades. No lo reproduzca sin previa autorización.
  • Seite 105: Descripción Del Producto

    Descripción del producto [LL-T17A4] [LL-T17D4] 1. Botón INPUT ......[LL-T17D4] Para conmutar entre los bornes de entrada de la señal. 2. Botón MENU ......Este botón se utiliza para ampliar, seleccionar y cerrar el menú OSD (On Screen Display). 3. Botón / MODE ......
  • Seite 106: Ajuste De Altura Y Ajuste De Ángulo

    Ajuste de altura y ajuste de ángulo ¡PRECAUCIÓN! - Si presiona el panel LCD con las manos podría dañarlo. - No trate de mover el monitor más allá de la gama de movimientos. Una fuerza excesiva para mover el monitor puede dañar el producto. - Tenga cuidado para que sus dedos no queden atrapados.
  • Seite 107: Conexión Del Monitor Y Encendido/Apagado Del Mismo

    Conexión del monitor y encendido/ apagado del mismo Cuando haga la conexión utilizando cables ¡PRECAUCIÓN! de señal digital o analógica vendidos - Antes de realizar la conexión, asegúrese de que separadamente [LL-T17D4] tanto el monitor como el ordenador están Los cables de visualización que se venden por apagados.
  • Seite 108: Conexión De Auriculares (De Venta En El Comercio)

    Conexión del monitor y encendido/apagado del mismo Conexión de auriculares (de venta en Prepare el monitor como se indica a continuación el comercio) cuando realice una conexión digital con un Power Mac usando un adaptador ADC-DVI fabricado por Se pueden conectar auriculares (de venta en el Belkin.
  • Seite 109: Encendido

    Conexión del monitor y encendido/apagado del mismo Encendido Alternar entre bornes de entrada [LL-T17D4] 1. Conmute el interruptor primario del monitor. Interruptor primario Utilizar el botón de ENTRADA (INPUT) para conmutar entre bornes de entrada de señal. Borne de entrada Borne de entrada RGB analógica DVI-I...
  • Seite 110: Ajuste De La Pantalla Y Volumen Del Altavoz

    Ajuste de la pantalla y volumen del altavoz Para la señal analógica Función de bloqueo de ajustes 1. En primer lugar, lleve a cabo un ajuste Si deshabilita los botones de control (es decir, automático. (p.112) activa el bloqueo) no podrá cambiar los valores 2.
  • Seite 111: Ajuste Del Volumen Del Altavoz

    Ajuste de la pantalla y volumen del altavoz Ajuste del volumen del altavoz Configuración del modo de pantalla La tonalidad cromática o brillo puede cambiarse 1. Sin el menú OSD a la vista, pulse el botón con un comando. 2. Compruebe que esté seleccionado [VOLUME]. Si no está...
  • Seite 112: Ajuste De La Pantalla (Cuando Se Utiliza Una Señal Analógica)

    Ajuste de la pantalla (cuando se utiliza una señal analógica) Ajuste automático de la pantalla Ajuste automático de la pantalla 1. Pulse el botón MENU. Aparecerá el menú ADJUSTMENT. Las opciones del Menú ADJUSTMENT (RELOJ, (Por ejemplo: Pantalla de LL-T17D4 que se FASE, H-POS, V-POS) se pueden ajustar mostrará) automáticamente.
  • Seite 113: Ajuste Manual De La Pantalla

    Ajuste de la pantalla (cuando se utiliza una señal analógica) Menú ADJUSTMENT Ajuste manual de la pantalla Los ajustes se pueden realizar a través del Menú en pantalla (OSD). Máscara en pantalla para el ajuste Si está utilizando Windows, abra el Patrón de ajuste incluido en el Disquete de utilidades.
  • Seite 114 Ajuste de la pantalla (cuando se utiliza una señal analógica) Menú GAIN CONTROL Menú WHITE BALANCE Notas: MANUAL: Las diferentes opciones del menú se - No todas las gradaciones pueden verse en ajustan manualmente. ajustes diferentes a [STD]. Ajuste a [STD] para AUTO: Cada opción del menú...
  • Seite 115 Ajuste de la pantalla (cuando se utiliza una señal analógica) Menú MODE SELECT Notas: - Según sea la resolución de la señal de entrada, la pantalla puede no cambiar incluso si pueden seleccionarse las opciones del menú. - Para seleccionar una opción del menú: Botón / MODE - Una vez finalizados los ajustes: Botón MENU OSD H-POSITION (posición horizontal OSD)
  • Seite 116: Ajuste De La Pantalla (Cuando Se Utiliza Una Señal Digital) [Ll-T17D4]

    Ajuste de la pantalla (cuando se utiliza una señal digital) [LL-T17D4] Menú WHITE BALANCE Los ajustes se pueden realizar a través del menú Máscara en pantalla (OSD). Máscara en pantalla para el ajuste Si está utilizando Windows, abra el Patrón de ajuste incluido en el Disquete de utilidades.
  • Seite 117 Ajuste de la pantalla (cuando se utiliza una señal digital) [LL-T17D4] Menú MODE SELECT Notas: - Para seleccionar una opción del menú: Botón / MODE - Una vez finalizados los ajustes: Botón MENU OSD H-POSITION (posición horizontal OSD) La posición del menú OSD puede moverse hacia la izquierda y hacia la derecha.
  • Seite 118: Conservación Y Reparación Del Monitor

    Consulte a su proveedor o al servicio autorizado de asistencia técnica de Utilice un paño suave y seco para limpiar, sin Sharp más cercano. (No intente jamás hacer apretar demasiado, la caja y el panel de control. usted mismo este cambio.) Si estuvieran muy sucios, eche un poco de - Debido a las características de los tubos...
  • Seite 119: Especificaciones Del Producto

    Salida de altavoces 1 W + 1 W Borne de señales de entrada [LL-T17A4] Mini D-sub de 15 vías (3 hileras) [LL-T17D4] Analógica : Mini D-sub de 15 vías (3 hileras) Digital/Analógica : DVI-I de 29 vías Borne de audio de entrada Clavija estéreo mini...
  • Seite 120 Especificaciones Sincronizaciones de las señales Sincronizaciones de las señales correspondientes (analógica) correspondientes (digital) [LL-T17D4] Hsync Vsync Frecuencia Modo display Modo display Hsync Vsync Frecuencia VESA VESA US text - La resolución recomendada es de 1280 x 1024. US text - Todos son compatibles únicamente con «non- Series Power interlace».
  • Seite 121: Gestión De Energía

    Especificaciones Vías del conector de entrada RGB Gestión de energía analógica LL-T17A4 está basado en VESA DPMS. LL-T17D4 está basado tanto en VESA DPMS como en DVI (Conector Mini D-sub de 15 vías) DMPM. Para activar la función de administrador de electricidad, la placa de video y el ordenador utilizado con ésta deben ajustarse a estos...
  • Seite 122: Instalación De La Información De Configuración Y Del Perfil Icc (Para Windows)

    Instalación de la información de configuración y del perfil ICC (Para Windows) Para Windows 98 Según sea el tipo de ordenador o de sistema operativo, puede que sea necesario utilizar el Instalación de la información de configuración del ordenador para llevar a cabo la instalación de la monitor en Windows 98 y configuración del perfil información de configuración del monitor, etc.
  • Seite 123 Instalación de la información de configuración y del perfil ICC (Para Windows) Para Windows 2000 Para Windows Me Instalación de la información de configuración del Instalación de la información de configuración del monitor en Windows 2000 y configuración del monitor en Windows Me y configuración del perfil perfil ICC del monitor como valor predeterminado.
  • Seite 124 Instalación de la información de configuración y del perfil ICC (Para Windows) Para Windows XP Instalación del perfil ICC Instalación del perfil ICC del monitor. (Si ya ha Instalación de la información de configuración del instalado la información de configuración, se habrá monitor en Windows XP y configuración del perfil instalado también el perfil por lo que no hace falta ICC del monitor como valor predeterminado.
  • Seite 125: Información Acerca Del Perfil Colorsync (Para Macos)

    Información acerca del perfil ColorSync (Para MacOS) Acerca del perfil ColorSync ColorSync es el sistema de gestión del color de Apple Computer y permite obtener características de reproducción cromática cuando se utiliza con una aplicación compatible. Un perfil ColorSync describe las características cromáticas del monitor LCD.
  • Seite 126: Instrucciones Para Acoplar Un Brazo De Compatibilidad Vesa

    Instrucciones para acoplar un brazo de compatibilidad VESA Puede acoplar al monitor un brazo o una base (de 5. Retire los seis tornillos y desmonte la base del venta en el comercio) conforme al estándar VESA. monitor. La adquisición del brazo o la base queda a discreción del cliente.
  • Seite 132 SHARP CORPORATION © 2003 SHARP CORPORATION Printed in Thailand 0NK5011091001 (1)

Diese Anleitung auch für:

Ll-t17d4

Inhaltsverzeichnis