Herunterladen Inhalt Inhalt Diese Seite drucken
Sharp LL-T1820-H Bedienungsanleitung
Vorschau ausblenden Andere Handbücher für LL-T1820-H:
Inhaltsverzeichnis

Werbung

Verfügbare Sprachen
  • DE

Verfügbare Sprachen

  • DEUTSCH, seite 35
LCD MONITOR
LCD FARBMONITOR
MONITEUR LCD
MONITOR LCD
MONITOR LCD
LL-T1820-H
LL-T1820-B
OPERATION MANUAL
BEDIENUNGSANLEITUNG
MODE D'EMPLOI
MANUALE D'USO
MANUAL DE FUNCIONAMIENTO

Werbung

Inhaltsverzeichnis
loading

Inhaltszusammenfassung für Sharp LL-T1820-H

  • Seite 1 LCD MONITOR LCD FARBMONITOR MONITEUR LCD MONITOR LCD MONITOR LCD LL-T1820-H LL-T1820-B OPERATION MANUAL BEDIENUNGSANLEITUNG MODE D’EMPLOI MANUALE D’USO MANUAL DE FUNCIONAMIENTO...
  • Seite 2 Table of Contents / Inhaltsverzeichnis / Table des matières / Indice / Índice English ..............3 Deutsch .
  • Seite 3: Inhaltsverzeichnis

    Table of Contents Notice for Users in the USA ..........................4 TCO '95/ '99 ..............................5 Notice for Users in Europe ..........................7 Notice for Users in the UK ..........................8 Notice for Users in Australia ..........................8 Tips and safety precautions ..........................9 Product description ............................10 Height adjustment, angle adjustment, rotation (long height/width) ..............
  • Seite 4: Notice For Users In The Usa

    Sharp Plaza, Mahwah, New Jersey 07430 TEL :1-800-BE-SHARP * As an ENERGY STAR Partner, SHARP has determined that this product meets the ENERGY STAR guidelines for energy efficiency. This product utilizes tin-lead solder, and fluorescent lamp containing a small amount of mercury. Disposal of these materials may be regulated due to environmental considerations.
  • Seite 5: Tco '95/ '99

    LL-T1820-B LL-T1820-H Congratulations! You have just purchased a TCO’95 or TCO’99 approved and labelled product! Your choice has provided you with a product developed for professional use. Your purchase has also contributed to reducing the burden on the environment and also to the further development of environmentally adapted electronics products.
  • Seite 6 Environmental requirements Flame retardants Flame retardants are present in printed circuit boards, cables, wires, casings and housings. Their purpose is to prevent, or at least to delay the spread of fire. Up to 30% of the plastic in a computer casing can consist of flame retardant substances.
  • Seite 7: Notice For Users In Europe

    Notice for Users in Europe This equipment complies with the requirements of Directives 89/336/EEC and 73/23/EEC as amended by 93/68/EEC. Dieses Gerät entspricht den Anforderungen der EG-Richtlinien 89/336/EWG und 73/23/EWG mit Änderung 93/68/EWG. Ce matériel répond aux exigences contenues dans les directives 89/336/CEE et 73/23/CEE modifiées par la directive 93/68/CEE.
  • Seite 8: Notice For Users In The Uk

    "WARNING :THIS APPARATUS MUST BE EARTHED" Notice for Users in Australia Service Inquiries Please contact your dealer for service if required or contact Sharp Corporation of Australia on 1 300 13 50 22 for referral to your nearest Sharp authorized Service Center.
  • Seite 9: Tips And Safety Precautions

    You are advised to retain the carton in case the This monitor and its accessories may be monitor needs to be transported. upgraded without advance notice. Sharp Corporation holds authorship rights to the Utility Disk program. Do not reproduce it without Location permission.
  • Seite 10: Product Description

    Product description 1. INPUT button ......To switch between the signal’s input terminals. (Input terminal 1 ↔ Input terminal 2) 2. MENU button ......This button is used to pop-up, select and close the OSD (On Screen Display) Menu. 3. SELECT button ......This button is used to select menu options when the OSD Menu is dis- played.
  • Seite 11: Height Adjustment, Angle Adjustment, Rotation (Long Height/Width)

    Height adjustment, angle adjustment, rotation (long height/width) CAUTION! Rotation (long height/width) The display can be rotated for a long height or width Pressure from hands on the LCD panel could to suit the displayed content. cause damage. Before rotating, move the display to its Be careful not to allow your fingers to be pinched.
  • Seite 12: Connecting The Monitor And Turning The Monitor On And Off

    Connecting the monitor and turning the monitor on and off CAUTION! 3. Refit the cover. When connecting, ensure that both the monitor Be careful not to pinch the cable. and computer are switched off. Be careful not to overly bend the cable or add extension cords as this could lead to a malfunction.
  • Seite 13: Connecting The Monitor To A Computer

    Connecting the monitor and turning the monitor on and off Digital RGB connection Connecting the monitor to a computer Using the accessory digital signal cable, connect with the digital RGB output terminal of the computer. Connecting the monitor to a computer using the acces- For digital RGB connection, the monitor has an sory signal cable.
  • Seite 14: Connecting The Monitor To A Power Source

    Connecting the monitor and turning the monitor on and off Connecting the monitor to a power source Connecting a USB device This monitor is equipped with a USB standard (Rev. 1.1) self-powered hub. Downstream (2 ports) Power terminal Each of these ports enables connection of a USB de- vice with working current up to 500 mA.
  • Seite 15: Turning The Power On

    Connecting the monitor and turning the monitor on and off Turning the power on Changing between input terminals 1. Turn on the main power of the monitor. Use the INPUT button to switch between signal input terminals. Input terminal 1 Input terminal 2 Main power switch INPUT...
  • Seite 16: Turning The Power Off

    Connecting the monitor and turning the monitor on and off Turning the power off 1. Turn the computer off. 2. Press the monitor's POWER button. The Power LED will disappear. Turn the computer off Press power button If the monitor will not be used for a long time, turn off the main power switch of the monitor, and remove the power plug from the outlet.
  • Seite 17: Adjusting The Screen Display

    Adjusting the screen display For analog signal Adjustment lock function 1. First perform an automatic adjustment. (p. 18) 2. Perform manual adjustment where necessary. By disabling the control buttons (i.e. setting the lock) (p. 19) any attempted changes to adjusted values will be For digital signal voided.
  • Seite 18: Adjusting The Screen Display (With Analog Connection)

    Adjusting the screen display (With analog connection) How to Adjust Automatic screen adjustment 1. Press the MENU button. Options in the ADJUSTMENT Menu can be adjusted The ADJUSTMENT Menu will be displayed. automatically (CLOCK, PHASE, H-POS V-POS). Note: When setting up this monitor for the first time or after having changed an aspect of the current system, perform an automatic screen adjustment before use.
  • Seite 19: Manual Screen Adjustment

    Adjusting the screen display (With analog connection) ADJUSTMENT Menu Manual screen adjustment Adjustments can be made using On Screen Display (OSD) Menu provided. On Screen Display for adjustment If you are using Windows, open the Adjustment Pattern on the accompanying CD-ROM. (p. 18) MANUAL: Individual menu options are manually If your system is not Windows, you can not use the adjusted.
  • Seite 20: Black Level

    Adjusting the screen display (With analog connection) GAIN CONTROL Menu COLOR CONTROL Menu MANUAL: Individual menu options are manually Notes: adjusted. To choose a menu option: SELECT button AUTO: Every menu option is automatically To go to the next menu: MENU button adjusted using the Auto Gain Control* function.
  • Seite 21 Adjusting the screen display (With analog connection) MODE SELECT Menu COOL ... Color tone bluer than standard • ..Color tone slightly bluer than standard STD ..Color tone standard setting • ..Color tone slightly redder than standard WARM .. Color tone redder than standard USER R-CONTRAST ..
  • Seite 22: Adjusting The Screen Display (With Digital Connection)

    Adjusting the screen display (With digital connection) Adjustments can be made using On Screen Display COLOR CONTROL Menu (OSD) Menu provided. On Screen Display for adjustment If you are using Windows, open the Adjustment Pattern on the accompanying CD-ROM. (p. 18) If your system is not Windows, you can not use the Adjustment Pattern.
  • Seite 23 Adjusting the screen display (With digital connection) COOL ... Color tone bluer than standard MODE SELECT Menu • ..Color tone slightly bluer than standard STD ..Color tone standard setting • ..Color tone slightly redder than standard WARM .. Color tone redder than standard USER R-CONTRAST ..
  • Seite 24: Monitor Care And Repair

    LCD panel. (A soft cloth such inquire at the shop where you purchased the as gauze or that used for lens cleaning is suitable.) monitor or your nearest Sharp authorized Service Center. (Never attempt this CAUTION! replacement on your own.)
  • Seite 25: Product Specifications

    Specifications Product specifications Dimensions (W x D x H) (Units: mm) With long width screen: 395 x 213 x 427 With long heightscreen: 324 x 213 x 463 LCD display Weight 46 cm measured diagonally Approx. 8.9 kg Advanced Super-V and Anti Glare Low Reflection Display area only, approx.
  • Seite 26 Specifications Relevant signal timings (analog) Relevant signal timings (digital) Display mode Hsync Vsync Display mode Hsync Vsync Dot frequency Dot frequency 640x480 31.5kHz 60Hz 25.175MHz 640x480 31.5kHz 60Hz 25.175MHz VESA VESA 37.9kHz 72Hz 31.5MHz 37.9kHz 72Hz 31.5MHz 37.5kHz 75Hz 31.5MHz 37.5kHz 75Hz 31.5MHz...
  • Seite 27: Power Management

    Specifications The DVI-I input connector pin DDC (Plug & Play) This monitor supports the VESA DDC (Display Data Channel) standard. DDC is a signal standard for carrying out Plug & Play functions on the monitor or PC. It transfers informa- tion such as degree of resolution between the moni- tor and PC.
  • Seite 28: Installing Set-Up Information And The Icc Profile (For Windows)

    Installing set-up information and the ICC profile (For Windows) Depending on the computer or OS, it may be neces- For Windows98 sary to use the computer to operate the installation Installing monitor set-up information into Windows98, of monitor set-up information etc. If so, follow the and setting the monitor's ICC profile as a predeter- steps below to install the monitor set-up information.
  • Seite 29 Installing set-up information and the ICC profile (For Windows) For Windows2000 For WindowsMe Installing monitor set-up information into Win- Installing monitor set-up information into dows2000, and setting the monitor's ICC profile as a WindowsMe, and setting the monitor's ICC profile as predetermined value.
  • Seite 30 Installing set-up information and the ICC profile (For Windows) Installing the ICC profile For WindowsXP Installing the monitor’s ICC profile. (If the set-up Installing monitor set-up information into WindowsXP, information has already been installed, so too has and setting the monitor's ICC profile as a predeter- the profile, and there is no need to install it.) mined value.
  • Seite 31: Information About The Colorsync Profile (For Macos)

    Information about the ColorSync profile (For MacOS) About the ColorSync profile ColorSync is the Apple Corporation's color manage- ment system and is a function that enables color resolution to be realized when used with a compat- ible application. A ColorSync profile describes the color characteristics of the LCD monitor.
  • Seite 32: Instructions For Attaching A Vesa Compliant Arm

    Instructions for attaching a VESA compliant arm An arm or stand based on the VESA standard Notes: (purchased separately) can be attached to the The stand is specially made for use with this monitor. monitor. Once having removed the stand, never Procurement of the arm or stand is at the custom- attempt to attach it to another device.
  • Seite 33: Information About The Pivot Software (Long Height/Width Display)

    Information about the Pivot Software (Long height/width display) When rotating the display, change the display Switching display direction orientation using Pivot Software. For Windows Compatible operating systems (OS) for the Pivot Choose [Rotate] by right clicking the mouse, or left Software (trial version) that comes with the monitor: clicking on at the lower right of the screen.
  • Seite 35 Inhaltsverzeichnis Hinweis für Benutzer in den USA ............36 TCO'95/'99 .
  • Seite 36: Hinweis Für Benutzer In Den Usa

    SHARP ELECTRONICS CORPORATION Sharp Plaza, Mahwah, New Jersey 07430 TEL :1-800-BE-SHARP * Als ENERGY STAR-Partner bestätigt SHARP, daß dieses Produkt die Richtlinien des ENERGY STAR für sparsamen Verbrauch einhält. In diesem Produkt wird bleihaltiger Lötzinn und eine Leuchtstofflampe mit einem geringen Quecksilberanteil verwendet.
  • Seite 37: Tco'95/'99

    LL-T1820-B LL-T1820-H Herzlichen Glückwunsch! Sie haben gerade ein Gerät mit TCO’95- oder TCO’99-Zulassung und entsprechender Kennzeichnung erworben! Damit haben Sie sich für ein Produkt entschieden, das für professionelle Anwendungen konzipiert ist. Mit Ihrem Kauf leisten Sie auch einen Beitrag zum Umweltschutz und zur Weiterentwicklung von umweltfreundlichen Elektronikprodukten.
  • Seite 38 Umweltanforderungen Flammschutzmittel Flammschutzmittel kommen in Platinen, Kabeln, Drähten, Verkleidungen und Gehäusen vor. Sie sollen die Ausbreitung eines Brandes verhindern oder zumindest verzögern. Bis zu 30% der Kunststoffteile in einem Computergehäuse können aus Flammschutzsubstanzen bestehen. Die meisten Flammschutzmittel enthalten Brom oder Chlorid und lassen sich in chemischer Hinsicht mit einer anderen Gruppe umweltschädigender Stoffe, den PCBs, in Verbindung bringen.
  • Seite 39: Hinweis Für Benutzer In Europa

    Hinweis für Benutzer in Europa This equipment complies with the requirements of Directives 89/336/EEC and 73/23/EEC as amended by 93/68/EEC. Dieses Gerät entspricht den Anforderungen der EG-Richtlinien 89/336/EWG und 73/23/EWG mit Änderung 93/68/EWG. Ce matériel répond aux exigences contenues dans les directives 89/336/CEE et 73/23/CEE modifiées par la directive 93/68/CEE.
  • Seite 40: Hinweis Für Benutzer In Gb

    Hinweis für Benutzer in Australien Serviceanfragen Wenden Sie sich an Ihren Händler, falls Reparaturen anfallen, oder setzen Sie sich mit Sharp Corporation of Australia unter 1 300 13 50 22 in Verbindung, um die Adresse des nächstgelegenen autorisierten Sharp-Kundendienstzentrums zu erfragen.
  • Seite 41: Tips Und Sicherheitsvorkehrungen

    Der Monitor darf niemals mit harten Verlängerungskabels kann aufgrund von Gegenständen abgerieben oder berührt werden. Überhitzung zu einem Brand führen. Wir bitten um Ihr Verständnis, daß Sharp Corporation über die gesetzlich anerkannte Checkliste für Monitor und Zubehör Leistungshaftung hinaus keine Haftung für Fehler Prüfen Sie den Kartoninhalt auf Vollständigkeit.
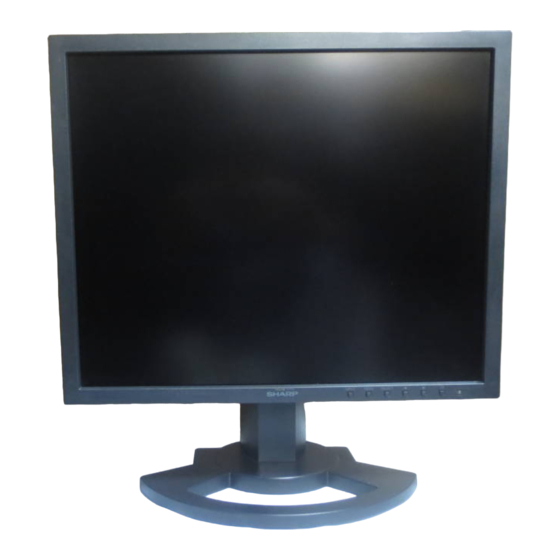
  • Seite 42: Produktbeschreibung

    Produktbeschreibung 1. Taste INPUT ....... Für die Umschaltung zwischen den Signaleingangsanschlüssen. (Eingangsanschluss 1 ↔ Eingangsanschluss 2) 2. Taste MENU ....... Mit dieser Taste öffnen, wählen und schließen Sie das OSD (On screen Display) -Menü. 3. Taste SELECT ......Mit dieser Taste wählen Sie die Menüoptionen aus, wenn das OSD-Menü angezeigt wird.
  • Seite 43: Höheneinstellung, Winkeleinstellung, Drehung (Vertikal/Horizontal)

    Höheneinstellung, Winkeleinstellung, Drehung (Vertikal/Horizontal) ACHTUNG: Drehung (Vertikal/Horizontal) Wenn Sie mit der Hand auf den LCD-Bildschirm Das Display kann vertikal oder horizontal gedreht drücken, kann dieser beschädigt werden. werden, um der Wiedergabe zu entsprechen. Vorsichtig vorgehen und darauf achten, dass die Vor dem Drehen sollte das Display in die oberste Finger nicht eingeklemmt werden.
  • Seite 44: Anschließen Des Monitors Und Ein- Und Ausschalten Des Monitors

    Anschließen des Monitors und Ein- und Ausschalten des Monitors Bevor Sie den Monitor anschließen, müssen Sie 3. Die Abdeckung wieder anbringen. den Monitor und den Computer ausschalten. Vorsichtig vorgehen, damit die Kabel nicht Achten Sie darauf, daß Sie das Kabel nicht eingeklemmt werden.
  • Seite 45: Verbinden Des Monitors Mit Einem Computer

    Anschließen des Monitors und Ein- und Ausschalten des Monitors Digitaler RGB-Anschluss Verbinden des Monitors mit einem Das mitgelieferte Digital-Signalkabel am digitalen Computer RGB-Ausgangsanschluss des Computers anschliessen. Anschliessen des Monitors an einen Computer unter Für einen digitalen RGB-Anschluss ist der Verwendung des mitgelieferten Signalkabels. Monitor mit einem Eingang für den Anschluss an Dieser Monitor ist mit zwei Eingangsanschlüssen einen Computer mit einem DVI-kompatiblen...
  • Seite 46: Anschließen Des Monitors An Eine Stromquelle

    Anschließen des Monitors und Ein- und Ausschalten des Monitors 4. Die Netzschalter drücken und den Monitor Anschließen eines USB-Geräts ausschalten. Damit sind die Einstellungen beendet. Dieser Monitor ist mit einem aktiven USB-Standard- Steckanschluss (Rev. 1.1) ausgestattet. Anschließen des Monitors an eine Stromquelle Nachgeschaltet (2 Anschlüsse) Jeder dieser Ports kann für den Anschluss an ein...
  • Seite 47: Einschalten Des Monitors

    Anschließen des Monitors und Ein- und Ausschalten des Monitors Einschalten des Monitors Umschalten zwischen Eingangsanschlüssen 1. Den Monitor mit dem Hauptschalter einschalten. Mit der Taste INPUT schalten Sie die Signaleingangsanschlüsse um. Eingangsanschluss 1 Eingangsanschluss 2 Hauptschalter INPUT INPUT-1 INPUT-2 < >...
  • Seite 48: Ausschalten Des Monitors

    Anschließen des Monitors und Ein- und Ausschalten des Monitors Ausschalten des Monitors 1. Schalten Sie den Computer aus. 2. Drücken Sie den Netzschalter am Monitor. Die Betriebsanzeige erlischt. Schalten Sie den Netzschalter betätigen Computer aus Wenn der Monitor längere Zeit nicht verwendet wird, sollten Sie den Monitor mit dem Hauptschalter ausschalten und den Netzstecker von der Steckdose abtrennen.
  • Seite 49: Einstellen Der Bildschirmanzeige

    Einstellen der Bildschirmanzeige Analogsignal Einstellsperrfunktion 1. Führen Sie zunächst eine automatische Einstellung durch. (S. 50) Wenn Sie die Steuertasten deaktivieren (d. h. die 2. Führen Sie bei Bedarf eine manuelle Einstellung Sperre setzen), können keine Werte eingestellt durch. (S. 51) werden.
  • Seite 50: Einstellen Der Bildschirmanzeige (Bei Analogem Anschluss)

    Einstellen der Bildschirmanzeige (bei analogem Anschluss) Einstellen Automatische Bildschirmeinstellung 1. Drücken Sie die Taste MENU. Die Optionen im Menü ADJUSTMENT können auto- Das Menü ADJUSTMENT wird angezeigt. matisch eingestellt werden (CLOCK, PHASE, H-POS, V-POS). Hinweis: Wenn Sie den Monitor zum ersten Mal einrichten oder eine Komponente des bestehenden Systems geändert haben, führen Sie vor der Verwendung eine automatische Bildschirmeinstellung durch.
  • Seite 51: Manuelle Bildschirmeinstellung

    Einstellen der Bildschirmanzeige bei analogem Anschluss Menü ADJUSTMENT Manuelle Bildschirmeinstellung Die Einstellungen können über das OSD-Menü vorgenommen werden. OSD für die Einstellung Wenn Sie mit Windows arbeiten, öffnen Sie das Einstellmuster auf der mitgelieferten CD-ROM. (S. 50) Falls Ihr System nicht unter Windows arbeitet, MANUAL: Einzelne Menüoptionen werden manuell können Sie das Einstellmuster nicht verwenden.
  • Seite 52 Einstellen der Bildschirmanzeige bei analogem Anschluss Menü GAIN CONTROL COLOR CONTROL Menu Hinweise: MANUAL: Einzelne Menüoptionen werden manuell So wählen Sie eine Menüoption: Taste SELECT eingestellt. So gelangen Sie zum nächsten Menü: Taste MENU AUTO: Alle Menüoptionen werden mit der Funktion Auto Gain Control* automatisch COLOR MODE eingestellt.
  • Seite 53 Einstellen der Bildschirmanzeige bei analogem Anschluss Wählen Sie [R-CONTRAST], [G-CONTRAST] und Menü MODE SELECT [B-CONTRAST] mit der Taste SELECT aus. Nach Abschluß der Einstellung: Taste MENU COOL ..Farbton mit stärkerem Blaustich als normal • ..Farbton mit leicht stärkerem Blaustich als normal STD ..
  • Seite 54: Einstellen Der Bildschirmanzeige (Bei Digitalem Anschluss)

    Einstellen der Bildschirmanzeige (bei digitalem Anschluss) COLOR CONTROL Menu Die Einstellungen können über das OSD-Menü vorgenommen werden. OSD für die Einstellung Wenn Sie mit Windows arbeiten, öffnen Sie das Einstellmuster auf der mitgelieferten CD-ROM. (S. 50) Falls Ihr System nicht unter Windows arbeitet, können Sie das Einstellmuster nicht verwenden.
  • Seite 55 Einstellen der Bildschirmanzeige (bei digitalem Anschluss) Wählen Sie [R-CONTRAST], [G-CONTRAST] und Menü MODE SELECT [B-CONTRAST] mit der Taste SELECT aus. Nach Abschluß der Einstellung: Taste MENU COOL ..Farbton mit stärkerem Blaustich als normal • ..Farbton mit leicht stärkerem Blaustich als normal STD ..
  • Seite 56: Pflege Des Monitors Und Reparaturen

    Wenden Sie sich an das Geschäft, in dem Sie Tuch vorsichtig ab. (Es eignet sich ein weiches Tuch, den Monitor gekauft haben, oder an das beispielsweise ein Gaze-Tuch, das auch zum Reinigen nächste autorisierte Sharp-Kundendienst- von Linsen verwendet wird. zentrum. (Nehmen Sie diesen Austausch niemals selber vor.)
  • Seite 57: Produktspezifikationen

    Technische Daten Produktspezifikationen Abmessungen (B x T x H) (Einheiten: mm) Bei vertikaler Anzeige: 395 x 213 x 427 LCD-Anzeige Bei horizontaler Anzeige: 324 x 213 x 463 46 cm diagonal gemessen Gewicht TFT LCD-Modul mit erweiterter Super-V und ca. 8,9 kg Antireflexbeschichtung Nur Anzeigebereich, ca.
  • Seite 58 Technische Daten Relevante Signaltakte (analog) Relevante Signaltakte (digital) Anzeigemodus Anzeigemodus Vsync Vsync Hsync Punktfrequenz Hsync Punktfrequenz 640x480 31.5kHz 60Hz 25.175MHz 640x480 31.5kHz 60Hz 25.175MHz VESA VESA 37.9kHz 72Hz 31.5MHz 37.9kHz 72Hz 31.5MHz 37.5kHz 75Hz 31.5MHz 37.5kHz 75Hz 31.5MHz 800x600 37.9kHz 60Hz 40.0MHz 800x600...
  • Seite 59: Pinbelegung Des Dvi-I-Eingangsanschluß

    Technische Daten Pinbelegung des DVI-I-Eingangsanschluß DDC (Plug & Play) Dieser Monitor unterstützt den Standard VESA DDC (Display Data Channel). DDC ist ein Signalstandard zum Ausführen von Plug & Play-Funktionen am Monitor oder PC. Er überträgt Informationen, beispielsweise den Auflösungsgrad, zwischen dem Monitor und dem PC. Sie können diese Funktion anwenden, wenn Ihr PC DDC- Funktion Nr.
  • Seite 60: Installieren Der Setup-Informationen Und Des Icc-Profils (Für Windows)

    Installieren der Setup-Informationen und des ICC-Profils (Für Windows) Je nach dem verwendeten Computer oder Betriebs- Für Windows 98 system muß die Installation der Monitor-Setup- Installieren der Monitor-Setup-Informationen unter Informationen usw. eventuell über den Computer Windows 98 und Festlegen des Monitor-ICC-Profils erfolgen.
  • Seite 61 Installieren der Setup-Informationen und des ICC-Profils (Für Windows) Für Windows 2000 Für Windows Me Installieren der Monitor-Setup-Informationen unter Installieren der Monitor-Setup-Informationen unter Windows 2000 und Festlegen des Monitor-ICC- Windows Me und Festlegen des Monitor-ICC-Profils Profils als vorbestimmter Wert. Die in den als vorbestimmter Wert.
  • Seite 62: Installieren Des Icc-Profils

    Installieren der Setup-Informationen und des ICC-Profils (Für Windows) Für Windows XP Installieren des ICC-Profils Installieren des Monitor-ICC-Profils (Wenn die Setup- Installieren der Monitor-Setup-Informationen unter Informationen bereits installiert wurden, ist auch das WindowsXP und Festlegen des Monitor-ICC-Profils Profil bereits installiert. Es braucht dann nicht mehr als vorbestimmter Wert.
  • Seite 63: Informationen Zum Profil Colorsync (Für Macos)

    Informationen zum Profil ColorSync (Für MacOS) Informationen zum Profil ColorSync ColorSync ist das Farbverwaltungssystem der Apple Corporation. Damit erkennt das System die Farbauflösung bei Verwendung mit einer kompatiblen Anwendung. Ein ColorSync-Profil beschreibt die Farbeigenschaften des LCD-Monitors. Hinweise: Das ColorSync-Profil dieses Monitors kann zusammen mit MacOS8.5 oder höher eingesetzt werden.
  • Seite 64: Anweisungen Zum Anbringen Eines Vesa-Kompatiblen Monitorarms

    Anweisungen zum Anbringen eines VESA- kompatiblen Monitorarms Ein Arm oder Fuß basierend auf dem VESA-Stan- Hinweise: dard (separat erhältlich) kann am Monitor angebracht Der Fuß ist nur für diesen Monitor bestimmt, werden. verwenden Sie ihn für keine anderen Geräte oder Der Arm oder Fuß...
  • Seite 65: Informationen Zur Pivot-Software (Vertikale Oder Horizontale Anzeige)

    Informationen zur Pivot-Software (vertikale oder horizontale Anzeige) Umschalten der Display-Ausrichtung Beim Drehen sollte die Ausrichtung des Displays unter Verwendung der Pivot-Software geändert werden. Für Windows Wählen Sie [Rotate] durch das Anklicken mit dem Kompatible Betriebssysteme (OS) für die Pivot- rechten Mausteil oder klicken Sie auf der unteren Software (Probeversion), die mit dem Monitor rechten Seite der Anzeige an.
  • Seite 67 Table des matières Avis aux utilisateurs américains ............68 TCO'95/'99 .
  • Seite 68: Avis Aux Utilisateurs Américains

    Sharp Plaza, Mahwah, New Jersey 07430 TEL :1-800-BE-SHARP * En sa qualité de partenaire du programme ENERGY STAR, SHARP a fait en sorte que ce produit réponde aux directives ENERGY STAR en matière d'économie d'énergie. Ce produit contient des soudures étain-plomb ainsi qu'une lampe fluorescente contenant une petite quantité...
  • Seite 69: Tco'95/'99

    LL-T1820-B LL-T1820-H Félicitations ! Vous venez d’acquérir un produit agréé et estampillé TCO’95 ou TCO’99 ! Votre choix vous permet de disposer désormais d’un produit développé pour être utilisé dans un environnement professionnel. Votre achat a également contribué à réduire les nuisances pesant sur l’environnement et à favoriser le développement de produits électroniques adaptés à...
  • Seite 70 Exigences environnementales Retardateurs de flamme Les retardateurs de flamme sont présents dans les cartes à circuits imprimés, les câbles , les fils, les boîtiers et enceintes closes. Leur objectif est de prévenir, ou tout au moins de retarder, la propagation du feu. Jusqu’à...
  • Seite 71: Avis Aux Utilisateurs Européens

    Avis aux utilisateurs européens This equipment complies with the requirements of Directives 89/336/EEC and 73/23/EEC as amended by 93/68/EEC. Dieses Gerät entspricht den Anforderungen der EG-Richtlinien 89/336/EWG und 73/23/EWG mit Änderung 93/68/EWG. Ce matériel répond aux exigences contenues dans les directives 89/336/CEE et 73/23/CEE modifiées par la directive 93/68/CEE.
  • Seite 72: Avis Aux Utilisateurs Britanniques

    Avis aux utilisateurs australiens Demandes d'intervention Si une intervention sur l'appareil s'avère nécessaire, veuillez contacter votre revendeur ou Sharp Corporation Australia au numéro 1 300 13 50 22, qui vous communiquera les coordonnées du centre d'entretien agréé Sharp le plus proche de votre domicile.
  • Seite 73: Astuces Et Mesures De Sécurité

    Ne pas faire subir de coups, légers ou forts au moniteur avec des objets durs. Moniteur et liste des accessoires Il faut savoir que la société Sharp décline toute S’assurer que les éléments suivants sont bien responsabilité en cas d’erreur survenue durant présents dans l’emballage:...
  • Seite 74: Description Du Produit

    Description du produit 1. Bouton INPUT ......Pour passer d’une borne d’entrée du signal à l’autre. (Borne d’entrée 1 ↔ Borne d’entrée 2) 2. Bouton MENU ......Ce bouton est utilisé pour faire apparaître, sélectionner et refermer le menu OSD (On Screen Display). 3.
  • Seite 75: Réglage De La Hauteur, De L'inclinaison Et De L'orientation (Hauteur/Largeur Inversées)

    Réglage de la hauteur, de l’inclinaison et de l’orientation (hauteur/largeur inversées) Attention : Orientation (largeur/hauteur inversées) Une pression des mains sur l’écran LCD peut L’écran peut être orienté dans le sens de la longueur ou provoquer un endommagement. de la largeur, selon le contenu affiché. prendre garde de ne pas se coincer les doigts.
  • Seite 76: Raccordement, Activation Et Désactivation Du Moniteur

    Raccordement, activation et désactivation du moniteur Attention : 3. Remettre le cache en place. Lors du raccordement, s’assurer que Attention de ne pas coincer le câble. l’alimentation tant du moniteur que de l’ordinateur est désactivée. Ne pas courber le câble de manière excessive ni y ajouter de rallonge car cela peut provoquer un dysfonctionnement.
  • Seite 77: Raccordement Du Moniteur À Un Ordinateur

    Raccordement, activation et désactivation du moniteur Raccordement numérique RVB Raccordement du moniteur à un Au moyen du câble de signal numérique fourni ordinateur comme accessoire, effectuer le raccordement avec Raccordement du moniteur à un ordinateur en la borne de sortie numérique RVB de l’ordinateur. utilisant le câble de signal fourni comme accessoire.
  • Seite 78: Raccordement Du Moniteur À Une Source D'alimentation

    Raccordement, activation et désactivation du moniteur 4. Presser le bouton d’alimentation, puis mettre le Connexion d’un appareil USB moniteur hors tension. Cette opération clôt la configuration. Ce moniteur est équipé d’un hub USB auto-alimenté standard (version 1.1). Raccordement du moniteur à une source En aval (2 ports) d’alimentation Chacun de ces ports permet de raccorder un...
  • Seite 79: Activation De L'alimentation

    Raccordement, activation et désactivation du moniteur Inversion entre les bornes d’entrée Activation de l’alimentation Utiliser le bouton INPUT pour basculer entre les 1. Activer la source d’alimentation principale du bornes d’entrée. moniteur. Borne d’entrée 1 Borne d’entrée 2 Interrupteur principal INPUT INPUT-1 INPUT-2...
  • Seite 80: Désactivation De L'alimentation

    Raccordement, activation et désactivation du moniteur Désactivation de l’alimentation 1. Mettre l’ordinateur hors tension. 2. Presser le bouton d’alimentation du moniteur. La diode d’alimentation s'éteind. Presser le bouton Mettre l’ordinateur d’alimentation hors tension Si le moniteur devait ne pas être utilisé pendant une période de temps prolongée, arrêter l’alimentation principale du moniteur, puis débrancher la prise d’alimentation de la prise murale.
  • Seite 81: Réglage De L'image Au Moniteur

    Réglage de l’image au moniteur Pour le signal analogique Fonction de verrouillage des réglages 1. Effectuer tout d’abord un réglage automatique. (p. 82) En désactivant les boutons de commande (c’est-à- 2. Effectuer au besoin un réglage manuel. (p. 83) dire en les verrouillant), toute tentative de Pour le signal numérique modification des valeurs sera vaine.
  • Seite 82: Réglage De L'image Du Moniteur (Avec Un Raccordement Analogique)

    Réglage de l’image du moniteur (avec un raccordement analogique) Comment procéder aux réglages Réglage automatique de l'image 1. Presser le bouton MENU. Les options CLOCK,PHASE,H-POS,V-POS du menu Le menu ADJUSTMENT s'affiche. ADJUSTMENT peuvent être ajustées automatiquement. Remarque : Lors de la toute première installation du moniteur, ou après avoir changé...
  • Seite 83: Réglage Manuel De L'image

    Réglage de l’image du moniteur (avec un raccordement analogique) Menu ADJUSTMENT Réglage manuel de l’image Des réglages peuvent être effectués au moyen du menu du moniteur actif (OSD) proposé. Affichage à l’écran pour le réglage Si l’on se trouve sous un environnement Windows, ouvrir le Modèle de réglage se trouvant sur le CD- ROM.
  • Seite 84 Réglage de l’image du moniteur (avec un raccordement analogique) Menu GAIN CONTROL Menu COLOR CONTROL MANUEL :Les options individuelles du menu sont Remarques : réglées manuellement. Pour choisir une option du menu : Bouton SELECT AUTO : Chaque option du menu est automatique- Pour passer au menu suivant : Bouton MENU ment réglée via la fonction de Auto Gain Control*.
  • Seite 85 Réglage de l’image du moniteur (avec un raccordement analogique) Le fait de sélectionner [USER], permettra OSD H-POSITION (positionnement horizontal OSD) d'afficher les valeurs de réglage pour [R- Le positionnement de l’affichage OSD peut être CONTRAST], [G-CONTRAST] et [B-CON- modifié vers la gauche et vers la droite. TRAST], afin de pouvoir effectuer des réglages (Boutons fins.
  • Seite 86: Réglage De L'image Du Moniteur (Avec Un Raccordement Numérique)

    Réglage de l'image du moniteur (avec un raccordement numérique) Menu COLOR CONTROL Des réglages peuvent être effectués au moyen du menu interactif (OSD) proposé. Affichage à l’écran pour le réglage Si l’on se trouve sous un environnement Windows, ouvrir le Modèle de réglage se trouvant sur le CD- ROM.
  • Seite 87 Réglage de l’image du moniteur (avec un raccordement numérique) Le fait de sélectionner [USER], permettra OSD H-POSITION (positionnement horizontal OSD) d'afficher les valeurs de réglage pour [R- Le positionnement de l’affichage OSD peut être modifié vers la gauche et vers la droite. CONTRAST], [G-CONTRAST] et [B-CON- (Boutons TRAST], afin de pouvoir effectuer des réglages...
  • Seite 88: Entretien Et Réparation Du Moniteur

    Utiliser un chiffon doux et sec pour éliminer les pous- rétroéclairage. Se renseigner auprès du sières de la surface de la dalle du moniteur. (Un revendeur ou du mainteneur agréé Sharp le chiffon doux tel qu’une gaze utilisée pour le nettoyage plus proche. (Ne jamais tenter d’effectuer ce des lentilles est idéal).
  • Seite 89: Caractéristiques Techniques

    Caractéristiques techniques Caractéristiques techniques du produit Dimensions (L x P x H) (Unités : mm) Avec l’écran dans le sens de la largeur: Moniteur LCD 395 x 213 x 427 46 cm en diagonale Avec l’écran dans le sens de la hauteur: Module TFT à...
  • Seite 90 Caractéristiques techniques Fréquences des signaux (analogique) Fréquences des signaux (numérique) Bande Bande Mode affichage Mode affichage Hsync Vsync Hsync Vsync passante passante 640x480 31.5kHz 60Hz 25.175MHz 640x480 31.5kHz 60Hz 25.175MHz VESA VESA 37.9kHz 72Hz 31.5MHz 37.9kHz 72Hz 31.5MHz 37.5kHz 75Hz 31.5MHz 37.5kHz 75Hz...
  • Seite 91: Gestion De L'alimentation

    Caractéristiques techniques La broche du connecteur d’entrée DVI-I DDC (Plug & Play) Ce moniteur supporte la norme VESA DDC (Display Data Channel). Le DDC est une norme de signal servant à exécuter les fonctions Plug & Play sur un moniteur ou un ordinateur.
  • Seite 92: Installation Des Fichiers Relatifs Au Paramétrage Du Moniteur Et Au Profil Icc (Pour Windows)

    Installation des fichiers relatifs au paramétrage du moniteur et au profil ICC (Pour Windows) En fonction du type d’ordinateur ou du système Pour Windows 98 d’exploitation, il peut parfois s’avérer nécessaire Installation des fichiers relatifs au paramétrage du d’utiliser l’ordinateur pour consulter les paramètres moniteur sous Windows 98, et au réglage du profil relatifs à...
  • Seite 93 Installation des fichiers relatifs au paramétrage du moniteur et au profil ICC (Pour Windows) Pour Windows 2000 Pour Windows Me Installation des fichiers relatifs au paramétrage du Installation des fichiers relatifs au paramétrage du moniteur sous Windows 2000, et au réglage du profil moniteur sous Windows Me, et au réglage du profil ICC du moniteur en tant que valeur par défaut.
  • Seite 94 Installation des fichiers relatifs au paramétrage du moniteur et au profil ICC (Pour Windows) Installation du profile ICC Pour Windows XP Installation du profile ICC du moniteur (Si Installation des fichiers relatifs au paramétrage du l’information relative à l’installation a déjà été moniteur sous Windows XP, et au réglage du profil installée, alors le profile l’a été...
  • Seite 95: Informations Sur Le Profil Colorsync (Pour Macos)

    Informations sur le profil ColorSync (Pour MacOS) A propos du profile ColorSync ColorSync est le système de gestion des couleurs de Apple Corporation et est une fonction qui permet de d’optimiser l’affichage des couleurs lors d’une utilisation avec une application compatible. Un profil ColorSync décrit les caractéristiques de couleur du moniteur LCD.
  • Seite 96: Instructions Relatives À L'installation D'un Bras Conforme Vesa

    Instructions relatives à l’installation d’un bras conforme VESA Un bras ou un support conforme à la norme VESA (à Remarques : acheter séparément) peut servir de support au Le support est conçu spécifiquement pour ce moniteur. moniteur, ne pas l'utiliser pour un autre L’acquisition du bras ou du support est laissée à...
  • Seite 97: Informations Sur Le Logiciel Pivot (Écran Dans Le Sens De La Hauteur/Largeur)

    Informations sur le logiciel Pivot (écran dans le sens de la hauteur/largeur) En cas de rotation de l’écran, changer le sens de l’image Changer le sens de l’image au moyen du logiciel Pivot. Pour Windows Systèmes d’exploitation (OS) compatibles pour le Choisir [Rotate] en cliquant avec le bouton droit, ou logiciel Pivot (version de démonstration) fourni avec avec le bouton gauche sur...
  • Seite 99 Indice Avviso per gli utenti negli the USA ........... . . 100 TCO '95/ '99 .
  • Seite 100: Avviso Per Gli Utenti Negli The Usa

    Sharp Plaza, Mahwah, New Jersey 07430 TEL :1-800-BE-SHARP * Nella sua qualità di partner dell'ENERGY STAR, la SHARP ha accertato che questo prodotto soddisfa le esigenze poste dalle direttive ENERGY STAR per la gestione efficiente dell'energia. Questo prodotto utilizza una lega per saldatura allo stagno-piombo ed una lampada fluorescente conte- nente una piccola quantità...
  • Seite 101: Tco '95/ '99

    LL-T1820-B LL-T1820-H Congratulazioni! Lei ha appena acquistato un prodotto riconosciuto e approvato con il marchio TCO’ 95 o TCO’ 99! La Sua scelta ci ha permesso di fornirle un prodotto sviluppato per l’uso professionale. Il Suo acquisto contribuisce anche a ridurre il carico sull’ambiente e ancor più incoraggiare lo sviluppo di prodotti elettronici adatti alle esigenze per la salvaguardia dell’ambiente.
  • Seite 102 Requisiti ambientali Additivi ignifughi Gli additivi ignifughi sono presenti in circuiti stampati, cavi, fili, rivestimenti e alloggiamenti. Il loro scopo consiste nel prevenire o almeno ritardare l’espandersi delle fiamme. Fino al 30% dei materiali plastici di cui sono formati gli alloggiamenti dei computer è costituito da additivi ignifughi. La maggior parte degli additivi contiene bromo e cloruro, e quegli additivi ignifughi sono chimicamente collegati a un altro gruppo di sostanze altamente tossiche e nocive per l’ambiente, i PCB.
  • Seite 103: Avviso Per Gli Utenti In Europa

    Avviso per gli utenti in Europa This equipment complies with the requirements of Directives 89/336/EEC and 73/23/EEC as amended by 93/68/EEC. Dieses Gerät entspricht den Anforderungen der EG-Richtlinien 89/336/EWG und 73/23/EWG mit Änderung 93/68/EWG. Ce matériel répond aux exigences contenues dans les directives 89/336/CEE et 73/23/CEE modifiées par la directive 93/68/CEE.
  • Seite 104: Avviso Per Gli Utenti Nel Regno Unito

    Per il servizio di assistenza tecnica , qualora se ne presentasse la necessità, per favore mettetevi in contatto con il vostro rivenditore oppure con la Sharp Corporation of Australia sull'1 300 13 50 22 per farvi indirizzare al Centro del Servizio Tecnico Assistenza Clienti autorizzato più vicino a voi.
  • Seite 105: Suggerimenti E Precauzioni Per La Sicurezza

    Per favore abbiate comprensione per il fatto che la Sharp Corporation non si assume nessuna Lista di controllo del monitor e degli accessori responsabilità per errori fatti nell’uso da parte del Per favore controllate che la confezione contenga cliente o di terzi, né...
  • Seite 106: Descrizione Del Prodotto

    Descrizione del prodotto 1. Tasto INPUT ....... Per commutare tra i terminali di ingresso del segnale. (Terminale di ingresso 1 ↔ Terminale di ingresso 2) 2. Tasto MENU ....... Questo tasto si usa per visualizzare, selezionare e chiudere il menu OSD (On Screen Display).
  • Seite 107: Regolazione Dell'altezza, Regolazione Dell'angolazione, Rotazione (Larghezza/Altezza Lunga)

    Regolazione dell’altezza, regolazione dell’angolazione, rotazione (larghezza/altezza lunga) ATTENZIONE: Rotazione (larghezza/altezza lunga) La pressione con le mani sul pannello LCD può Lo schermo può essere ruotato per un’altezza lunga produrre dei danni. o larghezza per adattare il contenuto visualizzato. Fare attenzione a non rimanere con le dita Prima di ruotare, spostare lo schermo nella sua incastrate.
  • Seite 108: Collegamento Del Monitor Ed Accensione E Spegnimento Del Monitor

    Collegamento del monitor ed accensione e spegnimento del monitor ATTENZIONE: 3. Reinserire il coperchio. Quando eseguite i collegamenti, assicuratevi che Fare attenzione a che il cavo non resti incastrato. sia il monitor che il computer siano spenti. Fate attenzione a non piegare eccessivamente il cavo oppure nell'aggiungere dei cavi di prolunga, in quanto ciò...
  • Seite 109: Collegamento Del Monitor Ad Un Computer

    Collegamento del monitor ed accensione e spegnimento del monitor Collegamento RGB digitale Collegamento del monitor ad un computer Usando il cavo per segnale digitale, che è un accessorio, collegare usando il terminale d’uscita Per collegare il monitor a un computer usando il cavo RGB digitale del computer.
  • Seite 110: Collegamento Del Monitor Ad Una Sorgente Di Alimentazione Elettrica

    Collegamento del monitor ed accensione e spegnimento del monitor 4. Premere il tasto di alimentazione e spegnere il Collegare un dispositivo USB monitor. A questo punto l’impostazione è completata. Questo monitor è equipaggiato con un hub alimentato di standard USB (Rev. 1.1). Collegamento del monitor ad una Downstream (2 porte) sorgente di alimentazione elettrica...
  • Seite 111: Accensione

    Collegamento del monitor ed accensione e spegnimento del monitor Commutare tra i terminali di ingresso Accensione 1. Posizionate su acceso l’interruttore principale rete Utilizzate il pulsante INPUT per commutare tra i del monitor. terminali di ingresso del segnale. Interruttore principale rete INPUT INPUT-1 INPUT-2...
  • Seite 112: Spegnimento

    Collegamento del monitor ed accensione e spegnimento del monitor Spegnimento 1. Spegnete il computer. 2. Premete il tasto di alimentazione del monitor. Il LED di alimentazione si spegnerà. Spegnete il computer Premete il tasto di alimentazione Se si prevede di non usare il monitor per un periodo di tempo piuttosto lungo, spegnere lInterruttore principale rete del monitor, e rimuovere la spina dell’alimentazione principale dalla presa della rete...
  • Seite 113: Regolazione Della Visualizzazione Sullo Schermo

    Regolazione della visualizzazione sullo schermo Per il segnale analogico Funzione di blocco delle regolazioni 1. Prima di tutto eseguite una regolazione automatica. Disattivando i tasti di controllo (cioè settando il (p. 114) blocco) si impedirà ogni tentativo di cambiare i valori 2.
  • Seite 114: Regolazione Della Visualizzazione Sullo Schermo (Con Collegamento Analogico)

    Regolazione della visualizzazione sullo schermo (con collegamento analogico) Come eseguire la regolazione Regolazione automatica dello schermo 1. Premete il tasto MENU. Le opzioni nel menu ADJUSTMENT si possono Il menu ADJUSTMENT verrà visualizzato. regolare automaticamente (CLOCK, PHASE (FASE), H-POS V-POS). Nota: Quando impostate questo monitor per la prima volta oppure dopo aver cambiato un aspetto del...
  • Seite 115: Regolazione Manuale Dello Schermo

    Regolazione della visualizzazione sullo schermo (con collegamento analogico) Menu ADJUSTMENT Regolazione manuale dello schermo Le regolazioni si possono fare mediante il menu On Screen Display (OSD) fornito. On Screen Display per la regolazione Se usate Windows, aprite il monoscopio sul CD- ROM accluso.
  • Seite 116 Regolazione della visualizzazione sullo schermo (con collegamento analogico) Menu GAIN CONTROL Menu COLOR CONTLOR Note: MANUAL: le singole opzioni del menu vengono Per selezionare un'opzione di menu: Tasto SELECT regolate manualmente. Per passare al menu successivo: Tasto MENU AUTO: ogni opzione del menu viene regolata automaticamente, utilizzando la funzione COLOR MODE Auto Gain Control*.
  • Seite 117 Regolazione della visualizzazione sullo schermo (con collegamento analogico) Usate il tasto SELECT per selezionare [R- OSD H-POSITION (posizione orizzontale CONTRAST], [G-CONTRAST] e [B-CONTRAST]. dell'OSD) Quando la regolazione è stata completata: La posizione del display dell'OSD si può spostare Tasto MENU verso sinistra e verso destra.
  • Seite 118: Regolazione Della Visualizzazione Sullo Schermo (Con Collegamento Digitale)

    Regolazione della visualizzazione sullo schermo (con collegamento digitale) Le regolazioni si possono fare mediante il menu On Menu COLOR CONTLOR Screen Display (OSD) fornito. On Screen Display per la regolazione Visualizzate un'immagine che rende l'intero schermo molto luminoso. Se usate Windows, potete aprire ed utilizzare il monoscopio sul CD-ROM accluso.
  • Seite 119 Regolazione della visualizzazione sullo schermo (con collegamento digitale) Selezionando USER si visualizzano i valori delle OSD H-POSITION (posizione orizzontale impostazioni per [R-CONTRAST], [G- dell'OSD) CONTRAST] e [B-CONTRAST], allo scopo di La posizione del display dell'OSD si può spostare eseguire delle regolazioni fini. verso sinistra e verso destra.
  • Seite 120: Cura E Riparazione Del Monitor

    LCD. (E’ adatto un panno morbido come la garza oppure dal Centro del Servizio Tecnico Assi- oppure quello che si usa per pulire le lenti.) stenza Clienti della Sharp più vicino a voi. (Non tentate mai di eseguire la sostituzione da voi.) ATTENZIONE!
  • Seite 121: Specifiche Del Prodotto

    Specifiche Specifiche del prodotto Dimensioni (L x P x A)(Unità: mm) Con schermata di larghezza lunga: 395x213x427 Display LCD Con schermata di altezza lunga: 324x213x463 46 cm misurati diagonalmente Peso Modulo TFT LCD Super-V ed anti abbagliamento Circa 8,9 kg a bassa riflessione perfezionato Area del display soltanto, circa 5,7kg Risoluzione (max.)
  • Seite 122 Specifiche Sincronizzazioni rilevanti del segnale Sincronizzazioni rilevanti del segnale (analogico) (digitale) Modalità di Modalità di Sincronismo Sincronismo Frequenza Sincronismo Sincronismo Frequenza visualizzazione orizzontale verticale punti visualizzazione orizzontale verticale punti 640x480 31.5kHz 60Hz 25.175MHz VESA 640x480 31.5kHz 60Hz 25.175MHz VESA 37.9kHz 72Hz 31.5MHz 37.9kHz...
  • Seite 123 Specifiche I pin del connettore di ingresso del segnale DDC (Plug & Play) digitale / analgico Questo monitor supporta lo standard VESA DDC (Display Data Channel). DDC è uno standard per i segnali per eseguire le funzioni Plug & Play sul monitor o sul PC. Esso trasferisce delle informazioni, come il grado di risoluzione, tra il monitor ed il PC.
  • Seite 124: Installazione Delle Informazioni Per Il Setup E Del Profilo Icc (Per Windows)

    Installazione delle informazioni per il setup e del profilo ICC (Per Windows) A seconda del computer oppure del sistema Per Windows98 operativo può essere necessario usare il computer Installazione delle informazioni di setup del monitor per eseguire l'installazione delle informazioni di setup in Windows98, e impostazione del profilo ICC del del monitor, ecc.
  • Seite 125 Installazione delle informazioni per il setup e del profilo ICC (Per Windows) Per Windows2000 Per WindowsMe Installazione delle imformazioni di setup del monitor SInstallazione delle informazioni di setup del monitor in Windows2000, e impostazione del profilo ICC del in WindowsMe, e impostazione del profilo ICC del monitor come valore predeterminato.
  • Seite 126 Installazione delle informazioni per il setup e del profilo ICC (Per Windows) Installazione del profilo ICC Per WindowsXP Installazione del profilo ICC del monitor. (Se le informazioni di setup sono già installate, lo è anche il Installazione delle imformazioni di setup del monitor profilo e non occorre installarlo.) in WindowsXP, e impostazione del profilo ICC del In questa spiegazione si parte dall'ipotesi che l'unità...
  • Seite 127: Informazioni Sul Profilo Colorsync (Per Macos)

    Informazioni sul profilo ColorSync (Per MacOS) Il profilo ColorSync ColorSync è il sistema di gestione del colore della Apple Corporation ed è una funzione che consente di realizzare la risoluzione del colore, quando lo si usa con un'applicazione compatibile. Un profilo ColorSync descrive le caratteristiche cromatiche del monitor LCD.
  • Seite 128: Istruzioni Per Collegare Un Braccio Compatibile Vesa

    Istruzioni per collegare un braccio compatibile VESA E’ possibile collegare al monitor un braccio oppure Note: un supporto basati sullo standard VESA (acquistati Il supporto è progettato appositamente per separatamente). questo monitor, non usatelo per altri apparecchi e L’acquisto del braccio oppure del supporto è a discre- scopi.
  • Seite 129: Informazioni Sul Software Pivot(Display Di Larghezza/Altezza Lunga)

    Informazioni sul Software Pivot (Display di larghezza/altezza lunga) Quando si ruota lo schermo, cambiare l’orientamento Per cambiare la direzione di visualizzazione dello schermo usando il Software Pivot. Per Windows I sistemi operativi compatibili (OS) per il Software Scegliere [Rotate] cliccando il mouse, o fare clic a Pivot (versione sperimentale) che viene fornito con il sinistra su nella parte bassa dello schermo.
  • Seite 131 Índice Nota para usuarios en EE.UU............132 TCO’95/'99 .
  • Seite 132: Nota Para Usuarios En Ee.uu

    Sharp Plaza, Mahwah, New Jersey 07430 TEL :1-800-BE-SHARP * Como empresa asociada a ENERGY STAR, SHARP certifica que el presente producto cumple las directivas de ENERGY STAR sobre el ahorro energético. El presente producto se sirve de soldador de hilo de estaño y lámpara fluorescente que contiene una pequeña cantidad de mercurio.
  • Seite 133: Tco'95/'99

    LL-T1820-B LL-T1820-H ¡Enhorabuena! Acaba de adquirir un producto certificado y homologado conforme a TCO’95 o TCO’99. Con su elección se ha decidido por un producto diseñado para aplicaciones profesionales. Su compra también ha contribuido a reducir las cargas medioambientales al igual que al desarrollo posterior de productos electrónicos compatibles con el medio ambiente.
  • Seite 134 Requisitos medioambientales Productos antiinflamantes Los productos antiinflamantes se encuentran en las tarjetas de circuitos impresos, cables, hilos, cajas y carcasas. Su finalidad es la de prevenir o, al menos, retardar la propagación del fuego. Hasta el 30% del plástico de la carcasa de un ordenador puede estar compuesto de sustancias antiinflamantes. La mayoría de las mismas contienen bromuros y cloruros, y estos antiinflamantes están químicamente relacionados con otro grupo de toxinas medioambientales, PCBs.
  • Seite 135: Nota Para Usuarios En Europa

    Nota para usuarios en Europa This equipment complies with the requirements of Directives 89/336/EEC and 73/23/EEC as amended by 93/68/EEC. Dieses Gerät entspricht den Anforderungen der EG-Richtlinien 89/336/EWG und 73/23/EWG mit Änderung 93/68/EWG. Ce matériel répond aux exigences contenues dans les directives 89/336/CEE et 73/23/CEE modifiées par la directive 93/68/CEE.
  • Seite 136: Nota Para Usuarios En El Reino Unido

    Nota para usuarios en Australia Consultas sobre el servicio Sírvase consultar con su proveedor para todo lo relacionado con el servicio técnico o contacte con Sharp Corporation of Australia, tel. 1 300 13 50 22, para información sobre el centro de asistencia técnica...
  • Seite 137: Sugerencias Y Precauciones De Seguridad

    Sharp Corporation es titular de los derechos de Asegúrese de que el monitor no entre en autor del programa del Disquete de utilidades. No contacto con agua u otros líquidos. Asegúrese de lo reproduzca sin previa autorización.
  • Seite 138: Descripción Del Producto

    Descripción del producto 1. Botón INPUT ......Para conmutar entre los bornes de entrada de la señal. (Terminales de entrada 1 ↔ Terminales de entrada 2) 2. Botón MENU ......Este botón se utiliza para ampliar, seleccionar y cerrar el menú OSD (On Screen Display).
  • Seite 139: Ajuste De Altura, Ajuste De Ángulo Y Rotación (Sentido Vertical/Horizontal)

    Ajuste de altura, ajuste de ángulo y rotación (sentido vertical/horizontal) Precaución: Rotación (altura/anchura) Si presiona el panel LCD con las manos podría La pantalla puede girar para colocarla en sentido dañarlo. vertical u horizontal y ver claramente la imagen. Tenga cuidado para que sus dedos no queden atrapados.
  • Seite 140: Conexión Del Monitor Y Encendido/Apagado Del Mismo

    Conexión del monitor y encendido/ apagado del mismo Precaución: 3. Vuelva a colocar la cubierta. Tenga cuidado de no pellizcar los cables. Antes de realizar la conexión, asegúrese de que tanto el monitor como el ordenador están apagados. Tenga cuidado de no doblar excesivamente el cable ni utilizar cables de prolongación ya que ello podría llevar a un funcionamiento anómalo.
  • Seite 141: Conexión Del Monitor A Un Ordenador

    Conexión del monitor y encendido/apagado del mismo Conexión RGB digital Conexión del monitor a un ordenador Utilizando el cable de señales digitales suministrado, conéctelo al terminal de salida de RGB digital del Conexión del monitor a un ordenador usando el cable ordenador.
  • Seite 142: Conexión Del Monitor A Una Toma De Corriente

    Conexión del monitor y encendido/apagado del mismo Conexión de un dispositivo USB Conexión del monitor a una toma de corriente Este monitor está equipado con un nodo autoalimentado de la norma USB (Rev. 1.1). Corriente abajo (2 puertos) Cada uno de estos puertos permite conectar un Borne de alimentación dispositivo USB con una corriente de trabajo de...
  • Seite 143: Encendido

    Conexión del monitor y encendido/apagado del mismo Encendido Alternar entre bornes de entrada 1. Conmute el interruptor primario del monitor. Utilizar el botón de ENTRADA (INPUT) para conmutar entre bornes de entrada de señal. Terminales de entrada 1 Terminales de entrada 2 Interruptor primario INPUT INPUT-1...
  • Seite 144: Apagado

    Conexión del monitor y encendido/apagado del mismo Apagado 1. Apague el ordenador. 2. Pulse el botón de encendido/apagado del monitor. El LED indicador de conexión se apagará. Pulse el botón de Apague el encendido/apagado ordenador Si no se va a utilizar el monitor durante mucho tiempo, desconecte la interruptor primario del monitor y desenchufe la clavija de alimentación de la toma de corriente.
  • Seite 145: Ajuste De La Pantalla

    Ajuste de la pantalla Para la señal analógica Función de bloqueo de ajustes 1. En primer lugar, lleve a cabo un ajuste automático. (p. 146) Si deshabilita los botones de control (es decir, activa 2. En caso necesario, realice un ajuste manual. el bloqueo) no podrá...
  • Seite 146: Ajuste De La Pantalla (Con Conexión Analógica)

    Ajuste de la pantalla (con conexión analógica) Cómo realizar el ajuste Ajuste automático de la pantalla 1. Pulse el botón MENU. Las opciones del Menú ADJUSTMENT (RELOJ, Aparecerá el menú ADJUSTMENT. FASE, H-POS V-POS) se pueden ajustar automáticamente. Nota: Al configurar por primera vez el monitor o tras cambiar cualquier aspecto del sistema actual, lleve a cabo un ajuste automático de la pantalla antes de su uso.
  • Seite 147: Ajuste Manual De La Pantalla

    Ajuste de la pantalla (con conexión analógica) Menú ADJUSTMENT Ajuste manual de la pantalla Los ajustes se pueden realizar a través del Menú en pantalla (OSD). Máscara en pantalla para el ajuste Si está utilizando Windows, abra la Carta de ajuste incluida en el CD-ROM.
  • Seite 148 Ajuste de la pantalla (con conexión analógica) Menú COLOR CONTROL Menú GAIN CONTROL Notas: Para seleccionar una opción del menú: MANUAL: Las diferentes opciones del menú se Botón SELECT ajustan manualmente. AUTO: Cada opción del menú se ajusta auto- Para pasar al siguiente menú: Botón MENU máticamente con la función Control COLOR MODE Automático de la Ganancia*.
  • Seite 149 Ajuste de la pantalla (con conexión analógica) Utilice el botón SELECT para seleccionar OSD V-POSITION (posición vertical OSD) [R-CONTRAST], [G-CONTRAST] y La posición de la pantalla OSD puede desplazarse [B-CONTRAST]. hacia arriba y hacia abajo. (botones Una vez finalizados los ajustes: Botón MENU OSD PIVOT COOL ..
  • Seite 150: Ajuste De La Pantalla (Con Conexión Digital)

    Ajuste de la pantalla (con conexión digital) Los ajustes se pueden realizar a través del menú Menú COLOR CONTROL Máscara en pantalla (OSD). Máscara en pantalla para el ajuste Si está utilizando Windows, abra la Carta de ajuste incluida en el CD-ROM. (p. 146) Si su sistema no es Windows, no podrá...
  • Seite 151 Ajuste de la pantalla (con conexión digital) Utilice el botón SELECT para seleccionar OSD V-POSITION (posición vertical OSD) [R-CONTRAST], [G-CONTRAST] y La posición de la pantalla OSD puede desplazarse [B-CONTRAST]. hacia arriba y hacia abajo. (botones Una vez finalizados los ajustes: Botón MENU OSD PIVOT COOL ..
  • Seite 152: Conservación Y Reparación Del Monitor

    Utilice un paño suave y seco para limpiar, sin apretar do de asistencia técnica de Sharp más cercano. demasiado, la caja y el panel de control. Si estuvieran muy sucios, eche un poco de deter- Los tubos fluorescentes del monitor tienen una gente neutro en un paño suave previamente hume-...
  • Seite 153: Especificaciones Del Producto

    Especificaciones Especificaciones del producto Dimensiones (An. x F x Al. ) (Unidades: mm) Con pantalla en sentido horizontal: 395x213x427 Display LCD Con pantalla en sentido vertical: 324x213x463 46 cm medidos en diagonal Peso Advanced Super-V y módulo antirreververante de Aprox. 8,9kg baja reflexión TFT LCD Sólo zona de visualización, Aprox.
  • Seite 154 Especificaciones Sincronizaciones de las señales Sincronizaciones de las señales correspondientes (analógica) correspondientes (digital) Vsync Modo display Hsync Frecuencia Modo display Hsync Vsync Frecuencia VESA 640x480 31.5kHz 60Hz 25.175MHz 640x480 31.5kHz 60Hz 25.175MHz VESA 37.9kHz 72Hz 31.5MHz 37.9kHz 72Hz 31.5MHz 37.5kHz 75Hz 31.5MHz 37.5kHz...
  • Seite 155: Gestión De Energía

    Especificaciones Vías del conector de entrada DVI-I DDC (Plug & Play) Este monitor soporta el estándar VESA DDC (Display Data Channel). DDC es un estándar de señalización para la ejecución de las funciones Plug & Play en el monitor o PC. Transmite información tal como el grado de resolución entre el monitor y el PC.
  • Seite 156: Instalación De La Información De Configuración Y Del Perfil Icc (Para Windows)

    Instalación de la información de configuración y del perfil ICC (Para Windows) Para Windows98 Según sea el tipo de ordenador o de sistema operativo, puede que sea necesario utilizar el Instalación de la información de configuración del ordenador para llevar a cabo la instalación de la monitor en Windows98 y configuración del perfil ICC información de configuración del monitor, etc.
  • Seite 157 Instalación de la información de configuración y del perfil ICC (Para Windows) Para WindowsMe Para Windows2000 Instalación de la información de configuración del Instalación de la información de configuración del monitor en WindowsMe y configuración del perfil ICC monitor en Windows2000 y configuración del perfil del monitor como valor predeterminado.
  • Seite 158 Instalación de la información de configuración y del perfil ICC (Para Windows) Instalación del perfil ICC Para WindowsXP Instalación del perfil ICC del monitor. (Si ya ha Instalación de la información de configuración del instalado la información de configuración, se habrá monitor en WindowsXP y configuración del perfil ICC instalado también el perfil por lo que no hace falta del monitor como valor predeterminado.
  • Seite 159: Información Acerca Del Perfil Colorsync (Para Macos)

    Información acerca del perfil ColorSync (Para MacOS) Acerca del perfil ColorSync ColorSync es el sistema de gestión del color de Apple Corporation y se trata de una función que permite obtener una resolución cromática cuando se utiliza con una aplicación compatible. Un perfil ColorSync describe las características cromáticas del monitor LCD.
  • Seite 160: Instrucciones Para Acoplar Un Brazo De Compatibilidad Vesa

    Instrucciones para acoplar un brazo de compatibilidad VESA Puede acoplar al monitor un brazo o una base (que Notas: se adquiere aparte) conforme al estándar VESA. La base se ha diseñado específicamente para La adquisición del brazo o la base queda a discre- este monitor, no la use con ningún otro equipo ni ción del cliente.
  • Seite 161: Información Acerca De Pivot Software (Pantalla Vertical/Horizontal)

    Información acerca de Pivot Software (Pantalla vertical/horizontal) Cuando gire la pantalla, cambie la orientación de la Cambio del sentido de la pantalla misma usando Pivot Software. Sistemas operativos (OS) compatibles para Pivot Para Windows Software (versión de prueba) entregados con el Elija [Rotate] haciendo clic con el botón derecho del monitor: ratón, o haga clic con el botón izquierdo en...
  • Seite 162 (TINSM1033MPZZ)
  • Seite 163 Cover 3...
  • Seite 164 SHARP CORPORATION © 2002 SHARP CORPORATION DSC8 TINSM1033MPZZ (8)

Diese Anleitung auch für:

Ll-t1820-b

Inhaltsverzeichnis