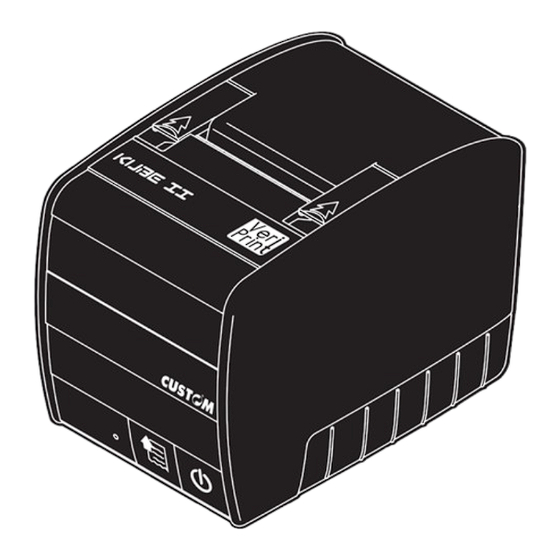
Custom KUBE II veri print Handbuch
Pos-drucker

Verwandte Anleitungen für Custom KUBE II veri print


Inhaltszusammenfassung für Custom KUBE II veri print
- Seite 1 KUBE II KUBE II USER’S GUIDE GUIDA OPERATIVA GUIDE D’UTILISATION BEDIENUNGSANLEITUNG GUIA OPERATIVA DOMC-0019e Command Reference:...
- Seite 3 The CE mark affi xed to the product certify that the product satisfi es the basic safety requirements. Il marchio CE applicato al prodotto certifi ca che il prodotto stesso soddisfa i requisi- ti base di sicurezza. Le label CE appliqué sur le produit certifi e que le produit même satisfait les qualités requises de securité...
- Seite 5 Table of contents Indice Table des matières Inhaltsverzeichnics Indice PRINTER SETTINGS PRINTER TYPE ......Kube SETUP SETUP PRINTING HEAD TYPE ....T80 INTERFACE ........RS232 PROGRAM MEMORY TEST..OK DYNAMIC DYNAMIC RAM TE TEST ST....AUTOTEST AUTOTEST EEPROM TEST......OK CUTTER CUTTER TEST TEST.......OK HEAD VO HEAD VOLTAGE LTAGE...
- Seite 6 BLANK PAGE <2>...
-
Seite 7: Unpacking The Printer
UNPACKING THE PRINTER User manual Paper adaptation stirrup Guarantee sheet Paper roll Upper foam packing shell Additional feets for vetical use SD/MMC card USB cable Power supply cable Printer Lower foam packing shell Power supply Carton DISIMBALLO DELLA STAMPANTE Manuale utente Paratie di riduzione larghezza carta Foglio garanzia Rotolo carta... - Seite 8 PRINTER OFF CLICK TURN ON ACCENDERE 1sec. PRINTER ON CLICK TUNR OFF SPEGNERE 3sec. PAPER FEED AVANZAMENTO CARTA CLICK <4>...
- Seite 9 DESCRIPTION DESCRIZIONE PRINTER OFF STAMPANTE SPENTA PRINTER ON: NO ERROR STAMPANTE ACCESA: NESSUN ERRORE COMMUNICATION STATUS / STATI COMUNICAZIONE GREEN RECEIVE DATA RICEZIONE DATI VERDE RECEPTION ERRORS ERRORI RICEZIONE (parity, frame error, overrun error) (parità, frame error, overrun error) MISINTERPRET COMMAND COMANDO INTERPRETATO NON CORRETT.
- Seite 10 ALIMENTAZIONE........230 Vac ±10% CORRENTE ........2A FREQUENZA ........50/60 Hz N O T E: If serial and USB connectors are inserted,communication port is USB N O T A: Se i connettori seriale e USB sono inseriti, la porta di comu- nicazione è la USB. RS232 DRAWER CASSETTO...
- Seite 11 • Connector. • Connettore. • Connecteur. • Schnittstellen. • Conectador. USB 2.0 J14 - USB type B connector SIGNAL DESCRIPTION VBUS (in) VBUS (in) Data - Data + Ground signal J13 - RS232 Serial Connector (DB9F) SIGNAL DESCRIPTION Data terminal ready Data transmission Data reception N.C.
- Seite 12 BLANK PAGE <8>...
- Seite 13 Paper roll insertion Paper roll insertion Inserimento rotolo Inserimento rotolo Introduire le rouleau Introduire le rouleau Einsetzen der Papierrolle Einsetzen der Papierrolle Introducir el rollo Introducir el rollo N O T E: Inspect inside the printer every paper change, and verify that there aren’t paper off-cuts on the cutter compartment;...
- Seite 14 A T T E N T I O N ! ! ! Remove the adapter guides, as shown, for 82,5mm paper roll only. A T T E N Z I O N E ! ! ! Togliere le alette di adattamento, come mostra- to, solo per il rotolo di carta da 82,5mm.
- Seite 15 Paper Jam Paper Jam Inceppamento Inceppamento Bourrage de papier Bourrage de papier Papierstau Papierstau Atasco de papel Atasco de papel B E W A R E: In case of paper jam do not operate over the printer with any kind of in- struments, like scissors, screwdriver, cutter, etc.
- Seite 16 To unlock: • operate on the mechanism, as shown in the label, and rotate it up in the direction that oppose less resistence; • press feed key. • If the cutter is unlocked, the led turns green. If the led remains blinked red, repeat the previous operation.
- Seite 17 SD/MMC CARD: SD/MMC CARD: Replacement Replacement Sostituzione Sostituzione Remplacement Remplacement Ersatz Ersatz Reemplazo Reemplazo <13>...
- Seite 18 <14>...
-
Seite 19: Customer Service Department
ROSSO Customer Service Department: e-mail: support@custom.it Contact Customer Service if the LED with the printer on, still blinking on red light. Chiamate l’Assistenza tecnica se il led (a stampante accesa) lampeggia prolunga- tamente sul colore rosso. Contacter le Service après-vente si le LED, avec l’imprimante allumée, continue... - Seite 20 BLANK PAGE <16>...
-
Seite 21: Printer Settings
1 Go into SETUP mode by pressing the FEED key before switch SETUP: SETUP: on the printer and going on to press it for a few seconds after the printer power up. 2 The printer should print all list of the parameters: CLICK 1sec. - Seite 22 1 Entrare nel SETUP tenendo premuto il tasto FEED prima dell’ac- SETUP: SETUP: censione della stampante e mantenendo la pressione per qualche secondo dopo l’accensione stessa. 2 La stampante stamperà la lista di tutti i parametri: CLICK SVELTA, ESC/POS TM D 1sec.
-
Seite 23: Clock Setup
1 Go into SETUP mode by pressing the FEED key before switch on the printer and going on to press it for a few seconds after the printer power up. Clock Clock 2 The printer should print all list of the param- eters: 3 Go into CLOCK SETUP mode by pressing SETUP:... - Seite 24 Go into AUTOTEST mode by pressing On/ Off key at turn power on of the printer. The printer should print all list of the fonts. FONT test: FONT test: Entrare in modalità AUTOTEST tenendo premuto il tasto On/Off all’accensione della CLICK 3sec.
- Seite 25 1 Download the SW from the web site: www.custom.biz Installation for Installation for 2 Use the following procedure to install the printer SW: drivers drivers • From the START menu, press Enter and key-in the path where the SW was saved on your PC, then click OK.
- Seite 26 BLANK PAGE <22>...
- Seite 27 è un sistema ideato da CUSTOM che permette di VeriPrint ® is a system designed by CUSTOM thanks to which the integrare le funzionalità di uno scanner di immagini e di una functions of an image scanner and those of a thermal printing...
- Seite 28 Waiting for the device identifi cation from PC. At the fi rst si collega la stampante per la prima volta, verrà richiesto connection the PC require the printer driver downloadable il driver scaricabile dal sito: www.custom.biz. from our site: www.custom.biz. Ora è possibile gestire il contenuto delle memorie della...
- Seite 29 Appendix Appendix <25>...
- Seite 30 Appendix Appendix A.2 STRUTTURA INTERNA A.2 INTERNAL STRUCTURE La stampante Veriprint è equipaggiata con 3 unità di memo- The Veriprint printer is equipped with 3 storage units: ® ® rizzazione: DISCO FLASH DRV: È una memoria interna di tipo fl ash con- FLASH DRV DISK: Is a fl...
- Seite 31 Appendix Appendix A.3 CONFIGURAZIONE SCANNER A.3 SCANNER CONFIGURATION Per confi gurare i parametri di funzionamento riguardanti la To set the functioning parameters for ticket scanning proceed lettura del ticket procedere come segue: as follow: Collegare la stampante Veriprint seguendo la procedu- Connect the Veriprint printer following the procedure ®...
- Seite 32 Appendix Appendix LASTCROP: Crop del bmp salvato nel disco crop of bmp saved in LASTSCAN LASTSCAN: disk: 0 = nessun crop 0 = no crop 1 = crop 1 = crop SCANHRES, 300, 200 JOURHRES: risoluzione orizzontale bmp salvato bmp horizontal resolution saved in nel disco SD/MMC CARD SD/MMC CARD SCANVRES, 300, 200...
-
Seite 33: Scanner Configuration
Appendix Appendix A.4 CONFIGURAZIONE STAMPANTE A.4 SCANNER CONFIGURATION Per confi gurare i parametri di funzionamento riguardanti la To set the functioning parameters for ticket scanning proceed stampante procedere come segue: as follow: Collegare la stampante Veriprint seguendo la procedu- Connect the Veriprint printer following the procedure ®... -
Seite 34: General Notes
Appendix Appendix 6, 5, 4, 3, 2, 1, 0 0 = Disabled 3 = Low Center 6 = Tr. Center Notch Position: 1 = Low Side 4 = Up Center 2 = Up Side 5 = Tr. Side 6, 5 , 4, 3, 2, 1, 0 0 = 30 % 3 = 60 %... - Seite 35 Appendix Appendix BLANK PAGE <31>...
- Seite 36 Appendix Appendix BLANK PAGE <32>...
-
Seite 37: Technical Specifications
Paper roll size Max Ø150 mm External roll diameter Not attached to roll core Paper end ≥ 25 (± 1 mm) Internal roll core diameter Cardboard or plastic Core type (1) Standard CUSTOM receipt (L=10cm, Density = 12,5% dots on). <33>... - Seite 38 Appendix Appendix IMAGE SENSOR SPECIFICATIONS 84 mm Scanning width Scanning resolution Vertical 400, 200 dpi Horizontal 600, 300 dpi BMP (256, 16, 2 gray tones) Files save format Saving resolution Vertical 400, 300, 200 dpi Horizontal 600, 300, 200 dpi ELECTRICAL SPECIFICATIONS 24 Vdc ±10% Power supply...
- Seite 39 Appendix Appendix Not proportional characters (WxH pixel) FONT 8x12 8x12 = 25 cpi FONT 8x12-2 FONT 12x12 12x12 = 17 cpi FONT 14x11 14x11 = 15 cpi FONT 10x24 10x24 = 20 cpi FONT 16x24 F10 FONT 16x24-1 12x24 = 13 cpi FONT 16x24-2 F12 FONT 14x24 14x24 = 15 cpi...
- Seite 40 Appendix Appendix B.4 PAPER WITH BLACK MARK 82.5 TEAR OFF LINE AUTOCUTTER LINE AUTOCUTTER LINE AUTOCUTTER LINE PRINTING LINE PRINTING LINE MAX.6 MAX.7,25 20,25 <36>...
-
Seite 41: Spare Parts
Appendix Appendix C ACCESSORIES AND SPARE PARTS C.2 SPARE PARTS Right black side SCDPT300-P2902-3 Fianco destro nero Left black side SCDPT300-P3101-3 Fianco sinistro nero Thermal paper roll size 80 x Ø 48 mm RCT82.5x48-25MM Rotolo carta termica 80 x Ø 48 mm Thermal paper roll size 82,5 x Ø150 mm RCT82.5x150-25MM-70GR Rotolo carta termica 82,5 x Ø150 mm... -
Seite 42: Power Supply
Appendix Appendix C.1 POWER SUPPLY AC INLET +24V DC OUTPUT WIRE 179.5 PDPS-144-24-01 Power supply 24V 144W Input specifi cations Input voltage 85Vac ÷ 264Vac Input frequency 47Hz ÷ 63Hz Output specifi cations Output voltage 24V ± 4% Power specifi cations Maximum power 144 W <38>... - Seite 43 Appendix Appendix D CLEANING D.1 OUTSIDE CLEANING To clean the machine, use a pneumatics air or soft cloth. First remove the mains plug from the wall socket. Do not use alcohol, solvents, or hard brushes. Do not let water or other liquids get inside the machine.
- Seite 44 Appendix Appendix D.2 ROLLERS To clean the roller, use a a medium-stiff brush to avoid them being scratched. First remove the mains plug from the wall socket. Do not use alcohol or solvents. Do not let water or other liquids get inside the machine.
-
Seite 45: Print Head
Appendix Appendix D .3 PRINT HEAD Clean the printing head heating line using a non-abrasive cloth moistened with dena- tured alcohol. To clean the scanner, wipe the glass sur- face gently with a clean cloth soaked in alcohol. The glass surface should be wiped very carefully. - Seite 46 Appendix Appendix BLANK PAGE <42>...
- Seite 48 CUSTOM ENGINEERING SPA World Headquarters Via Berettine, 2 - 43010 Fontevivo, Parma ITALY Tel. +39 0521 680111 - Fax +39 0521 610701 info@custom.biz - www.custom.biz All rigths reserved www.custom.biz...