Seite 1
WEVP 440 BIS Ed. 10-08 V2 ’ ’ ode d eMploi et d installation struzioni di utilizzo e installazione nstrucciones de uso e instalación Modo de eMprego e de instalação andleidding voor installatie en gebruik nstallation and operation Manual nstallations...
Seite 2
1. DESCRIPTIF GENERALITE Ce visiophone est composé d’un moniteur couleur avec son adaptateur et une platine de rue, il vous permet de communiquer avec la personne se présentant à votre entrée et de commander l’ouverture de la porte ou de votre portail. Vous avez la possibilité...
Seite 3
2. NOMENCLATURE a. Moniteur 1. Navigation à « gauche ». 2. Navigation à « droite ». 3. Navigation en « haut ». 4. Navigation en « bas ». 5. Capteur de la télécommande. 6. Menu (accessible que si vous avez une carte mémoire ou une clé USB insérée) 7.
Seite 4
b. Télécommande CR 2025 Pour la première utilisation retirer la languette de protection transparente de la pile. 1. Affichage du temps de lecture (mode lecture film). 2. Commutation cadre photo / visiophone en veille. 3. Lors de la lecture de musique ou d’un film, appuyer sur cette touche pour une lecture avant ou arrière accélérée.
c. Platine de rue 1. Micro, vous permet de communiquer vers l’intérieur. 2. Bouton d’appel : lorsqu’on appuie sur ce bouton, la sonnerie se fait entendre à l’intérieur, l’écran et la caméra se mettent en fonction (le voyant 4 s’illumine). 3.
3. RACCORDEMENT a. Raccordement du visiophone Dans le but d'éviter les risques de parasites et de dysfonctionnements, ne pas passer le câble de votre visiophone dans la même gaine que les câbles électriques. 1. Bien raccorder les appareils en suivant le schéma de câblage. 2.
Cette fonction est utilisable que si l’écran est allumé en fonction « visiophone » et en appuyant sur la touche du moniteur. Il est conseillé d’utiliser une gâche ou une serrure EXTEL avec mémoire d’appel, elle restera déver- rouillée après la fin de l’impulsion électrique. c. Raccordement d’une motorisation de portail La raccorder sur les 2 fils de l’adaptateur (option WE 8111 BIS) au dos de la platine de rue.
4. INSTALLATION a. Moniteur sur son support de table 1. Fixer la béquille (1) à l’aide de la molette (2). Suivant le trou choisi, le visiophone sera plus ou moins incliné 2. Raccorder les 4 fils venant de la platine de rue en respectant bien le schéma de câblage.
Seite 9
c. Platine de rue La platine de rue se présente en deux parties : - un socle avec la visière anti-pluie - une platine de rue avec 2 câbles courts équipés de connecteurs. Positionner le socle, préparer les 3 trous de fixation « b » et prévoir un petit logement dans la partie «...
5. MODE D’EMPLOI a. Visiophone Si besoin enlever le film protecteur sur l’écran et sur l’objectif de la caméra. • Une impulsion sur le bouton d’appel, la sonnerie retentit plusieurs fois, l’écran s’illumine et le visage du visiteur apparaît pendant 90 secondes environ. Si vous êtes en fonction «...
Seite 11
2. Visualisation de photos Sélectionner le menu « PHOTO ». Appuyer sur la touche « » pour sélectionner une photo et appuyer sur le bouton « ENTER » pour lancer la lecture en mode « diaporama ». Appuyer sur le bouton « ESC » pour quitter le diaporama. 3.
Seite 12
IMPORTANT ! Après un appel de la platine de rue, l’écran ne revient pas automatiquement sur le menu « MUSIC ». - Revenir au menu précédent Appuyer sur la touche « » ou la touche « » pour sélectionner « »...
Seite 13
9. Zoom avant/arrière sur l’image Lorsque vous visionnez un film, utilisez le bouton « ZOOM » pour changer l’échelle d’affichage à l’écran de 2x, 3x, 4x, 1/2x, 1/3x, 1/4x. 10. Menu de configuration du système - Appuyer sur la touche « SETUP » (configuration) pour entrer dans le menu de configuration. - Appuyer sur la touche «...
11. Horloge et calendrier - Réglage de la date Appuyer sur le bouton « SETUP » pour entrer dans le menu de configuration. Appuyer sur la touche « »pour vous positionner sur « Date Setting ». Valider le choix avec la touche « ENTER». Des flèches s’affichent sur l'année.
1. DESCRIZIONE INFORMAZIONI GENERALI Questo videocitofono è composto da un monitor a colori con un adattatore e una pulsantiera esterna; consente di comunicare con la persona che si presenta all’entrata e di comandare l’apertura della porta o del cancello. È possibile utilizzare il monitor, per mezzo del telecomando fornito, come portafoto digitale, come lettore MP 3 e come Divx (in tal caso dotarsi di 1 scheda di memoria o di una penna USB).
2. DESIGNAZIONE ELEMENTI a. Monitor 1. Navigazione a «sinistra». 2. Navigazione a «destra». 3. Navigazione in «alto». 4. Navigazione in «basso». 5. Sensore del telecomando. 6. Menù (accessibile solo se è inserita una scheda di memoria o una penna USB) 7.
Seite 17
b. Telecomando CR 2025 Per la prima utilizzazione, togliere la linguetta protettiva trasparente della pila. 1. Visualizzazione del tempo di lettura. 2. Commutazione portafoto / videocitofono in stand by. 3. Durante la riproduzione di musica o di un film, premere questo tasto per una lettura accelerata in avanti o indietro.
c. Pulsantiera esterna 1. Microfono, consente di comunicare con l’interno. 2. Pulsante di chiamata: premendo questo pulsante la suoneria si fa udire all’interno, la telecamera e lo schermo si mettono in funzione (la spia 4 si illumina). 3. Obiettivo della telecamera C-MOS con messa a fuoco automatica. 4.
3. COLLEGAMENTO a. Collegamento del videocitofono Al fine di evitare rischi di disturbi parassiti o di malfunzionamento, non far passare i cavi del videocitofono nella stessa guaina dei cavi elettrici. 1. Collegare gli apparecchi in modo corretto rispettando lo schema di cablaggio. 2.
Questa funzione è utilizzabile solo se lo schermo è acceso sulla funzione «videocitofono» e premendo il tasto del monitor. Si consiglia di utilizzare un incontro o una serratura EXTEL con antiripetitore; in questo modo la porta resterà aperta anche dopo la fine dell’impulso elettrico. c. Collegamento della motorizzazione del cancello.
4. INSTALLAZIONE a. Monitor su supporto da tavolo 1. Fissare il supporto (1) per mezzo della rotella (2). In base al foro scelto il monitor sarà più o meno inclinato 2. Collegare i 4 cavi in provenienza dalla pulsantiera esterna rispettando lo schema di cablaggio.
Seite 22
c. Pulsantiera esterna La pulsantiera esterna si presenta in due parti: - Una base dotata di visiera antipioggia • - La pulsantiera esterna con 2 cavi corti dotati di connettori. Posizionare la base, preparare i 3 fori di fissaggio « b » e prevedere un piccolo alloggiamento nella «...
Seite 23
5. MODALITÀ D’USO a. Videocitofono Togliere se necessario la pellicola di protezione dallo schermo e dall’obiettivo della telecamera. •Quando viene premuto il pulsante di chiamata, si sente la suoneria, lo schermo si illumina e il volto del visitatore appare per 90 secondi circa. Se ci si trova nella funzione «portafoto»...
Seite 24
2. Visualizzazione delle foto Selezionare il menù « PHOTO ». Premere il pulsante « » per selezionare una foto e premere il pulsante « ENTER » per lanciare « la lettura in modalità «diaporama». Premere il pulsante « ESC » per uscire dalla modalità diaporama. 3.
Seite 25
IMPORTANTE ! A seguito di una chiamata dalla pulsantiera esterna, lo schermo non torna automaticamente sul menù « MUSIC ». - Tornare al menù precedente Premere il tasto « » o il tasto « » per selezionare « » nella barra delle funzioni e premere il tasto «...
Seite 26
9. Zoom avanti/indietro sull’immagine Durante la visione di un film, utilizzare il pulsante « ZOOM » per cambiare la grandezza di visualizzazione sullo schermo di 2x, 3x, 4x, 1/2x, 1/3x, 1/4x. 10. Menù di configurazione del sistema - Premere il pulsante « SETUP » (configurazione) per entrare nel menù di configurazione. - Premere il pulsante «...
11. Orologio e calendario - Regolazione della data Premere il pulsante « SETUP » per entrare nel menù di configurazione. Premere il tasto « »per posizionarsi su « Date Setting ». Convalidare la scelta con il tasto « ENTER». Le frecce vengono visualizzate sulla anni.
1. DESCRIPCIÓN GENERALIDAD Este videoportero está formado por un monitor color con adaptador y por una pletina de calle. Gracias a él, podrá comunicarse con la persona que se presente en su entrada y accionar la apertura de su puerta o portal. Puede utilizar el monitor, con el mando a distancia suministrado, como un marco de fotos digital, como reproductor MP3 y como Divx (en este caso habrá...
Seite 29
2. DESPIECE DEL PRODUCTO a. Monitor 1. Navegación hacia la “izquierda”. 2. Navegación hacia la “derecha”. 3. Navegación hacia “arriba”. 4. Navegación hacia “abajo”. 5. Sensor del mando a distancia. 6. Menú (sólo podrá acceder a él si dispone de una tarjeta de memoria o de una llave USB). 7.
Seite 30
b. Mando a distancia CR 2025 En la primera utilización retirar la lengüeta de protección transparente de la pila. 1. Visualización del tiempo de reproducción. 2. Conmutación marco foto / videoportero en reposo. 3. Para avanzar o retroceder rápidamente, pulse esta tecla mientras se está reproduciendo música o una película.
c. Pletina de calle 1. Micrófono: permite comunicarse con el interior. 2. Botón de llamada: al pulsar este botón, la melodía suena en el interior y la pantalla y la cámara se ponen en funcionamiento (se ilumina el indicador 4). 3.
3. CONEXIÓN DEL VIDEOPORTERO a. Conexión del videoportero A fin de evitar posibles interferencias y disfunciones, no introduzca el cable del videoportero en ¡I la misma funda que los cables eléctricos. 1. Conecte los aparatos siguiendo el esquema de cableado. 2.
Esta función sólo se puede utilizar si la pantalla está encendida en modo “videoportero” y pulsando la tecla del monitor. Se recomienda utilizar un cerradero o una cerradura EXTEL con memoria de llamada, ya que per- manecen desbloqueados después del impulso eléctrico. c. Conexión de una motorización de portal La motorización de portal se conecta a los 2 cables del adaptador (opción WE 8111 BIS) situados en...
4. INSTALACIÓN a. Monitor sobre su soporte de sobremesa 1. Fije el soporte (1) utilizando la moleta (2). Dependiendo del orificio escogido, el videoportero quedará más o menos inclinado. 2. Conecte los 4 cables procedentes de la pletina de calle respetando rigurosamente el esquema de cableado.
Seite 35
c. Pletina de calle La pletina de calle consta de dos partes: - una base con la visera antilluvia. - una pletina de calle con 2 cables cortos provistos de conectores. Coloque la base, prepare los 3 agujeros de fijación “b” y prevea un pequeño alojamiento en la parte “a”...
5. MODO DE EMPLEO a. Videoportero En caso de necesidad, retire el plástico protector de la pantalla y del objetivo de la cámara. • Al pulsar el botón de llamada, la melodía suena varias veces, la pantalla se ilumina y la cara del visitante aparece durante unos 90 segundos.Si se encuentra en modo “marco de fotos”...
Seite 37
2. Visualización de fotos Seleccione el menú « PHOTO ». Pulse la tecla « » para seleccionar una foto y el botón « ENTER » para lanzar la reproducción en modo « diaporama ». Pulse el botón « ESC » para salir del diaporama. 3.
Seite 38
¡IMPORTANTE! Tras una llamada procedente de la pletina de calle, la pantalla no se vuelve automáticamente al menú “música”. - Volver al menú anterior Pulse la tecla « » o la tecla « » para seleccionar « » en la barra de funciones y pulse la tecla «...
Seite 39
9. Zoom de la imagen hacia delante/hacia atrás ú Cuando esté viendo una película, utilice el botón « ZOOM » para cambiar la escala de visualización en pantalla 2x, 3x, 4x, 1/2x, 1/3x, 1/4x. 10. Menu de configuration du système - Pulse la tecla «...
11. Reloj y calendario - Ajuste de la fecha Pulse el botón « SETUP » para entrar en el menú de configuración. Pulse la tecla « » para colocarse en « Date Setting ». Confirme con la tecla « ENTER». Aparecerán flechas encima de el año.
Seite 41
1. DESCRIÇÃO GENERALIDADE Este videofone é composto de um monitor a cores com o seu adaptador e uma placa de rua, permite- lhe comunicar com a pessoa que se apresenta na sua entrada e comandar a abertura da porta ou do seu portão.
Seite 42
2. NOMENCLATURA a. Monitor 1. Navegação à «esquerda». 2. Navegação à «direita». 3. Navegação em «cima». 4. Navegação em «baixo». 5. Detector do telecomando. 6. Menu (acessível apenas se tiver uma placa memória ou uma chave USB inserida). 7. Leitura / pausa. 8.
Seite 43
b. Telecomando CR 2025 Para a primeira a utilização retirar a lingueta de protecção transparente da pilha 1. Visualização do tempo de leitura. 2. Comutação quadro foto / videofone em modo presença. 3. Na leitura de música ou de um filme, premir esta tecla para uma leitura para a frente ou para trás acelerada.
c. Placa de rua 1. Microfone, permite-lhe comunicar para o interior. 2. Botão de chamada: quando pressiona este botão, a campainha ouve-se no interior, o ecrã e a câmara colocam-se em função (o sinal luminoso 4 ilumina-se). 3. Objectivo da câmara C-MOS com focagem automática. 4.
3. LIGAÇÃO DO VIDEOFONE a. Ligação do videofone Com o objectivo de evitar os riscos de parasitas e de disfuncionamento, não passar o cabo do seu videofone na mesma conduta que os cabos eléctricos. 1. Conectar bem os aparelhos seguindo o esquema de cablagem. 2.
Seite 46
Esta função é utilizável apenas se o ecrã estiver aceso em função “videofone” e premindo a tecla do monitor. Aconselhamos utilizar uma chapa-testa ou uma fechadura EXTEL com memória de chamada, ela ficará desbloqueada após o fim do impulso eléctrico. c. Conexão de uma motorização de portão Ligá-la nos 2 fios do adaptador (opção WE 8111 BIS) nas costas da placa de rua.
Seite 47
4. INSTALAÇÃO a. Monitor no seu suporte de mesa 1. Fixar o suporte (1) com a ajuda do selector rotativo (2). Conforme o orifício escolhido, o videofone será inclinado mais ou menos. 2. Conectar os 4 fios que vêm da placa de rua respeitando bem o esquema de cablagem.
Seite 48
c. Placa de rua A placa de rua apresenta-se em duas partes: - um suporte com a viseira de protecção para a chuva • - a placa de rua com 2 cabos curtos equipados de conectores. Posicionar o suporte, preparar os 3 orifícios de fixação “b” e prever um pequeno alojamento na parte “a”, onde irão chegar os cabos do monitor e do dispositivo de abrir a porta.
5. MODO DE UTILIZAÇÃO a. Videofone Se for necessário retirar o filme protector sobre o ecrã e sobre o objectivo da câmara • Com um impulso no botão de chamada, a campainha toca várias vezes, o ecrã ilumina-se e o rosto do visitante aparece durante cerca de 90 segundos.
Seite 50
2. Visualização de fotos Seleccionar o menu « PHOTO ». Premir a tecla « »para seleccionar uma fotografia e premir o botão « ENTER » para lançar a leitura em modo “diaporama”. Premir o botão « ESC » para deixar o diaporama. 3.
Seite 51
IMPORTANTE ! Após uma chamada da placa de rua, o ecrã volta automaticamente para o menu « MUSIC ». - Voltar para o menu anterior Premir a tecla « » ou a tecla « » para seleccionar « » na barra de funções e premir a tecla «...
Seite 52
9. Zoom para a frente/para trás na imagem Quando visiona um filme, utilize o botão « ZOOM » para alterar a escala de visualização no ecrã de 2x, 3x, 4x, 1/2x, 1/3x, 1/4x. 10. Menu de configuração do sistema - Premir a tecla « SETUP » (configuração) para entrar no menu de configuração. - Premir a tecla «...
Seite 53
11. Relógio e calendário - Regulação da data Premir o botão « SETUP »para entrar no menu de configuração. Premir a tecla « » para posicionar-se em « Date Setting ». Validar a escolha com a tecla « ENTER». As setas visualizam-se sobre o ano.
Seite 54
1. OMSCHRIJVING ALGEMEEENHEID Deze videofoon bestaat uit een kleurenmonitor met zijn adapter en een straatunit. Deze laatste geeft u de mogelijkheid om met de persoon te communiceren die zich bij uw voordeur presenteert en zorgt ervoor dat u uw deur of hek kunt openen. U hebt de mogelijkheid om uw monitor, met meegeleverde afstandsbediening, als digitale fotolijst, als MP3-speler en Divx te gebruiken (in dit laatste geval moet er 1 geheugenkaart of een USB-sleutel voorzien worden).
Seite 55
2. NOMENCLATUUR a. Monitor 1. Navigatie “links” 2. Navigatie “rechts”. 3. Navigatie “bovenaan” 4. Navigatie “onderaan”. 5. Receptor van de afstandsbediening. 6. Menu (alleen toegankelijk wanneer u een geheugenkaart of een USB-sleutel ingevoerd hebt). 7. Afspelen/pauze. 8. Bediening deuropener. 9. Communicatie met de straatunit. 10.
Seite 56
b. Afstandsbediening CR 2025 Bij de eerste keer gebruik dient u het beschermende de transparante stripje van de batterij weg te nemen. 1. Weergave van de afspeeltijd. 2. Schakeling van fotolijstje / videofoon in stand-by. 3. Tijdens het afspelen van muziek of een film, drukt u op deze toets om snel vooruit of achteruit af te spelen.
Seite 57
c. Straatunit 1. Microfoon, maakt het u mogelijk om naar binnen toe met een persoon te communiceren. 2. Gespreksknop: wanneer er op deze knop wordt gedrukt, wordt het belsignaal binnen gehoord en gaan het beeldscherm en de camera aan (het controlelampje 4 gaat branden). 3.
3. AANSLUITING a. Aansluiting van de videofoon Om storing en functiestoornissen te vermijden, moet de kabel van uw videofoon niet in dezelfde koker als de elektriciteitskabels getrokken worden. 1. Sluit de apparaten op de juiste manier aan volgens het bedradingschema. “v 2.
“videofoon” en door op toets van de monitor te drukken. Er wordt aangeraden om een schootplaat of een slot van EXTEL te gebruiken met gespreksgeheugen. Deze zal ontgrendeld blijven na het einde van de elektrische impuls. c. Aansluiting van een hekmotorisering Deze moet worden aangesloten op de 2 draden van de adapter (optie WE 8111 BIS) aan de achter- kant van de straatunit.
Seite 60
4. INSTALLATIE a. Monitor op zijn tafelsteun 1. Bevestig de standaard (1) met behulp van het draaiwieltje (2). Naar gelang het gat dat gekozen wordt, zal de videofoon min of meer hellen “a 2. Sluit de 4 draden uit de straatunit aan, waarbij u het bekabelingschema in acht houdt.
Seite 61
c. Straatunit De straatunit bestaat uit twee gedeelten: - een sokkel met regenscherm - de straatunit met 2 korte kabels die uitgerust zijn met aansluitingen. Plaats de sokkel, bereid de 3 bevestigingsschroeven “b” voor en voorzie een kleine ruimte in het “a”...
5. GEBRUIKSAANWIJZING a. Videofoon Wanneer nodig verwijdert u de beschermende film op het beeldscherm en op het objectief van de camera. • Een korte druk op de gespreksknop en het belsignaal gaat meerdere malen over, het beelds- cherm gaat aan en het gezicht van de bezoeker verschijnt gedurende ongeveer 90 seconden. Wanneer u zich in de functie “fotolijst”...
Seite 63
2.De foto’s bekijken Selecteert u het menu « PHOTO ». Druk op de toets « » om een foto te selecteren en druk op de knop « ENTER » om het afspel- en in de modus van de « diavertoning » te beginnen. Druk op de knop «...
Seite 64
BELANGRIJK! Na een gesprek van de straatunit, gaat het beeldscherm niet automatisch terug naar het menu « MUSIC ». - Teruggaan naar het vorige menu Druk op de toets « » of op de toets « » om « » te selecteren in de functiebalk, en druk op de toets «...
Seite 65
9. Vooruit/achteruit op het beeld inzoomen Wanneer u een film bekijkt, gebruikt u de knop « ZOOM » om de schaal van de weergave op het beeldscherm met 2x, 3x, 4x, 1/2x, 1/3x, 1/4x. 10. Configuratiemenu van het systeem - Druk op de toets « SETUP »(configuratie) om het menu van de configuratie binnen te gaan. - Druk op de toets «...
11. Klok en kalender - Instelling van de datum Druk op de knop « SETUP » om het menu van de configuratie binnen te gaan. Druk op de toets « » om u te plaatsen op « Date Setting ». Bevestig de keuze met de toets «...
Seite 67
1. DESCRIPTION INTRODUCTION This video door phone is composed of a colour monitor with its adapter and a roadside panel. It allows communicating with the visitor who calls at the door and controlling the opening of the door or gate. You can use your monitor, with the remote control unit supplied, as a digital photo frame, MP3 and Divx player (in this case use a memory card or a USB key).
2. SPECIFICATION a. Monitor 1. “Left”. 2. “Right”. 3. “Up”. 4. “Down”. 5. Remote control unit sensor. 6. Menu (accessible if you use a inserted memory card or a USB key) 7. Play / pause. 8. Door opener. 9. Communication with the roadside panel. 10.
b. Remote control unit CR 2025 For the first use, remove the transparent protection tab from the battery. 1. Current play time display. 2. Switching photo frame / stand-by video door phone. 3. When playing music or film, press this key for fast forward or rewind playing. 4.
c. Roadside panel 1. The microphone allows you to communicate with the internal unit. 2. Call button: when this button is pressed, the internal unit rings, the camera and the monitor start working (the indicator 4 lights up). 3. Auto focus C-MOS camera lens. 4.
3. CONNECTING THE VIDEO DOOR PHONE a. Connecting the video door phone To avoid disturbance and malfunction risks, do not put the video door phone cable in the same sheath as electric cables. 1. Carefully connect the devices according to wiring diagram. 2.
This function is only available if the screen is in “video door phone” mode and by pressing the of the monitor. It is advisable to use an EXTEL strike or lock with call memory, it will remain unlocked after the end of the electric pulse.
Seite 73
4. INSTALLATION a. Monitor on its table-top support 1. Fix the stand (1) with the wheel (2). According to the hole selected, the video door phone will be in different tilted positions. 2. Connect the 4 wires coming from the roadside panel carefully observing the wiring diagram.
Seite 74
c. Roadside panel The roadside panel is composed of two parts: - a base with the rain shield • - the roadside panel with 2 short wires equipped with connectors. Place the base, prepare the 3 mounting holes “b” and use a small housing in the part “a”, where the cables of the monitor and the automatic gate opener will pass.
Seite 75
5. INSTRUCTIONS FOR USE a. Video door phone If needed, remove the protective film from the screen and the camera lens • By pressing once the call button, the ring tone rings several times, the screen switches on and the face of the visitor is displayed for approximately 90 seconds.
Seite 76
2. Visualisation de photos Select the menu " PHOTO " Press the key " " to select a picture and press the button " ENTER " to launch the slideshow. Press the button " ESC " to quit the slideshow. 3.
Seite 77
IMPORTANT ! After a call on the roadside panel, the screen does not return automatically to the “music” menu. - Return to previous menu Press the key " " or the key " " to select " " in the function bar and press the key "ENTER" to return to file or folder mode.
Seite 78
9. Zoom in/out the image When you are watching a movie, use the button "ZOOM" to change the on-screen display scale of 2x, 3x, 4x, 1/2x, 1/3x, 1/4x. 10. System configuration menu - Press the key " SETUP" (configuration) to enter the configuration menu. - Press the key "...
11. Time and schedule - Date setting Press the key "SETUP" to enter the configuration menu. Press the key " " to go to "Date Setting" Validate the choice with the key "ENTER" The arrows " " and " " appear on the year Modify the year using the keys "...
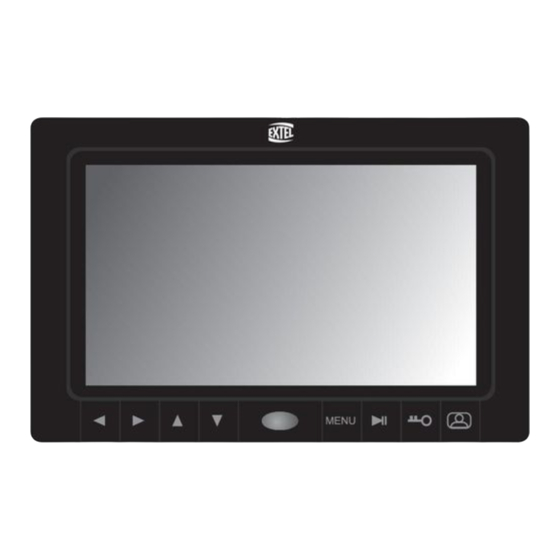
1. BESCHREIBUNG ALLGEMEINES Das Visiophon besteht aus einem Farbbildschirm mit Adapter und einer Außenstation mit Kamera, um mit dem Besucher, der geklingelt hat, zu sprechen und Ihre Tür bzw. Ihr Eingangstor zu öffnen oder zu schließen. Sie können Ihren Monitor mit der mitgelieferten Fernbedienung als digitalen Fotorahmen, MP-3-Player und Divx-Video-Player benutzen (In diesem Fall benötigen Sie auch eine Speicherkarte oder einen USB-Stick).
Seite 81
2. BEZEICHNUNGEN a. Monitor 1. Browsen nach « links ». 2. Browsen nach « rechts ». 3. Browsen nach « oben ». 4. Browsen nach « unten ». 5. Sensor für die Fernbedienung. 6. Menü (nur zugänglich nach Einlegen der Speicherkarte oder des USB-Sticks) 7.
Seite 82
b. Fernbedienung CR 2025 Bei erster Benutzung ziehen Sie die durchsichtige Schutzlasche der Batterie ab 1. Anzeige der Dauer der Wiedergabezeit. 2. Vom Fotorahmen auf das Visiophon im Stand-by-Modus wechseln. 3. Bei der Wiedergabe einer Musik oder eines Filmes für einen schnelleren Vor- oder Rücklauf auf diese Taste drücken.
Seite 83
c. Außenstation 1. Mikrofon: Sie können mit der Innenstation kommunizieren. 2. Klingelknopf: Wenn man diesen Knopf drückt, hört man im Inneren das Klingeln. Bildschirm und Kamera gehen an (die Kontrolllampe 4 leuchtet auf). 3. Objektiv der Kamera C-MOS mit automatischer Bild-Fokussierung. 4.
3. VISIOPHON ANSCHLIESSEN a. Visiophon anschließen Um eventuelle Störsignale und andere Betriebsstörungen zu vermeiden, darf das Kabel Ihres Visiophon mit anderen elektrischen Leitungen nicht im selben Isolierrohr verlegt werden. 1. Geräte nach Verkabelungsschema ordnungsgemäß anschließen. 2. Es sind nur 4 Leiter für alle Funktionen erforderlich: Klingel, Bild, Ton, Automatiksteuerung und Steuerung eines elektrischen Türöffners.
Diese Funktion kann nur verwendet werden, wenn die Funktion « Visiophon » des Bildschirms durch Drücken der Taste " " am Monitor aktiviert wurde. Es wird empfohlen, einen Türöffner oder ein Schloss von EXTEL mit Dauerentriegelung zu verwenden. c. Anschluss eines Torantriebs An die 2 Adern des Adapters (Option WE 8111 BIS) auf der Rückseite der Außenstation...
4. INSTALLATION a. Aufstellen des Monitors auf dem Tisch 1. Den Ständer (1) mit Hilfe des Rädchens (2) feststellen. Je nach gewähltem Loch ist das Visiophon mehr oder weniger geneigt. 2. Die 4 Adern von der Außenstation unter genauer Einhaltung des Verkabelungsschemas anschließen.
c. Außenstation Die Außenstation besteht aus zwei Teilen: - Ein Sockel mit Wetterschutz - Außenstation mit 2 kurzen Kabeln, die mit Anschlüssen versehen sind. Den Sockel in die richtige Position bringen, die 3 Löcher für die Befestigung « b » vorbereiten und etwas Platz in «...
Seite 88
5. ANLEITUNG a. Visiophon Falls erforderlich, die Schutzfolie von Bildschirm und Kameraobjektiv entfernen. • Bei Betätigen der Ruftaste ertönt die Klingel mehrere Male, der Bildschirm leuchtet auf und das Gesicht des Besuchers erscheint circa 90 Sekunden lang. Falls Sie die Funktion „Fotorahmen“ aktiviert haben, erscheint das Gesicht Ihres Besuchers. Die Funktion „Fotorahmen“...
Seite 89
2. Fotos im Display Das Menü « FOTO » wählen. Mit der Taste « » ein Foto auswählen und für eine Wiedergabe im Modus « Dia-Show » auf « ENTER » drücken. Drücken Sie auf « ESC », um das Dia-Show zu verlassen. 3.
Seite 90
WICHTIG ! Nach einem Ruf von der Außenstation kehrt der Bildschirm nicht automatisch in das « Musikmenü » zurück. - Zum vorigen Menü zurück Auf die Taste « » oder « » drücken, um « » in der Funktionsleiste zu wählen. Dann auf die Taste «...
Seite 91
9. Bild zoomen (nah und fern) Wenn Sie einen Film anschauen, verwenden Sie die « ZOOM » - Taste, um den Anzeigemaßstab auf dem Bildschirm zu ändern: 2x, 3x, 4x, 1/2x, 1/3x, 1/4x. 10. Das Menü « Systemeinstellungen » - Auf die Taste « SETUP » (Konfiguration) drücken, um das Menü « Einstellungen » zu aktivieren. - Auf die Taste «...
11. Uhrzeit und Datum einstellen - Das Datum einstellen Drücken Sie auf « SETUP », um das Menü « Einstellungen » aufzurufen. Drücken Sie auf die Taste « » und gehen Sie auf « Date Setting ». Bestätigen Sie Ihre Wahl mit der Taste « ENTER ». Die Pfeile «...