Herunterladen Inhalt Inhalt Diese Seite drucken
Inhaltsverzeichnis

Werbung

Verfügbare Sprachen

Verfügbare Sprachen

USER MANUAL
MANUAL DE UTILIZACION
MANUEL D´UTILISATION
BEDIENERHANDBUCH
SERIES/SERIE/SÉRIE/SERIE CM
Models / Modelos / Modèles / Modelle:
CM-3
CM-6
CM-15
CM-30
REV. 1A11M06
1

Werbung

Inhaltsverzeichnis
loading

Inhaltszusammenfassung für Gram CM series

  • Seite 1 USER MANUAL MANUAL DE UTILIZACION MANUEL D´UTILISATION BEDIENERHANDBUCH SERIES/SERIE/SÉRIE/SERIE CM Models / Modelos / Modèles / Modelle: CM-3 CM-6 CM-15 CM-30 REV. 1A11M06...
  • Seite 3: Inhaltsverzeichnis

    ENGLISH INDEX…………………………….Page 3 INDICE CASTELLANO………....…Página 18 SOMMAIRE FRANÇAIS………....Page 33 DEUTSCHES INHALTSVERZEICHNIS..Seite 48 INDEX Power source, power consumption and rechargeable battery Scale’s version number display Display description Keyboard description Keys functions description Preset Tara Value Preset the high weight value Preset the low weight value Check-weighing Function configuration Weights accumulation How to enter the sample for piece counting...
  • Seite 4: Power Source, Power Consumption And Rechargeable Battery

    POWER SOURCE Input: 100~240V 50/60hz Output: 12V/1A DC 12W Lead-acid rechargeable battery: 6V/4AH POWER CONSUMPTION Approx. 12mA Approx. 36mA with backlight Approx. 48mA with backlight and RS232 interface (optional) BATTERY HOURS PER CHARGE Approx. 320 hours (backlight off ) SCALE’S VERSION NUMBER DISPLAY 1.
  • Seite 5: Keyboard Description

    KEYBOARD DESCRIPTION KEY FUNCTIONS DESCRIPTION To turn off the scale, press and hold the OFF key and the display will show “Off” for 2 seconds. Press the key to turn on the scale. Function 1. To select desired weighing unit. Function 2.
  • Seite 6 printer at normal weighing mode (RS-232 must be set up keyboard transmission 232 3 or 232 6). Function 2. Works as enter key in setup mode. To preset Tare value To preset High Weight value To preset Low Weight value To program check weighing parameters Function 1.
  • Seite 7: Preset Tara Value

    PRESET TARA VALUE 1. Press the key. 2. Use numeric keys from 0 to 9 to enter the required Tara value. 3. Press the key to confirm, the indicators Net and PT will appear. 4. The scale will return to normal weighing mode automatically. Clear a preset Tare value.
  • Seite 8: Check-Weighing Function Configuration

    CHECK-WEIGHING FUNCTION CONFIGURATION 0 0 0 A: Acoustic signal. Option 0=stability is not required Option 1= stability is required B: LCD indicator and Relay activated Option 0=stability is not required Option 1= stability is required C: Acoustic signal conditions Option 0=acoustic signal deactivated Option 1=OK Option 2= LO and HI 1.
  • Seite 9: How To Enter The Sample For Piece Counting

    HOW TO CLEAR WEIGHT ACCUMULATIONS 1. Press the key and all the weight accumulations which were carried out will be erased. HOW TO ENTER THE SAMPLE FOR PIECE COUNTING 1. Press the key. 2. Use the numeric keys from 0 to 9 to enter desired sample quantity. 3.
  • Seite 10: Functions Setup

    Weight Calibration ECF-1 1. Press the key to start ECF-1 mode or the ESC key to exit menu and back to weighing mode. 2. The display will show CALZ, press the key. 3. Use ◄, ►, ▲, 0 ~ 9 keys to enter the calibration weight value and then confirm with key.
  • Seite 11: Check Weighing

    UF-2 Check weighing 1. Press the key to start check weighing setup. 2. The display will show the message “0000.0L” 3. Use ◄, ►, ▲, 0 ~ 9 keys to set LO weight value. 4. Press the key to confirm. 5.
  • Seite 12: Hold Function

    5. To exit menu and return back to weighing mode, press the key. UF-5 Function HOLD (keep displaying the weight on the screen during several seconds after having removed the weight from the scale) Modes: HOLD 0 : HOLD Function off. HOLD 1 : Animal Hold function.
  • Seite 13 Data bits Stop bits Start bit FORMAT 1 (232 1~3) Head 1 (2 bytes) Head 2 (2 bytes) OL – Over Load ST – Stable NT – Net Weight US - Unstable GS – Gross Weight Fixed 18 BYTES ASCII (kg g t lb) 1 2 1 1 2 1 1 2 3 4 5 6 7 8 1 2 1 2 HEAD1...
  • Seite 14 Output examples: Example 1. +0.876 kg Stable net weight: S T , N T , + 0 0 0 . 8 7 6 k g 0D 0A Example 2 -1.568 lb unstable gross weight: U S , G S , - 0 0 1 . 5 6 8 l b 0D 0A Example 3 -20.
  • Seite 15: Zero Weight Display Condition

    UF-6 Transmission Format RS-232 1. Press the key. 2. Use the ▲ key to select the desired mode and press the key. 3. Use the ▲ key to select baud rate and the key to confirm. 4. To continue with other setups use the ► key. 5.
  • Seite 16: Standard Gravitational Pre-Calibration

    1. Press the key to access the setting up. 2. Use the ▲ key to select the desired mode. 3. Press the key to confirm. 4. To continue with other setups use the ► key. 5. To exit menu and return back to weighing mode, press the key.
  • Seite 17: Guarantee

    This scale is guaranteed for one year from the delivery date. Te guarantee covers any fabrication defect of the material. During this period GRAM PRECISION, covers the manpower and the spare parts for the reparation of the scale. This guarantee does not cover the failures caused by an inappropriate use or overcharge.
  • Seite 18 INDICE Alimentación, consumo y batería recargable Visualización de la versión de la balanza Descripción del display Descripción del teclado Función de la teclas Predeterminar el valor de una Tara Predeterminar el valor del límite superior Predeterminar el valor del límite inferior Configuración de la función límites de peso Acumulación de pesadas Introducción de la muestra para función cuentapiezas...
  • Seite 19: Alimentación, Consumo Y Batería Recargable

    ALIMENTACION Entrada: 100~240V 50/60hz Salida: 12V/1A DC 12W Batería recargable: 6V/4AH CONSUMO Aprox. 12mA Aprox. 36mA con la iluminación interna del display Aprox. 48mA con la iluminación interna del display y el interface RS-232 (opcional) DURACION DE LA BATERIA Aprox. 320 horas, con la iluminación del display desactivada VISUALIZACION DEL NUMERO DE VERSION DE LA BALANZA 5.
  • Seite 20: Descripción Del Display

    DESCRIPCION DEL TECLADO FUNCION DE LAS TECLAS Para apagar la balanza, mantener pulsada la tecla OFF hasta que el display visualice “Off” durante 2 segundos. Pulsar esta tecla para conectar la balanza. Función 1. Para seleccionar la unidad de pesada deseada. Función 2.
  • Seite 21 Función 1. Impresión manual de datos a través del RS-232 a un PC ó impresora, en este caso, el RS-232 debe ser configurado con transimisión 232 3 ó 232 6. Función 2. Actúa como tecla de confirmación en el modo programación. Para predeterminar el valor de una Tara Para predeterminar el valor del límite superior Para predeterminar el valor del límite inferior...
  • Seite 22: Predeterminar El Valor De Una Tara

    PREDETERMINAR UN VALOR DE TARA 1. Pulsar la tecla 2. Utilizar las teclas numéricas del 0 al 9 para introducir el valor de la tara deseado. 3. Pulsar la tecla para confirmar, los indicadores Net y PT se activarán 4. La balanza volverá automáticamente al modo normal de pesaje. Borrar un valor predeterminado de Tara.
  • Seite 23: Configuración De La Función Límites De Peso

    CONFIGURACION DE LA FUNCION DE LIMITES DE PESO 0 0 0 A: Señal acústica. Opción 0=estabilidad no requerida Opción 1=estabilidad requerida B: Indicador LCD y relés activado Opción 0=estabilidad no requerida Opción 1=estabilidad requerida C: Condiciones de la señal acústica Opción 0=señal acústica desactivada Opción 1=OK Opción 2= LO y HI...
  • Seite 24: Introducción De La Muestra Para Función Cuentapiezas

    COMO BORRAR LAS ACUMULACIONES DE PESADA 1. Pulsar la tecla y todas las acumulaciones de pesada efectuadas se borrarán. INTRODUCCION DE LA MUESTRA PARA CUENTAPIEZAS 1. Pulsar la tecla 2. Utilizar las teclas numéricas del 0 al 9 para introducir el valor de la muestra. 3.
  • Seite 25: Configuración De Funciones

    Calibración de peso ECF-1 1. Pulsar la tecla para acceder al modo ECF-1 ó la tecla ESC para salir del menú y volver al modo normal de pesaje. 2. El display mostrará CALZ, pulsar la tecla 3. Con las teclas ◄, ►, ▲, 0 ~ 9 introducir el valor de la pesa de calibración y confirmar con la tecla 4.
  • Seite 26: Límites De Peso

    UF-2 Límites de peso 1. Pulsar la tecla para acceder a la configuración de límites de peso. 2. El display mostrará el mensaje “0000.0L” 3. Con las teclas ◄, ►, ▲, 0 ~ 9 introducir el valor del límite inferior. 4.
  • Seite 27: Función Hold

    5. Para salir y volver al modo de pesaje, pulsar la tecla UF-5 Función HOLD (mantiene el peso visualizado en el display durante unos segundos tras haber retirado el peso del plato) Modos: HOLD 0 : Función HOLD desactivada. HOLD 1 : Modo pesaje de animales. PCtXXX: Para configurar el rango de 001~100 dentro del modo HOLD 1 timEXX: Para configurar el tiempo en 1 2 4 8 16 32 64 dentro del modo HOLD Valor por defecto: HOLD 0...
  • Seite 28 Datos de los bits Parada bits Bit de comienzo FORMATO 1 (232 1~3) Cabezera 1 (2 bytes) Cabezera 2 (2 bytes) OL – Sobrecarga ST – Estable NT – Peso neto US - Inestable GS – Peso bruto 18 BYTES ASCII (kg g t lb) 1 2 1 1 2 1 1 2 3 4 5 6 7 8 1 2 1 2 HEAD1...
  • Seite 29 Ejemplos de transmisiones: Ejemplo 1. +0.876 kg Estable y Peso Neto: S T , N T , + 0 0 0 . 8 7 6 k g 0D 0A Ejemplo 2 -1.568 lb instable y Peso Bruto: U S , G S , - 0 0 1 . 5 6 8 l b 0D 0A Ejemplo 3 -20.
  • Seite 30: Configuración Del Cero

    UF-6 Formato de transmisión RS-232 1. Pulsar la tecla 2. Utilizar la tecla ▲ para seleccionar el modo deseado y pulsar la tecla 3. Utilizar la tecla ▲ para seleccionar la velocidad de transmisión y la tecla para confirmar. 4. Pulsar la tecla ► para pasar al siguiente parámetro. 5.
  • Seite 31: Pre-Calibración De La Gravedad

    1. Pulsar la tecla para acceder a la programación. 2. Utilizar la tecla ▲ para seleccionar el modo deseado 3. Pulsar la tecla para confirmar 4. Para pasar al siguiente parámetro pulsar la tecla ► 5. Para salir y volver al modo normal de pesaje pulsar la tecla UF-9 Pre-calibración Gravitacional (Valor G) Aunque la balanza permite efectuar al Calibración Standard, la Pre-calibración Gravitacional ayuda a proporcionar mayor exactitud a la balanza.
  • Seite 32: Garantía

    Esta balanza está garantizada contra todo defecto de fabricación y de material, por un periodo de 1 año a partir de la fecha de entrega. Durante este periodo, GRAM PRECISION, se hará cargo de la reparación de la balanza. Esta garantía no incluye los daños ocasionados por uso indebido o sobrecargas.
  • Seite 33 SOMMAIRE Alimentation, consommation et batterie rechargeable Version de la balance Description du display Description du clavier Fonctions des touches Prédéfinir la valeur d’une Tare Prédéfinir la valeur de la limite supérieure Prédéfinir la valeur de la limite inférieure Configuration de la fonction limites de poids Accumulation de pesées Introduction de l’échantillon pour fonction compte-pièces Fonction compte-pièces...
  • Seite 34: Version De La Balance

    ALIMENTATION Entrée: 100~240V 50/60hz Sortie: 12V/1A DC 12W Batterie rechargeable: 6V/4AH CONSOMMATION Approx. 12mA Approx. 36mA avec l’éclairage interne du display Approx. 48mA avec l’éclairage interne du display et l’interface RS-232 (optionnel) DURÉE DE LA BATTERIE Approx. 320 heures, avec l’éclairage du display désactivé AFFICHAGE DU NUMÉRO DE VERSION DE LA BALANCE 1.
  • Seite 35: Description Du Clavier

    DESCRIPTION DU CLAVIER FONCTIONS DES TOUCHES Pour éteindre la balance, mantenir appuyée la touche OFF jusqu’à ce que display affiche “Off” pendant 2 secondes. Appuyer sur cette touche pour connecter la balance. Fonction 1. Pour sélectionner l’unité de pesée désirée. Fonction 2.
  • Seite 36 Fonction 1. Impression manuelle de données grâce à la sortie RS-232, à ou une imprimante, dans ce cas, le RS-232 doit être configuré avec transmission 232 3 ou 232 6. Fonction 2. Fonctionne comme touche de confirmation dans le mode programmation.
  • Seite 37: Prédéfinir La Valeur D'une Tare

    PRÉDÉFINIR UNE VALEUR DE TARE 1. Appuyer sur la touche 2. Utiliser les touches numériques de 0 à 9 pour introduire la valeur de la tare souhaitée. 3. Appuyer sur la touche pour confirmer, les indicateurs Net et PT s’activeront. 4.
  • Seite 38: Configuration De La Fonction Limites De Poids

    CONFIGURATION DE LA FONCTION DE LIMITES DE POIDS 0 0 0 A: Signal accoustique. Option 0=stabilité non-nécessaire Option 1=stabilité nécessaire B: Indicateur LCD et relais activés Option 0= stabilité non-nécessaire Option 1= stabilité nécessaire C: Conditions du signal acustique Option 0=signal acustique désactivé Option 1=OK Option 2= LO et HI 1.
  • Seite 39: Introduction De L'échantillon Pour Fonction Compte-Pièces

    COMMENT VISUALISER LE TOTAL ACCUMULÉ 1. Appuyer sur la touche 2. L’écran affichera pendant 2 secondes le numéro de pesées effectuées. 3. L’écran affichera pendant 2 secondes le poids total accumulé. COMMENT SUPPRIMER LES ACCUMULATIONS DE PESÉE 1. Appuyer sur la touche et toutes les accumulations de pesées effectuées seront supprimées.
  • Seite 40: Configuration De Fonctions

    Calibration de poids ECF-1 1. Appuyer sur la touche pour accéder au mode ECF-1 ou sur la touche ESC pour sortir du menu et revenir au mode normal de pesage. 2. L’écran affichera CALZ, appuyer sur la touche 3. Avec les touches ◄, ►, ▲, 0 ~ 9 introduire la valeur du poids de calibration et confirmer avec la touche 4.
  • Seite 41: Limites De Poids

    UF-2 Limites de poids 1. Appuyer sur la touche pour accéder à la configuration de limites de poids. 2. L’écran affichera le message “0000.0L” 3. Avec les touches ◄, ►, ▲, 0 ~ 9 introduire la valeur de la limite inférieure. 4.
  • Seite 42: Fonction Hold

    4. Pour passer au paramètre suivant, appuyer sur la touche ► 5. Pour sortir et revenir au mode de pesage, appuyer sur la touche UF-5 Fonction HOLD (mantient l’affichage du poids sur l’écran pendant quelques secondes après avoir enlévé le poids du plateau) Modes: HOLD 0 : Fonction HOLD désactivée.
  • Seite 43 Protocole de communication: Signal UART de EIA-RS232 C Format: 1. Transmission de série: 1200/2400/4800/9600/19200/38400 BPS 2. Bits: 8 bits 3. Bits de parité: Aucun 4. Bits d’arrêt: 1 bit Données des bits Arrêt bits Bit de début FORMAT 1 (232 1~3) Tête 1 (2 bytes) Tête 2 (2 bytes)
  • Seite 44 Exemples de transmissions: Exemple 1. +0.876 kg Stable et Poids Net: S T , N T , + 0 0 0 . 8 7 6 k g 0D 0A Exemple 2 -1.568 lb instable et Poids Brut: U S , G S , - 0 0 1 . 5 6 8 l b 0D 0A Exemple 3 -20.
  • Seite 45: Configuration Du Zéro

    1. Appuyer sur la touche 2. Utiliser la touche ▲ pour sélectionner le mode souhaité et appuyer sur la touche 3. Utiliser la touche ▲ pour sélectionner la vitesse de transmission et sur la touche pour confirmer. 4. Appuyer sur la touche ► pour passer au paramètre suivante. 5.
  • Seite 46: Garantie

    Cette balance est garantiée contre tout défaut de fabrication et de materiel, pour une période de 1 an à partir de la date de la livraison. Pendant cette période, GRAM PRECISION, se chargera de la réparation de la balance. Cette garantie n’inclut pas les dommages causés par une mauvaise manipulation ou surcharge.
  • Seite 47: Declaración De Conformidad Ce

    INHALTSVERZEICHNIS Stromversorgung, Stromverbrauch und aufladbarer Akku Anzeige der Versionsnummer der Waage Beschreibung des Displays Beschreibung der Tastatur Beschreibung der Hauptfunktionen Voreinstellung des Tarawerts Voreinstellung des oberen Gewichtsgrenzwerts Voreinstellung des unteren Gewichtsgrenzwerts Konfiguration des Prüf-Wägemodus Summenfunktion So geben Sie die Stichprobe für die Stückzählung ein Stückzählungsfunktion Standardjustierungen Einrichtung der Funktionen...
  • Seite 48: Stromversorgung

    STROMVERSORGUNG Eingang: 100~240V 50/60Hz Ausgang: 12V/1A DC 12W Aufladbarer Blei-Säure-Akku: 6V/4AH STROMVERBRAUCH Ca. 12 mA Ca. 36 mA mit Hintergrundbeleuchtung Ca. 48 mA mit Hintergrundbeleuchtung und RS232-Schnittstelle (optional) AKKUSTUNDEN PRO AUFLADUNG Ca. 320 Stunden (ohne Hintergrundbeleuchtung). ANZEIGE DER VERSIONSNUMMER DER WAAGE 1.
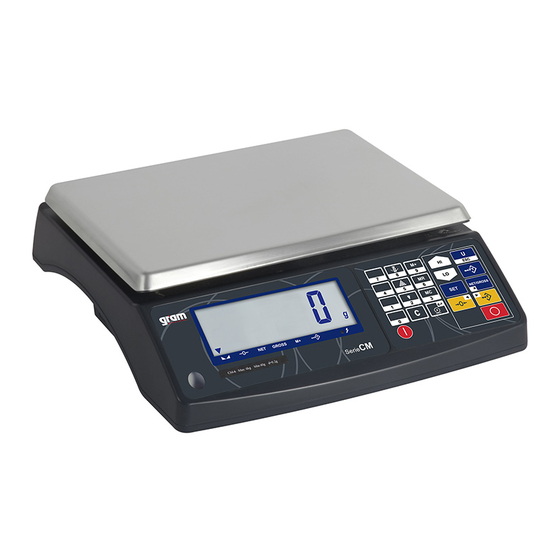
  • Seite 49: Beschreibung Der Tastatur

    BESCHREIBUNG DER TASTATUR BESCHREIBUNG DER HAUPTFUNKTIONEN Zum Ausschalten der Waage die AUS-Taste gedrückt halten. Das Display zeigt während 2 Sekunden „AUS“ an. Die Taste drücken, um die Waage auszuschalten. Funktion 1. Auswahl der gewünschten Wägeeinheit. Funktion 2. Verlassen der Einstellung im Einrichtungsmodus. Funktion 1.
  • Seite 50 Funktion 1. Manuelle Übertragung von Daten über die RS232-Schnittstelle an einen Computer oder Drucker im normalen Wägemodus (RS-232 muss für die Tastaturübertragung 232 3 oder 232 6 eingestellt sein). Funktion 2. Funktioniert als Eingabetaste im Einrichtungsmodus. Voreinstellung des Tarawerts. Voreinstellung des oberen Gewichtsgrenzwerts. Voreinstellung des unteren Gewichtsgrenzwerts.
  • Seite 51: Voreinstellung Des Tarawerts

    VOREINSTELLUNG DES TARAWERTS 1. Die Taste drücken. 2. Numerische Tasten von 0 bis 9 zur Eingabe des erforderlichen Tarawerts verwenden. 3. Zur Bestätigung die Taste drücken. Die Anzeigen Net und PT erscheinen. 4. Die Waage kehrt automatisch in den normalen Wägemodus zurück. Löschung eines voreingestellten Tarawerts.
  • Seite 52: Konfiguration Des Prüf-Wägemodus

    KONFIGURATION DES PRÜF-WÄGEMODUS o 0 0 0 A: Akustisches Signal Option 0=Stabilität ist nicht erforderlich Option 1= Stabilität ist erforderlich B: LCD-Anzeige und Relais aktiviert Option 0=Stabilität ist nicht erforderlich Option 1= Stabilität ist erforderlich C: Status akustisches Signal Option 0=akustisches Signal deaktiviert Option 1=OK Option 2= LO und HI 1.
  • Seite 53: So Löschen Sie Die Summierten Gewichte

    3. Der Bildschirm zeigt während 2 Sekunden das summierte Gesamtgewicht an. SO LÖSCHEN SIE DIE SUMMIERTEN GEWICHTE 1. Die Taste drücken. Alle durchgeführten Gewichtssummierungen werden gelöscht. SO GEBEN SIE DIE STICHPROBE FÜR DIE STÜCKZÄHLUNG EIN 1. Die Taste drücken. 2. Numerische Tasten von 0 bis 9 zur Eingabe der gewünschten Probenstückzahl verwenden.
  • Seite 54: Einrichtung Der Funktionen

    Gewichtsjustierung ECF-1 1. Die Taste drücken, um den Modus ECF-1 zu starten, bzw. ESC, um das Menü zu verlassen und zum Wägemodus zurückzukehren. 2. Auf dem Display erscheint CALZ. Die Taste drücken. 3. Den Wert des Justiergewichts mit den Tasten ◄, ►, ▲, 0 ~ 9 eingeben und die Eingabe dann mit der Taste bestätigen.
  • Seite 55: Prüf-Wägemodus

    zurückzukehren. UF-2 Prüf-Wägemodus 1. Die Taste drücken, um die Einrichtung des Prüf-Wägemodus zu starten. 2. Auf dem Display erscheint die Nachricht „0000.0L“. 3. Mit den Tasten ◄, ►, ▲, 0 ~ 9 den unteren Gewichtsgrenzwert (LO) einstellen. 4. Zur Bestätigung die Taste drücken.
  • Seite 56: Haltefunktion

    4. Um mit anderen Einrichtungen fortzufahren, die Taste ► verwenden. 5. Die Taste drücken, um das Menü zu verlassen und zum Wägemodus zurückzukehren. UF-5 HALTEFUNKTION (HOLD) (zeigt das Gewicht während mehrerer Sekunden weiterhin auf dem Display an, nachdem das Gewicht von der Waage genommen wurde).
  • Seite 57 Stoppbits Startbit Datenbits FORMAT 1 (232 1~3) Kopf 1 (2 Bytes) Kopf 2 (2 Bytes) OL – Überlastung ST – Stabil NT – Nettogewicht US - Instabil GS – Bruttogewicht Fest 18 BYTES ASCII (kg g t lb) 1 2 1 1 2 1 1 2 3 4 5 6 7 8 1 2 1 2 HEAD1 HEAD2 DATA...
  • Seite 58 Ausgabebeispiele: Beispiel 1. +0,876 kg stabiles Nettogewicht: S T , N T , + 0 0 0 . 8 7 6 k g 0D 0A Beispiel 2 -1,568 lb instabiles Bruttogewicht: U S , G S , - 0 0 1 . 5 6 8 l b 0D 0A Beispiel 3 -20.
  • Seite 59: Nullgewicht-Anzeigebedingung

    UF-6 Übertragungsformat RS-232 1. Die Taste drücken. 2. Mit der Taste ▲ den gewünschten Modus auswählen und die Taste drücken. 3. Mit der Taste ▲ die Baudrate auswählen und anschließend mit der Taste bestätigen. 4. Um mit anderen Einrichtungen fortzufahren, die Taste ► verwenden. 5.
  • Seite 60: Standardmäßige Gravitationsvorjustierung

    1. Die Taste drücken, um die Einrichtung aufzurufen. 2. Mit der Taste ▲ den gewünschten Modus auswählen. 3. Zur Bestätigung die Taste drücken. 4. Um mit anderen Einrichtungen fortzufahren, die Taste ► verwenden. 5. Die Taste drücken, um das Menü zu verlassen und zum Wägemodus zurückzukehren.
  • Seite 61: Gewährleistung

    Für diese Waage besteht eine Garantie von einem Jahr ab Lieferzeitpunkt. Die Garantie erstreckt sich auf alle Herstellungs- und Materialfehler. Während dieses Zeitraums deckt GRAM PRECISION die zur Reparatur der Waage erforderlichen Personal- und Ersatzteilkosten ab. Diese Garantie erstreckt sich nicht auf Ausfälle aufgrund unsachgemäßer Nutzung oder Überladung.

Diese Anleitung auch für:

Cm-3Cm-6Cm-15Cm-30Cm-serie

Inhaltsverzeichnis