Inhaltsverzeichnis

Verwandte Anleitungen für Ayce NTL 534 Serie


Inhaltszusammenfassung für Ayce NTL 534 Serie
- Seite 1 GEBRAUCHSANWEISUNG I MANUEL D'UTILISATION I MANUALE DI ISTRUZIONI I OPERATOR'S MANUAL RMB1051 - BENZINMÄHER MIT RADANTRIEB TOSAERBA A SCOPPIO A TRAZIONE NTL 534 W TR 4S TONDEUSE THERMIQUE TRACTÉE LAWN MOWER WITH WHEEL DRIVE...
- Seite 2 ÜBERSETZUNG DER ORIGINALBETRIEBSANLEITUNG TECHNISCHE DATEN NT / NTL TECHNISCHE DATEN 534 Series Nennleistung* 2.27 ÷ 3.30 2800 ± 100 ÷ Max. Betriebsgeschwindigkeit des Motors* 2900 ± 100 Maschinengewicht* 31 ÷ 44 Schnittbreite dB(A) Schalldruckpegel 83.7 Messungenauigkeit dB(A) dB(A) Gemessener Schallleistungspegel Messungenauigkeit 0.77 dB(A)
-
Seite 3: Technische Daten
NT / NTL TECHNISCHE DATEN 534 Series Garantierter Schallleistungspegel dB(A) Vibrationspegel 7.43 Messungenauigkeit Abmessungen 1650 - Länge - Breite 1115 - Höhe Oregon 69 244 0 Nummer Schneidwerkzeug (GGP 181004461/0) Zubehör Kit “Mulching”... -
Seite 4: Sicherheitsvorschriften
SICHERHEITSVORSCHRIFTEN Ihr Rasenmäher muss mit Vorsicht benutzt werden. Aus diesem Grund wurden an der Maschine Symbole angebracht, die Sie auf die wichtigsten Vorsichtsmassnah- men hinweisen. Die Bedeutung der Symbole ist nachstehend erklärt. Wir weisen auch noch einmal ausdrücklich auf die Sicherheitsnormen hin, die Sie im entspre- chenden Kapitel dieser Gebrauchsanleitung finden. -
Seite 5: Sicherheitsvorschriften Zur Strengsten Beachtung
SICHERHEITSVORSCHRIFTEN ZUR STRENGSTEN BEACHTUNG ACHTUNG: VOR INBETRIEBNAHME DES GERÄTS DIE GEBRAUCHSANLEITUNG AUFMERKSAM LESEN. Für zukünftiges Nachschlagen aufbewahren. A) ALLGEMEINE HINWEISE ACHTUNG! Bitte lesen Sie vor der Inbetriebnahme diese Gebrauchsan- weisungen aufmerksam durch. Machen Sie sich mit den Bedienungsteilen und dem richtigen Gebrauch der Maschine vertraut. Lernen Sie, den Motor schnell abzustellen. - Seite 6 Überprüfen Sie sorgfältig das ganze Gelände, auf dem die Maschine einge- setzt wird, und entfernen Sie alle Gegenstände, die von der Maschine wegge- schleudert werden oder das Schneidwerkzeug und den Motor beschädigen könnten (Steine, Äste, Eisendrähte, Knochen usw.). ACHTUNG: GEFAHR! Benzin ist hochgradig entflammbar. •...
- Seite 7 C) HANDHABUNG Der Motor darf nicht in geschlossenen Räumen laufen,in denen sich gefähr- liche Kohlenmonoxydgase ansammeln können. Das Anlassen hat im Freien oder an einem gut belüfteten Ort zu erfolgen. Immer daran denken, dass die Abgase giftig sind. Nur bei Tageslicht oder bei guter künstlicher Beleuchtung und mit guten Sichtverhältnissen arbeiten.
- Seite 8 15. Den Rasenmäher beim Start des Motors nicht kippen. Starten Sie den Motor auf einer ebenen Fläche ohne Hindernisse oder hohes Gras. 16. Bringen Sie niemals Hände oder Füsse in die Nähe von sich drehenden Tei- len. Halten Sie sich immer entfernt von der Auswurföffnung. 17.
-
Seite 9: Wartung Und Lagerung
26. Halten Sie während der Arbeit stets einen Sicherheitsabstand vom rotieren- den Schneidwerkzeug. Dieser Abstand entspricht der Länge des Handgriffs. 27. Bevor Sie den Motor abstellen, nehmen Sie das Gas zurück. Nach Ende der Arbeit, schliessen Sie die Benzinzufuhr, indem Sie die Anweisungen im Hand- buch befolgen. - Seite 10 Nach jeder Verwendung das Zündkerzenkabel abziehen und die Maschine auf eventuelle Schäden überprüfen. Sorgen Sie dafür, dass alle Muttern und Schrauben fest angezogen sind, um sicher zu sein, dass die Maschine immer unter guten Bedingungen arbeitet. Eine regelmässige Wartung ist unerlässlich für die Sicherheit und die Erhal- tung der Leistungsfähigkeit.
-
Seite 11: Transport Und Handhabung
17. Um Brandgefahr zu vermeiden, kontrollieren Sie regelmässig, dass keine Öl- und/oder Kraftstoffverluste auftreten. 18. Falls der Tank zu entleeren ist, muss dies im Freien und bei kaltem Motor erfolgen. E) TRANSPORT UND HANDHABUNG Folgende Hinweise müssen bei jedem Bewegen, Heben, Transportieren oder Kippen der Maschine beachtet werden: •... -
Seite 12: Die Maschine Kennenlernen
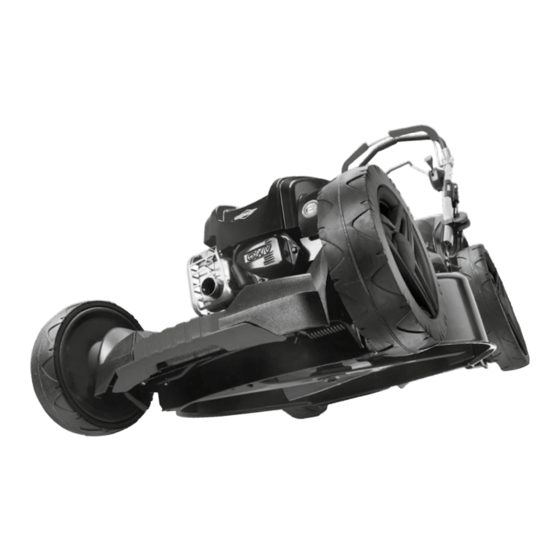
DIE MASCHINE KENNENLERNEN BESCHREIBUNG DER MASCHINE UND EINSATZBEREICH Diese Maschine ist ein Gartenbaugerät, genauer gesagt ein handgeführter Rasen- mäher. Die Maschine besteht im Wesentlichen aus einem Motor, der ein in einem Gehäuse eingeschlossenes Schneidwerkzeug antreibt, und verfügt über Räder und einen Griff. Der Bediener kann die Maschine führen und die Hauptsteuerun- gen betätigen, wobei er immer hinter dem Griff steht, also in Sicherheitsabstand zum rotierenden Schneidwerkzeug. - Seite 14 17/20...
-
Seite 15: Typenschild Und Maschinenbauteile
TYPENSCHILD UND MASCHINENBAUTEILE Schallleistungspegel Schneidwerkzeug CE-Kennzeichnung Hinterer Auswurfschutz Herstellungsjahr Seitlicher Auswurfdeflektor (falls vorgesehen) Typ des Rasenmähers Seitlicher Auswurfschutz Seriennummer (falls vorgesehen) Name und Anschrift des Grasfangeinrichtung Herstellers Griff Artikelnummer Gashebel Nennleistung und maximale Drehzahl des Motors Hebel Motorbremse / Schneidwerkzeug Gewicht in kg Kupplungshebel Chassis... -
Seite 16: Gebrauchsvorschriften
GEBRAUCHSVORSCHRIFTEN Für den Motor und die Batterie (falls vorhanden) wird auf die entsprechenden Bedie- nungsanleitungen verwiesen. HINWEIS Die Übereinstimmung zwischen den Ver- weisen im Text und den entsprechenden Abbildungen wird durch die Nummer vor jedem Abschnitt gegeben. ACHTUNG 1. MONTAGE Das Auspacken und die Montage müssen auf einer ebenen und stabilen Oberfläche erfolgen. -
Seite 17: Beschreibung Der Bedienelemente
2. BESCHREIBUNG DER BEDIENELEMENTE 2.1 Gasbetätigung Das Gas wird mit dem Hebel (1) betätigt. Die Positionen des Hebels sind auf dem entsprechenden Etikett angegeben. Auf einigen Modellen ist ein Motor ohne Gashebel vorgesehen. 2.2 Hebel Motorbremse / Schneidwerkzeug Die Bremse des Schneidwerkzeugs wird über den Hebel (1) bedient, der zum An- lassen und während des Betriebs des Rasenmähers gegen den Handgriff gedrückt werden muss. - Seite 18 2.4 Geschwindigkeitsregler (falls vorgesehen) Bei den Modellen mit Antrieb ermöglicht der Gesch- windigkeitsregler (falls vorgesehen) die Einstellung der Vorschubgeschwindigkeit. Diese Einstellung wird erhalten, indem man den Hebel (1) gemäss den dane- ben angeführten Anweisungen verstellt. WICHTIG! Der Übergang von einer Geschwindigkeit zur anderen muss bei laufendem Motor und einge- schaltetem Antrieb erfolgen.
-
Seite 19: Mähen Des Grases
3. MÄHEN DES GRASES WICHTIG! Diese Maschine ermöglicht das Mähen des Rasens mit verschiedenen Modi; vor Arbeitsbeginn sollte die Maschine entsprechend der gewünschten Schnittart eingestellt werden. DER ARBEITSGANG IST BEI AUSGE-SCHALTETEM MOTOR DURCHZUFÜHREN. 3.1 A 3.1 a Vorbereitung für das Mähen und Sammeln des Grases in der Grasfangeinrichtung: Den hinteren Auswurfschutz (1) anheben und die Grasfangeinrichtung (2) wie abge- bildet einhängen. - Seite 20 3.1 C 3.1 c Vorbereitung für das Mähen und Feinschnitt des Grases („Mulching“ Funktion – falls vorgesehen): • Bei Modellen mit der Möglichkeit des Auswurfs: Sicherstellen, dass der seit- liche Auswurfschutz (4) abgesenkt ist. • Den hinteren Auswurfschutz (1) anheben und die Deflektorklappe (5) so in die Auswurföffnung einsetzen, dass sie leicht nach rechts geneigt ist;...
- Seite 21 3.2 Anlassen des Motors Zum Anlassen die Anweisungen der Betriebsanleitung des Motors befolgen. • Modelle mit Handstart Den Bremshebel des Schneidwerkzeugs (1) gegen den Handgriff ziehen und kräftig am Griff des Starterseils (2) ziehen. • Modelle mit Elektrostart mit Schlüssel Den Bremshebel des Schneidwerkzeugs (1) gegen den Griff ziehen und den Zündschlüssel (3) drehen.
- Seite 22 • Beim „Mulching“ oder hinteren Grasauswurf: Stets vermeiden, eine über- mässige Menge Gras zu schneiden. Es darf nie mehr als ein Drittel der Gesamthöhe des Grases auf einmal geschnitten werden! Die Fahrgeschwin- digkeit ist dem Zustand des Rasens und der Menge des zu mähenden Grases anzupassen.
-
Seite 23: Ordentliche Wartung
3.4 Nach der Arbeit Nach der Arbeit den Bremshebel (1) loslassen und den Zündkerzenstecker (2) abstecken. • Modelle mit Elektrostart mit Schlüssel Den Zündschlüssel (3) abziehen. • Modelle mit Elektrostart durch Knopfdruck Die Lasche (5) drücken und den Freigabeschlüssel (4) entfernen. WARTEN SIE BIS DAS SCHNEID- WERKZEUG STILLSTEHT, bevor Sie irgendeinen Eingriff durchführen. - Seite 24 Falls ein Zugriff auf die Unterseite der Maschine erforderlich ist, darf diese nur in die Richtung gekippt werden, die im Motorhandbuch angegeben ist. Da- bei sind die entsprechenden Anweisungen zu beachten und man muss sicher- stellen, dass die Maschine stabil ist, bevor man jeglichen Eingriff durchführt. Bei Modellen mit seitlichem Auswurf muss der Auswurfdeflektor abmontiert werden (falls montiert - siehe 3.1.d).
- Seite 25 4.2 Regelung des Antriebs Bei den angetriebenen Modellen wird die richtige Riemenspan- nung mit Hilfe der Mutter (1) erreicht, mit der das angegebene Mass (6 mm) eingestellt wird. 4.3 Aufladen der Batterie (falls vorgesehen) Modelle mit Elektrostart mit Schlüssel • Schliessen Sie zum Aufladen einer leeren Batterie diese an das Batterie- ladegerät (1) an, wie in der Wartungs-...
- Seite 26 5. ZUBEHÖR ACHTUNG Für Ihre Sicherheit ist es strengstens verboten, ande- res Zubehör als das in der folgenden Liste genannt zu montieren. Diese Zubehörteile wurden speziell für das Modell und den Typ Ihrer Maschine entwickelt. 5.1 Mulching-Kit” (wenn nicht im Lieferumfang enthalten) Zerhackt das geschnittene Gras fein und lässt es auf dem Rasen, als Alternative zum Sammeln in der Grasfangeinrichtung (bei Maschinen, die dafür vorgesehen sind).
- Seite 27 6. DIAGNOSE Was tun wenn ... Ursache des Problems Abhilfemassnahme 1. Der Benzinrasenmäher funktioniert nicht Es fehlt Öl oder Benzin im Motor Kontrollieren Sie den Ölstand und den Benzinstand Die Zündkerze und den Filter reinigen, Die Zündkerze und der Filter sind nicht die verschmutzt sein können, oder sie in gutem Zustand auswechseln...
- Seite 28 Wahl getroffen. Unsere Qualitätsverpflichtung schliesst auch unseren Kundendienst ein. Jumbo bietet einen ausgezeichneten Reparaturdienst für alle ayce Produkte an. Sollte Ihr Gerät entgegen aller Erwartungen bei der privaten Nutzung innerhalb von FÜNF JAHREN ab Kaufdatum einen Mangel aufgrund von Material- oder Herstellungsfehlern aufweisen, können Sie...
- Seite 29 GARANTIESCHEIN Vorname Nachname Strasse/Hausnummer Telefon Postleitzahl Ort Mobil Artikelnummer Barcode (EAN) Garantie Kaufbeleg Nr./Datum (bitte ankreuzen) (Bitte ebenfalls eine Kopie des Kaufbelegs beifügen) Nein Das Gerät wurde in der folgenden Jumbo-Filiale gekauft: Aufgetretene Mängel (bitte auflisten) (Bitte beschreiben Sie das Problem oder die Betriebsstörung Ihres Gerätes so genau wie möglich. So können wir Ihre Beschwerde schneller und effizienter bearbeiten.
-
Seite 30: Eg-Konformitätserklärung
EG-KONFORMITÄTSERKLÄRUNG (Maschinenrichtlinie 2006/42/EG, Anhang II, Teil A) 1. Die Gesellschaft: GGP Italy S.p.A. – Via del Lavoro, 6 – 31033 Castelfranco Veneto (TV) – Italy 2. Erklärt auf eigene Verantwortung, dass die Maschine: Handgeführter Rasenmäher / Rasenschnitt a) Typ / Basismodell Sie finden die technischen Daten des b) Handelsmodell Rasenmähers auf der letzten Seite... - Seite 31 4. Bezugnahme auf die harmonisierten Normen: GEN ISO 5395-1:2013 EN ISO 5395-2:2013 97 dB(A) i) Gemessener Schallleistungspegel 98 dB(A) j) Garantierter Schallleistungspegel k) Schnittbreite 51 cm q) Zur Verfassung der technischen Unterlagen befugte Person: GGP ITALY S.p.A. Via delLavoro, 6 31033 Castelfranco Veneto (TV) - Italia r) Castelfranco V.to, 04.02.2016 Vice Presidente R&D &...
-
Seite 32: Caractéristiques Techniques
TRADUCTION DE LA NOTICE ORIGINALE CARACTÉRISTIQUES TECHNIQUES NT / NTL CARACTÉRISTIQUES TECHNIQUES 534 Series Puissance nominale* 2.27 ÷ 3.30 2800 ± 100 ÷ Vitesse max. de fonctionnement du moteur* 2900 ± 100 Poids machine* 31 ÷ 44 Largeur de coupe dB(A) Niveau de pression acoustique 83.7... - Seite 33 NT / NTL CARACTÉRISTIQUES TECHNIQUES 534 Series Niveau de puissance acoustique garanti dB(A) Niveau de vibrations 7.43 Incertitude de la mesure Dimensions 1650 - longueur - largeur 1115 - hauteur Oregon 69 244 0 Codice dispositivo di taglio (GGP 181004461/0) Équipements Kit “Mulching”...
-
Seite 34: Prescriptions De Sécurité
PRESCRIPTIONS DE SÉCURITÉ Il faut utiliser la tondeuse avec prudence. Dans ce but, des pictogrammes destinés à vous rappeler les principales précautions d’utilisation sont été placés sur la machi- ne. Leur signification est expliquée ci-après. Nous vous recommandons également de lire attentivement les consignes de sécurité données au chapitre prévu du pré- sent manuel. -
Seite 35: Opérations Préliminaires
NORMES DE SÉCURITÉ À OBSERVER SCRUPULEUSEMENT ATTENTION: LIRE ATTENTIVEMENT LE MANUEL AVANT D’UTILISER CETTE MACHINE. Conserver pour toute consultation future. A) FORMATION ATTENTION! Lire attentivement ces instructions avant d’utiliser la machine. Se familiariser avec les commandes et avec la bonne utilisation de la machi- ne. -
Seite 36: Pendant L'utilisation
ATTENTION: DANGER! L’essence est très inflammable. • Conserver le carburant dans les bidons prévus à cet effet; • Faire le plein d’essence à l’aide d’un entonnoir, en plein air unique- ment et ne pas fumer pendant cette opération, ni lors de la manipula- tion du carburant;... - Seite 37 Si possible, éviter de travailler dans l’herbe mouillée. Éviter de travailler sous la pluie et par temps orageux. Ne pas utiliser la machine par mauvais temps, notamment lorsqu’il existe un risque de foudre. Toujours vérifier le point d’appui sur les terrains en pente. Marcher, ne jamais courir;...
- Seite 38 22. Utiliser les équipements approuvés par le fabricant de la machine unique- ment. 23. Ne pas utiliser la machine si les équipements / appareils ne sont pas instal- lés aux endroits prévus. 24. Désactiver l’organe de coupe, arrêter le moteur et débrancher le câble de la bougie (en s’assurant que toutes les parties en mouvement sont complète- ment arrêtées): •...
-
Seite 39: Entretien Et Entreposage
sonores et les vibrations. Il faut donc adopter des mesures préventives afin d’éliminer tout dommage possible dûs à un bruit élevé et aux contraintes issues des vibrations; veiller à l’entretien de la machine, porter un casque anti-bruit, faire des pauses pendant le travail. D) ENTRETIEN ET ENTREPOSAGE ATTENTION! –... -
Seite 40: Transport Et Manutention
10. Ne pas toucher l’organe de coupe avant que le câble de la bougie ne soit débranché et que l’organe de coupe ne soit complètement à l’arrêt. Pendant les interventions sur l’organe de coupe, faire attention car l’organe de coupe peut se déplacer, même si le câble de la bougie est débranché. - Seite 41 La protection de l’environnement doit être un aspect important et prio- ritaire dans l’utilisation de la machine, au profit de la société civile et de l’environnement dans lequel nous vivons. Éviter de déranger le voisinage. Suivre scrupuleusement les normes locales pour l’élimination des embal- lages, des huiles, de l’essence, des pièces détériorées ou de tout élément ayant un effet important sur l’environnement;...
-
Seite 42: Connaître La Machine
CONNAÎTRE LA MACHINE DESCRIPTION DE LA MACHINEET CHAMP D’APPLICATION Cette machine est un équipement de jardinage et plus précisément une tondeu- se à gazon à conducteur à pied. La machine est composée pour l’essentiel d’un moteur actionnant un organe de coupe contenu dans un carter, équipé de roues et d’un guidon. - Seite 44 17/20...
- Seite 45 PLAQUE D’IDENTIFICATION ET COMPOSANTS DE LA MACHINE Niveau de puissance Organe de coupe acoustique Protection d’éjection arrière Marque de conformité CE Déflecteur d’éjection latéra- Année de fabrication le (si prévu) Type de tondeuse Protection d’éjection latéra- le (si prévue) Numéro de série Bac de ramassage Nom et adresse du fabricant Guidon...
-
Seite 46: Terminer Le Montage
MODE D’EMPLOI Pour le moteur et la batterie (si prévue), lire attentivement les manuel d’utilisation corre- spondants. REMARQUE Le rapport entre les références contenues ans le texte et les figures correspondantes (situées aux pages iii e suivantes) est indiqué par le numéro précédant chaque paragraphe. 1. -
Seite 47: Description Des Commandes
2. DESCRIPTION DES COMMANDES 2.1 Commande accélérateur L’accélérateur est commandé par le levier (1). Les positions du levier sont indi- quées sur l’étiquette correspondante. Un moteur sans accélérateur est prévu sur certains modèles de machine. 2.2 Levier frein moteur / organe de coupe Le frein de l’organe de coupe est commandé... - Seite 48 2.4 Commande variateur de vitesse (si prévue) Sur les modèles avec traction, le variateur de vitesse (si prévu) permet de régler la vitesse d’avancement. Le réglage se fait en déplaçant le levier (1) selon les instructions indiquées à proximité du levier. IMPORTANT! Pour passer d’une vitesse à...
-
Seite 49: Couper L'herbe
3. COUPER L’HERBE REMARQUE! Cette machine permet de couper la pelouse de différents façons; il est recommandé, avant de commencer le travail, de préparer la machine selon la coupe que l’on souhaite réaliser. EFFECTUER L’OPÉRATION À MOTEUR ÉTEINT. 3.1 A 3.1 a Préparation pour la coupe et le ramassage de l’herbe dans le sac de ramas- sage: Soulever la protection d’éjection arrière (1) et bien accrocher le bac de ramassage... - Seite 50 3.1 C 3.1 c Préparation pour la coupe et le broyage de l’herbe (fonction «mulching» – si prévue): • Pour les modèles avec possibilité d’éjection: s’assurer que la protection d’éjection latérale (4) est abaissée. • Soulever la protection d’éjection postérieure (1) et introduire le bouchon déflecteur (5) dans l’ouverture d’éjection en le tenant légèrement incliné...
- Seite 51 3.2 Démarrage du moteur Pour le démarrage, suivre les indications du livret du moteur. • Modèles avec démarrage manuel Tirer le levier du frein de l’organe de coupe (1) contre le guidon et don- ner un coup décisif à la poignée du câble de démarrage (2). •...
- Seite 52 • En cas de broyage ou d’éjection arrière de l’herbe: toujours éviter d’enlever une quantité d’herbe considérable. Ne jamais enlever plus d’un tiers de la hauteur totale de l’herbe en une seule fois! Adapter la vitesse d’avancement aux conditions de la pelouse et à la quantité d’herbe enlevée. •...
-
Seite 53: Entretien Périodique
3.4 Fin du travail Quand l’herbe est coupée, relâcher le levier (1) du frein et débrancher le capuchon de la bougie (2). • Modèles avec démarrage élec- trique à clé Retirer la clé de contact (3). • Modèles avec démarrage élec- trique à... - Seite 54 métal. Au cas où il serait nécessaire d’accéder à la partie inférieure, incliner la ma- chine du côté indiqué par le manuel du moteur uniquement, en observant les instructions correspondantes et en s’assurant de la stabilité de la machine avant d’effectuer toute intervention que ce soit. Sur les modèles qui prévoi- ent l’éjection latérale, il faut enlever le déflecteur d’éjection (s’il est monté...
- Seite 55 4.2 Réglage de la traction Pour les modèles avec traction, pour obtenir la bonne tension de la courroie, agir sur l’écrou (1) jusqu’à obtenir la mesure indiquée (6 mm). 4.3 Recharge de la batterie (si prévue) Modèles avec démarrage électrique à clé •...
- Seite 56 5. ÉQUIPEMENTS ATTENTION! Pour votre sécurité, il est strictement interdit de monter tout équipement autre que ceux inclus dans la liste suivante, conçus expressément pour ce modèle et pour ce type de machine. 5.1 «Mulching» (s’il n’est pas inclus dans la fourniture) Il broie finement l’herbe coupée et la laisse sur la pelouse au lieu de la collecter dans le bac de ramassage (pour machines prédisposées).
- Seite 57 6. DIAGNOSTIC Que faire si ... Origine du problème Action corrective 1. La tondeuse à essence fonctionne pas Absence d’huile ou d’essence dans le Contrôler des niveaux d’huile et moteur d’essence La bougie et le filtre ne sont pas en Nettoyer la bougie et le filtre qui peu- bon état vent être encrassés ou les remplacer...
-
Seite 58: Certificat De Garantie
Félicitations ! Vous avez fait un excellent choix en achetant ce produit de qualité. Notre engagement de qualité inclut également notre service de réparation. Jumbo offre un excellent service de réparation, pour tous les produits ayce. Si, contre toute attente, vous rencontrez un problème dû à un défaut de fabrication ou de matériau dans le cadre d’un usage privé... -
Seite 59: Carte De Garantie
CARTE DE GARANTIE Prénom Nom de famille Rue/N° Téléphone Code postal Ville Tél. portable : N° de modèle Code barre (EAN) Garantie Numéro/date du reçu de vente (cochez la case) (Fournissez également une copie du reçut de vente) Acheté dans un magasin Jumbo: Quel problème est survenu (veuillez expliquer) (Décrivez le problème ou le dysfonctionnement de votre appareil aussi précisément que possible. -
Seite 60: Déclaration Ce De Conformité
DÉCLARATION CE DE CONFORMITÉ (Directive Machines 2006/42/CE, Annexe II, partie A) 1. La Société : GGP Italy S.p.A. – Via del Lavoro, 6 – 31033 Castelfranco Veneto (TV) – Italy 2. Déclare sous sa propre responsabilité que la machine : Tondeuse à... - Seite 61 4. Renvoi aux Normes harmonisées : GEN ISO 5395-1:2013 EN ISO 5395-2:2013 97 dB(A) i) Niveau de puissance sonore mesuré 98 dB(A) j) Niveau de puissance sonore garanti k) Largeur de coupe 51 cm q) Personne habilitée à établir le Dossier Technique : GGP ITALY S.p.A.
-
Seite 62: Dati Tecnici
ISTRUZIONI ORIGINALI DATI TECNICI NT / NTL DATI TECNICI 534 Series Potenza nominale* 2.27 ÷ 3.30 2800 ± 100 ÷ Velocità mass. di funzionamento motore* 2900 ± 100 Peso macchina* 31 ÷ 44 Ampiezza di taglio dB(A) Livello di pressione acustica 83.7 Incertezza di misura dB(A) - Seite 63 NT / NTL DATI TECNICI 534 Series Livello di potenza acustica garantito dB(A) Livello di vibrazioni 7.43 Incertezza di misura Dimensioni 1650 - lunghezza - larghezza 1115 - altezza Oregon 69 244 0 Codice dispositivo di taglio (GGP 181004461/0) Accessori Kit “Mulching”...
-
Seite 64: Prescrizioni Di Sicurezza
PRESCRIZIONI DI SICUREZZA Il vostro rasaerba deve essere utilizzato con prudenza. A tale scopo, sulla macchina sono stati posti dei pittogrammi, destinati a ricordarvi le principali precauzioni d’uso. Il loro significato è spiegato qui di seguito. Vi raccomandiamo inoltre di leggere attentamente le norme di sicurezza riportate nell’apposito capitolodel presente libretto. -
Seite 65: Operazioni Preliminari
NORME DI SICUREZZA DA OSSERVARE SCRUPOLOSAMENTE ATTENZIONE: PRIMA DI USARE LA MACCHINA, LEGGERE ATTENTAMENTE IL PRESENTE LIBRETTO. Conservare per ogni futura necessità. A) ADDESTRAMENTO ATTENZIONE! Leggere attentamente le presenti istruzioni prima di usare la macchina. Prendere familiarità con i comandi e con un uso appropriato dellamacchina. -
Seite 66: Durante L'utilizzo
ATTENZIONE: PERICOLO! La benzina è altamente infiammabile. • Conservare il carburante in appositi contenitori; • Rabboccare il carburante, utilizzando un imbuto, solo all’aperto e non fumare durante questa operazione e ogni volta che si maneggia il carburante; • Rabboccare prima di avviare il motore; non aggiungere benzina o togliere il tappo del serbatoio quando il motore è... - Seite 67 Se possibile, evitare di lavorare nell’erba bagnata. Evitare di lavorare sotto la pioggia e con rischio di temporali. Non usare la macchina in condizioni di brutto tempo, specialmente con probabilità di lampi. Accertarsi sempre del proprio punto d’appoggio sui terreno in pendenza. Non correre mai, ma camminare.
- Seite 68 22. Utilizzare solo gli accessori approvati dal produttore della macchina. 23. Non utilizzare la macchina se gli accessori/utensili non sono installati nei punti previsti. 24. Disinnestare il dispositivo di taglio, fermare il motore e staccare il cavo della candela (accertandosi che tutte le parti in movimento si siano completamen- te arrestate): •...
-
Seite 69: Manutenzione E Magazzinaggio
D) MANUTENZIONE E MAGAZZINAGGIO ATTENZIONE! – Staccare il cavo della candela e leggere le relative istruzioni prima di iniziare qualsiasi intervento di pulizia o manutenzione. Indossare in- dumenti adeguati e guanti di lavoro in tutte le situazioni di rischio per le mani. ATTENZIONE! –... -
Seite 70: Trasporto E Movimentazione
12. Sostituire gli adesivi che riportano istruzioni e messaggi di avvertenza, se danneggiati. 13. Riporre la macchina in un luogo inaccessibile ai bambini. 14. Non riporre la macchina con della benzina nel serbatoio in un locale dove i vapori di benzina potrebbero raggiungere una fiamma, una scintilla o una forte fonte di calore. - Seite 71 Seguire scrupolosamente le norme locali per lo smaltimento dei materiali di risulta dopo il taglio. Al momento della messa fuori servizio, non abbandonare la macchina nell’ambiente, ma rivolgersi a un centro di raccolta, secondo le norme locali vigenti.
-
Seite 72: Conoscere La Macchina
CONOSCERE LA MACCHINA DESCRIZIONE DELLA MACCHINA E CAMPO DI UTILIZZO Questa macchina è una attrezzatura da giardinaggio e precisamente un rasaerba con operatore a piedi. La macchina si compone essenzialmente di un motore, che aziona un dispositivo di taglio racchiuso in un carter, dotato di ruote e di un manico. - Seite 74 17/20...
- Seite 75 ETICHETTA DI IDENTIFICAZIONE E COMPONENTI DELLA MACCHINA Livello potenza acustica Dispositivo di taglio Marchio di conformità CE Protezione di scarico poste- riore Anno di fabbricazione Deflettore di scarico laterale Tipo di rasaerba (se previsto) Numero di matricola Protezione di scarico latera- Nome e indirizzo del le (se prevista) Costruttore...
-
Seite 76: Completare Il Montaggio
NORME D’USO Per il motore e la batteria (se prevista) leggere i relativi manuali di istruzioni. NOTA La corrispondenza fra i riferimenti contenuti nel testo e le rispettive figure (poste alle pagg. iii e seguenti) è data dal numero che precede ciascun paragrafo. 1. -
Seite 77: Descrizione Dei Comandi
2. DESCRIZIONE DEI COMANDI 2.1 Comando acceleratore L’acceleratore è comandato dalla leva (1). Le posizioni della leva sono indicate dal- la relativa targhetta. Su alcuni modelli è previsto un motore senza acceleratore. 2.2 Leva freno motore / dispositivo di taglio Il freno del dispositivo di taglio è... - Seite 78 2.4 Comando variatore di velocità (se previsto) Nei modelli con trazione, il variatore di velocità (se previsto) permette di regolare la velocità di avanza- mento. La regolazione è ottenuta spostando la leva (1) secondo le indicazioni riportate in prossimità della leva.
-
Seite 79: Taglio Dell'erba
3. TAGLIO DELL’ERBA NOTA! Questa macchina permette di effettuare la rasatura del prato in diverse moda- lità; prima di iniziare il lavoro è opportuno predisporre la macchina in base a come si intende eseguire la rasatura. ESEGUIRE L’OPERAZIONE A MOTORE SPENTO. 3.1 A 3.1 a Predisposizione per il taglio e la raccolta dell’erba nel sacco di raccolta: Sollevare la protezione di scarico posteriore (1) e agganciare correttamente il... - Seite 80 3.1 C 3.1 c Predisposizione per il taglio e la sminuzzatura dell’erba (funzione “mul- ching” - se prevista): • Nei modelli con possibilità di scarico: accertarsi che la protezione di scarico laterale (4) sia abbassata. • Sollevare la protezione di scarico posteriore (1) e introdurre il tappo defletto- re (5) nell’apertura di scarico tenendolo leggermente inclinato verso destra;...
- Seite 81 3.2 Avviamento del motore Per l’avviamento, seguire le indicazioni del libretto del motore. • Modelli con avviamento manuale Tirare la leva del freno del dispositivo di taglio (1) contro il manico e dare un deciso strappo dalla manopola della fune di avviamento (2). •...
- Seite 82 • Nel caso di “mulching” o scarico posteriore dell’erba: evitare sempre di asportare una ingente quantità d’erba. Non asportare mai più di un terzo dell’altezza totale dell’erba in una sola passata! Adeguare la velocità di avanzamento alle condizioni del prato e alla quantità di erba asportata. •...
-
Seite 83: Manutenzione Ordinaria
3.4 Termine del lavoro Al termine del lavoro, rilasciare la leva (1) del freno e scollegare il cappuccio della candela (2). • Modelli con avviamento elettrico a chiave Togliere la chiave di contatto (3). • Modelli con avviamento elettrico a pulsante Premere la linguetta (5) e rimuo- vere la chiave di consenso (4). - Seite 84 Nel caso fosse necessario accedere alla parte inferiore, inclinare la macchi- na esclusivamente dal lato indicato sul libretto del motore, seguendo le rela- tive istruzioni, accertandosi della stabilità della macchina prima di eseguire qualsiasi tipo di intervento. Nei modelli che prevedono lo scarico laterale, occorre rimuovere il deflettore di scarico (se montato - vedi 3.1.d).
- Seite 85 4.2 Regolazione della trazione Nei modelli con trazione, la giusta tensione della cinghia si ottiene per mezzo del dado (1), fino ad ottenere la misura indicata (6 mm). 4.3 Ricarica della batteria (se prevista) Modelli con avviamento elettrico a chiave •...
- Seite 86 5. ACCESSORI ATTENZIONE Per la vostra sicurezza è tassativamente vietato montare qualsiasi altro accessorio oltre a quelli inclusi nell’elenco seguente, progettati espressamente per il modello e il tipo della vostra macchina. 5.1 Kit “Mulching” (se non fornito in dotazione) Sminuzza finemente l’erba tagliata e la lascia sul prato, in alternativa alla raccol- ta nel sacco di raccolta (per macchine predisposte).
- Seite 87 6. DIAGNOSTICA Cosa fare se ... Origine del problema Azione correttiva 1. Il rasaerba a benzina non funziona Manca l’olio o la benzina nel motore Procedere al controllo dei livelli dell’olio e della benzina La candela e il filtro non sono in buono Pulire la candela e il filtro che possono stato essere imbrattati o sostituirli...
-
Seite 88: Certificato Di Garanzia
Congratulazioni per avere acquistato questo prodotto di alta qualità. Il nostro impegno per la qualità include anche l'assistenza. Jumbo dispone di un eccellente servizio di riparazione, per tutti e prodotti ayce. Qualora si riscontrino difetti relativi ai materiali o alla fabbricazione entro CINQUE ANNI dalla data di acquisto del prodotto, l'utente potrà... -
Seite 89: Scheda Di Garanzia
SCHEDA DI GARANZIA Nome Cognome Via/Num. Telefono Codice postale Città Telefono cellulare Codice articolo Codice a barre (EAN) Garanzia Numero/data dello scontrino (contrassegnare con una croce) (Allegare una copia dello scontrino di vendita) Sì Acquistato presso un punto vendita Jumbo: Problema riscontrato (specificare) (Descrivere il problema nel modo più... - Seite 90 DICHIARAZIONE CE DI CONFORMITÁ (Direttiva Macchine 2006/42/CE, Allegato II, parte A) 1. La Società: GGP Italy S.p.A. – Via del Lavoro, 6 – 31033 Castelfranco Veneto (TV) – Italy 2. Dichiara sotto la propria responsabilità, che la macchina: Tosaerba con conducente a piedi / taglio erba a) Tipo / Modello Base Trova i dati tecnici del rasaerba b) Modello commerciale...
- Seite 91 4. Riferimento alle Norme armonizzate: GEN ISO 5395-1:2013 EN ISO 5395-2:2013 97 dB(A) i) Livello di potenza sonora misurato 98 dB(A) j) Livello di potenza sonora garantito k) Ampiezza di taglio 51 cm q) Persona autorizzata a costituire il FascicoloTecnico: GGP ITALY S.p.A.
-
Seite 92: Technical Data
TRANSLATION OF THE ORIGINAL INSTRUCTION TECHNICAL DATA NT / NTL TECHNICAL DATA 534 Series Rated voltage* 2.27 ÷ 3.30 2800 ± 100 ÷ Max. motor operating speed* 2900 ± 100 Machine weight* 31 ÷ 44 Cutting width dB(A) Acoustic pressure level 83.7 Measurement uncertainty dB(A) - Seite 93 NT / NTL TECHNICAL DATA 534 Series Guaranteed acoustic power level dB(A) Vibration level 7.43 Measurement uncertainty Dimensions 1650 - length - width 1115 - height Oregon 69 244 0 Cutting means code (GGP 181004461/0) Attachments Kit “Mulching”...
-
Seite 94: Safety Requirements
SAFETY REQUIREMENTS Your lawnmower should be used with due care and attention. Therefore, pictograms have been placed on various parts of the machine to remind you of the main precau- tions to be taken. Their meaning is explained below. You are also asked to carefully read the safety regulations in the specific chapter of this manual. -
Seite 95: Preliminary Operations
SAFETY REGULATIONS PLEASE FOLLOW METICULOUSLY WARNING: READ THOROUGHLY THE INSTRUCTION BOOKLET BEFORE USING THE MACHINE. Keep for future reference A) TRAINING WARNING! Read these instructions carefully before operating the machine. Become acquainted with the controls and the proper use of the machine. Learn how to stop the engine quickly. - Seite 96 SAFETY REGULATIONS PLEASE FOLLOW METICULOUSLY WARNING: READ THOROUGHLY THE INSTRUCTION BOOKLET BEFORE USING THE MACHINE. Keep for future reference A) TRAINING WARNING! Read these instructions carefully before operating the machine. Become acquainted with the controls and the proper use of the machine. Learn how to stop the engine quickly.
-
Seite 97: During Use
• Add fuel, using a funnel, only outdoors; do not smoke during this ope- ration and each time fuel is handled; • Top-up with fuel before igniting the engine; never remove the tank cap or add fuel while the engine is running or when it is hot; •... - Seite 98 stones, branches, roots, etc.) that may cause the machine to slide sideways or make you lose control of it. The machine must not be used on slopes of over 20°, regardless of the mo- wing direction. Be extremely careful when pulling the lawnmower toward you. Look behind you to make sure there are no obstacles before and during operations in reverse gear.
-
Seite 99: Maintenance And Storage
make repairs before using it again. 25. Disengage the cutting means and switch off the engine: • Before refuelling; • Whenever you remove or reattach the grass catcher; • Whenever you remove or reattach the side discharge chute; • Before adjusting the cutting height, if this operation can not be perfor- med from the driving seat. -
Seite 100: Transportation And Handling
After each use, disconnect the spark plug cable and check for damage. Keep all nuts, bolts and screws tight to be sure the machine is in safe wor- king condition. Routine maintenance is essential for safety and for maintai- ning a high performance level. Check that the cutting means screws are properly tightened on a regular basis. -
Seite 101: Environmental Protection
• Wear sturdy work gloves; • Grasp the machine at the points that offer a safe grip, taking into account the weight and relative distribution of the same; • Use an appropriate number of people for the weight of the machine and the characteristics of the vehicle or the place where it must be placed or collected;... -
Seite 102: Getting To Know The Machine
GETTING TO KNOW THE MACHINE MACHINE DESCRIPTION AND SCOPE OF APPLICATION This machine is a garden tool and precisely a pedestriancontrolled lawnmower. The machine is essentially composed of an engine which drives a cutting means enclosed in a casing, equipped with wheels and a handle. The operator is able to operate the machine and use the main controls, always staying behind the handle at a safe distance from the rotating cutting means. - Seite 104 17/20...
- Seite 105 IDENTIFICATION LABEL AND MACHINE COMPONENTS Acoustic power level Cutting means CE conformity marking Rear discharge guard Year of manufacture Side discharge chute (if provided) Type of lawnmower Side discharge guard (if Serial number provided) Name and address of Manu- Grass catcher facturer Handle Article Code...
- Seite 106 OPERATING INSTRUCTIONS For information on the engine and the battery (if supplied), read the relevant owner manuals. NOTE The number which precedes each pararaph links the references in the text to the respective illustrations (listed on page iii and following pages). 1.
-
Seite 107: Controls Description
2. CONTROLS DESCRIPTION 2.1 Throttle lever The throttle is controlled by the lever (1). Lever positions are indicated on the rele- vant plate. Some models have a fixed speed engine with no need for a throttle. 2.2 Engine brake lever / cutting means The cutting means brake is controlled by the lever (1) which must be held against the handle during ignition and during lawnmower operations. - Seite 108 2.4 Converter control lever (if fitted) In the models with drive systems, the converter con- trol lever (if fitted) allows the operator to regulate for- ward gear speed. To do so, move the lever (1) following the indications provided near the control lever. IMPORTANT! The engine must be running and the drive engaged when switching from one speed to another.
-
Seite 109: Grass Cutting
3. GRASS CUTTING NOTE! This machine can be used to mow lawns in a number of different ways; before starting work, prepare the machine based on how the lawn is to be mowed. DO THIS WHEN THE ENGINE IS OFF. 3.1 A 3.1 a Preparation for mowing and grass collection by the grass catcher: Lift the rear discharge guard (1) and fasten the grass catcher (2) correctly as... - Seite 110 3.1 C 3.1 c Preparation for mowing and mulching (where applicable) • In models with discharge potential: make sure the side discharge guard (4) is lowered. • Lift the rear discharge guard (1) and fit the chute cap (5) in the discharge ope- ning, keeping it slightly tilted to the right.
- Seite 111 3.2 Engine ignition During ignition, follow the instructions in the engine manual. • Manual ignition models Pull the cutting means brake lever (1) against the handle and firmly tug the knob on the ignition cable (2). • Electric key ignition models Pull the cutting means brake lever (1) against the handle and turn the ignition key (3).
- Seite 112 • For mulching or rear grass discharge: always avoid removing a large quanti- ty of grass. Never cut more than one third of the total grass height per single pass! Regulate the forward speed according to the lawn conditions and the amount of grass removed.
-
Seite 113: Routine Maintenance
3.4 When work is finished When work has been completed, release the brake lever (1) and discon- nect the spark plug cap (2). • Electric key ignition models Remove the ignition key (3). • Electric push-button ignition models Press the tab (5) and remove the consent key (4). - Seite 114 If accessing the lower part is necessary, only tilt the machine on the side indi- cated in the engine manual, following the relevant instructions, making sure that the machine is perfectly stable before performing any interventions. On side discharge models, remove the discharge chute (if installed – see 3.1.d). Do not drip petrol onto the plastic parts of the engine or the machine to pre- vent damaging them and remove all traces of spilled petrol immediately.
- Seite 115 4.2 Drive adjustment On power-driven models, the drive belt tension is obtained by adjusting the nut (1) until the indicated measurement (6 mm) is obtained. 4.3 Battery recharging (where applicable) Electric key ignition models • To recharge a flat battery, connect it to the battery charger (1) following the instructions in the battery maintenance manual.
- Seite 116 5. ATTACHMENTS WARNING For your safety, it is strictly prohibited to fit any other attachment other than those included in the following list, as they have been exclusively designed for the model and type of machine you are using. 5.1 Mulching kit (unless provided with the equipment) It chops the grass cuttings finely and leaves them on the lawn, instead of collec- ting them in the grass catcher (only on some models).
- Seite 117 6. DIAGNOSTICS What to do if … Problem description Corrective Action 1. The petrol-driven lawnmower doesn’t work No oil or fuel in the engine Check the oil and petrol levels The spark plug and filter are not in Clean the spark plug and filter which good condition may be dirty or replace them The lawnmower’s fuel tank was not...
-
Seite 118: Warranty Certificate
Additional note service center: Defect products can be returned to every Jumbo store during the warranty period. After the warranty period, the ayce products are accepted in any Jumbo store, so the product may be tested in accordance. CH-Import & Distributed exclusively by: Jumbo-Markt AG, 8305 Dietlikon Tel. -
Seite 119: Warranty Card
WARRANTY CARD First name Last name Street/No. Telephone Postal Code City Mobil Item-number Barcode (EAN) Warranty Sales receipt number/Date (please mark with a cross) (please also attach a copy of the sales receipt) Purchased at Jumbo store: Which error occurred (please specify) (Please describe the problem or malfunction of your device as accurately as possible. -
Seite 120: Ec Declaration Of Conformity
EC DECLARATION OF CONFORMITY (Machine Directive 2006/42/EC, Annex II, part A) 1. The Company: GGP Italy S.p.A. – Via del Lavoro, 6 – 31033 Castelfranco Veneto (TV) – Italy 2. Declares under its own responsibility that the machine: Pedestrian controlled lawn mower / Grass cutting a) Type / Base Model The technical datas of the lawn-mower b) Commercial model... - Seite 121 4. Reference to harmonised Standards: GEN ISO 5395-1:2013 EN ISO 5395-2:2013 97 dB(A) i) Sound power level measured 98 dB(A) j) Sound power level guaranteed k) Range of cut 51 cm q) Person authorised to create the Technical Folder: GGP ITALY S.p.A. Via delLavoro, 6 31033 Castelfranco Veneto (TV) - Italia r) Castelfranco V.to, 04.02.2016...
- Seite 122 NOTES...
- Seite 123 NOTES...
- Seite 124 Manufactured by GGP ITALY S.p.A via del Lavoro n. 6 I-31033 Castelfranco Veneto (Tv) ITALY" CH-Import & Distribution exklusiv durch: Jumbo-Markt AG, 8305 Dietlikon Tel. 044 805 61-11...