Technibel CA8FIA Installationsanleitungen
Zweirohrsystem-klimaanlage
Quicklinks
DECLARATION OF CONFORMITY
This product is marked
– Low voltage no. 2006/95/CE.
– Electromagnetic compatibility no. 2004/108/CE, 92/31 EEC and 93/68 EEC.
This declaration will become void in case of misuse and/or non observance though partial of manufacturer's installation
and/or operating instructions.
L
Cooling Maximum conditions
Outdoor temperature :
Room temperature :
L
Cooling Minimum conditions
Outdoor temperature :
Room temperature :
Tools required for installation (not supplied)
1.Standard screwdriver
2.Phillips head screwdriver
3.Knife or wire stripper
4.Tape measure
5.Level
6.Sabre saw or key hole saw
7.Hacksaw
8. Core bits ø 8
INSTALLATION INSTRUCTIONS
as it satisfies Directives:
OPERATING LIMITS
43°C D.B.
32°C D.B. / 23°C W.B.
–15°C D.B.
10°C D.B. / 6°C W.B.
19.Hammer
10.Drill
11. Tube cutter
12.Tube flaring tool
13.Torque wrench
14.Adjustable wrench
15.Reamer (for reburring)
16.Hex. key
37.4255.052.04
- Split system air conditioner -
L
Heating Maximum conditions
Outdoor temperature :
Room temperature :
L
Heating Minimum conditions
Outdoor temperature :
Room temperature :
Model Combinations:
SEE CATALOGUE
Power Supply:
220 - 240 V ~ 50 Hz
F-GAS Regulation (EC) No. 842/2006
Do not vent R410A into atmosphere: R410A is a
fluorinated greenhouse gas, covered by Kyoto Protocol,
with a Global Warming Potential (GWP) = 1975.
03/2013
24°C D.B. / 18°C W.B.
27°C D.B.
–15°C D.B.
5°C D.B.
EG
I
F
D
E

Verwandte Anleitungen für Technibel CA8FIA


Inhaltszusammenfassung für Technibel CA8FIA
- Seite 1 INSTALLATION INSTRUCTIONS - Split system air conditioner - DECLARATION OF CONFORMITY This product is marked as it satisfies Directives: – Low voltage no. 2006/95/CE. – Electromagnetic compatibility no. 2004/108/CE, 92/31 EEC and 93/68 EEC. This declaration will become void in case of misuse and/or non observance though partial of manufacturer's installation and/or operating instructions.
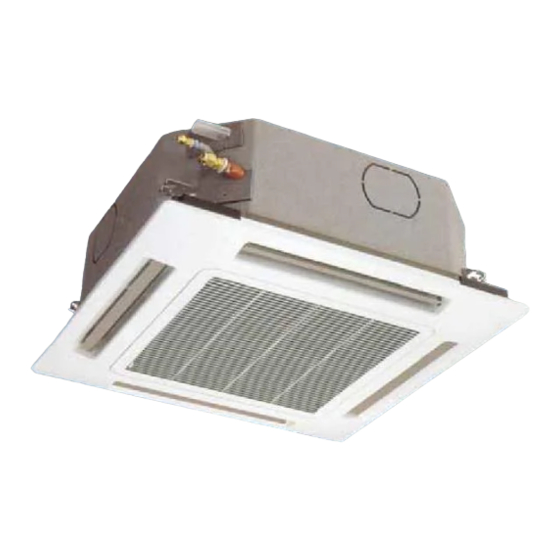
- Seite 2 Fresh air intake side SUSPENSION BRACKETS Suspension bolt Ceiling Electrical components box Nuts and washers Refrigerant tubing side REFRIGERANT TUBING SIDE Refrigerant tubing joint (NARROW tube) Refrigerant tubing joint (WIDE tube) Condensate drain piping NET WEIGHT CA8FIA CA9FIB Model UNIT FRAME-GRILLE ASSEMBLY...
- Seite 3 IMPORTANT! • Ground the unit following local electrical codes. • The Yellow/Green wire cannot be used for any connection Please read before installation different from the ground connection. • Connect all wiring tightly. Loose wiring may cause This air conditioning system meets strict safety and operating overheating at connection points and a possible fire standards.
- Seite 4 Deoxidized annealed copper tube for refrigerant tubing connecting the units of the system; it has to be insulated with ● foamed polyethylene (min. thickness 8mm). MODEL NARROW TUBE LARGE TUBE OUTER DIAMETER MIN. THICKNESS OUTER DIAMETER MIN. THICKNESS CA8FIA 6,35 mm 0,8 mm 9,52 mm 0,8 mm 6,35 mm 0,8 mm 0,8 mm CA9FIB 12,7 mm PVC pipe for condensate drain pipe (ø...
- Seite 5 ISTRUZIONI DI INSTALLAZIONE - Condizionatore d’aria Split System - DICHIARAZIONE DI CONFORMITÀ Questo prodotto è marcato in quanto conforme alle Direttive: – Bassa Tensione n. 2006/95/CE . – Compatibilità Elettromagnetica n. 2004/108/CE, 92/31 CEE e 93/68 CEE. Questa dichiarazione sarà nulla nel caso di impiego diverso da quello dichiarato dal Fabbricante e/o di mancata osservanza, anche solo parziale, delle istruzioni d'installazione e/o d'uso.
- Seite 6 STAFFE DI SOSPENSIONE Tirante di sospensione Soffitto Scatola componenti elettrici Dadi e rondelle Lato tubi refrigerante LATO TUBI REFRIGERANTE Attacco tubo refrigerante (tubo PICCOLO) Attacco tubo refrigerante (tubo GRANDE) Attacco scarico condensa PESO NETTO CA8FIA CA9FIB Modello UNITA’ GRUPPO CORNICE/GRIGLIA...
- Seite 7 IMPORTANTE! • Eseguire la messa a terra dell’unità secondo le norme elettriche locali. Leggere prima di iniziare l’installazione • Il conduttore giallo/verde non può essere utilizzato per collegamenti diversi dalla messa a terra. Questo sistema di condizionamento deve seguire rigidi •...
- Seite 8 ● spessore min. 8 mm. MODELLO TUBO PICCOLO TUBO GRANDE DIAMETRO ESTERNO SPESSORE MINIMO DIAMETRO ESTERNO SPESSORE MINIMO CA8FIA 6,35 mm 0,8 mm 9,52 mm 0,8 mm 6,35 mm 0,8 mm 0,8 mm CA9FIB 12,7 mm Tubo in PVC per scarico condensa (ø int. 18 mm) di lunghezza sufficiente a convogliare la condensa a uno scarico ●...
-
Seite 9: Notice D'installation
NOTICE D’INSTALLATION - Climatiseur split - DECLARATION DE CONFORMITE Ce produit est marqué puisque il est conforme aux Directives: – Basse Tension n. 2006/95/CE. – Compatibilité Electromagnétique n. 2004/108/CE, 92/31 CEE et 93/68 CEE. Cette déclaration sera nulle en cas d'une utilisation différente de celle déclarée par le Constructeur et/ou de la non- observation, même si partielle des instructions d'installation et/ou d’utilisation. - Seite 10 BRIDES DE SUSPENSION Tige de suspension Plafond Boîte des composants électriques Ecrous et rondelles Côté tubes frigorifique COTE TUBE FRIGORIFIQUE Raccord tube frigorifique (tube PETIT) Raccord tube frigorifique (tube GROSS) Raccord sortie des condensâtes POID NET CA8FIA CA9FIB Modèle UNITE ENSEMBLE CADRE-GRILLE...
- Seite 11 IMPORTANT! • Effectuez la mise à la terre de l'appareil en respectant les réglementations électriques locales. Veuillez lire ce qui suit avant de commencer • Le câble jaune/vert ne peut en aucun cas être utilisé pour Ce système de conditionnement de l'air répond à des toute autre connexion que celle de la mise à...
- Seite 12 ● mousse de polyéthylène avec épaisseur min. de 8mm. MODELE PETIT TUBE GROS TUBE DIAMETRE EXTERIEUR EPAISSEUR MIN. DIAMETRE EXTERIEUR EPAISSEUR MIN. CA8FIA 6,35 mm 0,8 mm 9,52 mm 0,8 mm 6,35 mm 0,8 mm 0,8 mm CA9FIB 12,7 mm Tube en PVC pour sortie du condensat (Ø...
- Seite 13 INSTALLATIONSANLEITUNGEN - Zweirohrsystem-Klimaanlage - KONFORMITÄTSERKLÄRUNG Dieses Produkt ist mit -Zeichen gekennzeichnet, weil es den folgenden Richtlinien entspricht: – Niederspannungsrichtilinie 2006/95/CE . – Elektromagnetische Verträglichkeit 2004/108/CE , 92/31 EWG und 93/68 EWG. Bei falschem Einsatz des Gerätes und/oder Nichtbeachtung auch nur von Teilen der Bedienungsanleitung und der Installatinsanweisungen wird diese Erklärung ungültig.
- Seite 14 AUSMAßE (mm) Aufhängungs-Halterungen Aufhängungs-Halterungen Decke Lufteintritt von Außen AUFHÄNGUNGS-HALTERUNGEN Aufhängungs-Befestigung Decke Elektrische Dose Mutter und Scheiben Kühlrohren Seite KÜHLROHREN SEITE Kühlrohr Verbindung (ENGES Rohr) Kühlrohr Verbindung (WEITES Rohr) Kondenswasser-Auslaß-Verbindung NETTO GEWICHTE CA8FIA CA9FIB Modelle EINHEIT RAHMEN-GITTER-BAUGRUPPE...
- Seite 15 WICHTIG! Tod verursachen. • Erden Sie das Gerät gemäß den örtlich zutreffenden Bitte vor Arbeitsbeginn lesen Vorschriften. Diese Klimaanlage entspricht strengen Sicherheits- und • Das Gelbe/Grüne Kabel ist für die ausschließliche Betriebsnormen. Verwendung als Erdleitung. • Verbinden Sie Kabel fest miteinander. Lockere Für den Installateur oder Bediener dieser Anlage ist es Verbindungen können...
- Seite 16 Polyethylenisolierung (r Isolierung min. 8mm). MODELL ENGES ROHR WEITES ROHR AUßENDURCHMESSER MIN. DICKE AUßENDURCHMESSER MIN. DICKE CA8FIA 6,35 mm 0,8 mm 9,52 mm 0,8 mm 6,35 mm 0,8 mm 0,8 mm CA9FIB 12,7 mm PVC-Rohr für Kondenswasser-Auslaß (Innen ø 18mm). Es soll lang genug sein, um das Kondenswasser zu einer ●...
- Seite 17 INSTRUCCIONES DE INSTALACION - Acondicionador de aire Split System - DECLARACION DE CONFORMIDAD Este Producto está marcado porque responde a las Directivas: – Baja Tensión n° 2006/95/CE. – Compatibilidad Electromagnetica n° 2004/108/CE, 92/31 CEE y 93/68 CEE. Esta declaración no tendrá efecto en sólo caso de que se haga un uso diferente al declarado por el Fabricante, y/o por el no respeto, incluso parcial, de las intrucciones de instalación y/o de uso.
- Seite 18 Varilla de suspensión Techo Caja de los componentes eléctricos Tuercas y arandelas Lado tubos refrigerantes LADO TUBOS REFRIGERANTE Empalme tubo refrigerante (tubo PEQUEÑO) Empalme tubo refrigerante (tubo GRANDE) Empalme drenaje de la condensación PESO NETO CA8FIA Modelo CA9FIB UNIDAD CONJUNTO-BASTIDOR-REJILLA...
- Seite 19 ¡IMPORTANTE! • Realizar la puesta a tierra de la unidad siguiendo las normas eléctricas locales. Leer antes de empezar la instalación • El conductor amarillo/verde no se puede utilizar para conexiones que no sean la de tierra. Este sistema de acondicionamiento cumple medidas rígidas •...
- Seite 20 ● conexión entre las unidades. MODELO TUBO PEQUEÑO TUBO GRANDE DIAMETRO EXTERIOR ESPESOR MINIMO DIAMETRO EXTERIOR ESPESOR MINIMO CA8FIA 6,35 mm 0,8 mm 9,52 mm 0,8 mm 6,35 mm 0,8 mm 0,8 mm CA9FIB 12,7 mm Tubo de PVC para descarga de condensación (ø int. 18mm) de longitud suficiente como para transportar el líquido de ●...
- Seite 21 INDOOR UNIT • UNITÁ INTERNA • UNITE INTERIEURE • INNENEINHEIT • UNIDAD INTERIOR Minimum operation and maintenance area. Area minima di esercizio e manutenzione. Surface minimum de fonctionnement et d’entretien. Raumbedarf des Gerätes . Área mínima de funcionamiento y manutención. SUSPENDING THE UNIT AT THE CEILING This unit uses a drain pump.
- Seite 22 Before installing the unit, place the tubes, the electrical wires and the condensate drain pipe in the proper position for the connection. Adjust the distance between the unit and the ceiling (max 23 mm) using the nuts of the four suspension bolts. Verify also the distance between the suspension bracket and the ceiling...
- Seite 23 INSTALLATION OF THE CONDENSATE DRAIN PIPE. Utilise a hard, well insulated PVC pipe (I.D. 18 mm) and fix it to the unit using a flexible PVC or gummy hose ; tighten firmly with hose bands The connection must be well insulated, using foamed polyethylene (thickness 8mm).
- Seite 24 • If it is necessary to increase the height of the drain pipe somewhat, the portion directly after the connection port can be raised a maximum of 25 cm. Do not raise it any higher than 25 cm , as this could result in water leaks.
- Seite 25 Drill a 65 mm diameter hole, insert a PVC pipe. Eseguire un foro di diametro 65 mm, inserire ed adattare un tubo in plastica. Faire un trou de diamètre 65 mm, introduire et adapter un tube PVC. Ein Loch mit Durchmesser 65 mm in die Wand schneiden, ein PVC- Rohr einfügen.
- Seite 26 Die Einheit ist für einen Anschluß an eine Leitung für neue Luft voreingestellt. Der Zusatz-Ventilatormotor für Außeinlufteinlaß muß separat versorgt werden und über einen Zweipol-EIN-/AUS- Schalter mit bauseitig installierten Sicherungen geregelt werden. Der Frischluftanteil des Gesamt-Luftstroms sollte maximal 10% betragen, um Betriebsproblemen und Geräusch zu vermeiden.
- Seite 27 Préparer les câbles électriques pour le branchement dans la boîte à bornes et les connecteur. (Voir schéma pour le branchement). Serrer les câbles d'alimentation a la bague de serrage. DANGER S'assurer que les bornes des câbles électriques soient bien serrées sur la boîte à...
- Seite 28 WIRING DIAGRAM • COLLEGAMENTI ELETTRICI • BRANCHEMENTS ELECTRIQUES • ELEKTRISCHE ANSCHLÜSSE • CONEXIONES ELECTRICAS TO OUTDOOR UNIT LENGTH, SIZE WIRES AND DELAYED FUSE • LUNGHEZZA, SEZIONE CAVI E FUSIBILI RITARDATI • LONGUEUR, SECTION CABLES ET FUSIBLES RETARDES • KABEL-LÄNGE UND QUERSCHNITT UND TRÄGE SICHERUNGEN •...
- Seite 29 Power supply wire A / Connecting wire C (with ground conductor): Multipolar electric wire; size and length of the suggested electric wire are showed on table “electrical data”. The wires have not to be lighter than Mod. H07RN-F (according to CEI 20-19 CENELEC HD22). Make sure the length of the conductors between the fixing point and the terminals allows the straining of the conductors L, N before that of the grounding.
- Seite 30 REMOTE CONTROL UNIT INSTALLATION • POSIZIONE DI INSTALLAZIONE TELECOMANDO • EMPLACEMENT DE LA COMMANDE A DISTANCE • POSITION DER FERNBEDIENUNG • POSICION DE INSTALACION DEL MANDO A DISTANCIA REMOTE CONTROL UNIT INSTALLATION To ensure that the air conditioner operates correctly, DO NOT install the remote control unit in the following places: •...
- Seite 31 WALL-MOUNTED POSITION • Momentarily place the remote control unit in the desired mounting position. • Verify that the remote control unit can operate from this position. • Fix the support at the wall with two screws and hang the remote control unit. POSIZIONE A PARETE •...
- Seite 32 DEFAULT SETTING RESET - RESET IMPOSTAZIONI DI DEFAULT - REMISE A ZERO DES REGLAGES DE DEFAUT - ZURÜCKSETZEN AUF STANDARDEINSTELLUNGEN - RESTABLECER LA CONFIGURACIÓN PREDETERMINADA - RESTABLECIMENTO DAS CONFIGURAÇÕES DE FABRICA - ∂ ·Ó·ÊÔÚ¿ ÛÙ¿ÓÙ·ÚÙ Ú˘ıÌ›ÛÂˆÓ To operate the unit again with the default setting it is necessary to set the remote control as follows: Filter: ON Night Mode / High Power Mode: OFF Operation mode: AUTO...
- Seite 33 Para restablecer las configuraciones predeterminadas de la unidad interior, ustedes tienen que regular el mando a distancia de la manera siguiente: Filter: ON Night Mode / High Power Mode: OFF Modo de funcionamiento: AUTO Flap: AUTO Temperatura seleccionada: 10°C Ahora, presionar simultáneamente los pulsadores del mando a distancia “FAN” y “I FEEL” durante mas de 5 segundos y soltarlos dirigiendo el mando a distancia hacia la unidad interior.
- Seite 34 PUMP DOWN (See Installation Instruction of Outdoor Unit) Pump down means collecting all refrigerant gas in the Das bedeutet: das Kühlmittel in die Außeneinheit ohne Gas-Verlust zurückzugewinnen. Man benutzt es, wenn system back into the outdoor unit without losing gas. das Klimagerät in eine neue Position gestellt werden Pump down is used when the unit is to be moved of muß...
- Seite 36 In order to carry on a constant improvement, our products can be modified without prior notice. Per garantire un costante miglioramento dei nostri prodotti, ci riserviamo di modificarli senza preavviso. Par souci d’amélioration constante, nos produits peuvent être modifiés sans préavis. Unsere Produkte werden laufend verbessert und können Vorankündigung abgeändert Werden.