Seite 1
AR005 autosen Montageanleitung Drehzahlwächter Compact M30 DC-Ausführung mit Stecker Installation Instructions Compact Speed Monitor M30 DC design, IO-Link, with connector Notice de Montage Contrôleur de vitesse compact M30 Modèle DC, IO-Link, avec connecteur Istruzioni di montaggio Controllore di velocità Compact M30...
1 Vorbemerkung Dieses Dokument gilt für Geräte des Typs „Drehzahlwächter Compact“ mit Steck- verbinder Art�-Nr�: AR005� Dieses Dokument richtet sich an Fachkräfte� Dabei handelt es sich um Personen, die aufgrund ihrer Ausbildung und ihrer Erfahrung befähigt sind, Risiken zu erken- nen und mögliche Gefährdungen zu vermeiden, die der Betrieb, die Installation...
2 Sicherheitshinweise Das Gerät darf nur von einer Elektrofachkraft installiert werden� Nationale und internationale Vorschriften zur Errichtung elektrotechnischer Anlagen beachten� 3 Bestimmungsgemäße Verwendung Der induktive Drehzahlwächter Compact erfasst berührungslos das Unterschreiten einer eingestellten Drehzahl und meldet dies durch ein Schaltsignal� 3.1 Schaltfunktion Schließer Transistorausgang LED grün...
3.3 Bedämpfung Die gelbe LED zeigt den Bedämpfungszustand des Sensors an, unabhängig von der Schaltfunktion und vom Schaltzustand des Transistorausgangs� Sensor LED gelb unbedämpft bedämpft 3.4 Funktionsdiagramm [Imp/min] SP + Hy 1: Spannungsversorgung SP = Schaltpunkt 2: Anlaufüberbrückung Hy = Hysterese 3: Schaltfunktion Schließer 4: Schaltfunktion Öffner = Transistorausgang geschaltet (leitend)
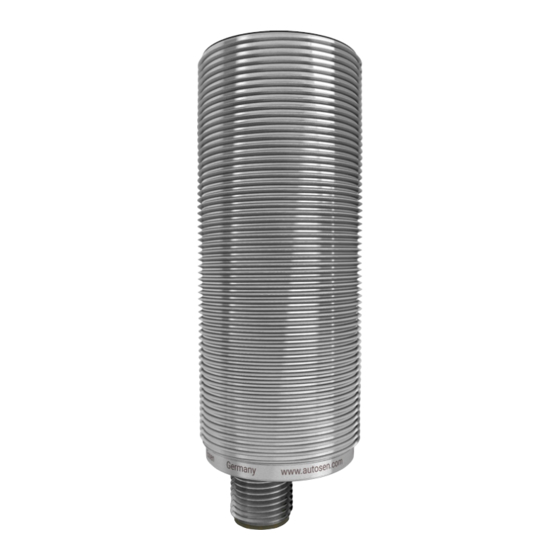
Ferner schützt IO-Link vor Signalstörungen und Messwertverlusten sowie vor Manipulation des Sensors� Die zur Konfiguration eines IO-Link-Gerätes notwendigen IODDs sowie detaillierte Informationen über Parametrierwerkzeuge, Prozessdatenaufbau, Diagnoseinfor- mationen und Parameteradressen sind abrufbar unter www�autosen�com� 4 Montage Montageprinzip Montagevorgaben ► Das Gerät mit Hilfe einer Montagehalterung befestigen und mit den beige- packten Muttern gegen Loslösen sichern�...
► Die zu überwachende Mindestdrehzahl in der Anlage konstant halten� ► Gerät an Versorgungspannung anschließen� ► Anlaufüberbrückungszeit verstreichen lassen (→ 8 Technische Daten). ► Abhängig vom Zustand der grünen LED die Schaltpunkteinstellung durchfüh- ren� 6.1 Einstellung für Schaltfunktion Schließer Wenn die grüne LED nicht leuchtet: - Poti langsam nach links (-) drehen, bis die grüne LED aufleuchtet.
P_MZ_e200_0089 Original Scale Drawing (MTD) 8 Technische Daten 92,3 75,5 LEDs 1: Potentiometer Abmessungen [mm] EPS Source Product Scale Drawing Frame Size: 80 mm x 27 mm Nennspannung 10���36 DC Stromaufnahme [mA] < 22 Strombelastbarkeit [mA] 92,3 75,5 Spannungsabfall < 2,5 Verpolungsfest LEDs Kurzschlussfest...
Seite 10
Schutzart / Schutzklasse IP 65 / IP 67 / III IO-Link ● Anschluss M12-Steckverbindung ● = zutreffend ○ = programmierbar - = nicht zutreffend Datenblätter und EG-Konformitätserklärungen sind abrufbar unter: www�autosen�com...
Seite 12
Contents 1 Preliminary note �������������������������������������������������������������������������������������������������13 1�1 Symbols and warnings used �����������������������������������������������������������������������13 2 Safety instructions ���������������������������������������������������������������������������������������������14 3 Functions and features ��������������������������������������������������������������������������������������14 3�1 Switching function normally open ���������������������������������������������������������������14 3�2 Switching function normally closed �������������������������������������������������������������14 3�3 Damping ����������������������������������������������������������������������������������������������������15 3�4 Function diagram ����������������������������������������������������������������������������������������15 3�5 IO-Link ��������������������������������������������������������������������������������������������������������16 4 Mounting �����������������������������������������������������������������������������������������������������������16 5 Electrical connection ������������������������������������������������������������������������������������������17 5�1 Wiring ���������������������������������������������������������������������������������������������������������17...
1 Preliminary note This document applies to devices of the type "compact speed monitor" with con- nector (AR005). This document is intended for specialists� These specialists are people who are qualified by their training and their experience to see risks and to avoid possible hazards that may be caused during operation, installation or maintenance of the device�...
2 Safety instructions A qualified electrician must connect the unit� Observe the national and internatio- nal regulations for the installation of electrical equipment� 3 Functions and features The compact, non-contact inductive speed monitor detects when a speed drops below a pre-set value and signals this with a switched output� 3.1 Switching function normally open Transistor output green...
3.3 Damping The yellow LED indicates the damping status of the sensor irrespective of either the switching function or the switching status of the transistor output� Sensor LED yellow undamped damped 3.4 Function diagram [Imp/min] SP + Hy 1: Voltage supply SP = switch point 2: Start-up delay Hy = hysteresis...
You will find the IODDs necessary for the configuration of an IO-Link device and detailed information about parameter setting tools, process data structure, dia- gnostic information and parameter addresses at www�autosen�com� 4 Mounting Mounting principle Mounting specifications ►...
► Keep the minimum speed to be monitored in the plant on a constant level� ► Connect the device to supply voltage� ► Wait until the start-up delay is over (→ 8 Technical data). ► Set the switch point depending on the status of the green LED� 6.1 Setting for switching function normally open When the green LED does not light: - Turn the pot slowly anticlockwise (-) until the green LED lights.
P_MZ_e200_0089 Original Scale Drawing (MTD) 8 Technical data 92,3 75,5 LEDs 1: Potentiometer Dimensions [mm] EPS Source Product Scale Drawing Frame Size: 80 mm x 27 mm Nominal voltage 10���36 DC Current consumption [mA] < 22 Current rating [mA] 92,3 75,5 Voltage drop <...
Seite 20
Protection IP 65 / IP 67 / III IO-Link ● Connection M12 connector ● = applicable ○ = programmable - = not applicable Data sheets and EC declarations of conformity can be found at: www�autosen�com...
Seite 22
Contenu 1 Remarque préliminaire ��������������������������������������������������������������������������������������23 1�1 Symboles utilisés et avertissements �����������������������������������������������������������23 2 Consignes de sécurité ���������������������������������������������������������������������������������������24 3 Fonctionnement et caractéristiques �������������������������������������������������������������������24 3�1 Fonction de commutation normalement ouvert ������������������������������������������24 3�2 Fonction de commutation normalement fermé �������������������������������������������24 3�3 Amortissement ��������������������������������������������������������������������������������������������25 3�4 Diagramme fonctionnel �������������������������������������������������������������������������������25 3�5 IO-Link ��������������������������������������������������������������������������������������������������������26 4 Montage �������������������������������������������������������������������������������������������������������������26 5 Raccordement électrique �����������������������������������������������������������������������������������27...
1 Remarque préliminaire Ce document s'applique à tous les appareils du type "contrôleur de vitesse com- pact" avec connecteur (AR005). Ce document s'adresse à des personnes compétentes� Ce sont des personnes qui sont capables - grâce à leur formation et expérience – d’appréhender les ris- ques et d'éviter les dangers potentiels qui pourraient être causés par le fonction-...
2 Consignes de sécurité L'appareil doit être raccordé par un électricien qualifié� Les règlements nationaux et internationaux relatifs à l'installation de matériels électriques doivent être respectés� 3 Fonctionnement et caractéristiques Le contrôleur de vitesse inductif compact détecte sans contact si une vitesse de rotation réglée n'est pas atteinte, et signale cela par un signal de commutation�...
3.3 Amortissement La LED jaune indique l'état d'amortissement du capteur indépendamment de la fonction de commutation et de l'état de commutation de la sortie transistor� Capteur LED jaune non amorti éteinte amorti allumée 3.4 Diagramme fonctionnel [Imp/min] SP + Hy 1: Alimentation en tension SP = seuil de commutation 2: Temporisation de démarrage...
Les IODD nécessaires pour la configuration d'un appareil IO-Link ainsi que des informations détaillées concernant les outils de paramétrage, la structure des données process, des informations de diagnostic et les adresses des paramètres sont disponibles sur www�autosen�com� 4 Montage Principe de montage Spécifications de montage...
► Respecter les spécifications de montage ci-dessus pour assurer un fonctionne- ment fiable. Portée nominale Sn (→ 8 Données techniques) 5 Raccordement électrique ► Mettre l'installation hors tension� ► Raccorder l'appareil selon le schéma de branchement� 5.1 Schéma de branchement 4 OUT / IO-Link 4 = sortie de communtation PNP / NPN programmable / Communication IO-Link Réglage usine = PNP / normalement ouvert...
6 Réglage 1: Potentiomètre multi-tours pour le réglage du seuil de commutation (sans butée) 2: LED : LED verte pour l'indication de commutation (→ 3.1 Fonction de commutation normalement ouvert) LED jaune pour l'indication de l'amortissement (signal d'entrée) (→ 3.3 Amortissement) Eléments de visualisation et de service ►...
- Tourner le potentiomètre à droite (+) jusqu'à ce que la LED verte soit allumée. - Tourner le potentiomètre lentement à gauche (-) jusqu'à ce que la LED verte s'éteigne� Le réglage est terminé� 7 Fonctionnement Le fonctionnement ne nécessite aucun entretien� Respecter pour un bon fonctionnement : ►...
P_MZ_e200_0089 Original Scale Drawing (MTD) 8 Données techniques 92,3 75,5 LEDs 1: Potentiomètre Dimensions [mm] EPS Source Product Scale Drawing Frame Size: 80 mm x 27 mm Tension nominale 10���36 DC Consommation [mA] < 22 Courant de sortie [mA] 92,3 75,5 Chute de tension <...
Seite 31
Protection IP 65 / IP 67 / III IO-Link ● Connexion connecteur M12 ● = applicable ○ = programmable - = non applicable Des fiches techniques et des déclarations de conformité CE sont disponibles sur : www�autosen�com...
Seite 32
Contenuto 1 Premessa�����������������������������������������������������������������������������������������������������������33 1�1 Simboli utilizzati e avvertenze ��������������������������������������������������������������������33 2 Indicazioni di sicurezza ��������������������������������������������������������������������������������������34 3 Uso conforme ����������������������������������������������������������������������������������������������������34 3�1 Funzione di commutazione NO ������������������������������������������������������������������34 3�2 Funzione di commutazione NC ������������������������������������������������������������������34 3�3 Damping �����������������������������������������������������������������������������������������������������34 3�4 Diagramma funzionale ��������������������������������������������������������������������������������35 3�5 IO-Link ��������������������������������������������������������������������������������������������������������35 4 Montaggio ����������������������������������������������������������������������������������������������������������36 5 Collegamento elettrico ���������������������������������������������������������������������������������������37 5�1 Cablaggio ���������������������������������������������������������������������������������������������������37...
1 Premessa Questo documento è valido per i dispositivi appartenenti alla tipologia „Controllore di velocità Compact“ con connettore AR005� Questo documento è rivolto al personale specializzato� Si tratta di persone che alla luce della loro formazione ed esperienza sono in grado di riconoscere i rischi ed evitare i possibili pericoli derivanti dal funzionamento, dall‘installazione o dalla...
2 Indicazioni di sicurezza Il dispositivo può essere installato esclusivamente da personale elettrotecnico specializzato� Attenersi alle normative nazionali e internazionali per l‘installazione di attrezzature elettrotecniche� 3 Uso conforme Il controllore di velocità induttivo Compact rileva senza contatto quando non si rag- giunge la velocità...
3.4 Diagramma funzionale [Imp/min] SP + Hy 1: Alimentazione di tensione SP = punto di commutazione 2: Ritardo all‘avviamento Ist� = isteresi 3: Funzione di commutazione NO 4: Funzione di commutazione NC = Uscita transistor commutata (conduttiva) Il ritardo all‘avviamento evita i messaggi d‘errore nella fase d‘avviamento della macchina fintanto che questa non ha raggiunto la velocità...
Gli IODD necessari per la configurazione di un dispositivo IO-Link e le informazi- oni dettagliate su strumenti di parametrizzazione, struttura dei dati di processo, informazioni di diagnosi e indirizzi parametri sono consultabili sul sito www� autosen�com� 4 Montaggio Principio di montaggio Indicazioni di montaggio ►...
► Mantenere costante la velocità minima da monitorare nell‘impianto� ► Collegare il dispositivo alla tensione d‘alimentazione� ► Attendere la fine del ritardo all‘avviamento (→ 8 Dati tecnici). ► A seconda dello stato del LED verde effettuare la regolazione del punto di commutazione�...
P_MZ_e200_0089 Original Scale Drawing (MTD) 8 Dati tecnici 92,3 75,5 LEDs 1: Potenziometro Dimensioni [mm] EPS Source Product Scale Drawing Frame Size: 80 mm x 27 mm Tensione nominale 10���36 DC Corrente assorbita [mA] < 22 Carico di corrente [mA] 92,3 75,5 ammesso...
Seite 40
Grado di protezione / IP 65 / IP 67 / III classe di protezione IO-Link ● Collegamento Connettore M12 ● = applicabile ○ = programmabile - = non applicabile Schede tecniche e dichiarazioni di conformità CE consultabili sul sito: www�autosen�com...
Seite 44
Technische Daten und weitere Informationen unter: Données techniques et informations supplémentaires sur notre site web à: Technical data and further information at: Dati tecnici e altre informazioni si trovano su : www.autosen.com...