Thrustmaster Gamecube Handbuch
THRUSTMASTER
US
TECHNICAL
FEATURES
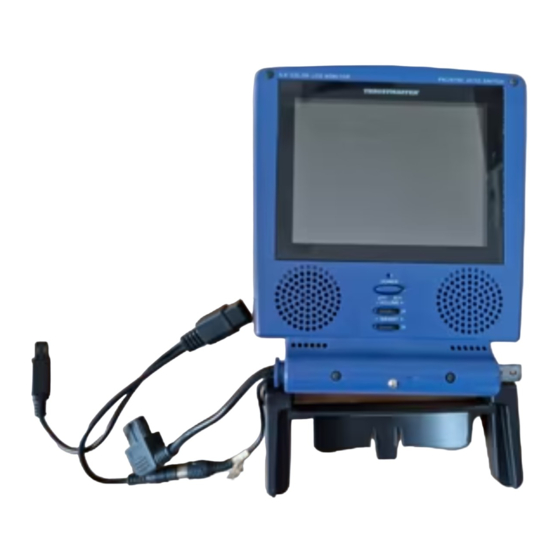
1. Flip-up monitor
2. Built-in speakers
3. POWER switch
4. GAME/AV switch
5. Earphone sockets
6. Brightness control
7. VOLUME control
8. Fixing device
®
D
TECHNISCHE
MERKMALE
1. Klappbarer Monitor
2. Eingebaute
Lautsprecher
3. Ein-/Aus-Schalter
4. GAME/AV-Schalter
5. Kopfhörer-Anschlüsse
6. Helligkeits-Regler
7. Lautstärke-Regler
8. Befestigungs-
mechanismus
QUICK INSTALL
E
CARACTERÍSTICAS
TÉCNICAS
1. Monitor abatible
2. Altavoces incorporados
3. Interruptor de corriente
4. Interruptor GAME/AV
5. Clavijas de auriculares
6. Control de brillo
7. Control de volumen
8. Dispositivo de fijación
P
CARACTERÍSTICAS
TÉCNICAS
1. Monitor flexível
2. Altifalantes incorporados
3. Botão POWER
4. Botão GAME/AV
5. Tomadas para
auscultadores
6. Controlo do brilho
7. Controlo do volume
8. Dispositivo de fixação

Verwandte Anleitungen für Thrustmaster Gamecube


Inhaltszusammenfassung für Thrustmaster Gamecube
- Seite 1 THRUSTMASTER ® QUICK INSTALL TECHNICAL TECHNISCHE CARACTERÍSTICAS CARACTERÍSTICAS FEATURES MERKMALE TÉCNICAS TÉCNICAS 1. Flip-up monitor 1. Klappbarer Monitor 1. Monitor abatible 1. Monitor flexível 2. Built-in speakers 2. Eingebaute 2. Altavoces incorporados 2. Altifalantes incorporados 3. POWER switch Lautsprecher 3. Interruptor de corriente 3.
- Seite 2 Guillemot Corporation S.A. eingetragenes Warenzeichen der marca registrada de Guillemot Corporation marca registada da Guillemot Corporation GameCube™ is a trademark of Nintendo Guillemot Corporation S.A. GameCube™ S.A. GameCube™ es una marca comercial S.A. GameCube™ é uma marca comercial Co., Ltd.
- Seite 3 6. No dejes el monitor funcionando desatendido mientras está conectado a la GameCube o a otra fuente de AV. 7. No dejes los juegos de GameCube en pausa, ya que esto puede quemar permanentemente la imagen en el pantalla. 8. No coloques el monitor cerca de una fuente productora de calor o expuesto directamente a los rayos solares.
-
Seite 4: Installation
(13b) to the DC 12V IN socket at the back of the console. 5. Connect the DC OUT (13c) either to the GameCube power adaptor (14) OR to the cigarette lighter socket in the car, via the car adaptor (15). - Seite 5 6. Stellen Sie den Ein-/Aus-Schalter (3) auf die Position ON. 7. Stellen Sie den GAME-/AV-Schalter (4) auf die Position GAME. 8. Schalten Sie Ihren GameCube ein. Anschließen an externe Videoquellen 1. Um externe Videoquellen anzuschließen, stecken Sie das externe AV-Kabel (10) in den externen AV-Eingang (9) ein.