DITEC WEL Serie Montage- Und Wartungshandbuch
Drehtürenantrieb
Inhaltsverzeichnis
Verfügbare Sprachen
Verfügbare Sprachen
Quicklinks
IP1891 - rev. 2008-12-16
DITEC S.p.A.
Via Mons. Banfi, 3 - 21042 Caronno Pertusella (VA) - ITALY
Tel. +39 02 963911 - Fax +39 02 9650314
www.ditec.it - ditec@ditecva.com
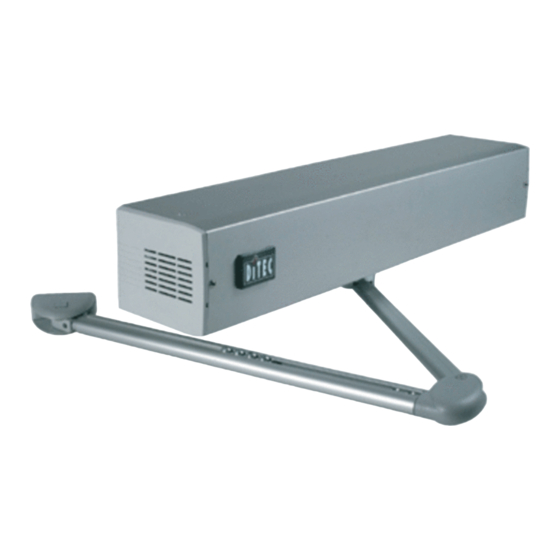
WEL
I
GB
F
D
E
P
Manuale di installazione
e manutenzione per
automazioni per porte
battenti.
Installation and
maintenance manual for
automations for swing
doors.
Manuel d'installation et
d'entretien pour portes
battantes.
Montage und
Wartungshandbuch für
Drehtürenantrieb.
Manual de instalaciòn y
manutenciòn para puertas
de vaivén.
Manual de instalação e
manutenção para portas
de balanço.
Inhaltsverzeichnis

Verwandte Anleitungen für DITEC WEL Serie


Inhaltszusammenfassung für DITEC WEL Serie
- Seite 1 Manual de instalaciòn y manutenciòn para puertas de vaivén. Manual de instalação e manutenção para portas de balanço. DITEC S.p.A. Via Mons. Banfi, 3 - 21042 Caronno Pertusella (VA) - ITALY Tel. +39 02 963911 - Fax +39 02 9650314 www.ditec.it - ditec@ditecva.com...
- Seite 2 Fig. 1 Fig. 2 Fig. 3 Fig. 4 WEL - IP1891...
-
Seite 24: Dallgemeine Sicherheitshinweise
Kinderhände gelangen, da sie eine Gefahrenquelle Realisierung der technischen Broschüre“, erhältlich im Internet darstellen können. Überprüfen Sie das Produkt vor der Montage unter der folgenden Adresse: www.ditec.it auf Transportschäden. Montieren Sie das Produkt nicht in ex- plosionsfähiger Atmosphäre oder Umgebung: Das Vorhanden- HINWEISE ZUM GEBRAUCH sein von entzündlichen Gasen oder Dämpfen bedeutet eine... -
Seite 25: Technischen Daten
3.1 Einleitende Kontrollen Die Funktionsgarantie und die angegebenen Leistungen werden Prüfen Sie die Stabilität und das Türgewicht. Kontrollieren Sie, ob nur mit Zubehör und Sicherheitsvorrichtungen von DITEC erzielt. die Bewegung gleichmäßig und reibungsfrei erfolgt (verstärken Sie gegebenenfalls den Rahmen). Mögliche Türschließer müssen entfernt bzw. - Seite 26 Achtung: die elektronische Steuerung laut Abbildung sorgfältig behandeln. Nach dem Zerlegen des Antriebs die in den Kapiteln 4, 5 oder 6 angeführten Installationsphasen je nach Art den verwendeten Arms durchführen. Die Antriebskomponenten wieder auf der Grundplatte anordnen. Anm.: in der Version mit Hebelarm WELBA muss der Motor immer an der Seite der Türbänder positioniert werden.
- Seite 27 4.1 Vorbereitung des Hebelarms Die Antriebskomponenten wieder auf der Grundplatte anordnen. Anm.: in der Version mit Gleitarm WELBS muss der Motor immer an Sollte aufgrund der Öffnungsrichtung der Tür die Notwendigkeit der gegenüber liegenden Seite der Türbänder positioniert werden. bestehen, den Arm umzudrehen, gehen Sie wie in der Abbildung Den Gleitarm in die Führung einschieben.
- Seite 28 Die Grundplatte [9] stabil und nivelliert an der Wand fixieren und Die Antriebskomponenten wieder auf der Grundplatte anordnen. dabei die in der Abbildung angegebenen Maße einhalten. Anm.: in der Version mit Arm WELBRAS muss der Motor immer an Außerdem die Tür übereinstimmend mit der Befestigung des der gegenüber liegenden Seite der Türbänder positioniert werden.
-
Seite 29: Elektrische Anschlüsse
EINSTELLUNGEN DES ANTRIEBS MIT FEDER 8.3 Schliessgeschwindigkeit Die Schließgeschwindigkeit (closing speed) und die Annähe- Die Regelungen des Antriebs mit Feder WELS und WELE sind rungsgeschwindigkeit (nur WELS: proximity speed der BRAKE- bei unterbrochener Stromversorgung durchzuführen. Karte), wie in der Anleitung der elektronischen Steuerung 8.1 Einstellungen des Vorendschalters Schliessen angegeben. -
Seite 30: Allgemeine Sicherheitshinweise
Wartungs- und Reparatureingriffe sind schriftlich zu protokol- lieren und zur Verfügung des Betreibers zu halten. Ihr Fachhändler: DITEC S.p.A. Via Mons. Banfi, 3 21042 Caronno Pertusella (VA) - ITALY Tel. +39 02 963911 - Fax +39 02 9650314 www.ditec.it - ditec@ditecva.com... - Seite 45 Tutti i diritti sono riservati I dati riportati sono stati redatti e controllati con la massima cura. Tuttavia non possiamo assumerci alcuna responsabilità per eventuali errori, omissioni o approssimazioni dovute ad esigenze tecniche o grafiche. All right reserved All data and specifications have been drawn up and checked with the greatest care. The manufacturer cannot however take any responsibility for eventual errors, ommisions or incomplete data due to technical or illustrative purposes.
- Seite 46 DITEC FRANCE PALAISEAU Tel. +33 1 64532860 Fax +33 1 64532861 www.ditecfrance.com Palaiseau Balerna DITEC GOLD PORTA ERMESINDE Tel. +22 977 35 20 Fax +22 977 35 28 www.goldporta.com DITEC SVIZZERA BALERNA Tel. +41 91 6463339 Fax +41 91 6466127 www.ditecswiss.ch...