DF-models SkyWatcher OPTICAL Flow Anleitung
Inhaltsverzeichnis
Verfügbare Sprachen
Verfügbare Sprachen
Quicklinks
Konformitätserklärung gemäß Richtlinie Radio Equipment Directive (RED)
2014/53/EU
Declaration of Conformity in accordance with the Radio Equipment Directive (RED) 2014/53/EU
Déclaration de conformitè CE (RED) 2014/53/EU
Hiermit wird erklärt, dass das Produkt:
I hereby declare that the product:
dèclarons sous notre seule responsabilitè que le produit:
Artikelnummer:
Product number:
9220 (EAN: 4250684192201)
Numèro d'article:
H4821
Bei bestimmungsgemäßer Verwendung den grundlegenden Anforderungen nach Artikel 3 und den
übrigen einschlägigen Bestimmungen der Richtlinie (RED) 2014/53/EU entspricht.
Complies with the essential requirements and the other relevant provisions of the Directive (RED)
2014/53/EU, when used for it intended purpose.
Est conforme aux exigences des directives et ordonnances suivantes (RED) 2014/53/EU.
In Übereinstimmung mit den folgenden harmonisierten Normen gefertigt:
Manufactured in accordance with the following harmonised standards:
Et a ètè fabriquè conformèment aux norms harmonisèes suviantes:
EN 62479:2010
Draft EN 301 489-1 V2.2.0 (2017-03)
Final Draft EN 301 489-3 V2.1.1 (2017-3)
EN 61000-6-3:2007 + A1:2011 +AC:2012
EN 61000-6-1:2007
EN 300 440 V2.1.1 (2017-03)
Directive TSD 2009/48/EC Safety of Toys:
EN71:Part 1:2014, clauses 1-7
EN71:Part 2:2011+A1:2014
EN71Part 3:2013+A2:2017
EN 62115 ELECTRONIC TOYS SAFETY + A2 + A11 + A12- PARTIAL
EN 62115:2005 + A2: 2011 + A11: 2012 + A12: 2015 "Electric toys – Safety"
Hersteller / verantwortliche Person:
drive & fly models, Jürgen Kamm
Manufacturer / responsible Person:
Drahthammer Str. 22
Fabricant / personne responsable:
92224 Amberg, Germany
Jürgen Kamm
Geschäftsführer / managing director / directeur général
Ort/ Datum:
place of issue/ date:
Amberg (Germany), 01.02.2019
Lieu de dèlivrance/ Date:
EIRP Power (Max.): 2460MHz-2472MHz | 4.38dBm (2.74mW)
The source-based time-averaging power which is below the max permitted sending level of 20 mW,
and then the EUT is not needed to conduct SAR measurement.
Frequenzbereich: 2460-2472 MHz
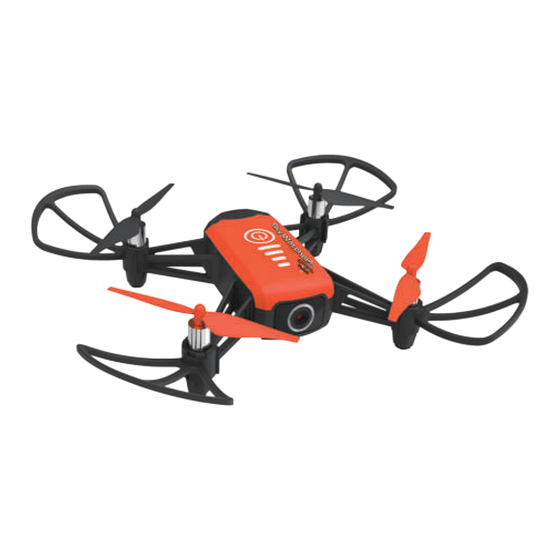
SkyWatcher OPTICAL Flow
N°9220
Anleitung / Manual
Impressum
Diese Bedienungsanleitung ist eine Publikation der Firma df models, Drahthammer Strasse 22, D-92224 Amberg.
Alle Rechte einschließlich Übersetzung vorbehalten. Reproduktionen jeder Art, z. B. Fotokopie, Mikroverfilmung,
oder die Erfassung in elektronischen Datenverarbeitungsanlagen, bedürfen der schriftlichen Genehmigung des
Herausgebers. Nachdruck, auch auszugsweise, verboten. Diese Bedienungsanleitung entspricht dem technischen
Stand bei Drucklegung. Änderung in Technik und Ausstattung vorbehalten.
© Copyright 2019 by df models
Inhaltsverzeichnis

Verwandte Anleitungen für DF-models SkyWatcher OPTICAL Flow


Inhaltszusammenfassung für DF-models SkyWatcher OPTICAL Flow
- Seite 1 Impressum EIRP Power (Max.): 2460MHz-2472MHz | 4.38dBm (2.74mW) Diese Bedienungsanleitung ist eine Publikation der Firma df models, Drahthammer Strasse 22, D-92224 Amberg. Alle Rechte einschließlich Übersetzung vorbehalten. Reproduktionen jeder Art, z. B. Fotokopie, Mikroverfilmung, The source-based time-averaging power which is below the max permitted sending level of 20 mW, oder die Erfassung in elektronischen Datenverarbeitungsanlagen, bedürfen der schriftlichen Genehmigung des...
-
Seite 2: Anleitungs-Videos
Sicherheitshinweise genommen werden - ungleiche Batterien oder neue und gebrauchte Batterien dürfen nicht zusammen Danke, dass Sie sich für ein Produkt von df Models entschieden haben. verwendet werden Sie haben somit die richtige Entscheidung in Sachen Produktqualität und - es dürfen nur die empfohlenen Batterien oder die eines gleichwertigen Typs Ersatzteilversorgung getroffen. -
Seite 3: Spezifikation
Spezifikation SkyWatcher OPTICAL Flow Fernsteuerung In- sowie Outdoor verwendbar nur im Sichtbereich maximale Flughöhe Best.Nr.: 9220 Frequenz: 2.4GHz fliegen beachten Gewicht: ca. 80 g maximale Reichweite: ca. 40 m Akku: Li-po, 3.7 Volt - 1000 mAh Batterien: 4x 1.5V AAA... -
Seite 4: Laden Des Flugakkus
Akku wie abgebildet in den Copter einsetzen. Wird das Modell nicht benutzt, muss der Akku immer aus dem Modell entnommen werden! 4xAAA Batterien (nicht enthalten) Laden des Flugakkus Nur Batterien verwenden, keine Akkus! Niemals alte und neue Batterien mischen! 1. Verbinden Sie das USB Kabel mit einer geeigneten Stromquelle 1. - Seite 5 Starten / Landen Einschalten/ Binden Start/ Landung Variante 2 Start-Variante 1 Landen-Variante 1 Variante 1: Drücken Sie die Start-Taste am Controller. Die Rotoren beginnen zu Ein-/ laufen. Drücken Sie nun den linken Steuerknüppel nach oben. Ausschalter Das Modell startet. Zum Landen drücken Sie die Landetaste. das Modell beginnt an seiner aktuellen Position selbständig zu sinken und landet selbständig.
-
Seite 6: Steuerung Des Modells
Steuerung des Modells Trimmung Solange der linke Hebel nach oben gedrückt wird, steigt das Sollte sich das Modell im Schwebeflug nicht ruhig an einem Punkt Modell. Lassen Sie diesen los hält das Modell die vorgegebene halten und immer in eine Richtung abdriften können Sie das Höhe selbstständig. - Seite 7 Features / Controller (Tastenbelegung - Funktionen) 1. Speed Modes (Agilität): Es stehen drei Geschwindigkeits-/ Agilitätsstufen zur Auswahl: 40% Speed (Controller piept 1x); 60% Speed (Controller piept 2x); Sport Mode, Speed > 10m/s ca. 36km/h 100% Speed (Controller piept 3x) 5. LED: Ein-/ Ausschalten der LED Beleuchtung.
- Seite 8 9. Not-Aus: Hinweise NUR im Notfall anwenden. Das Modell kann dabei Schaden nehmen! Achtung 1.Nach dem Flug muss der Akku aus dem Modell entnommen werden! 2.Sobald der Sender zu “piepen” beginnt müssen Sie umgehend Ihr Modell zum Startpunkt zurück fliegen oder die Auto-Return-Home-Taste drücken.
-
Seite 9: Ersatzteilübersicht
Smartphonehalter Ersatzteilübersicht Best.Nr. Bezeichnung 9221 Ersatzakku 9222 Ersatzrotorblätter (4) 9223 Rotorschützer (4) 9224 Ersatzmotor (Kabelfarbe rot/blau) 9225 Ersatzmotor (Kabelfarbe weiss/schwarz) 9226 Gehäuse/ Rahmen 9227 Ladekabel (USB) 9228 Hauptplatine 9229 720P WiFi Kamera 9230 Stoßdämpfer für Landefüße (4) 9231 Schraubensatz 9232 Sender/ Controller 9285 Smartphonehalterung für Controller... -
Seite 10: Funktionsweise Der App
Funktionsweise der APP: WOWITOYS 1. Akku des Quadrocopters anstecken 2. Öffnen Sie die WLAN Einstellungen und verbinden Sie den Für einige Funktionen des SkyWatcher OPTICAL benötigen Sie eine APP. Copter per WLAN mit Ihrem Smartphone Diese ist kostenlos, werbe- und vierenfrei! Scannen Sie den passenden 3. -
Seite 11: App Funktionen
Anleitungs-Videos 2. App Funktionen Bitte sehen Sie sich die Anleitungs-Videos zu den einzelnen Funktionen der App/ des Copters Gravity Sensor Mode auf unserem Youtube Chanel an. Hier weden die Funktionen ausführlich erklärt und vorgeführt. ON / OFF Mediathek https://www.youtube.com/playlist?list=PL11VRu9667OoKQ-kKJJZ4Z3V6lTIhZ_Zl Video Menü... - Seite 12 Steuerung Trimmung Sollte sich das Modell im Schwebeflug nicht ruhig an einem Punkt So lange der linke Button nach oben gedrückt wird steigt das halten und immer in eine Richtung abdriften können Sie das Modell. Lassen Sie diesen los hält das Modell die vorgegeben Modell austrimmen um einen ruhigen Schwebeflug zu bekommen.
- Seite 13 Bewegt sich das Modell nach rechts trimmen Sie das Modell mit den rechten Trimm-Buttons nach links. Bewegt sich das Modell nach hinten trimmen Sie das Modell mit den rechten Trimm-Buttons nach vorne. Bewegt sich das Modell nach vorne trimmen Sie das Modell mit den rechten Trimm-Buttons nach hinten.
- Seite 14 Hinweise...
- Seite 15 Lieu de dèlivrance/ Date: Impressum Diese Bedienungsanleitung ist eine Publikation der Firma df models, Drahthammer Strasse 22, D-92224 Amberg. Alle Rechte einschließlich Übersetzung vorbehalten. Reproduktionen jeder Art, z. B. Fotokopie, Mikroverfilmung, oder die Erfassung in elektronischen Datenverarbeitungsanlagen, bedürfen der schriftlichen Genehmigung des EIRP Power (Max.): 2460MHz-2472MHz | 4.38dBm (2.74mW)