Inhaltsverzeichnis
Werbung
Verfügbare Sprachen
Verfügbare Sprachen
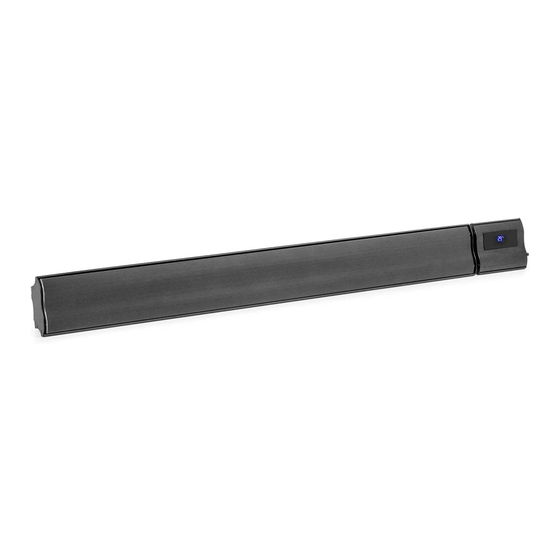
Cosmic Beam
Heizstrahler
Patio Heater
Radiador
Radiateur
Radiatore
10033698 10033699 10033700
Hinweis: Dieses Produkt ist nur für
gut isolierte Räume oder für den
gelegentlichen Gebrauch geeignet.
Note: This product is only suitable for
well insulated spaces or occasional use.
Advertencia: Este producto está
indicado únicamente en lugares
abrigados o para una utilización punctual.
Remarque : Ce produit ne peut être
utilisé que dans des locaux bien isolés ou
de manière occasionnelle.
Nota: Questo prodotto è adatto solo per
spazi ben isolati o uso occasionale.
Werbung
Kapitel
Inhaltsverzeichnis

Verwandte Anleitungen für Blumfeldt Cosmic Beam


Inhaltszusammenfassung für Blumfeldt Cosmic Beam
- Seite 1 Cosmic Beam Hinweis: Dieses Produkt ist nur für gut isolierte Räume oder für den gelegentlichen Gebrauch geeignet. Heizstrahler Note: This product is only suitable for well insulated spaces or occasional use. Patio Heater Advertencia: Este producto está Radiador indicado únicamente en lugares abrigados o para una utilización punctual.
-
Seite 3: Inhaltsverzeichnis
Français 45 Sicherheitshinweise 4 Italiano 59 Geräteübersicht 6 Installation 7 Bedienung 10 Reinigung und Pflege 12 Hinweise zur Entsorgung 13 Produktdatenblatt 14 TECHNISCHE DATEN Artikel Cosmic Beam Plus XXL Cosmic Beam Plus Artikelnummer 10033698 10033699 10033700 Stromversorgung 220-240 V ~ 50/60 Hz Leistung (Watt) 3000 W 2400 W KONFORMITÄTSERKLÄRUNG... -
Seite 4: Sicherheitshinweise
SICHERHEITSHINWEISE • Lesen Sie alle Anweisungen, bevor Sie dieses Gerät benutzen. • Lassen Sie das Gerät nicht unbeaufsichtigt, wenn es in Betrieb ist. • Diese Heizung wird während der Benutzung heiß. Berühren Sie nicht die heißen Oberfl ächen. VORSICHT Verbrennungsgefahr! Einige Teile dieses Produktes können sehr heiß... - Seite 5 • Fassen Sie das Heizelement nicht mit bloßen Händen an. Wenn es versehentlich berührt wird, entfernen Sie Fingerabdrücke mit einem weichen Tuch, da sich diese sonst in das Element einbrennen und einen vorzeitigen Ausfall der Heizung verursachen. • Ersetzen Sie das Heizelement nicht oder versuchen Sie nicht, es zu entfernen.
-
Seite 6: Geräteübersicht
Gehäuse Abmessungen: Modell Leistung Länge Breite Höhe Cosmic Beam Plus 2400 W 1540 mm 150 mm 65 mm Cosmic Beam Plus XXL 3000 W 1840 mm 150 mm 65 mm Fernbedienung SWITCH DISPLAY EIN/AUS-Taste AUF/AB-Tasten HOCH/NIEDRIG-Taste (Heizstufe) SWITCH-Taste (Umschalten) SET-Taste (Einstellungen) -
Seite 7: Installation
Modell Länge 1 Länge 2 Cosmic Beam Plus 1307 mm 1540 mm Cosmic Beam Plus XXL 1607 mm 1840 mm Schritt 1: Bringen Sie, wie in Abbildung A dargestellt, zwei der Montagehalterungen mit Schrauben am oberen Teil des Gerätes an. - Seite 8 1. Deckeninstallation: Der Abstand vom Gerät zu den umliegenden Wänden sollte, wie in Abbildung 1 dargestellt, mindestens 200 mm betragen. 2. Zweifach-Deckeninstallation: Zwei Geräte werden, wie in Abbildung 2 dargestellt, über einen an der Decke fixierten Verbindungsrahmen miteinander verbunden. Hinweis: Die zur Zweifach-Installation benötigten Teile sind nicht im Lieferumfang enthalten und müssen separat gekauft werden.
-
Seite 9: Installationserweiterung
3. Für Geräte, die an der Wand angebracht werden: Wie in Abbildung 3 gezeigt, muss der Abstand zum Boden mindestens 220 cm betragen. Der Mindestabstand zur Decke sollte bei 20 cm liegen. Decke ≥ 200 mm Wand ≥ 200 mm Boden 4. Installationserweiterung: Die Geräteerweiterungen werden wie in Abbildung 4 gezeigt, an der Decke eingehakt und hängen herunter. -
Seite 10: Bedienung
Hinweis: Die zur Installationserweiterung benötigten Teile sind nicht im Lieferumfang enthalten und müssen separat gekauft werden. BEDIENUNG Bitte lesen Sie diese Bedienungsanleitung vor dem ersten Gebrauch des Geräts sorgfältig durch. • Nehmen Sie das Heizgerät vorsichtig aus dem Karton. Bitte heben Sie den Karton auf, da Sie das Gerät in den warmen Jahreszeiten darin lagern können. -
Seite 11: Temperatureinstellung
Bildschirm an- und ausschalten Display • Wenn Sie die DISPLAY-Taste drücken, schaltet sich der Bildschirm aus, die Kontrollleuchte bleibt aber an. • Drücken Sie erneut die DISPLAY-Taste , um den Bildschirm wieder Display einzuschalten. Temperatureinstellung • Drücken Sie zunächst die SET-Taste und dann die AUF-Taste oder AB-Taste , um die Temperatur einzustellen. -
Seite 12: Aufsichtspfl Icht
VORSICHT Gefahr einer Verbrennung! Das Heizgerät heizt sich stark auf, wenn es in Gebrauch ist. Berühren Sie die Oberfl äche nicht, um Verbrennungen zu vermeiden. Wartung und Reparatur Wenn Sie eine Wartung oder Reparatur des Geräts benötigen, kontaktieren Sie bitte den Kundendienst oder hierfür qualifi ziertes Fachpersonal. Austausch des Stromkabels Wenn das Netzkabel beschädigt ist, muss es vom Hersteller oder einer qualifi zierten Fachkraft ersetzt werden, um eine Gefährdung zu vermeiden. -
Seite 13: Hinweise Zur Entsorgung
HINWEISE ZUR ENTSORGUNG Befindet sich die linke Abbildung (durchgestrichene Mülltonne auf Rädern) auf dem Produkt, gilt die Europäische Richtlinie 2012/19/EU. Diese Produkte dürfen nicht mit dem normalen Hausmüll entsorgt werden. Informieren Sie sich über die örtlichen Regelungen zur getrennten Sammlung elektrischer und elektronischer Gerätschaften. -
Seite 14: Produktdatenblatt
PRODUKTDATENBLATT Modellkennung(en) 10033698 10033699 Angabe Symbol Wert Einheit Angabe Einheit Wärmeleistung Nur bei elektrischen Speicher-Einzelraumheizgeräten: Art der Regelung der Wärmezufuhr Nennwärmeleistung Manuelle Regelung der Wärmezufuhr mit nein integriertem Thermostat Mindestwärmeleistung Manuelle Regelung der Wärmezufuhr nein (Richtwert) mit Rückmeldung der Raum- und/oder Außentemperatur Maximale Elektronische Regelung der Wärmezufuhr... - Seite 15 PRODUKTDATENBLATT Modellkennung(en) 10033700 Angabe Symbol Wert Einheit Angabe Einheit Wärmeleistung Nur bei elektrischen Speicher-Einzelraumheizgeräten: Art der Regelung der Wärmezufuhr Nennwärmeleistung Manuelle Regelung der Wärmezufuhr mit nein integriertem Thermostat Mindestwärmeleistung Manuelle Regelung der Wärmezufuhr nein (Richtwert) mit Rückmeldung der Raum- und/oder Außentemperatur Maximale Elektronische Regelung der Wärmezufuhr...