Herunterladen Inhalt Inhalt Diese Seite drucken

Werbung

Verfügbare Sprachen
  • DE

Verfügbare Sprachen

  • DEUTSCH, seite 1
Rising Sun Zenith
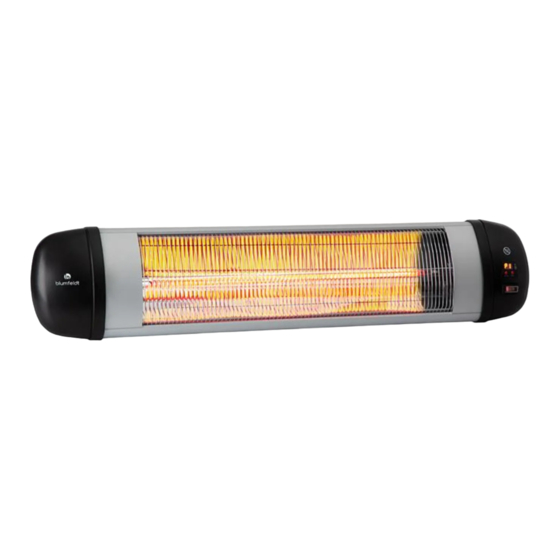
Heizstrahler
Patio Heater
Radiador
Radiateur
Radiatore
10033028
Hinweis: Das Gerät eignet sich nur für den
Außengebrauch.
Note: The device is only suitable for
outdoor use.
Advertencia: Este aparato solo es apto
para su uso en exteriores.
Remarque : l'appareil convient pour une
utilisation extérieure uniquement.
Nota: il dispositivo è idoneo solo per un
uso esterno.

Werbung

Inhaltsverzeichnis
loading

Inhaltszusammenfassung für Blumfeldt Rising Sun Zenith

  • Seite 1 Rising Sun Zenith Hinweis: Das Gerät eignet sich nur für den Außengebrauch. Note: The device is only suitable for Heizstrahler outdoor use. Patio Heater Advertencia: Este aparato solo es apto para su uso en exteriores. Radiador Remarque : l‘appareil convient pour une Radiateur utilisation extérieure uniquement.
  • Seite 3: Inhaltsverzeichnis

    Sehr geehrter Kunde, wir gratulieren Ihnen zum Erwerb Ihres Gerätes. Lesen Sie die folgenden Hinweise sorgfältig durch und befolgen Sie diese, um möglichen Schäden vorzubeugen. Für Schäden, die durch Missachtung der Hinweise und unsachgemäßen Gebrauch entstehen, übernehmen wir keine Haftung. Scannen Sie den folgenden QR-Code, um Zugriff auf die aktuellste Bedienungsanleitung und weitere Informationen rund um das Produkt zu erhalten: INHALTSVERZEICHNIS...
  • Seite 4: Sicherheitshinweise

    SICHERHEITSHINWEISE • Lesen Sie alle Anweisungen, bevor Sie dieses Gerät benutzen. • Lassen Sie das Gerät nicht unbeaufsichtigt, wenn es in Betrieb ist. • Diese Heizung wird während der Benutzung heiß. Berühren Sie nicht die heißen Oberfl ächen. VORSICHT Verbrennungsgefahr! Einige Teile dieses Produktes können sehr heiß...
  • Seite 5 • Fassen Sie das Heizelement nicht mit bloßen Händen an. Wenn es versehentlich berührt wird, entfernen Sie Fingerabdrücke mit einem weichen Tuch, da sich diese sonst in das Element einbrennen und einen vorzeitigen Ausfall der Heizung verursachen. • Ersetzen Sie das Heizelement nicht oder versuchen Sie nicht, es zu entfernen.
  • Seite 6: Installation

    INSTALLATION 1. Es gibt 4 Halterungen und Befestigungen, die mit der Heizung kombiniert werden. Außerdem befinden sich im Kanal der Rückseite des Heizgerätes 4 quadratische Unterlegscheiben mit den Abmessungen 25×25 mm. Nehmen Sie die eckigen Unterlegscheiben (Abbildung 1) und befestigen Sie 2 Halterungen mit Hilfe von Schrauben am Kanal der Rückseite des Heizgerätes (Abbildung 2).
  • Seite 7 3. Zwei weitere Halterungen werden mit Hilfe von den Befestigungselementen im entsprechenden Abstand an der Wand parallel zum Boden befestigt. Der Abstand vom Boden sollte mindestens 1,8 m und zur Decke mindestens 0,5 m betragen (Abbildung 4). 4. Verbinden Sie die Halterungen am Heizgerät mit den an der Wand befestigten Halterungen mit Hilfe von den abgebildeten Schraubenmuttern (Abbildung 5).
  • Seite 8: Abstände Und Winkel

    ABSTÄNDE UND WINKEL Mindestabstände zu den Wänden Mindestabstände zu Wannen und und zur Decke Duschen und zu anderen Objekten Richten Sie das Heizgerät in einem geeigneten Winkel aus: Verhindern Sie Wärmeverlust durch Fenster:...
  • Seite 9: Bedienung Über Das Display

    BEDIENUNG ÜBER DAS DISPLAY Schließen Sie die Stromversorgung des Geräts an die Steckdose an. Drücken Sie den Kippschalter auf die Position (I) und drücken Sie einmal auf Öffnen/ Schließen, der digitale Bildschirm zeigt P0 an, was bedeutet, dass das Gerät eingeschaltet ist.
  • Seite 10: Bedienung Über Die Fernbedienung

    BEDIENUNG ÜBER DIE FERNBEDIENUNG Wenn Sie eine beliebige Taste drücken, blinkt die rote Anzeige Schaltet die Heizung ein oder aus oder hält sie an. Niedrige Heizleistung. Mittlere Heizleistung. Hohe Heizleistung. Nach dem Einschalten der Funktion kann der Aus-Timer von 1-24 Stunden eingestellt werden.
  • Seite 11: Reinigung Und Pflege

    So legen Sie Batterien in die Fernbedienung ein • Öffnen Sie das Batteriefach auf der Rückseite der Fernbedienung. Legen Sie 2 AAA-Batterien ein. Achten Sie darauf, dass die (+) und (-) Enden der Batterie mit den (+) und (-) Enden im Batteriefach übereinstimmen.
  • Seite 12: Hinweise Zur Entsorgung

    Pflege • Überprüfen Sie die Sauberkeit des Reflektors und des Infrarot-Filaments mindestens einmal monatlich. Gegebenenfalls Reinigungs- und Wartungsanweisungen einhalten. • Die Anzahl der Kontrollen kann je nach der Menge an Staub in der Umgebung erhöht werden. • Kontrollieren Sie optisch, ob sich der Reflektor, der Draht und der Rahmen beim Reinigen des Gerätes verformt haben.
  • Seite 13: Technical Data

    Dear Customer, Congratulations purchasing this equipment. Please read this manual carefully and take care of the following hints to avoid damages. Any failure caused by ignoring the items and cautions mentioned in the instruction manual is not covered by our warranty and any liability.
  • Seite 14: Safety Instructions

    SAFETY INSTRUCTIONS • Read all instructions before using this unit. • Do not leave this unit unattended when in use. • This heater will get hot when in use. Do not touch hot surfaces. CAUTION Risk of burns! Some parts of this product can become very hot and cause burns.
  • Seite 15 • Do not handle the element with bare hands. If it is inadvertently touched, remove finger marks with a soft cloth and methylated spirits or alcohol, otherwise the marks will burn into the element causing premature heater failure. • Do not replace or attempt to replace the element in this product. •...
  • Seite 16 INSTALLATION 1. There are 4 brackets and fasteners used with the heater. Furthermore, in the canal of back side of the heater there are 4 square fastener washers 25×25 mm. Take the square washers (Figure 1) and fasten 2 brackets to the canal of the backside of the heater by the help of screws (Figure 2).
  • Seite 17 3. Two other brackets are fastened by the help of fasteners at the appropriate distance on the wall parallel to the floor, at least 1.8 m from the floor and 0.5 m from the ceiling (Figure 4). 4. Join the brackets on the heater with the brackets, fastened on the wall, with the help of figured screw-nuts (Figure 5).
  • Seite 18 DISTANCES AND ANGLES Minimum distances from wall Minimum distances from coverage corners area and other objects Direct the heater the appropriate angle: Prevent the loss of directed heat through the windows:...
  • Seite 19 OPERATION VIA CONTROL PANEL Connect the power line and the power strip. Click rocker switch to (I) position and press Open/ Close once, the digital screen shows P0 which means power on. Press Open/Close twice, the digital screen shows P1 which means first power setting Press Open/Close 3 times, the digital screen shows P2 which means second power setting Press Open/Close 4 times, the digital screen...
  • Seite 20: Operation Via Remote Control

    OPERATION VIA REMOTE CONTROL When in use, press any button, the red indicator will flash. Switches on or off the heater or stands it by. After turn on the heater, you can choose low heating. After turn on the heater, you can choose moderate heating. After turn on the heater, you can choose high heating.
  • Seite 21: Cleaning And Care

    Insert the batteries of your remote control • Open the battery compartment at the rear of the remote control. Insert 2 AAA batteries make sure to match the (+) and (-) ends of the battery with the (+) and (-) ends indicated in the battery compartment.
  • Seite 22: Hints On Disposal

    Care • Check the cleanliness of the Reflector and IR-Filament at least once a month. If necessary, apply cleaning and maintenance instructions. • The number of checks may be increased considering the amount of the dust in the environment. • Check the deformation of the Reflector, Wire and Frame visually while cleaning the appliance.
  • Seite 23: Datos Técnicos

    Estimado cliente: Le felicitamos por la adquisición de este producto. Lea atentamente el siguiente manual y siga cuidadosamente las instrucciones de uso con el fin de evitar posibles daños. La empresa no se responsabiliza de los daños ocasionados por un uso indebido del producto o por haber desatendido las indicaciones de seguridad.
  • Seite 24: Indicaciones De Seguridad

    INDICACIONES DE SEGURIDAD • Lea atentamente estas indicaciones antes de utilizar este aparato. • No deje el aparato en marcha si no se encuentra bajo supervisión. • Este radiador alcanza temperaturas muy elevadas durante su uso. No toque las superfi cies calientes. ATENCIÓN Existe riesgo de quemaduras.
  • Seite 25 • No toque la resistencia con las manos mojadas. Si se ha tocado por accidente, retire las manchas de dedos con un paño suave; de lo contrario, estas se quedarán marcadas en la resistencia y provocarán una merma anticipada del radiador. •...
  • Seite 26 INSTALACIÓN 1. El radiador dispone de 4 soportes y tornillos. Además, cuenta con 4 arandelas cuadradas de 25 x 25 mm en la parte posterior. Atornille 2 soportes con la ayuda de los tornillos en las arandelas cuadradas (imagen 1) de la parte posterior del radiador (imagen 2). 2.
  • Seite 27 3. Atornille los otros 2 soportes con la ayuda de los tornillos a una distancia adecuada en la pared, paralela al suelo. La distancia hacia al suelo debe ser de al menos 1,8 m y hacia el techo, de 0,5 m (imagen 4). 4.
  • Seite 28 DISTANCIAS Y ÁNGULOS Distancia mínima hacia las paredes Distancia mínima hacia las bañeras y y el techo. duchas, así como otros objetos. Ajuste el radiador a un ángulo óptimo: Evite una pérdida de calor a través de las ventanas:...
  • Seite 29 MANEJO VÍA DISPLAY Conecte el radiador a la toma de corriente. Posicione el interruptor en (I) y pulse 1 vez el botón Open/Close. El display digital muestra P0 indicando que el aparato está encendido. Pulse 2 veces el botón Open/Close. El display digital muestra P1 indicando que se ha activado el primer nivel de calefacción.
  • Seite 30 MANEJO VÍA MANDO A DISTANCIA Pulse cualquier botón, el indicador luminoso rojo parpadeará. Enciende/Apaga la calefacción o la mantiene en standby. Calefacción de baja potencia. Calefacción de potencia media. Calefacción de alta potencia. Una vez elegido el nivel de calefacción deseado, se puede configurar el temporizador de apagado de 1-24 horas.
  • Seite 31: Limpieza Y Cuidado

    Introducir las pilas en el mando a distancia • Abra la tapa del compartimento de pilas en la parte posterior del mando a distancia. Introduzca 2 pilas AAA. Asegúrese de que las marcas (+) y (-) en los extremos de las pilas coincidan con las marcas (+) y (-) en el compartimento de pilas.
  • Seite 32: Retirada Del Aparato

    Cuidado • Inspeccione la limpieza del reflector y filamento infrarrojo una vez al mes como mínimo. De ser necesario, aplique las indicaciones de limpieza y cuidado. • La frecuencia de las inspecciones depende de la cantidad de polvo que puede haber en el entorno. •...
  • Seite 33: Fiche Technique

    Cher client, Toutes nos félicitations pour l’acquisition de ce nouvel appareil. Veuillez lire attentivement les instructions suivantes de branchement et d’utilisation afin d’éviter d’éventuels dommages. Le fabricant ne saurait être tenu pour responsable des dommages dus au non-respect des consignes de sécurité et à la mauvaise utilisation de l’appareil.
  • Seite 34: Consignes De Sécurité

    CONSIGNES DE SÉCURITÉ • Lisez toutes les instructions avant d‘utiliser cet appareil. • Ne laissez pas l‘appareil en marche sans surveillance. • Ce radiateur chauffe lorsqu‘il est en fonctionnement. Ne touchez pas les surfaces chaudes. ATTENTION Risque de brûlure ! Certaines parties de ce produit peuvent devenir très chaudes et causer des brûlures.
  • Seite 35 • Ne touchez pas l‘élément chauffant à mains nues. Si vous les touchez accidentellement, retirez les traces de doigts avec un chiffon doux, car elles risqueraient de brûler à l‘intérieur de l‘élément et de provoquer une panne prématurée du radiateur. •...
  • Seite 36 INSTALLATION 1. Il y a 4 supports et accessoires combinés avec le chauffage. En outre, 4 rondelles carrées de dimensions 25 × 25 mm se trouvent dans le canal à l‘arrière du radiateur. Prenez les rondelles carrées (Figure 1) et fixez 2 supports à...
  • Seite 37 3. Deux autres supports sont fixés au moyen des attaches à une distance appropriée du mur parallèle au sol. La distance du sol doit être d‘au moins 1,8 m et au moins 0,5 m du plafond (figure 4). 4. Connectez les supports du radiateur aux supports muraux en utilisant les écrous montrés (figure 5).
  • Seite 38 DISTANCES ET ANGLES Distances minimales aux murs et au Distances minimales aux baignoires, plafond aux douches et aux autres objets Dirigez le radiateur selon un angle approprié : Prévenir la perte de chaleur par les fenêtres :...
  • Seite 39 UTILISATION AVEC L‘ÉCRAN Connectez l‘alimentation de l‘appareil à la prise de secteur. Mettez l‘interrupteur à bascule en position (I) et appuyez une fois sur ouvrir / fermer, l’écran numérique affiche P0, ce qui signifie que l’appareil est allumé. Appuyez deux fois sur ouvrir/fermer, l'écran numérique affiche P1, ce qui signifie que le premier réglage de puissance du radiateur est réglé.
  • Seite 40: Utilisation Avec La Télécommande

    UTILISATION AVEC LA TÉLÉCOMMANDE Si vous appuyez sur une touche, le voyant rouge clignote. Allume ou éteint le radiateur ou l'arrête. Faible production de chaleur Puissance calorifique moyenne. Forte production de chaleur Après avoir activé la fonction, la minuterie peut être réglé entre 1 et 24 heures. L'écran de l'appareil indique la durée, par exemple 01 (une heure) ou 02 (deux heures).
  • Seite 41: Nettoyage Et Entretien

    Installation des piles dans la télécommande • Ouvrez le compartiment à piles à l‘arrière de la télécommande. Insérez 2 piles AAA. Assurez-vous que les extrémités (+) et (-) de la pile correspondent aux extrémités (+) et (-) du compartiment à piles. •...
  • Seite 42: Conseils Pour Le Recyclage

    Entretien • Vérifiez la propreté du réflecteur et du filament infrarouge au moins une fois par mois. Si nécessaire, suivez les instructions de nettoyage et d‘entretien. • Le nombre de contrôles nécessaires peut être plus important en fonction de la quantité de poussière dans la zone. •...
  • Seite 43 Gentile cliente, La ringraziamo per aver acquistato il dispositivo. La preghiamo di leggere attentamente le seguenti istruzioni per l’uso e di seguirle per evitare possibili danni tecnici. Non ci assumiamo alcuna responsabilità per danni scaturiti da una mancata osservazione delle avvertenze di sicurezza e da un uso improprio del dispositivo.
  • Seite 44: Avvertenze Di Sicurezza

    AVVERTENZE DI SICUREZZA • Leggere attentamente tutte le indicazioni prima di utilizzare il dispositivo. • Non lasciare il dispositivo privo di controllo durante il funzionamento. • Questo dispositivo diventa estremamente caldo durante il funzionamento. Non toccare le superfi ci bollenti. ATTENZIONE Pericolo di ustione! Alcuni componenti di questo prodotto possono diventare estremamente caldi e causare ustioni.
  • Seite 45 • Per evitare pericoli, se il cavo di alimentazione è danneggiato, deve essere riparato dal produttore, dal servizio di assistenza ai clienti o da una persona con qualifica equivalente. • Non toccare l’elemento riscaldante a mani nude. Se viene toccato involontariamente, rimuovere le impronte digitali con un panno morbido, per evitare che restino impresse nell’elemento, causando un guasto precoce dell’irradiatore di calore.
  • Seite 46 INSTALLAZIONE 1. Ci sono 4 staffe e fissaggi che vengono combinati con il radiatore. Inoltre, nel canale del retro del radiatore si trovano 4 rondelle quadrate di dimensioni 25 × 25 mm. Prendere le rondelle quadrate (Figura 1) e attaccare 2 staffe usando le viti sul retro del dispositivo (Figura 2). 2.
  • Seite 47 3. Due altre staffe sono fissate mediante i dispositivi di fissaggio a una distanza adeguata dalla parete parallela al terreno. La distanza dal suolo deve essere di almeno 1,8 m ed almeno 0,5 m dal soffitto (Figura 4). 4. Collegare le staffe del radiatore alle staffe a parete usando i dadi mostrati (Figura 5).
  • Seite 48 DISTANZE E ANGOLI Distanze minime dalle pareti e dal Distanze minime da vasche e docce e soffitto da altri oggetti Allineare il radiatore con un‘angolazione adeguata: Prevenire la perdita di calore attraverso le finestre:...
  • Seite 49 FUNZIONAMENTO TRAMITE IL DISPLAY Collegare l‘alimentazione del dispositivo alla presa di corrente. Premere l‘interruttore a levetta sulla posizione (I) e premere una volta per aprire/chiudere, lo schermo digitale mostrerà P0, a indicare che il dispositivo è acceso. Premere due volte aprire/chiudere, lo schermo digitale mostrerà...
  • Seite 50: Funzionamento Tramite Il Telecomando

    FUNZIONAMENTO TRAMITE IL TELECOMANDO Se si preme un tasto qualsiasi, l'indicatore rosso lampeggia. Accende o spegne il riscaldatore o lo arresta. Bassa emissione di calore. Potenza di riscaldamento media. Elevata capacità di riscaldamento. Dopo aver attivato la funzione, è possibile impostare il timer di spegnimento da 1 a 24 ore.
  • Seite 51: Pulizia E Manutenzione

    Inserire le batterie nel telecomando • Aprire il vano batteria sul retro del telecomando. Inserire 2 batterie AAA. Assicurarsi che i terminali (+) e (-) della batteria corrispondano ai terminali (+) e (-) nel vano batteria. • Utilizzare solo il tipo di batteria specificato in questo manuale.
  • Seite 52: Smaltimento

    Manutenzione • Controllare la pulizia del riflettore e del filamento a infrarossi almeno una volta al mese. Se necessario, attenersi alle istruzioni di pulizia e manutenzione. • Il numero di controlli può essere aumentato a seconda della quantità di polvere nell‘area. •...

Inhaltsverzeichnis