Herunterladen Inhalt Inhalt Diese Seite drucken
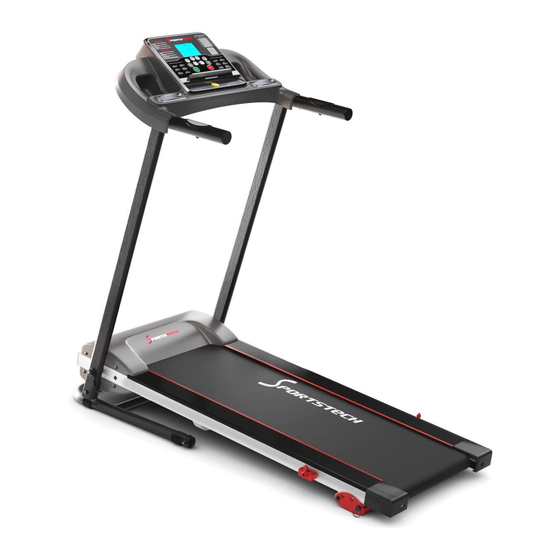
SPORTSTECH F10 Benutzerhandbuch
Vorschau ausblenden Andere Handbücher für F10:
Inhaltsverzeichnis

Werbung

Verfügbare Sprachen
  • DE

Verfügbare Sprachen

  • DEUTSCH, seite 1
F10
DE
EN
ES
FR
IT

Werbung

Inhaltsverzeichnis
loading

Inhaltszusammenfassung für SPORTSTECH F10

  • Seite 3: Video Tutorials

    Video Tutorials Unsere für dich! Aufbau Benutzung Abbau In 3 einfachen Schritten zum schnellen und sicheren Start: 1. QR-Code scannen 2. Videos anschauen 3. schnell und sicher starten Link zu den Videos: www.sportstech.de/qr/f10.html...
  • Seite 4 Sehr geehrter Kunde wir freuen uns, dass Sie sich für ein Gerät aus der SPORTSTECH Produktpalette entschieden haben. SPORTSTECH Sportgeräte bieten Ihnen höchste Qualität und neueste Technologie. Um die Leistungsfähigkeit des Gerätes voll nutzen zu können und viele Jahre Freude an Ihrem Gerät zu haben, lesen Sie bitte vor der Inbetriebnahme und dem Beginn des Trainings dieses Benutzerhandbuch sorgfältig durch und verwenden Sie das Gerät den Anweisungen entsprechend.
  • Seite 5: Inhaltsverzeichnis

    INHALTSVERZEICHNIS 1. WICHTIGE SICHERHEITSHINWEISE ................6 2. EXPLOSIONSZEICHNUNG/ERSATZTEILLISTE .............. 8 3. AUFBAU ANLEITUNG ....................9 4. KLAPPMECHANISMUS ..................... 11 5. KONSOLEBEDIENUNG ....................12 6. REINIGUNG, WARTUNG & FEHLERSUCHE ..............16 7. ANWENDUNGSSOFTWARE (APP) ................19 8. DECLARATION OF CONFORMITY ................92...
  • Seite 6: Wichtige Sicherheitshinweise

    1. WICHTIGE SICHERHEITSHINWEISE Diese allgemeinen Sicherheitsinformationen müssen unbedingt für die Benutzung dieses Produkt beachtet werden. Lesen Sie alle Hinweise, bevor Sie das Produkt in Benutzung nehmen. ACHTUNG: Um die Gefahr eines Stromschlags zu reduzieren ziehen Sie den Stromstecker des Produkts nach der Benutzung, beim Auf- oder Abbau und für Wartungs- oder Reinigungszwecke.
  • Seite 7 • Nur eine Person darf das Gerät gleichzeitig nutzen. • Tragen Sie komfortable und passende Kleidung während der Benutzung. Nutzen Sie das Laufband nicht in Socken oder barfuss. Tragen Sie immer passende Sportbekleidung. Tragen Sie keine Kleidung oder Gegenstände, welche lose sind oder sich im Laufband verfangen können.
  • Seite 8: Explosionszeichnung/Ersatzteilliste

    2. EXPLOSIONSZEICHNUNG/ERSATZTEILLISTE Unter folgendem Link finden Sie die Explosionszeichnung und die Ersatzteile-Liste: www.sportstech.de/manuals/pdf/sportstech_f10_spareparts.pdf...
  • Seite 9: Aufbau Anleitung

    3. AUFBAU ANLEITUNG BEFESTIGUNGSMATERIAL Schraube M8x50 Federscheibe Schraube M8x15 Konsolenhalterung Sicherheitsclip Endkappen Inbusschlüssel 5 einfache Schritte, um Ihr Laufband zu montieren, dann sind Sie bereit zum Training. Schritt 1 A. Stellen Sie das Gerät auf einer ebenerdigen Fläche aufrecht auf. B.
  • Seite 10 Hauptleitung Schritt 2 A. Entfernen Sie die (4) Befestigungsschrauben (17) aus dem oberen Ende von den Seitenstützen (3) und (4). B. Stellen Sie die Grifflleiste (5) auf die Seitenstützen (3) und (4) und fixieren Sie die zuvor entfernten Befestigungsschrauben. C. Verbinden Sie die freiliegenden Kabel der Konsole (55) mit der Hauptleitung in der rechten Seitenstütze (4). D.
  • Seite 11: Klappmechanismus

    4. KLAPPMECHANISMUS Zusammenklappen Halten Sie das hintere Ende des Hauptrahmens mit beiden Händen fest. Heben Sie das Ende des Hauptrahmens vorsichtig in die aufrechte Position, bis die Fussverriegelung einrastet und den Hauptrahmen sicher arretiert. Vergewis- sern Sie sich, dass der Hauptrahmen sicher verriegelt ist, bevor Sie das Laufband transportieren. Bewahren Sie das Laufband in einer sauberen und trockenen Umgebung ausserhalb der Reichweite von Kindern auf.
  • Seite 12: Schnellstart

    5. KONSOLEBEDIENUNG Schalten Sie das Laufband mit dem Stromschutzschalter auf der Rückseite an, indem Sie diesen in die Position “ON” stellen. Bevor Sie mit dem Training beginnen stellen Sie sicher, dass der Sicherheitsclip angelegt wurde und sich im Steckplatz auf der Konsole befindet. HINWEIS: Stehen Sie immer auf den Seitentrittflächen bevor Sie mit dem Training beginnen.
  • Seite 13 MODE: Drücken Sie diese Taste, um zwischen den einzelnen Werten zu wechseln und diese bei Bedarf anzupassen im manuellen Modus. SPEED (GESCHWINDIGKEIT ERHÖHEN): Drücken Sie vor Trainingsbeginn die Taste „SPEED “, um während der Programmeinstellung im manuellen oder einem anderen einstellbaren Modus den Wert nach oben zu erhöhen. Das Drücken der Taste während des Trainings erhöht die Laufgeschwindigkeit.
  • Seite 14: Training Im Manuellen Modus

    CAL. (KALORIEN): Zeigt den Wert für verbrauchte Kalorien an Drücken Sie die START Taste, um mit dem Training zu beginnen. Auf dem Bildschirm wird ein Countdown von 3 Sekunden angezeigt, bevor das Training beginnt und das Laufband in Bewegung gesetzt wird. Das Laufband startet mit einer Geschwindigkeit von 1.0 KM/H. T Drücken Sie die Tasten „SPEED “...
  • Seite 15 Programm Geschwindigkeit (km/h) je Abschnitt 8 10 7 7 10 10 7 7 10 10 6...
  • Seite 16: Reinigung, Wartung & Fehlersuche

    6. REINIGUNG, WARTUNG & FEHLERSUCHE WARNUNG: Um die Gefahr eines Stromschlags zu reduzieren ziehen Sie den Stromstecker des Produkts. WARNUNG: Prüfen Sie immer den Verschleiss sichtbaren Teile, um das Verletzungsrisiko zu minimieren. REINIGUNG Reinigen Sie nach jeder Benutzung das Gerät von Schweiss oder anderer Nässe. Das Laufband kann mit einem trockenen Tuch und schonendem Reinigungsmittel für die entsprechenden Teile gereinigt werden.
  • Seite 17: Schmieren

    SCHMIEREN Das Schmieren der Lauffläche garantiert eine längere Lebensdauer der Lauffläche. Tragen Sie immer nach 50 Trainingsstunden eine neue Schicht Silikonöl auf. Wie überprüfe ich die Schmierung Heben Sie eine Seite der Lauffläche an und streichen Sie mit dem Finger über das Laufbrett unter der Lauffläche. Ist diese Fläche trocken, so wird eine Schmierung benötigt.
  • Seite 18 LAUFFLÄCHE SPANNEN Die Lauffläche ist bereits gespannt eingestellt. Entsprechend Ihrem Körpergewicht, muss diese Spannung angepasst werden, damit ein richtiges Training erfolgen kann. Um die Lauffläche zu spannen nutzen Sie das mitgelieferte Werkzeug. In den Endkappen (wie auf Foto unten) befinden sich Schrauben mit welchen Sie die Spannung einstellen. Drehen Sie die Schrauben im Uhrzeigersinn, um mehr Spannung einzustellen.
  • Seite 19: Anwendungssoftware (App)

    7. ANWENDUNGSSOFTWARE (APP) Sie können die App's über die hier abgebildeten QR-Codes herunterladen oder in Ihrem Store suchen. Voraussetzung für mobiles Gerät: Android 5.0 oder höher mit Bluetooth 4.0, iOS 8.0 oder höher. Android Kinomap Hinweise zur Nutzung der App: Als Android-Nutzer stellen Sie bitte sicher, dass unter dem Punkt "Einstellungen ->...
  • Seite 20 Europäische Entsorgungsrichtlinie 2002/96/EG Entsorgen Sie Ihr Trainingsgerät in keinem Fall über den normalen Hausmüll. Entsorgen Sie das Gerät ausschließlich über einen kommunalen oder zugelassenen Entsorgungsbetrieb. Beachten Sie hierbei die aktuell geltenden Vorschriften. Erkundigen Sie sich im Zweifelsfall bei Ihrer Stadt- bzw. Gemeindeverwaltung nach einer sach- und umweltgerechten Entsorgungsmöglichkeit. Batterien / Akkus Gemäß...
  • Seite 22 3 simple steps for a fast and safe start: 1. scan the QR code 2. watch videos 3. start fast and safely Link to the videos: www.sportstech.de/qr/f10.html...
  • Seite 23 Dear customer, We are pleased you chose a device from the SPORTSTECH product range. With sports equipment from SPORTSTECH you get the highest quality and latest technology. In order to fully use the potential of your device and be able to enjoy it for many years, please read this manual carefully before starting up and beginning of training, and use the device according to the instructions.
  • Seite 24 INDEX 1. IMPORTANT SAFETY INSTRUCTIONS ................. 24 2. EXPLODED DRAWING/SPARE PARTS LIST ..............26 3. ASSEMBLY INSTRUCTIONS ..................27 4. FOLDING INSTRUCTIONS ..................29 5. OPERATING THE COMPUTER ..................30 6. CARE, MAINTENANCE & TROUBLESHOOTING GUIDE ..........34 7. APPLICATION SOFTWARE (APP) ................37 8.
  • Seite 25: Important Safety Instructions

    1. IMPORTANT SAFETY INSTRUCTIONS Basic precautions, including the following important safety instructions should always be followed when using this treadmill. Read all instructions before using this treadmill. DANGER: To reduce the risk of electric shock, always unplug the treadmill from the electrical outlet immediately after using and before cleaning, assembling, or servicing the treadmill.
  • Seite 26 • Only one person should use the treadmill at a time. • Wear comfortable and suitable clothing when using the treadmill. Do not use the treadmill barefoot or in socks. Always wear appropriate, enclosed athletic footwear. Never wear loose or baggy clothing as it can become caught on the treadmill and create an entrapment hazard.
  • Seite 27: Exploded Drawing/Spare Parts List

    2. EXPLODED DRAWING/SPARE PARTS LIST At the following link you will find the exploded drawing and the spare parts list: www.sportstech.de/manuals/pdf/sportstech_f10_spareparts.pdf...
  • Seite 28: Assembly Instructions

    3. ASSEMBLY INSTRUCTIONS TOOL KIT Hex Screw M8X50 Spring Washer Hex Screw M8X15 Console Knob Safety Key Handlebar Cover Allen Key 5 easy steps to assemble your treadmill then you‘re ready to workout. Step 1 A. Place the treadmill in the upright position on a level flat surface. B.
  • Seite 29 Main Control Cable Socket Step 2 A. Remove the four Head Hex Socket Screws (17) in the end of the Left Stand Tube (3) and Right Stand Tube (4). B. Attach the Handlebar (5) onto both ends of the Stand Tube (3 and 4), tighten the screws with the Allen Key provided.
  • Seite 30: Folding Instructions

    4. FOLDING INSTRUCTIONS To fold Firmly grasp the rear end of the main frame with both hands. Carefully lift the end of the main frame up into the upright position until the Foot Lock Latch engages and securely locks the main frame into position. Make sure the main frame is securely latched before moving the treadmill.
  • Seite 31: Quick Start

    5. OPERATING THE COMPUTER Flip the Master Power Switch that is located at the front of the treadmill to the ON position. Before beginning a wor- kout session ensure that the Safety Tether Key is properly placed onto the Computer Console and the Safety Clip is securely attached to an article of your clothing.
  • Seite 32: Display Functions

    MODE: Press the MODE button to select different functions (time or distance) for setting exercise goals in manual program mode before training. SPEED (SPEED UP): Press the „SPEED “ button to make upward adjustments for pre-setting target training time or distance in manual program mode before training.
  • Seite 33: Training In Manual Program Mode

    CAL. (CALORIES): Displays the total calories burned during your workout. Press the START button on the computer to begin exercising, the LCD window will countdown 3 seconds with the LCD showing „3-2-1“ before the running belt starts moving. The running belt starts moving with an initial speed of 1.0 KPH. You may press the „SPEED ” or „SPEED V“ button on the computer console or handlebar to increase or decrease the running speed during exercise.
  • Seite 34 Program Speed (km/h) per segment 8 10 7 7 10 10 7 7 10 10 6...
  • Seite 35: Care, Maintenance & Troubleshooting Guide

    6. CARE, MAINTENANCE & TROUBLESHOOTING GUIDE WARNING: To prevent electrical shock, please turn off and unplug the treadmill before cleaning or performing routine maintenance. WARNING: Always check the wear and tear components like spring knob and running belt to prevent injury. CLEANING After each exercise, ensure that the unit is wiped down and any sweat is removed from the unit.
  • Seite 36: Emergency Stop

    LUBRICATION Lubricating under the running belt will ensure superior performance and extend its life expectancy. After the first 25 hours of use (or 2-3 months) apply some lubricant, and repeat for every following 50 hours of use (or 5-8 months). How to check running belt for proper lubrication Lift one side of the running belt and feel the top surface of the running deck.
  • Seite 37: Belt Adjustment

    BELT ADJUSTMENT The running belt is pre-adjusted to the running deck at the factory, but after prolonged use it can stretch and require readjustment. To adjust the belt, turn on the main power switch of the treadmill and let the belt run at a speed of 8-10 KPH.
  • Seite 38: Application Software (App)

    7. APPLICATION SOFTWARE (APP) You can download the app using the QR codes shown here or search in your store. Minimum compatibility specifications for mobile device; android 5.0 or higher with Bluetooth 4.0, iOS 8.0 or higher. Android Kinomap Notes on using the App: As an android user, please make sure that under "Settings ->...
  • Seite 39 European Disposal Directive 2002/96/EG Never dispose your training device in your regular household waste. Dispose the device only at a local or approved disposal. Take care of the currently applicable regulations. If you have doubts contact your local authorities for information about a correct and environment friendly disposal option. batteries/rechargable batteries In accordance with the battery regulation you are legally obliged as an end user to return all used batteries.
  • Seite 41 Nuestros para usted! Construcción Utilizar Reducción En 3 sencillos pasos para un arranque rápido y seguro: 1. Escanear el código QR 2. Ver vídeos 3. Comienza rápido y seguro Enlace a los videos: www.sportstech.de/qr/f10.html...
  • Seite 42 Estimado cliente, Nos complace que haya elegido un dispositivo de la línea de productos SPORTSTECH. Con el equipo deportivo de SPORTSTECH usted obtiene la más alta calidad y la mejor tecnología. Con el fin de usar todo el potencial de su dispositivo y para que pueda disfrutarlo durante muchos años, por favor lea este manual cuidadosamente antes de comenzar a ejercitarse, y use el dispositivo...
  • Seite 43 ÍNDICE 1. INSTRUCCIONES DE SEGURIDAD IMPORTANTES ............42 2. DIBUJO DE EXPLSOIÓN/LISTA DE REPUESTOS ............44 3. INSTRUCCIONES DE ENSAMBLAJE ................45 4. INSTRUCCIONES DE PLEGADO ................. 47 5. FUNCIONAMIENTO DEL ORDENADOR ................ 48 6. GUIA DE CUIDADO, MANTENIMIENTO & SOLUCION DE PROBLEMAS ......52 7.
  • Seite 44: Instrucciones De Seguridad Importantes

    1. INSTRUCCIONES DE SEGURIDAD IMPORTANTES Al usar la caminadora siempre se deben seguir las precauciones básicas, incluyendo las siguientes instrucciones de seguridad importantes. Lea todas las instrucciones antes de usar esta caminadora. DANGER: Para reducir el riesgo de choque eléctrico, desconecte siempre la caminadora de la toma eléctrica inmediatamente después de usarla y antes de limpiarla, ensamblarla o hacerle mantenimiento.
  • Seite 45 • Solo una persona debe usar la caminadora a la vez. • Use ropa cómoda y adecuada al momento de usar la caminadora. No use la caminadora descalzo o en medias. Use siempre calzado deportivo adecuado y cerrado. Nunca vista ropa holgada ya que podría atascarse en la caminadora y puede producir riesgo de atascamiento.
  • Seite 46: Dibujo De Explsoión/Lista De Repuestos

    2. DIBUJO DE EXPLSOIÓN/LISTA DE REPUESTOS En el siguiente enlace encontrarás el dibujo de explosión y la lista de repuestos: www.sportstech.de/manuals/pdf/sportstech_f10_spareparts.pdf...
  • Seite 47: Instrucciones De Ensamblaje

    3. INSTRUCCIONES DE ENSAMBLAJE KIT DE HERRAMIENTAS Tornillo hexagonal M8X50 Arandela de resorte Tornillo hexagonal M8X15 Perilla de consola Llave de seguridad Tapa del manillar Llave Allen 5 pasos fáciles para ensamblar su caminadora, luego estará listo para ejercitarce. Paso 1 A.
  • Seite 48 Entrada del cable de control principal Paso 2 A. Quite los cuatro tornillos Allen (17) al final del tubo de soporte izquierdo y derecho (3) (4). B. Ajuste el manillar (5) en ambos extremos de los tubos de soporte (3 y 4), apriete los tornillos con la llave Allen suministrada.
  • Seite 49: Instrucciones De Plegado

    4. INSTRUCCIONES DE PLEGADO Para plegar Agarre firmemente el extremo posterior de la estructura principal con ambas manos. Levante cuidadosamente el extremo de la estructura principal en posición vertical hasta que el pestillo de bloqueo se active y bloquee la estruc- tura principal en posición.
  • Seite 50: Funcionamiento Del Ordenador

    5. FUNCIONAMIENTO DEL ORDENADOR Gire el interruptor de encendido principal que está ubicado frente a la caminadora en posición ON. Antes de comen- zar una sesión de ejercicio asegúrese de que la llave de seguridad está ubicada correctamente en la consola y que el clip de seguridad esté...
  • Seite 51 MODE: Presione el botón MODE para seleccionar diferentes funciones (tiempo o distancia) para ajustar los objetivos del ejercicio en el modo de programa manual antes del ejercicio. SPEED (SPEED UP): Presione el botón „SPEED “ para hacer ajustes ascendentes para predefinir el tiempo o las distancia objetivo del ejercicio en el modo de programa manual antes del ejercicio.
  • Seite 52 precisa, agarre ambos sensores con ambas manos. CAL. (CALORIES): Muestra el total de calorías quemadas durante el ejercicio. Presione el botón START en el ordenador para comenzar el ejercicio, la ventana LCD contará 3 segundos hacia atrás con la ventana LCD mostrando “3-2-1” antes de que la cinta comience a moverse.
  • Seite 53 Programa Velocidad (km/h) por segmento 8 10 7 7 10 10 7 7 10 10 6...
  • Seite 54: Guia De Cuidado, Mantenimiento & Solucion De Problemas

    6. GUIA DE CUIDADO, MANTENIMIENTO & SOLUCION DE PROBLEMAS PRECAUCIÓN: Para prevenir choque eléctrico, por favor apague y desconecte las caminadora antes de limpiarla o de hacerle mantenimiento de rutina. PRECAUCIÓN: Siempre revise las piezas de desgaste como la perilla de resorte y la cinta para prevenir lesiones. LIMPIEZA Después de cada ejercicio, asegúrese de que la unidad esté...
  • Seite 55: Parada De Emergencia

    LUBRICACION La lubricación debajo de la cinta garantizará un rendimiento superior y extenderá su vida útil. Después de las primeras 25 horas de uso (o 2-3 meses) aplique algo de lubricante, y repita para cada 50 horas de uso (o 5-8 meses). Cómo revisar la cinta para una lubricación adecuada Levante un lado de la cinta y sienta la superficie superior de la placa de soporte.
  • Seite 56 AJUSTE DE LA CINTA La cinta se preajusta a la placa de soporte en la fábrica, pero después de un uso prolongado esta puede estirarse y necesitará un reajuste. Para ajustar la cinta, encienda el interruptor principal de la caminadora y deje que la cinta corra a una velocidad de 8-10 Km/h.
  • Seite 57: Software (Aplicación)

    7. SOFTWARE (APLICACIÓN) Puede descargar las aplicaciones usando los códigos QR mostrados aquí o buscarlos en la tienda. Requisitos para dispositivos móviles: Android 5.0 o superior con Bluetooth 4.0, iOS 8.0 o superior. Android Kinomap Consejos para el uso de las aplicaciones: Como usuario de Android, por favor, asegúrese de marcar la opción "Fuentes desconocidas"...
  • Seite 58 Directiva Europea de Residuos 2002/96/EG Nunca elimine su dispositivo de entrenamiento en su basura doméstica ordinaria. Elimine el dispositivo únicamente en un sitio de eliminación aprobado. Tenga en cuenta las normativas aplicables actualmente. Si tiene dudas contacte a las autoridades locales para conseguir información sobre una opción de eliminación adecuada y ecológica. Baterías/baterías recargables De acuerdo a la normativa de baterías usted está...
  • Seite 59 MANUEL FRANÇAIS...
  • Seite 60 3 étapes simples pour un démarrage ra- pide et sécurisé: 1. Scannez le code QR 2. Regarder les vidéos 3. Démarrez rapidement et en toute sécurité. Lien vers les vidéos: www.sportstech.de/qr/f10.html...
  • Seite 61 Cher client, Nous sommes ravis que vous ayez choisi un appareil de la gamme de produits SPORTSTECH. Avec les équipements sportifs de SPORTSTECH, vous obtenez la plus haute qualité et la meilleure technologie. Afin d'utiliser pleinement le potentiel de votre appareil et de pouvoir l'apprécier pendant de nombreuses années, lisez attentivement ce manuel avant l'utilisation et le début de votre entraînement et utilisez...
  • Seite 62 SOMMAIRE 1. DES INFORMATIONS DE SÉCURITÉ IMPORTANTES............60 2. DESSIN ÉCLATÉ/LISTE DES PIÈCES DE RECHANGE ............ 62 3. INSTRUCTIONS DE MONTAGE .................. 63 4. INSTRUCTIONS DE PLIAGE ..................65 5. FONCTIONNEMENT DE L'ORDINATEUR ..............66 6. SOIN , ENTRETIEN & GUIDE DE DÉPANNAGE .............. 70 7.
  • Seite 63: Des Informations De Sécurité Importantes

    1. DES INFORMATIONS DE SÉCURITÉ IMPORTANTES Les précautions de base, y compris les consignes de sécurité importantes suivantes doivent toujours être respectées lorsque vous utilisez ce tapis roulant. Lisez toutes les instructions avant d'utiliser ce tapis roulant. DANGER: Pour réduire le risque de choc électrique, débranchez toujours le tapis roulant de la prise électrique immédiatement après utilisation et avant le nettoyage, l'assemblage ou l'entretien du tapis roulant.
  • Seite 64 • Ce tapis de course est pour un usage domestique seulement. Une seule personne doit utiliser le tapis roulant à la fois. • Portez des vêtements confortables et adaptés lorsque vous utilisez le tapis roulant. N’ utilisez pas le tapis de course pieds nus ou en chaussettes. Portez toujours des vêtements appropriées, chaussures de sport ci-joint.
  • Seite 65: Dessin Éclaté/Liste Des Pièces De Rechange

    2. DESSIN ÉCLATÉ/LISTE DES PIÈCES DE RECHANGE A l‘adresse suivante vous trouverez le dessin éclaté et la liste des pièces de rechange : www.sportstech.de/manuals/pdf/sportstech_f10_spareparts.pdf...
  • Seite 66: Trousse À Outils

    3. INSTRUCTIONS DE MONTAGE TROUSSE À OUTILS Vis hexagonale M8X50 Rondelle de blocage Vis hexagonale M8X15 Console Bouton Clé de sécutité Couvre guidon Allen clé 5 étapes faciles pour assembler votre tapis de course pour que vous soyez prêt pour l'entraînement. Etape 1 A.
  • Seite 67 Main Control Cable Socket Etape 2 A. Débranchez les quatre vis à tête hexagonale (17) à la fin du tube gauche (3) et du tube droit (4). B. Attachez le Guidon (5) sur les deux extrémités du Tube de support (3 et 4), serrer les vis avec la clé Allen fournie. C.
  • Seite 68: Instructions De Pliage

    4. INSTRUCTIONS DE PLIAGE POUR PLIER Saisissez fermement l'extrémité arrière du cadre principal avec les deux mains. Soulevez soigneusement l'extrémité du cadre principal vers le haut jusqu'à ce que le loquet de verrouillage du pied s'enclenche et verrouille solidement le cadre principal en position.
  • Seite 69: Fonctionnement De L'ordinateur

    5. FONCTIONNEMENT DE L'ORDINATEUR Retournez le commutateur principal d'alimentation qui se trouve à l'avant du tapis roulant à la position ON. Avant de commencer une séance d'entraînement faites en sorte que la clé de sécurité Tether est correctement placée sur la console de l'ordinateur et que le clip de sécurité...
  • Seite 70: Affichage Des Fonctions

    MODE: Appuyez sur le bouton MODE pour sélectionner différentes fonctions (temps ou distance) pour fixer des objectifs de l'exercice en mode programme manuel avant l'entraînement. SPEED (SPEED UP): Appuyez sur le bouton „SPEED “ pour faire augmenter et mettre en avant le temps de formation ciblé ou de la distance en mode programme manuel avant la formation.
  • Seite 71 CAL. (CALORIES): Affiche le nombre des calories brûlées pendant votre séance d'entraînement. Appuyez sur le bouton START sur l'ordinateur pour commencer à exercer, la fenêtre LCD commence le compte à rebours de 3 secondes avec l'écran LCD montrant "3-2-1" avant que la courroie commence à se déplacer. La vitesse commence à augmenter avec une vitesse initiale de 1,0 KPH.
  • Seite 72 Programme Vitesse (km/h) par segment 8 10 7 7 10 10 7 7 10 10 6...
  • Seite 73: Soin , Entretien & Guide De Dépannage

    6. SOIN , ENTRETIEN & GUIDE DE DÉPANNAGE AVERTISSEMENT: Pour éviter un choc électrique, veuillez éteindre et débrancher le tapis roulant avant de le nettoyer ou d'effectuer l'entretien de routine. AVERTISSEMENT: Toujours vérifier l'usure et les composants lacrymaux comme les boutons et la ceinture du tapis pour éviter les blessures.
  • Seite 74: Lubrification

    LUBRIFICATION Lubrifiantes sous le tapis roulant permettra d'assurer une performance supérieure et de prolonger sa durée de vie. Après les 25 premières heures d'utilisation (ou 2-3 mois) appliquer un peu de lubrifiant, et répéter pour toutes les 50 heures d'utilisation (ou 5-8 mois). Comment vérifier tapis roulant pour une bonne lubrification ? Soulevez un côté...
  • Seite 75 AJUSTEMENT DE CEINTURE Le tapis roulant est pré-réglé sur le pont en cours d'exécution à l'usine, mais après une utilisation prolongée, il peut s’étirer et nécessiter un réajustement. Pour régler la ceinture, tourner l'interrupteur principal d'alimentation du tapis roulant et laisser le tapis à une vitesse de 8-10 KPH. Utilisez la clé Allen fournie pour tourner les vis de réglage du rouleau arrière afin de centrer la ceinture.
  • Seite 76: Logiciel D'application (App)

    7. LOGICIEL D’APPLICATION (APP) Pour télécharger l’application, scannez son code QR ou recherchez-la dans votre App Store. Conditions requises : l’appareil mobile doit correspondre à un Android 5.0 ou davantage avec Blue- tooth 4.0 ou un iOS 8.0 ou davantage. Android Kinomap Informations sur l’utilisation de l’application :...
  • Seite 77 Directive européenne n° 2002/96/EG relative aux déchets Ne jeter en aucun cas l‘appareil avec les ordures ménagères. Ne disposez de l‘appareil que dans les décharges publiques (Gestion des déchets communaux de la ville). Pour leur élimination respectez les réglementations en vigueur locales. Renseignez-vous à...
  • Seite 78 MANUALE D’USO ITALIANO...
  • Seite 79 Video Tutorial Il nostro per te! Montaggio Utilizzo Smontaggio 3 semplici passaggi per un inizio veloce e sicuro: 1. Scannerizza il QR-Code 2. Guarda il Video 3. Inizia ad allenarti! Link per il Video: www.sportstech.de/qr/f10.html...
  • Seite 80 Gentile cliente Siamo lieti che abbiate scelto un dispositivo della gamma SPORTSTECH. Con le attrezzature sportive di SPORSTECH potrete usufruire della più alta qualità e della più recente tecnologia. Per sfruttare a pieno il potenziale del dispositivo e poterlo utilizzare per molti anni, raccomandiamo di leggere attentamente questo manuale prima di iniziare l’allenamento e di utilizzare il dispositivo...
  • Seite 81 INDICE 1. IMPORTANTI ISTRUZIONI DI SICUREZZA ..............78 2. DISEGNO ESPLOSO/LISTA DEI PEZZI DI RICAMBIO ............. 80 3. ISTRUZIONI PER L’ASSEMBLAGGIO ................81 4. ISTRUZIONI PER PIEGA .................... 83 5. FUNZIONAMENTO DEL COMPUTER ................84 6. CURA, MANUTENZIONE E GUIDA AI PROBLEMI PIU’ COMUNI ........88 7.
  • Seite 82: Importanti Istruzioni Di Sicurezza

    1. IMPORTANTI ISTRUZIONI DI SICUREZZA Precauzioni minime, incluse importanti istruzioni di sicurezza incluse nel presente manual dovrebbero essere sempre seguite durante l’uso del tapisroulant. Leggere tutte le istruzioni prima di usare il tapis-roulant. PERICOLO: Per ridurre il rischio di shock elettrici, staccare sempre la spina del tapis roulant dalla presa immediatamente dopo l’uso e prima della pulizia, assemblaggio e ripa razione del tapis roulant.
  • Seite 83 ostruzioni durante l’uso. • Questo tapis roulant è ad uso esclusivamente domestico. • Solo una persona alla volta deve usare • Tenere sempre le mani sui manubri durante l’uso del tapis roulant. • Assicurarsi sempre sul funzionamento della molla di emergenza. •...
  • Seite 84: Disegno Esploso/Lista Dei Pezzi Di Ricambio

    2. DISEGNO ESPLOSO/LISTA DEI PEZZI DI RICAMBIO Al seguente link troverete il disegno esploso e la lista dei pezzi di ricambio: www.sportstech.de/manuals/pdf/sportstech_f10_spareparts.pdf...
  • Seite 85: Istruzioni Per L'assemblaggio

    3. ISTRUZIONI PER L’ASSEMBLAGGIO KIT ASSEMBLAGGIO Vite esagonale M8X50 Rondella di bloccaggio Vite esagonale M8X15 Maniglie Chiave di sicurezza Copertura manubrio Chiave a 5 facili passi per assemblare il tuo tapis roulant, prima di iniziare l’allenamento. Passo 1 A. Posizionare il tapis roulant in posizione dritta su una superficie piatta. B.
  • Seite 86 Presa cavo controllo principale Passo 2 A. Rimuovere le 4 viti a presa esagonale (17) alla fine del tubo sinistro di supporto (3) e del tubo destro di supporto (4). B. attaccare il manubrio (5) su entrambe le estremità del tubo (3 and 4), stringere le viti con la chiave a stele in dotazione.
  • Seite 87: Istruzioni Per Piega

    4. ISTRUZIONI PER PIEGA PER PIEGA Afferrare saldamente l'estremità posteriore del telaio principale con entrambe le mani. Sollevare con cautela l'estremità del telaio principale verso l'alto in posizione verticale finché il sistema di bloccaggio con piede non si inserisce e bloc- ca in posizione e in modo sicuro il telaio principale.
  • Seite 88: Funzionamento Del Computer

    5. FUNZIONAMENTO DEL COMPUTER Accendi il pulsante principale collocato sul tapis roulant alla posizione ON. Prima di iniziare una sessione di allenamen- to, assicurarsi che la Chiave di Sicurezza sia posizionata sulla console del computer e che la molla di sicurezza sia attaccata a uno dei vostri vestiti.
  • Seite 89: Funzioni Del Display

    MODE: Premi il pulsante MODE per selezionare le differenti funzioni (tempo o distanza) per impostare obiettivi di esercizio nella modalità di programma manuale prima di iniziare SPEED (SPEED UP): Premi il pulsante „SPEED “ per regolare e aumentare l’obiettivo dell’allenamento, il tempo o la distanza nel rogramma manuale prima di iniziare l’allenamento.
  • Seite 90 CAL. (CALORIES): Mostra il totale delle calorie bruciate durante l’allenamento. Premi il pulsante START sul computer per iniziare l’allenamento, lo schermo LCD eseguirà un conto alla rovescia di 3 secondi con lo schermo che mostrerà "3-2-1" prima che il tappeto inizi a muoversi. Il tappeto si muoverà con una velocità iniziale di 1.0 KPH. Puoi premere i pulsanti „SPEED ”...
  • Seite 91 Programma Velocità (km/h) per segmento 8 10 7 7 10 10 7 7 10 10 6...
  • Seite 92: Cura, Manutenzione E Guida Ai Problemi Piu' Comuni

    6. CURA, MANUTENZIONE E GUIDA AI PROBLEMI PIU’ COMUNI ATTENZIONE: Per prevenire shock elettrici, si prega di spegnere e staccare la presa del tais roulant prima di pulirlo o di eseguire la manutenzione.. ATTENZIONE: Controllare sempre le component mobili della macchina che potrebbero danneggiarsi con l’uso come la maniglia a molle e il rullo rotante per prevenire incidenti.
  • Seite 93: Lubrificazione

    LUBRIFICAZIONE Lubrificare l’area sotto il tappeto assicurerà una performance superior della macchina e una durata più consistente. Dopo le prime 25 ore di uso (o 2-3 mesi) applicare un po’ di lubrificante, e ripetere a ciascune successive 50 ore di uso (o 5-8 mesi).
  • Seite 94 RIPOSIZIONAMENTO CINGHIA La cinghia del tappeto è preregolata in fabbrica per aderire alla base del tapis roulant, ma in seguito ad uso prolungato, potrebbe spostarsi e necessitare di un riposizionamento. Per riposizionare la cinghia, accendi il pulsante del tapis roulant e fai andare la macchina a una velocità di 8-10 KPH. Usa la chiave a stella in dotazione per girare i bulloni per la regolazione del rullo sul retro per ricentrare la cinghia.
  • Seite 95: Software Di Utilizzo (App)

    7. SOFTWARE DI UTILIZZO (APP) Puoi scaricare l'app utilizzando i codici QR mostrati qui o cercando direttamente nel negozio. Pre- requisito per il dispositivo mobile: Android 5.0 o versioni successive con Bluetooth 4.0, iOS 8.0 o versioni successive. Android Kinomap Note sull'uso dell'app: Come utente Android, assicurati che in "Impostazioni ->...
  • Seite 96 Direttive Europee 2002/96/EG per lo smaltimento Non gettare mai il tuo attrezzo sportivo nell’immondizia normale. Smaltisci l’attrezzo solo tramite un sistema locale o approvato. Tieni in conto le regole applicabili correntemente. Se hai dubbi contatta le autorità locali per informazioni circa le opzioni per uno smaltimento corretto ed ecosostenibile.
  • Seite 97: Declaration Of Conformity

    8. DECLARATION OF CONFORMITY Unter folgendem Link finden Sie die Konformitätserklärung: At the following link you will find the declaration of conformity: www.sportstech.de/manuals/pdf/sportstech_f10_conformity.pdf...
  • Seite 98 Verkauf durch / Distributed by / Distribuido por / Distribué / Distribuito da InnovaMaxx GmbH Potsdamer Str. 144 10783 Berlin +49 30 364 286 609 service@innovamaxx.de http://www.sportstech.de...

Inhaltsverzeichnis