Herunterladen Inhalt Inhalt Diese Seite drucken
SPORTSTECH F15 Benutzerhandbuch
Vorschau ausblenden Andere Handbücher für F15:
Inhaltsverzeichnis

Werbung

Verfügbare Sprachen
  • DE

Verfügbare Sprachen

  • DEUTSCH, seite 1
FITNESS TECHNOLOGY MADE IN GERMANY
F15
DE
EN
ES
FR
IT

Werbung

Inhaltsverzeichnis
loading

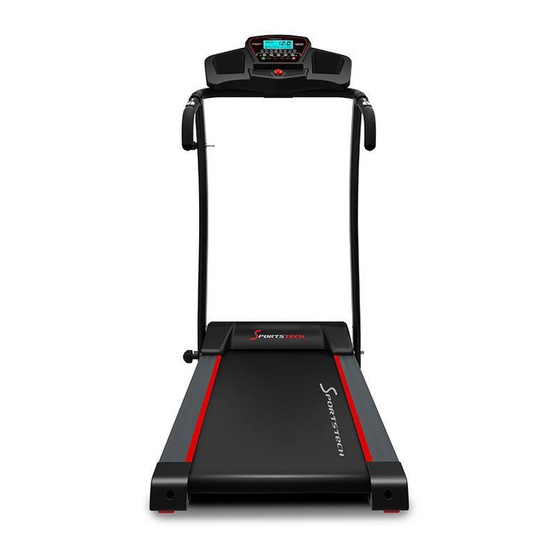
Inhaltszusammenfassung für SPORTSTECH F15

  • Seite 1 FITNESS TECHNOLOGY MADE IN GERMANY...
  • Seite 3: Video Tutorials

    Video Tutorials Unsere für dich! Aufbau Benutzung Abbau In 3 einfachen Schritten zum schnellen und sicheren Start: 1. QR-Code scannen 2. Videos anschauen 3. schnell und sicher starten Link zu den Videos: www.sportstech.de/qr/f15.html...
  • Seite 4 Sehr geehrter Kunde wir freuen uns, dass Sie sich für ein Gerät aus der SPORTSTECH Produktpalette entschieden haben. SPORTSTECH Sportgeräte bieten Ihnen höchste Qualität und neueste Technologie. Um die Leistungsfähigkeit des Gerätes voll nutzen zu können und viele Jahre Freude an Ihrem Gerät zu haben, lesen Sie bitte vor der Inbetriebnahme und dem Beginn des Trainings dieses Benutzerhandbuch sorgfältig durch und verwenden Sie das Gerät den Anweisungen entsprechend.
  • Seite 5: Inhaltsverzeichnis

    INHALT Wichtige Sicherheitshinweise Teileliste Explosionszeichnung Befestigungsmatrial Aufbauanleitung Hochklappen Konsolenbedienung Reinigung, Wartung & Pflege Schmierung Sicherheitsstop Lauffläche Spannen Kompatible Apps Dehnungsübungen...
  • Seite 6: Wichtige Sicherheitshinweise

    WICHTIGE SICHERHEITSHINWEISE Diese allgemeinen Sicherheitsinformationen müssen unbedingt für die Benutzung dieses Produkt beachtet werden. Lesen Sie alle Hinweise, bevor Sie das Produkt in Benutzung nehmen. ACHTUNG: Um die Gefahr eines Stromschlags zu reduzieren ziehen Sie den Stromstecker des Produkts nach der Benutzung, beim Auf- oder Abbau und für Wartungs- oder Reinigungszwecke.
  • Seite 7 • Tragen Sie immer den Sicherheitsclip an Ihrer Kleidung, um das Laufband in Notfall stoppen zu können. • Das Gerät darf nur mit einer Spannung von 220-240V 50Hz in geerdeten Steckdosen genutzt werden. Es darf keine Steckerleiste genutzt werden. • Tragen Sie keinen Schmuck während des Training. Halten Sie während der Benutzung die Hände von der Lauffläche fern.
  • Seite 8: Teileliste

    TEILELISTE Beschreibung Beschreibung Sicherheits Clip Transport-Rollen Bildschirmabdeckung Sicherungsmutter M6 Kreuzschlitz Schraube ST3*10 Flachkopf-Schrauben M6*25 CPU Platine Motorverkleidung (oben Konsolenverkleidung (oben) Innensechskantschrauben M8*50 Getränkehalter Bolzen (f. manuelle Steigung) Flachkopf-Schraube ST3*14 Regler (f. manuelle Steigung) Konsolenverkleidung (unten) Flachkopf-Schraube M5*10 Innensechskantschraube M6*20 Kreuzschlitz Schraube ST3*10 Kreuzschlitz Schraube ST4*14 Platine Tablet-Halterung...
  • Seite 9 Beschreibung Beschreibung Federscheibe Ø8 Umlaufrolle (vorn) Kreuzschlitz-Schraube M4*10 Innensechskantschraube M8*45 Regulierungsknopf (Handauflage) Dichtung Φ8*16*1.5 Handpulssensor (rostfreier Stahl) Versteifungsstreben Handpulssensor (Plastik) Endkappe (R) Kreuzschlitz Schraube ST3*6 Überlastungsschutz 3-ädriges Kabel (560m) Netzschalter 3-ädriges Kabel (1500m) Kabel Sprengring SB4N-4P Handauflagenummante- Kreuzschlitz Schraube ST4*14 lung(29*T4.0*300mm) Handauflage Laufbrett...
  • Seite 10: Explosionszeichnung

    EXPLOSIONSZEICHNUNG NV OM P N P O QT QV QR QS QN QO QP...
  • Seite 11: Befestigungsmatrial

    BEFESTIGUNGSMATERIAL Feststellknauf Federknauf Handauflagen- (für Klappmechanismus) x 1 Verkleidung Sechskant ) x 1 AUFBAUANLEITUNG Schritt 1: A.Stellen Sie das Laufband aufrecht auf einen ebenerdigen, flachen Untergrund B. Drehen Sie dem Knauf (28) per Hand im Uhrzeigersinn in die Löcher des Haupt-Rahmens (77) ein und ziehen Sie ihn mit dem Schraubenschlüssel fest.
  • Seite 12 Haupt-Steuerkabel Steckverbindung Schritt 2: A. Entfernen Sie die vier Sechskantinnenschrauben (17) aus den oberen Enden der linken und rechten Verstrebungsrohre. B. Bringen Sie die Haltegriffe(70) auf beiden enden der Verstrebungsrohre an, und ziehen Sie die Schrauben mit beiliegendem Sechskantschlüssel fest. C.
  • Seite 13: Hochklappen

    HOCHKLAPPEN Zum Hochklappen: Nach der Nutzung drehen Sie den Halterungsstift unten gegen den Uhrzeigersinn und ziehen Sie diesen anschliessen heraus, um die Lauffläche hochklappen zu können. Klappen Sie die Lauffläche hoch und fixieren Sie diese mit dem oberen Halterungsstift. Anschliessend können Sie den Halterungsstift unten wieder befestigen, damit dieser nicht verloren geht.
  • Seite 14: Konsolenbedienung

    KONSOLENBEDIENUNG Schalten Sie das Laufband mit dem Stromschutzschalter auf der Rückseite an, indem Sie diesen in die Position “ON” stellen. Bevor Sie mit dem Training beginnen stellen Sie sicher, dass der Sicherheitsclip angelegt wurde und sich im Steckplatz auf der Konsole befindet. HINWEIS: Stehen Sie immer auf den Seitentrittflächen bevor Sie mit dem Training beginnen.
  • Seite 15 MODE: Drücken Sie diese Taste, um zwischen den einzelnen Programm-Modi zu wechseln und die Zielwerte im manuellen Modus auszuwählen. SPEED UP (GESCHWINDIGKEIT ERHÖHEN): Drücken Sie vor Trainingsbeginn die Taste SPEED UP, um während der Programmeinstellung im manuellen oder einem anderen einstellbaren Modus den Wert nach oben zu erhöhen. Das Drücken der Taste während des Trainings erhöht die Laufgeschwindigkeit.
  • Seite 16 CAL. (KALORIEN): Zeigt den Wert für verbrauchte Kalorien an Drücken Sie die START Taste, um mit dem Training zu beginnen. Auf dem Bildschirm wird ein Countdown von 3 Sekunden angezeigt, bevor das Training beginnt und das Laufband in Bewegung gesetzt wird. Das Laufband startet mit einer Geschwindigkeit von 0.8 KM/H.
  • Seite 18: Reinugung, Wartung & Pflege

    REINUGUNG, WARTUNG & PFLEGE WARNUNG: Um bei der regelmässigen Wartung und Reinigung keinen Stromschlag zu riskieren schalten Sie das Laufband am Netzschalter aus und ziehen den Stromstecker des Produkts. WARNUNG: Prüfen Sie immer den Verschleiss sichtbarer Teile, um das Verletzungsrisiko zu minimieren.
  • Seite 19: Schmierung

    SCHMIERUNG Das Schmieren der Lauffläche garantiert eine längere Lebensdauer der Lauffläche. Tragen Sie immer nach 50 Trainingsstunden eine neue Schicht Silikonöl auf. Wie überprüfe ich die Schmierung Heben Sie eine Seite der Lauffläche an und streichen Sie mit dem Finger über das Laufbrett unter der Lauffläche.
  • Seite 20: Lauffläche Spannen

    LAUFFLÄCHE SPANNEN Die Lauffläche ist bereits gespannt eingestellt. Entsprechend Ihrem Körpergewicht, muss diese Spannung angepasst werden, damit ein richtiges Training erfolgen kann. Um die Lauffläche zu spannen nutzen Sie das mitgelieferte Werkzeug. In den Endkappen (wie auf Foto unten) befinden sich Schrauben mit welchen Sie die Spannung einstellen.
  • Seite 21: Kompatible Apps

    KOMPATIBLE APPS iFitshow Android: Laden Sie sich ihre bevorzugte App aus dem Google PlayStore herunter. iPad/iPhone: Laden Sie sich ihre bevorzugte App aus dem AppStore herunter. Prüfen Sie ob ihr Mobilgerät die geforderten Systemvoraussetzungen der App erfüllt. Diese Voraussetzungen der entsprechenden App sind auf der jeweiligen Seite innerhalb des Google PlayStore oder AppStore zu finden.
  • Seite 22: Dehnungsübungen

    DEHNUNGSÜBUNGEN Bevor Sie das Laufband benutzen, ist es am besten, 5 bis 10 Minuten zum Aufwärmen Stretching-Übungen durchzuführen. Dehnen vor dem Training wird hilft die Flexibilität zu verbessern und das Verletzungsrisiko zu mindern. QUADRIZEPS-DEHNUNG Mit einer Hand an der Wand abstützen, um das Gleichgewicht besser zu halten, nach hinten greifen und den rechten Fuss nach oben ziehen.
  • Seite 23 MIT DEM KOPF ROLLEN Drehen Sie den Kopf nach rechts für eine Sekunde, fühlen Sie die Streckung auf der linken Seite des Nackens, dann drehen Sie den Kopf zurück für eine Sekunde, recken Sie Ihr Kinn nach oben und lassen Ihren Mund geöffnet. Drehen Sie Ihren Kopf nach links für eine Sekunde, dann senken Sie Ihren Kopf auf die Brust für eine Sekunde.
  • Seite 24: Eu-Konformitätserklärung

    InnovaMaxx GmbH Potsdamer Platz 11 10785 Berlin Deutschland Wir, InnovaMaxx GmbH, erklären hiermit, dass das Produkt: Sportstech F15 ,in der von uns in Verkehr gebrachten Ausführung, den einschlägigen Anforderungen der nachfolgend genannten EG-Richtlinien entspricht. Angewandte EG Richtlinien: • EG Machinenrichtlnie 2006/42/EG •...
  • Seite 25 Europäische Entsorgungsrichtlinie 2002/96/EG Entsorgen Sie Ihr Trainingsgerät in keinem Fall über den normalen Hausmüll. Entsorgen Sie das Gerät ausschließlich über einen kommunalen oder zugelassenen Entsorgungsbetrieb.Beachten Sie hierbei die aktuell geltenden Vorschriften.Erkundigen Sie sich im Zweifelsfall bei Ihrer Stadt- bzw. Gemeindeverwal- tung nach einer sach- und umweltgerechten Entsorgungsmöglichkeit.
  • Seite 27 3 simple steps for a fast and safe start: 1. scan the QR code 2. watch videos 3. start fast and safely Link to the videos: www.sportstech.de/qr/f15.html...
  • Seite 28 Dear customer, We are pleased you chose a device from the SPORTSTECH product range. With sports equipment from SPORTSTECH you get the highest quality and latest technology. In order to fully use the potential of your device and be able to enjoy it for many years, please read this manual carefully before starting up and beginning of training, and use the device according to the instructions.
  • Seite 29 INDEX Important Safety Instructions Parts List Exploded-View Tool Kit Assembly Instructions Folding Instructions Operating The Computer Care, Maintenance & Troubleshooting Lubrication Emergency Stop Belt Adjustment Compatible Fitness Applications Stretching Excercise...
  • Seite 30: Important Safety Instructions

    IMPORTANT SAFETY INSTRUCTIONS Basic precautions should always be followed, including the following safety instructions when using the crosstrainer: Read all instructions before using this equipment. WARNING: To reduce the risk of electric shock, always unplug the treadmill from the electrical outlet immediately after using and before cleaning, assembling, or servicing the tread mill.
  • Seite 31 • This treadmill is for domestic household use only. • Only one person should use the treadmill at a time. • Wear comfortable and suitable clothing when using the treadmill. Do not use the treadmill barefoot or in socks. Always wear appropriate, enclosed athletic footwear. Never wear loose or baggy clothing as it can become caught on the treadmill and create an entrapment hazard.
  • Seite 32: Parts List

    PARTS LIST Beschreibung Beschreibung safety key transportation wheel monitor sticker locknut M6 cross tapping screw ST3*10 Cross flat head screws M6*25 CPU circuit board motor cover (upper) monitor cover (upper) socket head screwsM8*50 cup holder manual incline bolt cross flat head screw ST3*14 manual incline adjustor monitor cover (down) cross flat head screw M5*10...
  • Seite 33 Beschreibung Beschreibung spring washer Ø8 roller (front) cross screw M4*10 socket head screw M8*45 adjusted button gasket 8*16*1.5 hand-pulse sensor(stainless steel) strengthen Bracket hand-pulse sensor(plastic) End cap (R) cross tapping screw ST3*6 overload switch three code line (560m) power switch three code line (1500m) cable snap ring SB4N-4P handlebar for grip(29*T4.0*300mm)
  • Seite 34: Exploded-View

    EXPLODED VIEW NV OM P N P O QT QV QR QS QN QO QP...
  • Seite 35: Tool Kit

    TOOL KIT Feststellknauf Handlebar Cover x 2 Socket Head Screw Federknauf Handauflagen- Knob Spring Knob x 1 (für Klappmechanismus) x 1 Verkleidung ( to fold and unfold) x 1 Safety Key Allen Key x 1 Wrench x 1 Sechskant (emergency stop) x 1 ) x 1 ASSEMBLY INSTRUCTIONS Step 1:...
  • Seite 36 Haupt-Steuerkabel Steckverbindung Main Control Cable Socket Step 2: A.Remove the four Head Hex Socket Screws (17) in the end of the Left Stand Tube and Right Stand Tube. B.Attach the Handlebar (70) onto both ends of the Stand Tube, tighten the screws with the Allen Key provided.
  • Seite 37: Folding Instructions

    FOLDING INSTRUCTIONS TO FOLD: After use, unscrew the safety lock on the bottom frame, fold the treadmill and pull the expandable safety lock out from the left Upright and release to lock the treadmill in an upright position. To avoid losing the safety lock, screw the safety lock to the bottom and upper frames whilst in an upright position.
  • Seite 38: Operating The Computer

    OPERATING THE COMPUTER NOTE: Always stand on the side rails when you start the treadmill, never start the treadmill while you are standing on the running belt. QUICK START: Press the START button on the computer to start exercise, the LCD window will countdown 3 seconds with the LCD showing "3-2-1"...
  • Seite 39 MODE: Press the MODE button to select different functions (time, distance, or calories) for setting exercise goals in manual program mode before training. SPEED + (SPEED UP): Press the SPEED + button to make upward adjustments for pre-setting target training time, distance, or calorie in manual program mode before training.
  • Seite 40 CALORIES: Displays the total calories burned during your workout. Press the START button on the computer to begin exercising, the LCD window will countdown 3 seconds with the LCD showing "3-2-1" before the running belt starts moving. The running belt starts moving with an initial speed of 0.8 KPH.
  • Seite 41 Speed (km/h) per Segment...
  • Seite 42: Care, Maintenance & Troubleshooting

    CARE, MAINTENANCE & TROUBLESHOOTING WARNING: To prevent electrical shock, please turn off and unplug the treadmill before cleaning or performing routine maintenance. WARNING: Always check the wear and tear components like spring knob and running belt to prevent injury. CLEANING After each exercise, ensure that the unit is wiped down and any sweat is removed from the unit.
  • Seite 43: Lubrication

    LUBRICATION Lubricating under the running belt will ensure superior performance and extend its life expectancy. After the first 25 hours of use (or 2-3 months) apply some lubricant, and repeat for every following 50 hours of use (or 5-8 months). How to check running belt for proper lubrication Lift one side of the running belt and feel the top surface of the running deck.
  • Seite 44: Belt Adjustment

    BELT ADJUSTMENT The running belt is pre-adjusted to the running deck at the factory, but after prolonged use it can stretch and require readjustment. To adjust the belt, turn on the main power switch of the treadmill and let the belt run at a speed of 8-10 KPH. Use the 6 mm Allen Wrench provided to turn the rear roller adjustment bolts in order to centre the belt.
  • Seite 45: Compatible Fitness Applications

    COMPATIBLE FITNESS APPLICATIONS iFitshow Android: Download your favorite application from the Google PlayStore. iPad/iPhone: Download your favorite application from the AppStore. Check if your mobile device confirms the requirements for the application. The requirements of each application are shown in the Google PlayStore or AppStore. How to use: Turn on the Bluetooth function of your mobile device.
  • Seite 46: Stretch Exercise

    STRETCH EXERCISE No matter how you do sports, please do some stretch at first, The warm muscle will extend easily, so warm up yourself with 5-10minutes, Then We suggest the following stretch exercise, five times.10counts for each time or longer do these exercise again after sports. QUADRICEPS STRETCH With one hand against a wall for balance, reach behind you and pull your right foot up.
  • Seite 47 HEAD ROLLS Rotate your head to the right for one count, feeling the stretch up the left side of your neck, then rotate your head back for one count, stretching your chin to the ceiling and letting your mouth open. Rotate your head to the left for one count, then drop your head to your chest for one count.
  • Seite 48: Eu-Konformitätserklärung

    InnovaMaxx GmbH Potsdamer Platz 11 10785 Berlin Deutschland Wir, InnovaMaxx GmbH, erklären hiermit, dass das Produkt: Sportstech F15 ,in der von uns in Verkehr gebrachten Ausführung, den einschlägigen Anforderungen der nachfolgend genannten EG-Richtlinien entspricht. Angewandte EG Richtlinien: • EG Machinenrichtlnie 2006/42/EG •...
  • Seite 49 European Disposal Directive 2002/96/EG Never dispose your training device in your regular household waste. Dispose the device only at a local or approved disposal. Take care of the currently applicable regulations. If you have doubts contact your local authorities for information about a correct and environment friendly disposal option.
  • Seite 51 Nuestros para usted! Construcción Utilizar Reducción En 3 sencillos pasos para un arranque rápido y seguro: 1. Escanear el código QR 2. Ver vídeos 3. Comienza rápido y seguro Enlace a los videos: www.sportstech.de/qr/f15.html...
  • Seite 52 Estimado cliente, Nos complace que haya elegido un dispositivo de la línea de productos SPORTSTECH. Con el equipo deportivo de SPORTSTECH usted obtiene la más alta calidad y la mejor tecnología. Con el fin de usar todo el potencial de su dispositivo y para que pueda disfrutarlo durante muchos años, por favor lea este manual cuidadosamente antes de comenzar a ejercitarse, y use el dispositivo...
  • Seite 53 CONTENIDOS Instrucciones de seguridad importantes Lista de piezas Vista en despiece Kit de herramientas Instrucciones de ensamblaje Instrucciones de plegado Funcionamiento del ordenador Cuidado, mantenimiento & solucion de problemas Lubricación Parada de emergencia Ajuste de la cinta Aplicaciones de fitness compatibles Ejercicios de estiramiento...
  • Seite 54: Instrucciones De Seguridad Importantes

    INSTRUCCIONES DE SEGURIDAD IMPORTANTES Al usar la caminadora siempre se deben seguir las precauciones básicas, incluyen- do las siguientes instrucciones de seguridad importantes. Lea todas las instruccio- nes antes de usar este producto. ADVERTENCIA: Antes de comenzar cualquier programa de ejercicios consulte a su médico. Esto es especialmente importante para personas mayores de 35 años o para quienes tienen problemas prexistentes de salud.
  • Seite 55 • Solo una persona debe usar la caminadora a la vez. • Use ropa cómoda y adecuada al momento de usar la caminadora. No use la caminadora descalzo o en medias. Use siempre calzado deportivo adecuado y cerrado. Nunca vista ropa holgada ya que podría atascarse en la caminadora y puede producir riesgo de atascamiento.
  • Seite 56: Lista De Piezas

    LISTA DE PIEZAS Beschreibung Beschreibung llave de seguridad rueda de transporte pegatina del monitor contratuerca M6 Tornillos de cabeza plana cruzada tornillo roscado ST3 * 10 M6 * 25 CPU placa de circuito tapa del motor (superior) cubierta del monitor (superior) tornillos de cabeza hueca M8 * 50 posavasos perno de inclinación manual...
  • Seite 57 Beschreibung Beschreibung arandela elástica Ø8 rodillo (frontal) tornillo cruzado M4 * 10 tornillo de cabeza hueca M8 * 45 botón ajustado junta Φ8 * 16 * 1.5 sensor de pulso de mano (acero fortalecer el soporte inoxidable) sensor de pulso de mano (plástico) Tapa de cierre (R) tornillo roscado ST3 * 6 interruptor de sobrecarga...
  • Seite 58: Vista En Despiece

    VISTA EN DESPIECE NV OM P N P O QT QV QR QS QN QO QP...
  • Seite 59: Kit De Herramientas

    KIT DE HERRAMIENTAS Feststellknauf Tapas del manillar x 2 Tornillo Allen x 1 Federknauf Handauflagen- Perilla Perilla de resorte x 1 (für Klappmechanismus) x 1 Verkleidung (para plegar y desplegar) x 1 Llave de seguridad Llave Allen x 1 Llave x 1 Sechskant (parada de ) x 1...
  • Seite 60 Haupt-Steuerkabel Steckverbindung Conector del cable de control principal Paso 2: A. Quite los cuatro tornillos Allen (17) al final del tubo de soporte izquierdo y derecho. B. Ajuste el manillar (70) en ambos extremos de los tubos de soporte, apriete los tornillos con la llave Allen incluida.
  • Seite 61: Instrucciones De Plegado

    INSTRUCCIONES DE PLEGADO PARA PLEGAR: Después de usarla, desenrosque el cierre de seguridad del marco inferior, pliegue la caminadora y saque el cierre de seguridad expansible fuera del lado izquierdo y suéltelo para bloquear la caminadora en posición vertical. Para evitar perder el cierre de seguridad, apriételo en los marcos inferior y superior mientras está en posición vertical.
  • Seite 62: Funcionamiento Del Ordenador

    FUNCIONAMIENTO DEL ORDENADOR NOTA: Siempre esté de pie al lado de las barras laterales cuando encienda la caminadora, nunca encienda la caminadora mientras está sobre la cinta. INICIO RÁPIDO: Presione el botón START en el ordenador para comenzar el ejercicio, la ventana LCD contará 3 segundos hacia atrás con la ventana LCD mostrando “3-2-1”...
  • Seite 63 MODE: Presione el botón MODE para seleccionar diferentes funciones (tiempo, distancia o calorías) para ajustar los objetivos del ejercicio en el modo de programa manual antes del ejercicio. SPEED + (SPEED UP): Presione el botón SPEED+ para hacer ajustes ascendentes para predefinir el tiempo o las distancia objetivo del ejercicio en el modo de programa manual antes del ejercicio.
  • Seite 64 CALORIES: Muestra el total de calorías quemadas durante el ejercicio. Presione el botón START en el ordenador para comenzar el ejercicio, la ventana LCD contará 3 segundos hacia atrás con la ventana LCD mostrando “3-2-1” antes de que la cinta comience a moverse. La cinta comienza a moverse con una velocidad inicial de 0.8 Km/h.
  • Seite 65 Velocidad (Km/h) por segmento...
  • Seite 66: Cuidado, Mantenimiento & Solucion De Problemas

    CUIDADO, MANTENIMIENTO & SOLUCION DE PROBLEMAS PRECAUCIÓN: Para prevenir choque eléctrico, por favor apague y desconecte las caminadora antes de limpiarla o de hacerle mantenimiento de rutina. PRECAUCIÓN: Siempre revise las piezas de desgaste como la perilla de resorte y la cinta para prevenir lesiones.
  • Seite 67: Lubricación

    LUBRICACIÓN La lubricación debajo de la cinta garantizará un rendimiento superior y extenderá su vida útil. Después de las primeras 25 horas de uso (o 2-3 meses) aplique algo de lubricante, y repita para cada 50 horas de uso (o 5-8 meses). Cómo revisar la cinta para una lubricación adecuada Levante un lado de la cinta y sienta la superficie superior de la placa de soporte.
  • Seite 68: Ajuste De La Cinta

    AJUSTE DE LA CINTA La cinta se ajusta previamente a la placa de soporte en la fábrica, pero después de un uso prolongado esta puede estirarse y necesitará un reajuste. Para ajustar la cinta, encienda el interruptor principal de la caminadora y deje que la cinta corra a una velocidad de 8-10 Km/h. Use la llave Allen proporcionada para girar los tornillos de ajuste del rodillo posterior para centrar la cinta.
  • Seite 69: Aplicaciones De Fitness Compatibles

    APLICACIONES DE FITNESS COMPATIBLES iFitshow Android: descargue su aplicación favorita de Google PlayStore. iPad / iPhone: Descarga tu aplicación favorita de la AppStore. Compruebe si su dispositivo móvil confirma los requisitos para la aplicación. Los requisitos de cada aplicación se muestran en Google PlayStore o AppStore. Cómo utilizar: Active la función Bluetooth de su dispositivo móvil.
  • Seite 70: Ejercicios De Estiramiento

    EJERCICIOS DE ESTIRAMIENTO No importa cómo se ejercite, siempre haga algo de estiramiento primero. El calentamiento muscular hará que sus músculos se extiendan fácilmente, así que caliente al menos 5-10 minutos. Luego le sugerimos hacer los siguientes ejercicios de estiramiento cinco veces. El estiramiento antes del ejercicio le ayuda a mejorar la flexibilidad y reduce los riesgos de lesiones.
  • Seite 71 GIROS CON LA CABEZA Gire su cabeza hacia la derecha por un segundo, sienta como se estira el lado izquierdo de su cuello, luego gire su cabeza hacia tras por un segundo, estirando su barbilla hacia el techo y dejando su boca abierta. Gire su cabeza hacia la izquierda por un segundo, luego deje caer su cabeza hacia su pecho por un segundo.
  • Seite 72: Eu-Konformitätserklärung

    InnovaMaxx GmbH Potsdamer Platz 11 10785 Berlin Deutschland Wir, InnovaMaxx GmbH, erklären hiermit, dass das Produkt: Sportstech F15 ,in der von uns in Verkehr gebrachten Ausführung, den einschlägigen Anforderungen der nachfolgend genannten EG-Richtlinien entspricht. Angewandte EG Richtlinien: • EG Machinenrichtlnie 2006/42/EG •...
  • Seite 73 Directiva Europea de Residuos 2002/96/EG Nunca elimine su dispositivo de entrenamiento en su basura doméstica ordinaria. Elimine el dispositivo únicamente en un sitio de eliminación aprobado. Tenga en cuenta las normativas aplicables actualmen- te. Si tiene dudas contacte a las autoridades locales para conseguir información sobre una opción de eliminación adecuada y ecológica.
  • Seite 74 MANUEL FRANÇAIS...
  • Seite 75 3 étapes simples pour un démarrage ra- pide et sécurisé: 1. Scannez le code QR 2. Regarder les vidéos 3. Démarrez rapidement et en toute sécurité. Lien vers les vidéos: www.sportstech.de/qr/f15.html...
  • Seite 76 Cher client, Nous sommes ravis que vous ayez choisi un appareil de la gamme de produits SPORTSTECH. Avec les équipements sportifs de SPORTSTECH, vous obtenez la plus haute qualité et la meilleure technologie. Afin d'utiliser pleinement le potentiel de votre appareil et de pouvoir l'apprécier pendant de nombreuses années, lisez attentivement ce manuel avant l'utilisation et le début de votre entraînement et utilisez...
  • Seite 77 CONTENU Consignes de sécurité importantes Liste des pièces Vue de eclatee Outils Instructions d'assemblage Instructions de plaisance Fonctionnement de l'ordinateur Nettoyage, entretien et entretien Lubrification Arrét d'urgence Dépannage Applications compatibles Excercice d'étirement...
  • Seite 78: Consignes De Sécurité Importantes

    CONSIGNES DE SÉCURITÉ IMPORTANTES Les précautions de base, y compris les consignes de sécurité importantes suivantes doivent toujours être respectées lorsque vous utilisez ce tapis roulant. Lisez toutes les instructions avant d'utiliser cette appareil. AVERTISSEMENT: Avant de commencer un programme d'exercice, consultez votre médecin. Ceci est particulièrement important pour les personnes qui ont plus de 35 ans ou qui ont des problèmes de santé...
  • Seite 79 • Ce tapis de course est pour un usage domestique seulement. Une seule personne doit utiliser le tapis roulant à la fois. • Portez des vêtements confortables et adaptés lorsque vous utilisez le tapis roulant. N’ utilisez pas le tapis de course pieds nus ou en chaussettes.
  • Seite 80: Liste Des Pièces

    LISTE DES PIÈCES Beschreibung Beschreibung clé de sécurité roue de transport autocollant pour écran contre-écrou M6 vis à tête croisée ST3 * 10 Vis à tête plate croisée M6 * 25 Carte de circuit imprimé CPU couvercle du moteur (en haut) couverture du moniteur (en haut) vis à...
  • Seite 81 Beschreibung Beschreibung rondelle élastique Ø8 rouleau (avant) vis croisée M4 * 10 vis à tête creuse M8 * 45 bouton ajusté joint d'étanchéité Φ8 * 16 * 1.5 capteur à impulsion manuelle (acier renforcer le support inoxydable) capteur à impulsion manuelle (plas- Capuchon de fin de course (R) tique) vis à...
  • Seite 82: Vue De Eclatee

    VUE DE ECLATEE NV OM P N P O QT QV QR QS QN QO QP...
  • Seite 83: Outils

    OUTILS Feststellknauf Couvercle du Vis a tete Federknauf Handauflagen- Bouton x 1 Bouton x 1 (für Klappmechanismus) x 1 Verkleidung guidon x 2 creuse x 1 Cle de securite Cle Allen x 1 Cle anglaise x 1 Sechskant (Arret d'urgence) x 1 ) x 1 INSTRUCTIONS D'ASSEMBLAGE Etape 1:...
  • Seite 84 Haupt-Steuerkabel Steckverbindung Prise de câble de commande principale Étape 2: A. Retirez les quatre vis à tête hexagonale (17) à la fin du tube gauche et du tube droit. B.Appuyez sur le guidon (70) sur les deux extrémités du tube de support, serrez les vis avec la clé Allen fournie.
  • Seite 85: Instructions De Plaisance

    INSTRUCTIONS DE PLAISANCE PLIER: Après l'utilisation, dévisser le verrou de sécurité sur le cadre inférieur, plier le tapis roulant et tirer le verrou de sécurité extensible du montant gauche et relâcher pour verrouiller le tapis roulant en position verticale. Pour éviter de perdre le verrou de sécurité, visser le verrou de sécurité sur le bas et les cadres supérieurs en position verticale.
  • Seite 86: Fonctionnement De L'ordinateur

    FONCTIONNEMENT DE L'ORDINATEUR REMARQUE: toujours debout sur les rails latéraux lorsque vous démarrez le tapis roulant, ne démarrez jamais le tapis roulant pendant que vous êtes debout sur la courroie de course. DÉMARRAGE RAPIDE: Appuyez sur le bouton START sur l'ordinateur pour commencer l'exercice, la fenêtre LCD se décompte 3 secondes avec l'écran LCD "3-2-1"...
  • Seite 87 MODE: Appuyez sur pour basculer entre les modes de programme individuels et pour sélectionner les valeurs cibles en mode manuel. SPEED: Avant le début de l'exercice, appuyez sur la touche SPEED + pour augmenter la valeur vers le haut pendant le mode manuel ou autre pendant le réglage du programme. En appuyant sur le bouton pendant l'exercice, vous augmentez la vitesse de fonctionnement.
  • Seite 88 CAL. (CALORIES): affiche la valeur des calories consommées Appuyez sur le bouton START pour commencer à faire de l'exercice. Un compte à rebours de 3 secondes s'affiche à l'écran avant le début de l'entraînement et le tapis roulant est démarré. Le tapis roulant commence à une vitesse de 0,8 KM / H.
  • Seite 89 vitesse km/h per segment...
  • Seite 90: Nettoyage, Entretien Et Entretien

    NETTOYAGE, ENTRETIEN ET ENTRETIEN AVERTISSEMENT: Pour éviter tout risque d'électrocution lors d'un entretien et d'un nettoyage réguliers, éteignez le tapis roulant en tirant l'interrupteur d'alimentation et débranchez le produit. AVERTISSEMENT: Vérifiez toujours l'usure des pièces visibles afin de minimiser les risques de blessures.
  • Seite 91: Lubrification

    LUBRIFICATION La lubrification de la bande de roulement garantit une durée de vie plus longue de la bande de roulement. Toujours porter une nouvelle couche d'huile de silicone après 50 heures d'entraînement. Comment vérifier la lubrification Soulevez un côté de la bande de roulement et glissez votre doigt sur le tapis roulant sous la bande de roulement.
  • Seite 92: Dépannage

    DÉPANNAGE La bande de roulement est déjà tendue. Selon votre poids corporel, cette tension doit être ajustée de manière à permettre une bonne formation. Pour couvrir la bande de roulement, utilisez l'outil fourni. Dans les bouchons d'extrémité (comme dans la photo ci-dessous), il existe des vis avec lesquelles vous pouvez ajuster la tension.
  • Seite 93: Applications Compatibles

    APPLICATIONS COMPATIBLES iFitshow Android: Téléchargez votre application favorite depuis Google PlayStore. iPad / iPhone: téléchargez votre application favorite à partir de l'AppStore. Vérifiez si votre appareil mobile répond aux exigences système requises de l'application. Ces conditions préalables pour l'application respective peuvent être trouvées sur la page respective dans Google PlayStore ou AppStore.
  • Seite 94: Excercice D'étirement

    EXCERCICE D'ÉTIREMENT Peu importe comment vous pratiquez le sport, Veuillez faire quelques étirements avant de commencer votre entraî- nement, le muscle chaud s’étendra facilement, donc réchauffez vous durant 5-10minutes, nous suggérons l'exercice d'étirement suivant : 5 fois ,10 comptes pour chaque fois ou plus, faire ces exercices à nouveau après le sport. ETIREMENT DU QUADRICEPS D'une seule main contre un mur pour l'équilibre, essayez d'atteindre votre derrière et etendez votre pied droit.
  • Seite 95 ROULER LA TÊTE Tournez la tête vers la droite une fois, en étirant le côté gauche de votre cou, puis faites pivoter votre tête en arrière une fois, étirez votre menton jusqu'au plafond et laissez votre bouche ouverte. Faites pivoter votre tête vers la gauche une fois, puis inclinez votre tête sur votre poitrine une fois.
  • Seite 96: Eu-Konformitätserklärung

    InnovaMaxx GmbH Potsdamer Platz 11 10785 Berlin Deutschland Wir, InnovaMaxx GmbH, erklären hiermit, dass das Produkt: Sportstech F15 ,in der von uns in Verkehr gebrachten Ausführung, den einschlägigen Anforderungen der nachfolgend genannten EG-Richtlinien entspricht. Angewandte EG Richtlinien: • EG Machinenrichtlnie 2006/42/EG •...
  • Seite 97 Directive européenne n° 2002/96/EG relative aux déchets Ne jeter en aucun cas l‘appareil avec les ordures ménagères. Ne disposez de l‘appareil que dans les décharges publiques (Gestion des déchets communaux de la ville). Pour leur élimination respectez les réglementations en vigueur locales. Renseignez-vous à la mairie ou à la commune de votre ville sur les possibilités offertes pour éliminer votre appareil correctement et en respectant l‘environnement.
  • Seite 98 MANUALE D’USO ITALIANO...
  • Seite 99 Video Tutorial Il nostro per te! Montaggio Utilizzo Smontaggio 3 semplici passaggi per un inizio veloce e sicuro: 1. Scannerizza il QR-Code 2. Guarda il Video 3. Inizia ad allenarti! Link per il Video: www.sportstech.de/qr/f15.html...
  • Seite 100 Gentile cliente Siamo lieti che abbiate scelto un dispositivo della gamma SPORTSTECH. Con le attrezzature sportive di SPORSTECH potrete usufruire della più alta qualità e della più recente tecnologia. Per sfruttare a pieno il potenziale del dispositivo e poterlo utilizzare per molti anni, raccomandiamo di leggere attentamente questo manuale prima di iniziare l’allenamento e di utilizzare il dispositivo...
  • Seite 101 INDICE Importanti istruzioni di sicurezza Elenco delle parti Disegno esploso Kit di attrezzi Istruzioni di assemblaggio Istruzioni per piega Funzionamento del computer Cura, manutenzione e guida ai problemi piu' comuni Lubrificazione Arresto di emergenza Riposizionamento cinghia Applicazioni di fitness compatibili Esercizi di stretching...
  • Seite 102: Importanti Istruzioni Di Sicurezza

    IMPORTANTI ISTRUZIONI DI SICUREZZA Precauzioni minime, incluse importanti istruzioni di sicurezza incluse nel presente manual dovrebbero essere sempre seguite durante l’uso del tapisroulant. Leggere tutte le istruzioni prima di utilizzare il dispositivo. ATTENZIONE: Prima di iniziare qualsiasi programma di esercizio consultare il proprio medico. Questo è...
  • Seite 103 • Tenere il tapis roulant su una superficie solida e piana con un’area minima di sicurezza di due metri intorno al tapis roulant. Assicurarsi che l’area intorno al tapis roulant rimanga sgombra da ostruzioni durante l’uso. • Tenere sempre le mani sui manubri durante l’uso del tapis roulant. •...
  • Seite 104: Elenco Delle Parti

    ELENCO DELLE PARTI Beschreibung Beschreibung chiave di sicurezza ruota di trasporto adesivo del monitor ghiera M6 vite di crociera ST3 * 10 Viti a testa piatta M6 * 25 Scheda circuito CPU copertura del motore (superiore) coperchio del monitor (superiore) viti testa morsetti M8 * 50 portabicchieri bullone di inclinazione manuale...
  • Seite 105 Beschreibung Beschreibung rondella a molla Ø8 rullo (anteriore) vite incrociata M4 * 10 vite testa presa M8 * 45 pulsante regolato guarnizione Φ8 * 16 * 1.5 sensore a impulsi a mano (acciaio rafforzare la staffa inossidabile) sensore a impulsi a mano (plastica) Tappo terminale (R) vite di crociera ST3 * 6 interruttore di sovraccarico...
  • Seite 106: Disegno Esploso

    DISEGNO ESPLOSO NV OM P N P O QT QV QR QS QN QO QP...
  • Seite 107: Kit Di Attrezzi

    KIT DI ATTREZZI Feststellknauf Coperchio manubrio Vite a brugola x 1 Federknauf Handauflagen- Manopola Manopola di regolazi- (für Klappmechanismus) x 1 Verkleidung (per chiudere e aprire) x1 one della molla x 1 Chiave di sicurezza Chiave a brugola x 1 Chiave inglese x 1 Sechskant (arresto di...
  • Seite 108 Haupt-Steuerkabel Steckverbindung Presa del cavo di controllo principale Passo 2: A. Rimuovere le quattro viti a testa esagonale (17) in fondo al tubo di sinistra e destra. B. Fissare il manubrio (70) su entrambe le estremit del tubo, serrare le viti con la chiave a brugola fornita.
  • Seite 109: Istruzioni Per Piega

    ISTRUZIONI PER PIEGA PER PIEGA: Dopo l’uso, svitare il blocco di sicurezza sulla struttura di base, piegare il tapis roulant e tirare il blocco di sicurezza espandibile fuori da sinistra verso la posizione dritta e rilasciare per bloccare il tapis roulant nella posizione dritta. Per evitare di perfere il blocco di sicurezza, riavvitare il blocco di sicurezza alla base e alle strutture superiori una volta raggiunta la posizione dritta.
  • Seite 110: Funzionamento Del Computer

    FUNZIONAMENTO DEL COMPUTER NOTA: Rimanere sempre sui binari laterali uando si mette in funzione il tappeto, mai mettere in funzione il tappeto mentre siete sulla fascia principale. INIZIO VELOCE: Premi il pulsante start sul computer per iniziare l’esercizio. Lo schermo LCD eseguirà un conto alla rovescia di 3 secondi con lo schermo che mostrerà...
  • Seite 111 MODE: Premere per passare tra le singole modalità di programma e selezionare i valori di destinazione in modalità manuale. SPEED∧ (SPEED UP): Prima dell'inizio dell'esercizio, premere il tasto SPEED Φ per aumentare il valore verso l'alto durante un manuale o un altro modo regolabile durante l'impostazione del programma. Premendo il pulsante durante l'esercizio aumenta la velocità...
  • Seite 112 CAL. (CALORIE): visualizza il valore delle calorie consumate Premere il pulsante START per iniziare l'esercizio. Un conto alla rovescia di 3 secondi viene visualizzato sullo schermo prima dell'inizio dell'allenamento e del movimento del tapis roulant. Il tapis roulant inizia con una velocità di 0,8 KM / H.
  • Seite 113 Velocità (km/h) per segmento...
  • Seite 114: Cura, Manutenzione E Guida Ai Problemi Piu' Comuni

    CURA, MANUTENZIONE E GUIDA AI PROBLEMI PIU' COMUNI ATTENZIONE: Per prevenire shock elettrici, si prega di spegnere e staccare la presa del tais roulant prima di pulirlo o di eseguire la manutenzione. ATTENZIONE: Controllare sempre le component mobili della macchina che potrebbero danneggiarsi con l’uso come la maniglia a molle e il rullo rotante per prevenire incidenti.
  • Seite 115: Lubrificazione

    LUBRIFICAZIONE La lubrificazione del battistrada garantisce una maggiore durata del battistrada. Indossare sempre un nuovo strato di olio di silicone dopo 50 ore di allenamento. Come controllare la lubrificazione Sollevare un lato del battistrada e far scorrere il dito sul treadmill sotto il battistrada. Se questa superficie è...
  • Seite 116: Riposizionamento Cinghia

    RIPOSIZIONAMENTO CINGHIA Il battistrada è già teso. Secondo il peso corporeo, questa tensione deve essere regolata in modo da poter svolgere un'adeguata formazione. Per spianare il battistrada, utilizzare lo strumento fornito. Nei tappi terminali (come nella foto riportata di seguito) sono presenti viti con le quali è possibile regolare la tensione.
  • Seite 117: Applicazioni Di Fitness Compatibili

    APPLICAZIONI DI FITNESS COMPATIBILI iFitshow Android: scarica la tua app preferita da Google PlayStore. iPad / iPhone: Scarica l'app preferita da AppStore. Verifica se il tuo dispositivo mobile soddisfa i requisiti di sistema richiesti dell'app. Questi requisiti per la relativa app possono essere trovati nella rispettiva pagina di Google PlayStore o AppStore. Condizioni: Attivare la funzione Bluetooth sul dispositivo Avvia l'applicazione sul tuo dispositivo...
  • Seite 118: Esercizi Di Stretching

    ESERCIZI DI STRETCHING Non importa la ragione per cui fai sport, fai in modo di fare sempre esercizi di stretching prima di cominciare. Il uscolo riscaldato si allungherà facilmente, quindi scaldati con degli esercizi per 5-10 minuti. Ti suggeriamo di eseguire i seguenti esercizi cinque volte conta fino a dieci ogni volta o anche più...
  • Seite 119 RULLI PER LA TESTA Ruotare la testa a destra, fino a sentir allungare il lato sinistro del collo, poi ruotare la testa indietro, allungando il mento verso il soffitto e aprendo la bocca. Ruotare la testa a sinistra, quindi abbassare la testa verso il petto per un conteggio. SOLLEVAMENTO SPALLE Sollevare la spalla destra verso l'orecchio.
  • Seite 120 InnovaMaxx GmbH Potsdamer PLatz 11 10785 Berlin Deutschland Wir, InnovaMaxx GmbH, erklären hiermit, dass das Produkt: Sportstech F15 ,in der von uns in Verkehr gebrachten Ausführung, den einschlägigen Anforderungen der nachfolgend genannten EG-Richtlinien entspricht. Angewandte EG Richtlinien: • EG Machinenrichtlnie 2006/42/EG •...
  • Seite 121 Direttive Europee 2002/96/EG per lo smaltimento Non gettare mai il tuo attrezzo sportivo nell’immondizia normale. Smaltisci l’attrezzo solo tramite un siste- ma locale o approvato. Tieni in conto le regole applicabili correntemente. Se hai dubbi contatta le autorità locali per informazioni circa le opzioni per uno smaltimento corretto ed ecosostenibile. Batterie / Batterie ricaricabili In accordo con il regolamento per le batterie, sei obbligato legalmente a ritornare tutte le batterie usate ed esaurite.
  • Seite 122 Verkauf durch / Distributed by / Distribuido por / Distribué / Distribuito da InnovaMaxx GmbH Potsdamer Platz 11 10785 Berlin +49 30 220 663 569 service@innovamaxx.de http://www.sportstech.de...

Inhaltsverzeichnis