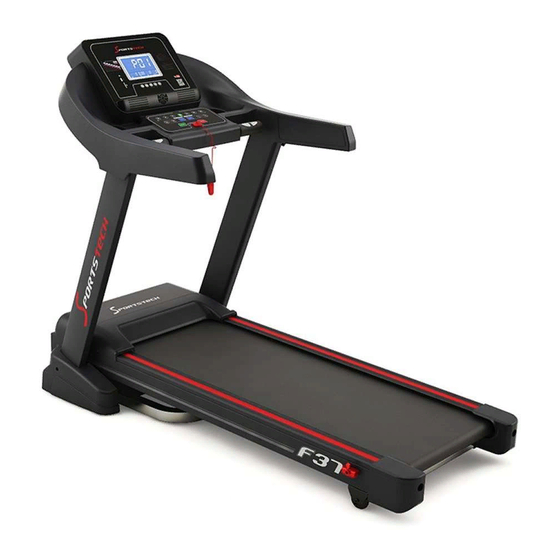
Video Tutorials Unsere für dich! Aufbau Benutzung Abbau In 3 einfachen Schritten zum schnellen und sicheren Start: 1. QR-Code scannen 2. Videos anschauen 3. schnell und sicher starten Link zu den Videos: http://sportstech.de/qr/f37.html...
Seite 4
Sehr geehrter Kunde wir freuen uns, dass Sie sich für ein Gerät aus der SPORTSTECH Produktpalette entschieden haben. SPORTSTECH Sportgeräte bieten Ihnen höchste Qualität und neueste Technologie. Um die Leistungsfähigkeit des Gerätes voll ausnutzen zu können und viele Jahre Freude an Ihrem Gerät zu haben, lesen Sie bitte vor der Inbetriebnahme und dem Beginn des Trainings dieses Benut-...
1. Sicherheitshinweise Diese allgemeinen Sicherheitshinweise sind bei der Verwendung dieses Produkts zu beachten. Lesen Sie alle Anweisungen, bevor Sie das Produkt benutzen. Bewahren Sie das Benutzerhandbuch an einem sicheren Ort auf, um im Bedarfsfall jederzeit darauf zurückgreifen zu können. Bitte bewahren Sie diese Anleitung zum späteren Nachschlagen auf. Bevor Sie mit der Montage und Nutzung Ihres neuen Fitness-Laufbands beginnen, sollten Sie die Bedienungsanleitung sorgfältig durchlesen, damit Sie die Informationen verstehen.
2. Gebrauchsanweisung Um einen Unfall zu vermeiden, vergewissern Sie sich bitte, dass Sie den Sicherheitsschlüssel zuvor sicher an Ihrer Kleidung befestigt haben. Für den Fall, dass Sie unvorhergesehen stolpern oder aus- rutschen während des Gehens oder Laufens auf dem Trainer, wird durch das Entfernen des Sicher- heitsschlüssels aus der Konsole die Stromzufuhr für den Motor unterbrochen und das Laufband zum Halten gebracht.
5. Montageanleitung Wir empfehlen 2 Personen für die Montage dieses Gerätes. Breiten Sie alle Teile des Laufband auf einer freien Fläche aus, und entfernen Sie das Verpackungsmaterial. Entsorgen Sie das Verpackungs- material erst, wenn die Montage abgeschlossen ist. Bevor Sie mit dem Zusammenbau beginnen, sollten Sie sämtliche in diesem Handbuch vorgestellten Teile und Schrauben überprüfen und bereitle- gen.
Seite 11
Schritt 1 Montage des Stützrahmens Stellen Sie den Stützrahmen aufrecht und sichern ihn in dem Stabilisator mit Sechskantschraube M8x50mm Zähne 12mm (S2) und Sechskantschraube M8x16mm (S3) an den Rückseiten. Wichtig: Während der Montage müssen zwei Personen zusammenarbeiten. Einer hält den Compu- ter, und der andere zieht die Schrauben mit dem beiliegenden Inbusschlüssel (S1) an.
Schritt 3 Montage der Abdeckungen Befestigen Sie die Abdeckung (S8) mit einer Sechskantschraube (S4) auf beiden Seiten, ziehen Sie die Schrauben mit dem Multi Sechskant-Werkzeug mit dem mitgelieferten Philips Schraubendreher (S5) fest. NOTABSCHALTUNG SICHERHEITS-SCHLÜSSEL Bevor Sie eine Trainingseinheit beginnen, vergewissern Sie sich, dass der Sicherheitsschlüssel ord- nungsgemäss in der Halterung auf der Computerkonsole platziert ist und der Sicherheitsclip sicher an einem Stück Ihrer Kleidung befestigt ist.
6. Bedienungsanleitung TIME PULSE Anzeige-Funktionen TIME Keine Zeit Vorgabe - die ZEIT wird von 00:00 bis maximal 99:00 hochzählen in Schritten von jeweils einer Minute. Mit Zeit Vorgabe - die ZEIT wird von dem voreingestellten Wert heruntergezählt. Jeder voreingestellte Schritt entspricht einer Minute in einem Zeitfenster zwischen 5:00 bis 99:00 Minuten.
Funktionstasten MODUS: Für sämtliche Einstellungen und die Eingabe Ihrer Trainings-Modi. Geschwindigkeit +: Zur Auswahl des Trainingsmodus, und um den Funktionswert nach oben anzupassen. Geschwindigkeit -: Zur Auswahl des Trainingsmodus, und um den Funktionswert nach unten anzupassen. START/STOP: Um Ihr Training zu starten oder zu stoppen. POWER ON Stecken Sie das Netzkabel in eine geerdete Steckdose, und bitte stellen Sie sicher, dass die Span- nungswerte übereinstimmen.
Mobile Gerät Voraussetzung: Android 4.3 oder höher mit Bluetooth 4.0, iOS 7.0 oder höher. Android Android https://play.google.com/store/apps/details?id=com.fitshow https://itunes.apple.com/de/app/ifitshow/id1099080595?mt=8 Wie funktioniert es? Installieren Sie die „iFitShow“ App und registrieren sie sich mit Ihren Daten. Verbinden Sie Ihr Lauf- band mit der Suchfunktion, in Ihrer App, über Bluetooth. Eine Video-Erklärung der App: www.sportstech.de/qr/f37...
8. Anleitung für Transport und Lagerung Zusammenklappen Ihres Laufbands Stellen Sie das Laufband ab, schalten die Stromzufuhr mit dem Hauptschalter aus und ziehen den Stecker. Heben Sie das Laufband-Deck in Richtung der Hauptkonsole an. Sie sollten spüren, dass das Gasfedersystem des Laufbands eingreift. Um das Laufband-Deck abzusenken, drücken Sie das Gasfedersystem mit dem Fuss herein, um die Verriegelung zu lösen.
9. Aufwärmübungen Aufwärmübung sind wichtig bei der Vorbereitung der Muskeln für die Aktivität bei gleichzeitiger Minimierung der Gefahr von Verletzungen. Sie können wählen, und mit einem leichten / flotten Gehen Tempo für 5-10 Minuten sich aufwärmen, bevor Sie stoppen und einige einfache Strecken durchführen.
10. Wartungsanweisungen ACHTUNG: Bevor Sie Reinigungs- oder Wartungsarbeiten an Ihrem Laufband ausführen, vergewissern Sie sich, dass die Stromzufuhr ausgeschaltet ist und das Netzkabel aus der Steckdose gezogen wurde. Mindestens einmal im Jahr sollte die Motorabdeckung des Laufbands abgenommen und eventuell vorhandener Staub oder Schmutz mit einem Staubsauger entfernt werden, um das weiterhin rei- bungslose Funktionieren des Motors und des Antriebssystems zu gewährleisten REINIGUNG:...
Verantwortung, dass das weiter unten genannte Produkt type of product / Geräteart trade : Motorized Treadmills name / Handelsbezeichnung Treadmill F37 trade mark / Handelsmarke Sportstech model / Modell meets the essentials requirements of the following EC Directives: die grundlegenden Anforderungen der aufgeführten EG Richtlinien erfüllt:...
Seite 21
3 simple steps for a fast and safe start: 1. scan the QR code 2. watch videos 3. start fast and safely Link to the videos: http://sportstech.de/qr/f37.html...
Seite 22
Dear customer We are pleased that you have chosen a device from the SPORTSTECH product range. SPORTSTECH sports equipment offer you the highest quality and latest technology. In order to take full advantage of the device‘s performance, and to have many years of pleasure in your device, please read this manual carefully before commissioning and starting the training and use the device according to the instructions.
Seite 23
TABLE OF CONTENTS 1. Safety Precautions ....................24 2. Directions for Use ....................25 3. Parts list ......................... 26 4. Exploded view ......................27 5. Assembly Instructions ....................28 6. Operation Instructions ....................31 7. Application software (app) ..................33 8.
1. Safety Precautions This general safety information must be observed when using this product. Read all instructions before using the product. Keep the user manual in a safe place to be able to access it at any time if necessary. Please keep this manual for future reference.
2. Directions for Use In order to avoid an accident, please ensure you have the treadmill safety key securely attached to your clothing. In the event, that you accidently trip or slip whilst walking or running on the treadmill, removing the safety key from the console will ensure the power is paused to the motor bringing the belt to a stop.
3. PARTS LIST N° Description N° Description N° Description Base Frame Motor Handlerail frame PVC Foot Pad Incline motor Flat washer Hexagon socket cap screws Hexagon socket cap screws Head screw Hexagon socket cap screws Hexagon socket cap screws Hexagon socket cap screws Base wheel Locknut Hexagon socket cap screws...
5. Assembly Instructions We recommend 2 people assist in assembling this unit. Place all parts of the Treadmill in a cleared area and remove the packing materials. Do not dispose of the packing materials until assembly is completed. Before you start installation inspect and prepare all parts and screws featured in this manual.
Seite 29
Step 1 Installing the upright frame Upright and secure the upright frame into the stabilizer with Hex Bolt M8x50mm teeth 12mm (S2) and Hex Bolt M8x16mm(S3) back sides. Important: While assembly, it needs two persons to work together. One person holds the computer, and the second tightens the bolts with the Allen Wrench (S1) provided.
Step 3 Installing the Covers Secure the cover (S8) to the upright frame with one Hex Bolt (S4) both sides, tighten the bolts with Multi Hex Tool with Philips Screwdriver (S5) provided. EMERGENCY STOP SAFETY KEY Before beginning a workout session ensure that the Safety Tether Key is properly placed onto the Computer Console and the Safety Clip is securely attached to an article of your clothing.
6. Operation Instructions TIME PULSE Display Functions TIME No Set Target Time - TIME will count up from 00:00 to maximum 99:00 with each increments is one minute. Using Set Target Time - TIME will count down from Preset Value . Each preset Increment is one minute between 5:00 to 99:00 minutes.
Function Buttons MODE: To confirm all settings and to enter exercise modes. Speed +: To select training mode and adjust the function value up. Speed -: To select training mode and adjust the function value down. START/STOP: To start or stop your workout. POWER ON Plug the main power cord in a grounded wall outlet, please make sure the power matched.
Requirement: Android 4.3 or higher with Bluetooth 4.0, iOS 7.0 or higher. Android Android https://play.google.com/store/apps/details?id=com.fitshow https://itunes.apple.com/de/app/ifitshow/id1099080595?mt=8 How to use? Install the „iFitShow“ app and register with your data. Connect your treadmill to your device using the search function in your app, via Bluetooth. A video explanation of the app: www.sportstech.de/qr/f37...
8. Moving & Storage Instructions Folding away your Treadmill A.)Turn off the treadmill, switch off at the main power switch and pull out the plug. B.) Lift the treadmill deck up towards the main console. You should feel the treadmill gas spring system engage. C.) To lower the treadmill deck, press the gas spring system in with your foot to disengage the lock.
9. Warm-Up Exercise Warm up exercise is important in preparing the muscles for activity whilst minimising the risk of injury. You may choose to warm up with a light/brisk walking pace for 5-10 minutes before stopping and performing some simple stretches. (As shown in the pictures below) 1.
10. Maintenance Instructions WARNING Before cleaning or carrying out any maintenance on your treadmill, ensure the power is turned off and the power cord removed from the plug socket. At least once a year, the motor cover on your treadmill should be removed and any dust or debris vacuumed up to maintain the smooth operation of the motor and drive system.
Verantwortung, dass das weiter unten genannte Produkt type of product / Geräteart trade : Motorized Treadmills name / Handelsbezeichnung Treadmill F37 trade mark / Handelsmarke Sportstech model / Modell meets the essentials requirements of the following EC Directives: die grundlegenden Anforderungen der aufgeführten EG Richtlinien erfüllt:...
Seite 39
Nuestros para usted! Construcción Utilizar Reducción En 3 sencillos pasos para un arranque rápido y seguro: 1. Escanear el código QR 2. Ver vídeos 3. Comienza rápido y seguro Enlace a los videos: http://sportstech.de/qr/f37.html...
Seite 40
Estimado cliente Nos alegra que haya elegido un dispositivo de la línea de productos de SPORTSTECH. El equipo de- portivo de SPORTSTECH le ofrece la más alta calidad y lo último en tecnología. Con el fin de aprovechar al máximo el rendimiento el dispositivo, y de poder disfrutar de muchos años con el mismo, por favor lea este manual cuidadosamente antes de ponerlo en marcha y antes de comenzar su rutina de ejercicios y use el dispositivo siguiendo las instrucciones.
Seite 41
CONTENIDO 1. Precauciones de seguridad ..................42 2. Instrucciones de uso ....................43 Lista de piezas ....................... 44 Vista en despiece ....................45 5. Instrucciones de ensamblaje ..................46 6. Instrucciones de uso ....................49 7. Software de la aplicacion ..................51 8.
1. Precauciones de seguridad Esta información general de seguridad debe ser observada al usar este producto. Lea todas las instrucciones antes de usar el producto. Mantenga el manual de usuario en un lugar seguro para poder acceder a él en cualquier momento de ser necesario.
2. Instrucciones de uso IPara evitar accidentes, por favor asegúrese de tener la llave de seguridad de la caminadora unida a su ropa. En caso de que se caiga o se deslice accidentalmente sobre la caminadora, retirar la llave de seguridad de la consola garantizará que se detenga el motor deteniendo la cinta. Vuelva a conec- tar la llave para retomar el ejercicio.
3. LISTA DE PIEZAS N° Descripción N° Descripción N° Descripción Estructura base Motor Estructura de agarre Protector plástico Motor de inclinación Arandela plana Tornillo hexagonal Tornillo hexagonal Tornillo Tornillo hexagonal Tornillo hexagonal Tornillo hexagonal Rueda base Tuerca de bloqueo Tornillo hexagonal Tuerca de bloqueo Tuerca de bloqueo Tuerca de bloqueo...
5. Instrucciones de ensamblaje Es recomendable que 2 personas ensamblen esta máquina. Ubique todas las piezas de la ca- minadora en una zona despejada y retire los materiales de empaque. No se deshaga de los mate- riales de empaque hasta completar el ensamblaje. Antes de comenzar el ensamblaje inspeccione y prepare todas las piezas y tornillos presentados en este manual.
Seite 47
Paso 1 Instalación de la estructura vertical Levante y asegure la estructura vertical en el estabilizador con tornillos hexagonales M8x50mm de 12mm (S2) y contornillos hexagonales M8x16mm (S3) en la parte posterior. Importante : Durante el ensamblaje, es necesario que dos personas trabajen juntas. Una persona sostiene la consola y la otra aprieta los tornillos con la llave Allen (S1) incluida.
Paso 3 Instalación de las cubiertas Asegure la cubierta (S8) a la estructura vertical con un tornillo hexagonal (S4) a ambos lados, Apriete los tornillos con la herramienta hexagonal multi con destornillador (S5) incluida. PARADA DE EMERGENCIA LLAVE DE SEGURIDAD Antes de comenzar una sesión de ejercicio, asegúrese de que la llave de seguridad esté...
6. Instrucciones de uso TIME PULSE Funciones de la pantalla TIME Tiempo no configurado - TIME contará desde 00:00 hasta máximo 99:00 con cada incremento de un minuto. Con tiempo configurado - TIME contará hacia atrás desde el valor configurado. Cada incremento configurado es de un minuto desde 5:00 hasta 99:00 minutos.
Botones de función MODE: Para confirmar todos los ajustes y para entrar en los modos de ejercicio. Speed +: Para seleccionar el modo de ejercicio y ajustar el valor de la función en aumento. Speed -: Para seleccionar el modo de ejercicio y ajustar el valor de la función en descenso.
¿Cómo utilizar? Instala la aplicación „iFitShow“ y regístrate con tus datos. Conecte su máquina para correr a su dis- positivo usando la función de búsqueda en su aplicación, a través de Bluetooth. Una explicación en video de la aplicación: www.sportstech.de/qr/f37...
8. Instrucciones de transporte y almacenamiento Plegar su caminadora A.)Apague la caminadora, apague el interruptor principal y des- conéctela del tomacorriente. B.) Levante la plataforma de la caminadora hacia la consola principal desde atrás. Debe sentir como el sistema del resorte de gas se activa.
9. Warm-Up Exercise El ejercicio de calentamiento es importante en la preparación de los músculos para la actividad, minimizando al mismo tiempo el riesgo de lesiones. Usted puede elegir calentarse con un ritmo de marcha ligero / rápido durante 5-10 minutos antes de detener y realizar algunos tramos simples. (Como se muestra en las imágenes de abajo) 1.
10. Instrucciones de mantenimiento PRECAUCIÓN Antes de limpiar o realizar mantenimiento a su caminadora, asegúrese de que esté apagada y el cable eléctrico esté desconectado del tomacorriente. Al menos una vez al año, debe retirar la cubierta del motor de su caminadora y aspirar cualquier polvo o residuos para mantener un funcionamiento fluido del motor y del sistema impulsor.
Verantwortung, dass das weiter unten genannte Produkt type of product / Geräteart trade : Motorized Treadmills name / Handelsbezeichnung Treadmill F37 trade mark / Handelsmarke Sportstech model / Modell meets the essentials requirements of the following EC Directives: die grundlegenden Anforderungen der aufgeführten EG Richtlinien erfüllt:...
Seite 57
3 étapes simples pour un démarrage ra- pide et sécurisé: 1. Scannez le code QR 2. Regarder les vidéos 3. Démarrez rapidement et en toute sécurité. Lien vers les vidéos: http://sportstech.de/qr/f37.html...
Seite 58
Cher client Nous sommes très heureux que vous ayez choisi un appareil de SPORTSTECH. L‘équipement sportif de SPORTSTECH vous offre la plus haute qualité et la dernière technologie. Afin de profiter pleinement des performances de l‘appareil et de pouvoir utiliser l’appareil pendant plusieurs années, veuillez lire attentivement ce manuel avant la mise en service et le démarrage de...
Seite 59
TABLE DES MATIÈRES 1. Précautions de sécurité .................... 60 2. Mode d‘emploi ....................... 61 La liste des pièces ....................62 Vue éclatée ......................63 5. Instructions de montage ................... 64 6. Instructions de fonctionnement .................. 67 7. Logiciel d‘application (application) ................69 8.
1. Précautions de sécurité Cette information de sécurité générale doit être observée lors de l‘utilisation de ce produit. Lisez toutes les instructions avant d‘utiliser le produit. Conservez le manuel de l‘utilisateur dans un endroit sûr pour pouvoir y accéder à tout moment si néces- saire.
2. Mode d‘emploi Afin d‘éviter un accident, assurez-vous d‘avoir la clé de sécurité du tapis roulant bien attaché à vos vêtements. Dans le cas où vous trébuchez ou glissez accidentellement pendant que vous marchiez ou courriez sur le tapis roulant, le fait d‘enlever la clé de sécurité de la console assurera que le mo- teur s‘arrête ce qui amène la courroie à...
3. LA LISTE DES PIÈCES N° Description N° Description N° Description Châssis de base Moteur Cadre de poignée Coussin de pied Moteur incliné Rondelle plate Vis à tête hexagonale Vis à tête hexagonale Vis à tête Vis à tête hexagonale Vis à...
5. Instructions de montage Nous recommandons que 2 personnes soient présentes pour assister à l‘assemblage de cette unité. Placez toutes les parties du tapis roulant dans une zone dégagée et enlevez les matériaux de l‘em- ballage. Ne jetez surtout pas les matériaux de l‘emballage jusqu‘à ce que l‘assemblage soit terminé. Avant de commencer l‘installation, inspectez et préparez toutes les pièces et vis fournies dans ce manuel.
Seite 65
Étape 1 Installation du cadre droit Fixez le cadre vertical dans le stabilisateur avec les vis arrière hexagonales M8x50mm 12mm (S2) et le boulon hexagonal M8x16mm (S3). Important: lors de l‘assemblage, il faut que deux personnes travaillent ensemble. Une personne tient l‘ordinateur et une autre serre les boulons avec la clé...
Seite 66
Étape 3 Installation des couvercles Fixez le couvercle (S8) sur le cadre vertical avec un boulon hexagonal (S4) des deux côtés, serrez les boulons avec l‘outil Multi Hexagonal avec le tournevis Phillips (S5) fourni. Arrêt d‘urgence Clé de sécurité Avant de commencer une séance d‘entraînement, assurez-vous que la clé de sécurité est correcte- ment placée sur la console de l‘ordinateur et que le clip de sécurité...
6. Instructions de fonctionnement TIME PULSE Affichage des fonctions TIME Pas de valeur préréglée - TIME comptera de 00:00 à maximum 99:00 Chaque incrément est d‘une minute. À l‘aide de la valeur préréglée - TIME décompte de la valeur préréglée. Chaque incrément préréglé...
Boutons fonctions MODE: Pour confirmer tous les réglages et pour accéder aux modes d‘exercice. Vitesse +: pour sélectionner le mode de formation et ajuster la valeur de la fonction (+). Vitesse -: Pour sélectionner le mode de formation et ajuster la valeur de la fonction (-). START / STOP: pour commencer ou arrêter votre séance d‘entraînement.
Android Android https://play.google.com/store/apps/details?id=com.fitshow https://itunes.apple.com/de/app/ifitshow/id1099080595?mt=8 Comment utiliser? Installez l‘application „iFitShow“ et enregistrez-vous avec vos données. Connectez votre tapis rou- lant à votre appareil en utilisant la fonction de recherche dans votre application, via Bluetooth. Une explication vidéo de l‘application: www.sportstech.de/qr/f37...
8. Instructions de déménagement et de stockage Pliage du tapis roulant A.) Éteignez le tapis roulant, éteignez l‘interrupteur principal et retirez la prise. B.) Soulevez le tablier du tapis roulant vers le haut de la console principale. Vous devriez sentir le système de ressort à gaz du tapis roulant se déclencher.
9. Exercice de réchauffement L‘exercice de réchauffement est important dans la préparation des muscles pour l‘activité tout en minimisant le risque de blessure. Vous pouvez choisir de réchauffer avec un pas de marche léger / rapide pendant 5 à 10 minutes avant de vous arrêter et d‘effectuer des étirements simples. (Comme le montrent les images ci-dessous) 1.
10. Instructions d‘entretien ATTENTION Avant de nettoyer ou d‘effectuer un entretien sur votre tapis roulant, assurez-vous que l‘alimentation est éteinte et que le cordon d‘alimentation est retiré de la prise. Au moins une fois par an, le capot du moteur sur votre tapis roulant doit être enlevé et toute pous- sière ou débris aspirés pour maintenir le bon fonctionnement du moteur et du système d‘entraîne- ment.
Verantwortung, dass das weiter unten genannte Produkt type of product / Geräteart trade : Motorized Treadmills name / Handelsbezeichnung Treadmill F37 trade mark / Handelsmarke Sportstech model / Modell meets the essentials requirements of the following EC Directives: die grundlegenden Anforderungen der aufgeführten EG Richtlinien erfüllt:...
Seite 75
Video Tutorial Il nostro per te! Montaggio Utilizzo Smontaggio 3 semplici passaggi per un inizio veloce e sicuro: 1. Scannerizza il QR-Code 2. Guarda il Video 3. Inizia ad allenarti! Link per il Video: http://sportstech.de/qr/f37.html...
Seite 76
Gentile cliente Siamo lieti che lei abbia scelto un apparecchio della gamma di prodotti SPORTSTECH. Le attrezzature sportive SPORTSTECH offrono la massima qualità e la tecnologia più moderna. Al fine di sfruttare appieno le prestazioni del dispositivo, e di avere molti anni di piacere nell‘utilizzarlo, si prega di leggere attentamente questo manuale prima di avviarlo e di iniziare l‘allenamento e utilizzare...
Seite 77
INDICE 1. Precauzioni di sicurezza .................... 78 2. Istruzioni per l‘uso ....................79 Lista del componenti ....................80 Disegno esploso ....................81 5. Istruzioni di montaggio ....................82 6. Istruzioni per le operazioni ..................85 7. Aplicación de software (aplicación) ................87 8.
1. Precauzioni di sicurezza Queste informazioni generali sulla sicurezza devono essere rispettate quando si utilizza questo prodotto. Leggere tutte le istruzioni prima di utilizzare il prodotto. Conservare il manuale in un luogo sicuro per poterlo consultare in qualsiasi mo- mento, se necessario. Conservare questo manuale per riferimenti futuri.
2. Istruzioni per l‘uso Al fine di evitare incidenti, si prega di assicurarsi che la chiave di sicurezza tapis roulant sia legata saldamente al vostro abbigliamento. Nel caso in cui accidentalmente inciampiate o scivoliate mentre camminate o correte sul tapis roulant, estraendo la chiave di sicurezza dalla console farà in modo che il motore dell’apparecchio vada in pausa portando il nastro a fermarsi.
3. LISTA DEI COMPONENTI N° Descrizione N° Descrizione N° Descrizione Telaio di base Motore Telaio corrimano Tappetino piedi in PVC inclinazione motore Rondella piatta Viti a testa cilindrica esagonale Viti a testa cilindrica esagonale Vite a testa Viti a testa cilindrica esagonale Viti a testa cilindrica esagonale Viti a testa cilindrica esagonale Ruota di base...
5. Istruzioni di montaggio È preferibile che 2 persone assistano nel montaggio di questa unità. Mettere tutte le parti del tapis roulant in una zona libera e rimuovere il materiale di imballaggio. Non gettare il materiale d‘imballag- gio fino a montaggio completato. Prima di iniziare il montaggio, ispezionare e preparare tutte le parti e le viti presenti nel manuale.
Seite 83
Passo 1 Installazione del telaio verticale Montare in posizione verticale e fissare il telaio verticale nello stabilizzatore con bullone Hex M8x- 50mm, denti 12mm Importante: durante l‘assemblaggio, è necessario che due persone lavorino insieme. Una persona tiene il computer Abbinamento congiunto Passo 2 Installazione del computer Collegare il cavo segnale dal computer al cavo segnale del telaio verticale per prima cosa.
Passo 3 Installazione dei coperchi Fissare il coperchio (S8) al telaio verticale con un bullone esagonale (S4) da entrambi i lati, stringere i bulloni con l’attezzo Multi Hex con cacciavite a croce (S5) fornito. FERMATA D’EMERGENZA CHIAVE DI SICUREZZA Prima di iniziare una sessione di allenamento, accertarsi che la chiave di sicurezza sia correttamente posizionata sulla console del computer e la clip di sicurezza sia saldamente attaccata ad un capo di abbigliamento.
6. Istruzioni per le operazioni TIME PULSE Funzioni del display TIME Nessuna impostazione del tempo di allenamento - Il TIMER parte da 00:00 e arriva fino 99:00 con incremento è di un minuto. Utilizzando l‘impostazione del tempo di allenamento – Il TIMER conta alla rovescia dal valore predefinito.
Seite 86
Pulsanti funzione MODE: per confermare tutte le impostazioni e per accedere alle modalità di esercizio. Speed +: per selezionare la modalità di allenamento e regolare il valore della funzione verso l‘alto. Speed -: per selezionare la modalità di allenamento e regolare il valore della funzione verso il basso.
Android 4.3 o superiore con Bluetooth 4.0, iOS 7.0 o superiore. Android Android https://play.google.com/store/apps/details?id=com.fitshow https://itunes.apple.com/de/app/ifitshow/id1099080595?mt=8 Come usare? Installare l‘applicazione „iFitShow“ e registrarsi con i tuoi dati. Collegare il tapis roulant al tuo dispositi- vo utilizzando la funzione di ricerca nell‘applicazione, tramite Bluetooth. Una spiegazione video dell‘app: www.sportstech.de/qr/f37...
8. Istruzioni di trasporto e stoccaggio Ripiegare il tuo Tapis roulant A.) Spegnere il tapis roulant, spegnere l ‚interruttore principale e estrarre la spina. B.) Sollevare la piattaforma del tapis roulant verso la consolle prin- cipale. Dovreste sentire il sistema a molla a gas del tapis roulant attivarsi.
9. Esercizio di riscaldamento L‘esercizio di riscaldamento è importante per preparare i muscoli per l‘attività, minimizzando il rischio di lesioni. Potete scegliere di riscaldare con un passo leggero / veloce a piedi per 5-10 minuti prima di fermarsi e eseguire alcuni tratti semplici. (Come mostrato nelle immagini sotto) 1.
10. Istruzioni sulla manutenzione AVVERTIMENTO Prima di pulire o di effettuare qualsiasi intervento di manutenzione sul tapis roulant, verificare che l’apparecchio sia spento e il cavo di alimentazione sia stato rimosso dalla presa di corrente. Almeno una volta l‘anno, il coperchio del motore del tapis roulant deve essere rimosso e devono essere aspirati polvere e detriti per mantenere un buon funzionamento e azionamento del sistema motore.
Seite 91
Verantwortung, dass das weiter unten genannte Produkt type of product / Geräteart trade : Motorized Treadmills name / Handelsbezeichnung Treadmill F37 trade mark / Handelsmarke Sportstech model / Modell meets the essentials requirements of the following EC Directives: die grundlegenden Anforderungen der aufgeführten EG Richtlinien erfüllt:...
Seite 92
Verkauf durch / Distributed by / Distribuido por / Distribué / Distribuito da InnovaMaxx GmbH Potsdamer Platz 11 10785 Berlin +49 30 220 663 569 service@innovamaxx.de http://www.sportstech.de...