Klarstein 10030846 Bedienungsanleitung
Inhaltsverzeichnis
Verfügbare Sprachen
Verfügbare Sprachen
Quicklinks
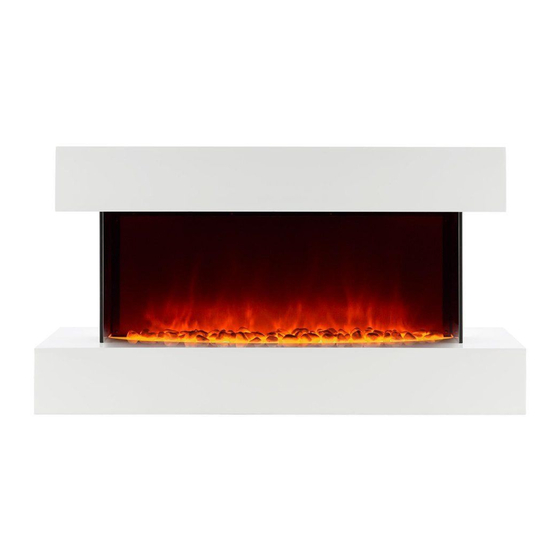
Elektrischer Kamin
10030846
Hinweis: Das Gerät eignet sich nicht zur Nutzung als
primäre Heizquelle.
Note: The device is not suitable for use as a primary
heat source.
Remarque : l'appareil ne convient pas en tant que
source principale de chauffage.
Nota: il dispositivo non è idoneo ad essere utilizzato
come fonte di riscaldamento primaria.
Advertencia: el aparato no es apto para utilizar como
fuente de calefacción primaria.
Inhaltsverzeichnis
Fehlerbehebung

Verwandte Anleitungen für Klarstein 10030846


Inhaltszusammenfassung für Klarstein 10030846
- Seite 1 Remarque : l‘appareil ne convient pas en tant que source principale de chauffage. Nota: il dispositivo non è idoneo ad essere utilizzato come fonte di riscaldamento primaria. Advertencia: el aparato no es apto para utilizar como fuente de calefacción primaria. Elektrischer Kamin 10030846...
-
Seite 2: Technische Daten
Ihnen zum Erwerb Ihres Gerätes. Lesen Sie die folgenden Hinweise sorgfältig durch und befol- gen Sie diese, um möglichen Schäden vorzubeugen. Für Schäden, die durch Missachtung der Hinweise und unsachgemäßen Gebrauch entstehen, übernehmen wir keine Haftung. TECHNISCHE DATEN Artikelnummer 10030846 Stromversorgung 220-240 V ~ 50 Hz Leistung 2000 W... - Seite 3 • Stecken Sie den Stecker immer direkt in die Steckdose. Verwenden Sie keine Verlängerungskabel, externe Zeitschaltuhren oder ferngesteuerte Steckdosen. • Sobald die interne Gerätetemperatur 85 °C ± 2 °C übersteigt, schaltet sich das Gerät automatisch ab. Lassen Sie es mindestens 5 Minuten abkühlen, bevor Sie es wieder in Betrieb nehmen. Hinweise zur Installation •...
-
Seite 4: Installation
INSTALLATION Benutzen Sie das Gerät erst wenn es fest an die Wand angebracht wurde. Halten Sie sich bei der Suche nach einem geeigneten Platz und der Installation genau an die folgenden Anweisungen. Für eine höchstmögliche Effizienz empfehlen wir Ihnen das Gerät nicht direktem Sonnenlicht und staubiger Luft auszusetzen. Gerät auspacken •... -
Seite 5: Bedienfeld Und Fernbedienung
BEDIENFELD UND FERNBEDIENUNG 1 Ein/ Aus 5 Kindersicherung 2 Heizung 6 Plus 3 Timer 7 Minus 4 Helligkeit TASTENFUNKTIONEN Ein/Aus-Taste Über diese Taste schalten Sie den Kamin und den Flammeneffekt ein. Im Ein-Zustand können durch Drücken dieser Taste alle Funktionen gleichzeitig ausgeschaltet werden. - Seite 6 Timer Wenn Sie diese Taste wiederholt drücken, können Sie zwischen den folgenden Timereinstellungen auswählen: 30 Minuten, 1 h, 2 h, 3 h, 4 h, 5 h, 6 h, 7 h, 8 h und Timer aus. Wenn der Timer bis auf 0 heruntergezählt hat, schaltet sich das Gerät automatisch aus.
- Seite 7 INBETRIEBNAHME UND BEDIENUNG Hinweise zum Einstellen des Timers Mit der TIMER-Taste schalten Sie den täglichen oder wöchentliche Timer ein. Hinweis: Über das Bedienfeld des Geräts können Sie ausschließlich den täglichen Timer einstellen. Sie können zwischen den folgenden Timereinstellungen auswählen: 30 Minuten, 1 h, 2 h, 3 h, 4 h, 5 h, 6 h, 7 h, 8 h und Timer aus.
- Seite 8 Täglichen Timer einstellen Wenn Sie auf der Fernbedienung die TIMER-Taste drücken, können Sie den täglichen Timer einstellen. Drücken Sie die Tasten [+] und [-], um die tägliche Zeit einzustellen. Drücken Sie die Taste [+], um eine Zeit zwischen 30 min, 1 h, 2 h, 3 h …...
- Seite 9 wird die von Ihnen zuerst gespeichert Einstellung gewählt. Kindersicherung Die Kindersicherung kann NUR über die Fernbedienung aktiviert und deaktiviert werden. Wenn Sie die Kindersicherungs- Taste für 5 Sekunden gedrückt halten, wird die Kindersicherung aktiviert und alle Tasten des Bedienfelds und der Fernbedienung werden gesperrt.
-
Seite 10: Reinigung Und Pflege
für mindestens 10 Minuten ausgeschaltet und stellen Sie sicher, dass alle Blockaden entfernt werden. Stecken Sie nun den Netzstecker zurück in die Steckdose und schalten Sie das Gerät ein. REINIGUNG UND PFLEGE Hinweis: Schalten Sie das Gerät immer aus und ziehen Sie den Netzstecker aus der Steckdose, bevor Sie das Gerät reinigen oder warten. -
Seite 11: Hinweise Zur Entsorgung
Problem Mögliche Ursache und Lösungsansatz Der Flammeneffekt macht Es gibt ein vom Motor verursachtes Hintergrundrauschen, wenn der Flammeneffekt an ist. laute Geräusche. Dieses Rauschen wird aber nur hörbar, wenn es keine anderen Hintergrundgeräusche gibt. Die Benutzung des Heizungsmotors ist mit einem höheren Geräuschpegel verbunden, der auf den Luftstrom zurückzuführen ist.