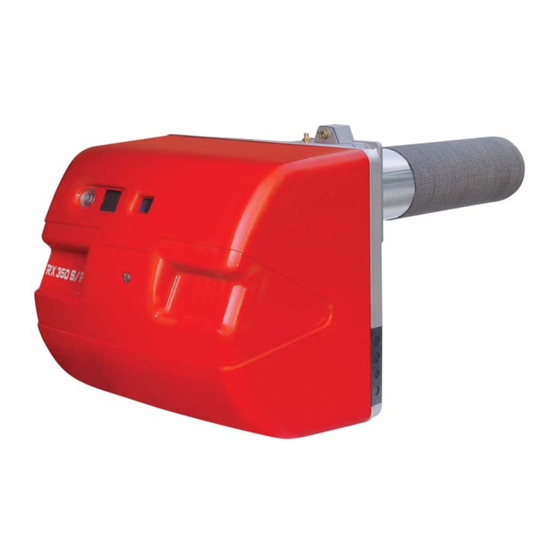
Riello RX 350S/P Montage- Und Bedienungsanleitung
Gas-vormisch-brenner zweistufig gleitender betrieb
Inhaltsverzeichnis
Quicklinks
Istruzioni per installazione, uso e manutenzione
Montage und Bedienungsanleitung
Installation, use and maintenance instructions
Manuel d'entretien
Bruciatori di gas premiscelato
I
Gas-Vormisch-Brenner
D
Premixed gas burners
GB
Brûleurs de gaz pré-mélangé
F
Funzionamento bistadio progressivo
Zweistufig gleitender Betrieb
Progressive two-stage operation
Fonctionnement à deux allures progressives
CODICE - CODE
3898700 - 3898710
3898800 - 3898810
MODELLO - MODELL
MODEL - MODELE
RX 350S/P
RX 500S/P
TIPO - TYP
TYPE
851 T2
852 T2
2916124 (13) - 05/2010
Inhaltsverzeichnis

Verwandte Anleitungen für Riello RX 350S/P


Inhaltszusammenfassung für Riello RX 350S/P
- Seite 1 Zweistufig gleitender Betrieb Progressive two-stage operation Fonctionnement à deux allures progressives MODELLO - MODELL TIPO - TYP CODICE - CODE MODEL - MODELE TYPE 3898700 - 3898710 RX 350S/P 851 T2 3898800 - 3898810 RX 500S/P 852 T2 2916124 (13) - 05/2010...
-
Seite 3: Dichiarazione Del Costruttore
TÜV SÜD Gruppe Ridlerstrase, 65 80339 München DEUTSCHLAND Dichiarazione del costruttore RIELLO S.p.A. dichiara che i seguenti prodotti rispettano i valori limite di emissione di NOx imposti dalla normativa tedesca “1. BImSchV 2009”. Prodotto Tipo Modello Bruciatori di gas premiscelato... -
Seite 4: Erklärung
Kontrollorganismus: TÜV Industrie Service GmbH TÜV SÜD Gruppe Ridlerstrase, 65 80339 München DEUTSCHLAND Erklärung des Herstellers RIELLO S.p.A. erklärt, dass die folgenden Produkte die Nox-Emissionsgrenzwerte gemäß der deutschen Vorschrift “1. BImSchV 2009” respektieren. Produkt Modell Gas-Vormisch-Brenner 851 T2 RX 350S/P... -
Seite 5: Manufacturer's Declaration
TÜV Industrie Service GmbH TÜV SÜD Gruppe Ridlerstrase, 65 80339 München DEUTSCHLAND Manufacturer's declaration RIELLO S.p.A. declares that the following products are compliant with NOx maximum emission values as set by the German Directive “1. BImSchV 2009”. Product Type Model... -
Seite 6: Déclaration Du Fabricant
TÜV Industrie Service GmbH TÜV SÜD Gruppe Ridlerstrase, 65 80339 München DEUTSCHLAND Déclaration du fabricant RIELLO S.p.A. déclare que les produits suivants respectent les valeurs limite d'émission de NOx imposées par la réglementation alle- mande “1. BImSchV 2009”. Produit Type MODELE Brûleurs gaz à... -
Seite 7: Inhaltsverzeichnis
INDICE INHALT DATI TECNICI ........pagina 3 TECHNISCHE ANGABEN . - Seite 8 CONTENTS INDEX TECHNICAL DATA........page 5 DONNÉES TECHNIQUES .
-
Seite 9: Dati Tecnici
DATI TECNICI MODELLO RX 350S/P RX 500S/P TIPO 851 T2 852 T2 MAX. POTENZA Mcal/h MIN. Mcal/h COMBUSTIBILE GAS NATURALE: G20 - G21 - G22 - G23 - G25 kWh/Sm 9,45 8,13 9,45 8,13 - Potere calorifico inferiore Mcal/Sm - Densità assoluta... -
Seite 10: Technische Angaben
TECHNISCHE ANGABEN MODELL RX 350S/P RX 500S/P 851 T2 852 T2 MAX. LEISTUNG Mcal/h MIN. Mcal/h BRENNSTOFF ERDGAS: G20 - G21 - G22 - G23 - G25 kWh/Sm 9,45 8,13 9,45 8,13 - Heizwert Hu Mcal/Sm - Reindichte 0,68 0,75... -
Seite 11: Technical Data
TECHNICAL DATA MODEL RX 350S/P RX 500S/P TYPE 851 T2 852 T2 MAX. Mcal/h OUTPUT MIN. Mcal/h FUEL NATURAL GAS: G20 - G21 - G22 - G23 - G25 kWh/Sm 9.45 8.13 9.45 8.13 - Net calorific value Mcal/Sm - Absolute density 0.68... -
Seite 12: Données Techniques
DONNÉES TECHNIQUES MODÈLE RX 350S/P RX 500S/P TYPE 851 T2 852 T2 MAX. Mcal/h PUISSANCE MIN. Mcal/h COMBUSTIBLE GAZ NATUREL: G20 - G21 - G22 - G23 - G25 kWh/Sm 9,45 8,13 9,45 8,13 - Pouvoir calorifique inférieur Mcal/Sm - Densité absolue... - Seite 13 PAESE - LAND CATEGORIA - KATEGORIE COUNTRY - PAYS CATEGORY - CATEGORIE IT-AT-GR-DK-FI-SE 2H3B/P ES-GB-IE-PT 2H3P 2L3B/P 2Er3P 2ELL3B/P 2E(R)B, 2E3B/P...
-
Seite 14: Descrizione Bruciatore
- diminuzione potenza 15 Contattore motore e relè termico con pul- sante di sblocco (RX 500S/P) 16 Condensatore motore (RX 350S/P) 17 Apparecchiatura elettrica con avvisatore luminoso di blocco e pulsante di sblocco 18 Prese per il collegamento elettrico 19 Serranda aria 20 Staffa per l’applicazione del regolatore di... -
Seite 15: Brennerbeschreibung (A)
Entriegelungsschalter (RX 500S/P) bouton de déblocage (RX 500S/P) reset button (RX 500S/P) 16 Motorkondensator (RX 350S/P) 16 Condensateur moteur (RX 350S/P) 16 Motor capacitor (RX 350S/P) 17 Steuergerät mit Kontrollampe für Störab- 17 Coffret de sécurité avec signal lumineux de... -
Seite 16: Campi Di Lavoro
• una POTENZA MASSIMA, che non deve essere superiore al limite massimo del dia- gramma: RX 350S/P = 390 KW RX 500S/P = 510 KW • una POTENZA MINIMA, che non deve essere inferiore al limite minimo del dia-... -
Seite 17: Regelbereiche (A)
être supérieure à la limite maximale du dia- als die Höchstgrenze im Diagramm sein darf: gramme: RX 350S/P = 390 KW RX 350S/P = 390 KW RX 500S/P = 510 KW RX 350S/P = 390 KW RX 500S/P = 510 KW RX 500S/P = 510 KW •... -
Seite 18: Pressione Gas
14,7 10 - 1,6 = 8,4 mbar Alla pressione 8,4 mbar, colonna 1, corrisponde nella tabella RX 350S/P una potenza di 300 kW. Questo valore serve come prima approssimazi- one; la portata effettiva va misurata al contatore. Per conoscere invece la pressione del gas nec-... -
Seite 19: Gasdruck
10 - 1,6 = 8,4 mbar sächliche Durchsatz wird am Zähler abgelesen. delivery must be measured at the gas meter. Sur le tableau RX 350S/P à la pression de 8,4 mbar, colonne 1, correspond une puissance de Zur Ermittlung des für den an der Entnahmes- To calculate the required gas pressure at test 300 kW. -
Seite 20: Installazione
Le lunghezze, L (mm), disponibili sono: RX 350S/P RX 500S/P Zona di non combustione I bruciatori non possono essere utilizzati su caldaie inversione di fiamma. -
Seite 21: Installation
Les longueurs, L (mm), dis- sein. Die verfügbaren Längen, L (mm), sind: (mm), is as follows: ponible sont: Bereich, in dem RX 350S/P RX 500S/P keine Verbren- RX 350S/P RX 500S/P RX 350S/P RX 500S/P Non combus- Zone de non... -
Seite 22: Linea Alimentazione Gas
LINEA ALIMENTAZIONE GAS • La rampa del gas va collegata all’attacco del 1)(A), tramite flangia 2)(A), guarnizione 3)(A) e le viti 4)(A) date a corredo del bruciatore. • La rampa può arrivare da destra o da sinistra, secondo comodità, vedi fig. (A). •... -
Seite 23: Gaszuleitung
GASZULEITUNG GAS LINE LIGNE ALIMENTATION GAZ • Gasarmaturen sind über Flansch 2)(A), Dich- • The gas train must be connected to the gas • La rampe du gaz doit être reliée au raccord du tung 3)(A) und Schrauben 4)(A), zur Brenner- attachment 1)(A), using flange 2)(A), gasket gaz 1)(A), par la bride 2)(A), le joint 3)(A) et les ausstattung gehörend, mit dem Gasanschluß... -
Seite 24: Componenti Rampa Gas
11 - Vite per presa pressione alimentazione gas COLLEGAMENTO PRESA DI PRESSIONE BRUCIATORE ALLA RAMPA GAS (C) - (D) Per effettuare i suddetti collegamenti procedere come segue: RX 350S/P - Fissare il raccordo da G1/8 (a corredo del bruciatore) sulla piastra... -
Seite 25: Bestandteile Der Gasarmatur
BESTANDTEILE DER GASARMATUR GAS TRAIN COMPONENTS ÉLÉMENTS RAMPE GAZ LEGENDE (A) - (B) KEY (A) - (B) LÉGENDE (A) - (B) 1 - Gasdruckwächterverbindung 1 - Gas pressure switch connection 1 - Raccordement pressostat gaz 2 - Verbindung 2 - Valves connection 2 - Raccordement vannes 3 - Gasdruckwächter 3 - Gas pressure switch... -
Seite 26: Regolazioni Prima Dell'accensione
REGOLAZIONI PRIMA DELL'ACCENSIONE PRESSOSTATO GAS DI MIN. PRESSOSTATO ARIA Le regolazioni da fare sono: GAS-MINDESTDRUCKWÄCHTER LUFT-DRUCKWÄCHTER - aprire le valvole manuali poste a monte della MIN GAS PRESSURE SWITCH AIR PRESSURE SWITCH rampa del gas. PRESSOSTAT GAZ MINIMUM PRESSOSTAT AIR - Regolare il pressostato gas di minima all’inizio scala (A). -
Seite 27: Einstellungen Vor Der Zündung
EINSTELLUNGEN VOR DER ZÜNDUNG ADJUSTMENTS BEFORE FIRST FIRING RÉGLAGES AVANT L'ALLUMAGE Die auszuführenden Einstellungen sind: The following adjustments must be made: Les réglages à faire sont les suivants: - handbetätigte Ventile vor der Gasarmatur öff- - open manual valves up-line from the gas - ouvrir les vannes manuelles situées en amont nen. -
Seite 28: Regolazione Bruciatore
REGOLAZIONE BRUCIATORE Per ottenere una regolazione ottimale del bruci- atore è necessario effettuare l’analisi dei gas di scarico della combustione all’uscita della caldaia. Regolare in successione: 1 - Potenza Max 2 - Potenza Min 3 - Verifica modulazione D791 4 - Potenza all’ accensione 5 - Potenze intermedie 6 - Pressostato aria 7 - Pressostato gas di minima... -
Seite 29: Brennereinstellung
BRENNEREINSTELLUNG BURNER CALIBRATION REGLAGE BRÛLEUR Für die optimale Einstellung des Brenners soll- The optimum calibration of the burner requires Pour obtenir un réglage optimal du brûleur, il ten die Abgase am Kesselausgang analysiert an analysis of the flue gases at the boiler outlet. faut effectuer l’analyse des gaz d’échappement werden. -
Seite 30: Potenza All'accensione
4 - POTENZA ALL’ACCENSIONE La potenza di accensione si trova all’interno dell’area A evidenziata nel campo di lavoro (A, pag. 10). La taratura avviene agendo sulla camma (III - IV) secondo le indicazioni riportate sulla tabella (D) pag. 20. - I V Comunque vale la seguente regola espressa dalla norma EN 676. -
Seite 31: Zündleistung
4 - ZÜNDLEISTUNG 4 - FIRING OUTPUT 4 - PUISSANCE À L'ALLUMAGE Die Zündleistung befindet sich innerhalb des Firing power is inside area A highlighted inside La puissance d’allumage se trouve à l’intérieur auf dem Regelbereich (A, S. 10) gezeigten the operating range (A, page 10). -
Seite 32: Pressostato Aria Di Minima
6 - PRESSOSTATO ARIA DI MINIMA (A) PRESSOSTATO ARIA 3)(A)p. 8 Il pressostato aria è collegato in modo differen- LUFT-DRUCKWÄCHTER 3)(A)S. 8 ziale, vedi Fig. (B), cioè è sollecitato sia dalla AIR PRESSURE SWITCH 3)(A)p. 8 depressione che dalla pressione generate dal PRESSOSTAT AIR 3)(A)p. -
Seite 33: Air Minimaldruckwächter
6 - AIR MINIMALDRUCKWÄCHTER (A) 6 - MINIMUM AIR PRESSURE SWITCH (A) 6 - PRESSOSTAT DE L’AIR SEUIL MINIMUM (A) Der Luft-Druckwächter (Differentialtyp) wird The air pressure switch is differentially con- Le pressostat de l’air est relié de façon différen- tielle, voir Fig. -
Seite 34: Funzionamento Bruciatore
FUNZIONAMENTO BRUCIATORE (A) ACCENSIONE REGOLARE ORDNUNGSGEMÄSSES ZÜNDEN (n° = secondi dall’istante 0) (n° = Sekunden ab Zeitpunkt 0) AVVIAMENTO BRUCIATORE (A) NORMAL FIRING ALLUMAGE REGULIER • 0s: Chiusura telecomando TL. (n° = seconds from istant 0) (n° = secondes à partir de l’instant 0) •... -
Seite 35: Brennerbetrieb
BRENNERBETRIEB (A) BURNER OPERATION (A) FONCTIONNEMENT BRÛLEUR (A) ANFAHREN DES BRENNERS (A) BURNER STARTING (A) DEMARRAGE BRÛLEUR (A) • 0s: Einschalten Fernsteuerung TL. • 0s: Load control TL closes. • 0s: Fermeture télécommande TL. • 2s: Anfahren Stellantrieb: • 2s: Servomotor starts: •... -
Seite 36: Controlli Finali
CONTROLLI FINALI (con bruciatore funzionante) • Scollegare un filo del pressostato gas di APERTURA BRUCIATORE minima: BRENNERÖFFNUNG • aprire il telecomando TL; OPENING THE BURNER • aprire il telecomando TS. OUVERTURE BRULEUR Il bruciatore deve fermarsi • Scollegare il filo comune P del pressostato aria. -
Seite 37: Endkontrollen
ENDKONTROLLEN FINAL CHECKS (bei Brenner in Betrieb) (with burner running) CONTRÔLES FINAUX (brûleur en fonction- nement) • Disconnect one of the wires on the minimum • Einen Draht des Gas-Mindestdruckwächters • Débrancher un fil du pressostat de seuil mini- gas pressure switch: abtrennen: mum gaz: •... -
Seite 38: Inconvenienti - Cause - Rimedi
ANOMALIE / RIMEDI L’ apparecchiatura in dotazione ha una sua funzione diagnostica attraverso la quale è possibile facilmente individuare le possibili cause di mal funziona- mento (segnalazione: LED ROSSO). Per utilizzare tale funzione, bisogna aspettare almeno dieci secondi dall’istante di messa in sicurezza dell’apparecchiatura e premere il pulsante di sblocco per un tempo minimo di tre secondi. -
Seite 39: Normale Funzionamento / Tempo Di Rilevazione Fiamma
Segnale Inconveniente Causa probabile Rimedio consigliato Il bruciatore non si avvia ed 37 - Collegamenti elettrici errati ..... . . Controllarli 10 lampeggi appare il blocco Il bruciatore va in blocco... -
Seite 40: Störungen - Ursachen - Abhilfen
STÖRUNGEN / ABHILFEN Das gelieferte Steuergerät hat eine Diagnosefunktion, über die eventuelle Betriebsstörungen leicht festgestellt werden könnenen (Anzeige: ROTE LED). Um diese Funktion zu benützen, muss man mindestens zehn Sekunden ab dem Augenblick warten, ab dem das Gerät in Sicherheitszustand ist, dann mindestens drei Sekunden lang auf den Entriegelungsschalter drücken. -
Seite 41: Flammenfühlzeit
Signal Störung Mögliche Ursache Empfohlene Abhilfe Brenner geht nicht an und es 37 - Falsche Elektrische Anschlüsse Kontrollieren ..Kontrollieren 10 Blinken erfolgt eine Störabschaltung Störabschaltung des Bren- 38 - Defektes Steuergerät ......Auswechseln ners 39 - Vorhandensein elektromagnetischer Störungen . -
Seite 42: Faults/Suggested Remedies
FAULTS/SUGGESTED REMEDIES The control box supplied performs a diagnostic role by means of which it is possible to easily identify the possible causes of any malfunctions (signal: RED LED). In order to use this function, it is necessary to wait at least ten seconds from the moment the control box is put in safety mode and press the lock-out reset button for a minimum of three seconds. -
Seite 43: Normal Operation / Flame Sensor Timing
Signal Problem Possible cause Suggested remedy The burner does not switch 37 - Incorrect electrical wiring......Check 10 x blinks on, and the lockout appears The burner goes to lock-out... -
Seite 44: Anomalies/ Solutions
ANOMALIES/ SOLUTIONS La boîte de contrôle fournie de série a une fonction diagnostic qui permet de localiser facilement les causes possibles de mauvais fonctionnement (sig- nalisation: LED ROUGE). Pour utiliser cette fonction, il faut attendre au moins dix secondes après la mise en sécurité de la boîte et appuyer sur le bouton de déblocage pendant au moins trois secondes. -
Seite 45: Fonctionnement Normal/ Temps De Révélation Flamme
Signal Inconvénient Cause probable Remède conseillé Le brûleur ne démarre pas et 37 - Raccordements électriques mal faits ....Contrôler 10 clignotements met en sécurité. Le brûleur se met en sécurité 38 - Coffret de sécurité défectueux ....Remplacer 39 - Présence de perturbations électromagnétiques . -
Seite 46: Schema Quadro Elettrico
Appendice - Anhang - Appendix - Annexe Schema quadro elettrico - Schaltplan Layout of electric panel board - Schéma tableau électrique INDICE - INHALT - CONTENTS - INDEX Indicazione riferimenti - Bezugangabe References layout - Indication références RX 350 S/P Schema funzionale - Betriebsschema Functional diagram - Schéma de fonctionnement RX 500 S/P... -
Seite 55: Legenda Schemi Elettrici
LEGENDA SCHEMI ELETTRICI LEGENDE DER SCHALTPLÄNE Apparecchiatura elettrica RMG... Steuergerät RMG... Filtro contro radiodisturbi Entstörungsfilter Sonda di temperatura Temperaturfühler Sonda di pressione Druckfühler Condensatore Kondensator Relè termico Thermorelais Contaore primo stadio Stundenzähler der 1 Stufe Interruttore elettrico per arresto manuale bruciatore Schalter für das manuelle Anhalten des Brenners Sonda di ionizzazione Ionisationsfühler... - Seite 56 400V, la protezione è assicurata lo stesso. NOTE I bruciatori RX 350S/P - RX 500S/P sono stati omologati per funzionamento intermittente. Ciò significa che devono fermarsi "per Norma" almeno 1 volta ogni 24 ore per permettere all’apparecchiatura elettrica di effettuare un con-...
-
Seite 57: Attention
REMARQUE type- approved for intermittent operation. This wird der Schutz trotzdem gewährleistet. Les modèles RX 350S/P - RX 500S/P ont été means they should compulsorily be stopped at homologués pour fonctionner de façon intermit- least once every 24 hours to enable the control ANMERKUNGEN tente. - Seite 60 RIELLO S.p.A. I-37045 Legnago (VR) Tel.: +39.0442.630111 http:// www.riello.it http:// www.rielloburners.com Con riserva di modifiche - Änderungen vorbehalten! - Subject to modifications - Sous réserve de modifications...