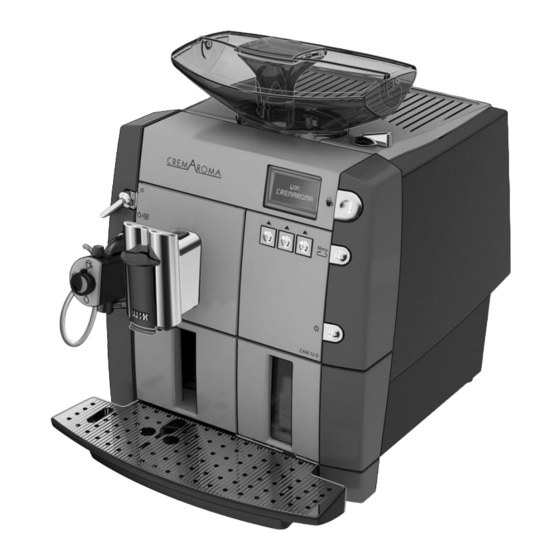
Herunterladen Inhalt Inhalt Diese Seite drucken

Werbung

Verfügbare Sprachen

Verfügbare Sprachen

C R E M A R O M A
Z U B E H Ö R M O D. 1 0 9 7 . 2
DE
A C C E S S O R I E S M O D. 1 0 9 7 . 2
GB
A C C E S S O I R E M O D. 1 0 9 7 . 2
FR
Cappuccinatore

Werbung

Inhaltsverzeichnis
loading

Inhaltszusammenfassung für WIK Cremaroma 9752

  • Seite 1 C R E M A R O M A Z U B E H Ö R M O D. 1 0 9 7 . 2 A C C E S S O R I E S M O D. 1 0 9 7 . 2 A C C E S S O I R E M O D.
  • Seite 2: Inhaltsverzeichnis

    Inhaltsverzeichnis Symbolik in dieser Anleitung ........... .Seite 2 Allgemeine Hinweise .
  • Seite 3: Lieferumfang

    CremAroma Zubehör wie z. B. die Reinigungstabletten oder die spezial Reinigungsflüssig- keit für den Cappuccinatore können Sie über die unten angegebene Service-Hotline bestel- len. Service-Hotline Für Fragen oder Anregungen rufen Sie bitte die gebührenfreie Kunden Service-Hotline: 0 80 00 / 86 66 60 an, oder schriftlich unter: wik@wik.de...
  • Seite 4: Cappuccinatore Mit Ansaugfunktion

    Cappuccinatore mit Ansaugfunktion Übersicht der Geräteelemente Anschlussadapter mit Düse Wahlschalter – aufgeschäumte Milch Einstellschraube, – warme Milch (Milchschaumqualität) – Heißwasser Zentraleinheit Ausgabeeinheit Auslauf mit Magnethalter Ansaugschlauch...
  • Seite 5: Cappuccinatore Montieren

    Cappuccinatore montieren Montage nur dann erforderlich, wenn an Ihrer CremAroma eine Dampfdüse montiert ist Servicetür öffnen Brüheinheit 1. Dampfdüse gegen und abnehmen. herausziehen. den Uhrzeigersinn bis zum Anschlag drehen. 2. Dampfdüse herausziehen. 1. Cappuccinatore wie Servicetür einsetzen und 1. Ansaugschlauch abgebildet halten.
  • Seite 6: Milchschaum Für Milchkaffee/Latte Macchiato Zubereiten

    Milchschaum für Milchkaffee / Latte Macchiato zubereiten Achtung! Verbrühungsgefahr durch heiße Milch Tägliche Reinigung ist erforderlich – siehe Kapitel „Reinigung“ 1. Ansaugschlauch 1. Wahlschalter START! in ein Gefäß mit „aufgeschäumte Hebel am Kaffeeauto- ausreichend Milch Milch“ stellen. maten nach oben auf tauchen.
  • Seite 7: Warme Milch Zubereiten

    Warme Milch zubereiten Achtung! Verbrühungsgefahr durch heiße Milch Tägliche Reinigung ist erforderlich – siehe Kapitel „Cappuccinatore Reinigung“ 1. START! 1. Ansaugschlauch 1. Wahlschalter Hebel auf Dampffunk- in ein Gefäß mit „warme Milch“ stellen. tion drehen. Warme ausreichend Milch 2. Am Kaffeeautomaten Milch wird ausgegeben.
  • Seite 8: Cappuccinatore Reinigen

    Cappuccinatore reinigen Tägliche Reinigung Achtung! Vor dem ersten Gebrauch sowie beim Spülen, Schritte 1–4 ohne Reinigungsflüssigkeit durchführen. NUR 200ML KLARES LEITUNGSWASSER BENUTZEN! Reinigungsflüssigkeit, Am Kaffeeautomaten 1. Wahlschalter gemäß Anweisung auf durch Drücken der „aufgeschäumte der Ver packung, ver- Taste “B“ in den Milch“...
  • Seite 9 Cappuccinatore reinigen Wöchentliche Reinigung empfohlen – häufiger bei intensiverer Nutzung Cappuccinatore wie Servicetür öffnen und Zentraleinheit abgebildet demontie- abnehmen. abgebildet demontie- ren. ren. Befolgen Sie die Rei- Schritt 6: Ziehen Sie henfolge der Schritte zuerst das Innenteil wie angegeben. der Zentraleinheit aus dem Gehäuse bevor Sie Sie dann in Schritt 7 das Gehäuse...
  • Seite 10: Entkalkung

    Cappuccinatore reinigen Wöchentliche Reinigung empfohlen – häufiger bei intensiverer Nutzung Servicetür montieren Cappuccinatore wie Zentraleinheit und schließen abgebildet montie- abgebildet montieren. ren. Schritt 1: Haken Sie das Befolgen Sie Reihen- Gehäuse der Zentralein- folge der Schritte wie heit in den An- angegeben.
  • Seite 11 Entkalkung Der Entkalkungsschlauch muss vor dem Start des Entkalkungsprogramms der CremAroma auf den Anschlussadapter gesteckt werden Hinweise zum Entkalken finden Sie in der Bedienungsanleitung der CremAroma Die gelöste Düse vom Entkalkungsschlauch Das untere Ende des Anschlussadapter auf die Düse aufschie- Entkalkungsschlauch in abziehen.
  • Seite 12: User Manual Symbols

    Table of contents User manual symbols ............Page 12 General information .
  • Seite 13: Scope Of Supply

    Service-Hotline For questions and/or comments please do not hesitate to call the toll-free customer service hotline: 0 80 00 / 86 66 60 , or send an e-mail to: wik@wik.de...
  • Seite 14: Overview Of Appliance Elements

    Cappuccinatore with intake function Overview of appliance elements Adapter with nozzle Selector switch – frothed milk Setting screw, – warm milk (quality of milk froth) – hot water Central unit Spout unit Outlet with magnet holder Intake hose...
  • Seite 15: Install Cappuccinatore

    Install Cappuccinatore Installation required only if a steam nozzle is installed on your CremAroma Open and remove Pull out brewing unit. 1. Turn steam nozzle service door. anti-clockwise to the stop. 2. Pull out steam nozzle. 1. Hold Cappuccina- Insert and close 1.
  • Seite 16: Prepare Milk Froth For Caffe Latte/Latte Macchiato

    Prepare milk froth for caffe latte / latte macchiato Attention! Risk of scalding by hot milk! Daily cleaning required – see Chapter “Cleaning” 1. Set selector switch 1. Put intake hose START! to “frothed milk”. into a container Turn lever on coffee holding a sufficient machine upwards to 2.
  • Seite 17: Prepare Warm Milk

    Prepare warm milk Attention! Risk of scalding by hot milk! Daily cleaning required – see Chapter “Clean Cappuccinatore” 1. Put intake hose 1. START! 1. Set selector switch into a contai- Turn lever to steam to “warm milk”. ner holding a suf- function.
  • Seite 18: Clean Cappuccinatore

    Clean Cappuccinatore Daily cleaning Attention! Prior to first use as well as for rinsing, carry out steps 1-4 without cleaning agent. USE 200ML OF CLEAR TAP WATER ONLY! Pour diluted cleaner Press button “B” on 1. Set selector switch into a glass according the coffee machine to to “frothed milk”.
  • Seite 19 Clean Cappuccinatore Weekly cleaning recommended – more often at intensive use Dismantle Cappucci- Dismantle central unit Open and remove natore as shown. as shown. service door. Adhere to the order of Step 6: Pull the inter- the steps as stated. nal part of central unit out of the casing first before proceed-...
  • Seite 20: Descaling

    Clean Cappuccinatore Weekly cleaning recommended – more often at intensive use 1. Insert and close Assemble Cappucci- Install central unit service door. natore as shown. as shown. Adhere to the order of Step 1: Hook casing of the steps as stated. central unit into adapter...
  • Seite 21 Descaling The descaling hose must be connected to the adapter prior to the start of the descaling programme of the CremAroma. For information on descaling please refer to the CremAroma user manual Pull off the loosened Push descaling hose Lead the lower end of nozzle from the adapter onto nozzle.
  • Seite 22: Symboles Utilisés Dans Cette Notice

    Sommaire Symboles utilisés dans cette notice ..........page 22 Remarques générales .
  • Seite 23: Fournitures

    Service client/Hotline Pour toutes questions ou suggestions complémentaires, contactez notre hotline gratuite : 0 80 00/86 66 60 ou bien envoyez-nous un e-mail à l’adresse suivante : wik@wik.de...
  • Seite 24: Vue D'ensemble Des Éléments De L'appareil

    Cappuccinatore avec fonction d'aspiration Vue d'ensemble des éléments de l'appareil Adaptateur avec buse Sélecteur – mousse de lait Vis de réglage – lait chaud (qualité de la mousse de lait) – eau chaude Unité centrale Unité de distribution Sortie avec support magnétique Tuyau d'aspiration...
  • Seite 25: Montage Du Cappuccinatore

    Montage du cappuccinatore Montage uniquement nécessaire si une buse vapeur est montée sur votre CremAroma Ouvrir la porte de Dégager le 1. Tourner la buse vapeur service et l'enle- percolateur. dans le sens inverse des ver. aiguilles d'une montre, jusqu'en butée. 2.
  • Seite 26: Préparation De La Mousse De Lait Pour Le Café Au Lait/Latte Macchiato

    Préparation de la mousse de lait pour le café au lait/latte macchiato Attention ! Risque de brûlure dû au lait chaud Nettoyage quotidien requis – voir chapitre « Nettoyage » 1. Plonger le tuyau d'as- 1. Mettre le sélecteur START! piration dans un sur «...
  • Seite 27: Préparation Du Lait Chaud

    Préparation du lait chaud Attention ! Risque de brûlure dû au lait chaud Nettoyage quotidien requis – voir chapitre « Nettoyage du cappuccinatore » 1. Plonger le tuyau 1. Mettre le sélecteur 1. DÉPART ! d'aspiration Tourner le levier jus- sur «...
  • Seite 28: Nettoyage Du Cappuccinatore

    Nettoyage du cappuccinatore Nettoyage quotidien Attention ! Avant la première utilisation et lors du rinçage, procéder aux étapes 1 à 4 sans liquide de nettoyage. UTILISER UNIQUEMENT 200 ML D'EAU DU ROBINET CLAIRE ! Verser dans un verre 1. Amener le sélecteur Sur la cafetière auto- le liquide de net- sur «...
  • Seite 29 Nettoyage du cappuccinatore Nettoyage hebdomadaire recommandé – plus fréquemment en cas d'utilisation intensive Démonter le cappucci- Démonter l'unité cen- Ouvrir la porte de ser- natore comme cela est trale comme cela est vice et l'enlever. représenté sur la fi- représenté sur la figure. gure.
  • Seite 30: Détartrage

    Nettoyage du cappuccinatore Nettoyage hebdomadaire recommandé – plus fréquemment en cas d'utilisation intensive Remettre la porte de Monter l'unité centrale Monter le cappuccina- service en place et la comme cela est re- tore comme cela est fermer. présenté sur la figure. représenté...
  • Seite 31 Détartrage Le tuyau de détartrage doit être inséré sur l'adaptateur avant que le programme de détartrage de CremAroma soit démarré Pour de plus amples informations sur le détartrage, reportez-vous au mode d'emploi de CremAroma Retirer la buse dévissée Mettre le tuyau de Amener l'extrémité...
  • Seite 32: Gewährleistung

    Gedruckt auf umweltgerechtem chlorfrei gebleichten Papier Printed on environment-friendly paper bleached without chlorine Tel. (+49) 201 / 86 66-0 Imprimé sur papier écologique blanchi sans chlore Fax (+49) 201/ 86 66-121 www.wik.de Änderungen vorbehalten / Modifications reserved / Modifications éventuelles...

Inhaltsverzeichnis