Herunterladen Inhalt Inhalt Diese Seite drucken

Werbung

Verfügbare Sprachen
  • DE

Verfügbare Sprachen

  • DEUTSCH, seite 35
Owner's Manual
Intelligent, Line-Interactive
• 220/230/240V Pure Sine Wave Input/Output
1111 W. 35th Street, Chicago, IL 60609 USA • www.tripplite.com/support
Copyright © 2019 Tripp Lite. All rights reserved. SmartPro
18-09-244-933152.indb 1
SmartPro
UPS System
Agency Models
AG-0020, AG-0021, AG-0022
Not suitable for mobile applications.
1
SLT
®
2
3
4
4
7
8
9
18
27
35
is a trademark of Tripp Lite
®
5/31/2019 5:01:52 PM

Werbung

Inhaltsverzeichnis
loading

Inhaltszusammenfassung für Tripp Lite SmartPron SLT

  • Seite 1: Inhaltsverzeichnis

    Owner’s Manual SmartPro ® Intelligent, Line-Interactive UPS System • 220/230/240V Pure Sine Wave Input/Output Agency Models AG-0020, AG-0021, AG-0022 Not suitable for mobile applications. Important Safety Instructions Quick Installation Optional Installation Basic Operation Battery Replacement Storage and Service Español Français Русский...
  • Seite 2: Important Safety Instructions

    Important Safety Instructions SAVE THESE INSTRUCTIONS This manual contains important instructions that should be followed during the installation, operation and storage of all Tripp Lite UPS Systems. Failure to heed these warnings may affect your warranty. UPS Location Warnings • Use caution when lifting UPS. •...
  • Seite 3: Quick Installation

    Quick Installation With the UPS disconnected from utility SMX750SLT, 240V power, use a small tool to set the Voltage SMX1050SLT 230V & SMX1500SLT Dip Switches to match your input voltage. 220V 230V (All models are preset to the 230V setting.) Insert a user-supplied power cord (with country-specific plug) into the UPS System's AC input receptacle.
  • Seite 4: Optional Installation

    Optional Installation These connections are optional. Your UPS will function properly without these connections. USB and RS-232 Serial Communications Use the included USB cable (see ) and/or DB9 serial cable (see ) to connect the communication port on your computer to the communication port of your UPS.
  • Seite 5 Basic Operation “MUTE/TEST” Button To Silence (or “Mute”) UPS Alarms: briefly press and release the MUTE/TEST button.* To Run a Self-Test: with your UPS plugged in and turned ON, press and hold the MUTE/TEST button. Continue holding the button until the alarm beeps several times and the UPS performs a self test.
  • Seite 6 Basic Operation “OUTPUT LOAD LEVEL” LEDs: the LEDs indicate the approximate electrical load of equipment connected to the UPS's AC outlets. They will turn from green (light load) to yellow (medium load) to red (overload). If the LED is red (either illuminated continuously or flashing), clear the overload immediately by unplugging some of your equipment from the outlets until the LED changes from red to yellow (or green).
  • Seite 7: Battery Replacement

    Basic Operation Voltage DIP Switches: These switches enable the UPS to be set to match 240V actual input voltage. If the Voltage DIP Switches are set above or below input 230V 220V voltage, the UPS will treat the input as a continuous overvoltage or undervoltage 230V condition, and will automatically adjust input voltage to match the Voltage DIP Switch setting.
  • Seite 8: Storage And Service

    Storage and Service Storage Before storing your UPS, turn it completely OFF: with the UPS ON and receiving utility power, press and hold the “ON/OFF/STANDBY” button for one second (an alarm will beep once briefly after the interval has passed); then, unplug the UPS from the wall outlet. If you store your UPS for an extended period of time, recharge the UPS batteries once every three months: plug the UPS into a wall outlet;...
  • Seite 9: Español

    Manual del propietario SmartPro ® Sistema de UPS, Inteligentes y Interactivos en Línea • 220/230/240V entrada/salida de onda sinusoidal Modelos de Agencia AG-0020, AG-0021, AG-0022 No conveniente para los usos móviles. Instrucciones de seguridad importantes Instalación rápida Instalación opcional Operación básica Reemplazo de batería Almacenamiento y servicio English...
  • Seite 10: Instrucciones De Seguridad Importantes

    Instrucciones de seguridad importantes GUARDE ESTAS INSTRUCCIONES Este manual contiene importantes instrucciones que deben seguirse durante la instalación, operación y el almacenamiento de todos los UPS de Tripp Lite. La falta de observar estas advertencias podría afectar su garantía. Advertencias sobre la ubicación del UPS •...
  • Seite 11: Instalación Rápida

    Instalación rápida Con el no-break desconectado de la energía SMX750SLT, 240V de la red, use una herramienta pequeña SMX1050SLT 230V & SMX1500SLT para ajustar el conmutador DIP de voltaje 220V 230V de modo que coincida con su voltaje de entrada (El no-break está prefijado a un valor de 230 V).
  • Seite 12: Instalación Opcional

    Instalación rápida Encienda el UPS. Presione y mantenga presionado el botón “ON/OFF/ STANDBY”(Encendido/Apagado/Reserva) durante un segundo. La alar-ma emitirá un pitido brevemente después de pasado unsegundo. Suelte el botón. Nota: El sistema UPS funcionará adecuadamente desde la puesta en marcha inicial, no obstante, la autonomía máxima de la batería de la unidad solo se alcanzará...
  • Seite 13: Operación Básica

    Operación básica Botones (Panel frontal) Botón "ON/OFF/STANDBY" (Encendido/Apagado/Reserva) • Para encender el UPS: Con el UPS conectado en una toma de CA con energía*, presione y mantenga presionado el botón "ON/OFF/STANDBY" (Encendido/Apagado/Reserva) por un segundo.** Suelte el botón. Si no hay energía de la red, puede "arrancar en frío"...
  • Seite 14 Operación básica Luces indicadoras (Panel frontal) Todas las descripciones de luces indicadoras se aplican cuando el UPS está conectado en un tomacorriente y encendido. LED “POWER” (ALIMENTACIÓN): Este LED verde se enciende permanentemente cuando el UPS está encendido y proporcionando energía de CA al equipo conectado desde el suministro de red.
  • Seite 15 Operación básica LED “BATTERY WARNING” (ADVERTENCIA DE BATERÍA): Este LED se enciende rojo y una alarma suena en forma intermitente después de iniciar una auto-prueba (vea la descripción del botón “MUTE/TEST” (SILENCIO/PRUEBA)) para indicar que las baterías del UPS deben ser recargadas o reemplazadas. Permita que el UPS se recargue continuamente por 12 horas y repita la auto- prueba.
  • Seite 16: Reemplazo De Batería

    Reemplazo de batería Puerta de reemplazo de la batería: En condiciones normales, las baterías originales de este sistema UPS tienen varios años de vida útil. Sólo deberá reemplazar la batería personal técnico calificado. Véase “Advertencias sobre las baterías”, en la sección sobre seguridad. Si requiere reemplazar la batería de su UPS, visite Tripp Lite en la web en www.tripplite.com/support/battery/ index.cfm para localizar la batería de reemplazo específica para su UPS.
  • Seite 17: Servicio Técnico

    Almacenamiento y servicio Servicio técnico Tripp Lite pone a su disposición una variedad de Garantías extendidas y Programas de servicio técnico en el sitio. Si desea más información sobre el servicio técnico, visite www.tripplite.com/ support. Antes de devolver su producto para servicio técnico, siga estos pasos: 1.
  • Seite 18: Français

    Manuel du propriétaire SmartPro ® Systémes UPS intelligent, en attente active • 220/230/240V entrée/sortie onde sinusoïdale Modèles d'agences AG-0020, AG-0021, AG-0022 Non approprié aux applications mobiles. Directives de sécurité importantes Installation rapide Installation en option Fonctionnement de base Remplacement de batterie Entreposage et service English Español...
  • Seite 19: Directives De Sécurité Importantes

    Directives de sécurité importantes CONSERVER CES DIRECTIVES Ce manuel contient des directives importantes que vous devez respecter durant l'installation, l'utilisation et l'entreposage de tous les systèmes UPS Tripp Lite. Ne pas tenir compte de ces mises en garde pourrait affecter votre garantie. Mises en garde : Emplacement de l'UPS •...
  • Seite 20: Installation Rapide

    Installation rapide L'onduleur UPS étant déconnecté du courant SMX750SLT, 240V de secteur, utiliser un petit outil pour régler SMX1050SLT 230V & SMX1500SLT les commutateurs DIP de tension à votre 220V 230V tension d'entrée (l'onduleur est préréglé à 230 v.) Brancher un cordon d'alimentation fourni par l'utilisateur (avec une fiche spécifique au pays) dans la prise d'entrée CA de l'onduleur.
  • Seite 21: Installation En Option

    Installation rapide Mettre le système d'alimentation continue sans coupure sous tension. Appuyer sur le bouton “ ON/OFF/STANDBY” et le main-tenir pendant une seconde. L'alarme bippera une fois briève-ment après une seconde. Relâcher le bouton. Remarque: L'onduleur fonctionnera correctement dès le démarrage d'initialisation, cependant le fonctionnement maximum de la batterie de l'unité...
  • Seite 22: Fonctionnement De Base

    Fonctionnement de base Boutons (Panneau avant) Bouton " ON/OFF/STANDBY " (Marche/Arrêt/Attente) • Pour mettre en marche l'UPS : L'UPS étant branché dans une prise murale de secteur,* appuyer sur le bouton " ON/OFF/STANDBY " et le maintenir durant une seconde.** Relâcher le bouton. S'il n'y a pas de courant, vous pouvez mettre en marche l'UPS "...
  • Seite 23 Fonctionnement de base Voyants indicateurs (Panneau avant) Toutes les descriptions de voyants indicateurs s'appliquent lorsque l'UPS est branché sur une prise murale et mis sous tension. Voyant DEL « POWER » : Ce voyant DEL vert est continuellement allumé pour indiquer que l'UPS est sous tension et alimente votre équipement en courant alternatif à...
  • Seite 24 Fonctionnement de base Autres caractéristiques de l'UPS (panneau arrière) Prises d'alimentation c.a. : Votre système d'alimentation continue sans coupure comportedes sorties IEC-320-C13. L'équipement branché sur ces prisesest alimenté par la puissance du secteur en fonction-nement normal et sur celle des batteriesdurant les pannes et les baisses de tension. L'UPSprotège l'équipement branché...
  • Seite 25: Remplacement De Batterie

    Remplacement de batterie Porte de remplacement de batterie : Dans des conditions normales, la batterie initiale de votre système UPS durera plusieurs années. Le remplacement de la batterie ne doit être réalisé que par du personnel de service qualifié. Référezvous à la rubrique " Mises en garde relatives à la batterie " à...
  • Seite 26 Entreposage et service Entretien Une variété de garantie prolongées et de programmes de service sur place sont également disponibles chez Tripp Lite. Pour plus de renseignements sur le service, visitez www.tripplite.com/ support. Avant de retourner votre produit pour entretien ou réparation, suivez les étapes suivantes : 1.
  • Seite 27: Руководство Пользователя

    Руководство пользователя Линейно-интерактивный ИБП SLT с элементами SmartPro ® искусственного интеллекта • Входное/выходное напряжение: 220/230/240 В чистой синусоидальной формы Не предназначено для передвижной техники. Важные указания по технике безопасности Порядок быстрой установки Установка опциональных элементов Основной режим работы Замена батарей Хранение...
  • Seite 28: Важные Указания По Технике Безопасности

    Важные указания по технике безопасности СОХРАНИТЕ НАСТОЯЩИЕ УКАЗАНИЯ В настоящем руководстве содержатся важные указания и предупреждения, которые необходимо соблюдать в процессе установки, эксплуатации и хранения всех ИБП марки Tripp Lite. Игнорирование этих предупреждений может привести к потере гарантии. Предупреждения относительно места размещения ИБП •...
  • Seite 29: Порядок Быстрой Установки

    Порядок быстрой установки Отключив ИБП от электрической сети, установите 240V Dip-переключатели напряжения на свое номинальное 230V значение входного напряжения с помощью 220V SMX750SLT, 230V остроконечного предмета. (На заводе-изготовителе все SMX1050SLT модели устанавливаются на 230 В). и SMX1500SLT Подключите шнур питания, оснащенный штепсельной вилкой, принятой...
  • Seite 30: Установка Опциональных Элементов

    Установка опциональных элементов Подключения, выполненные согласно описанным методам, являются необязательными. ИБП будет функционировать надлежащим образом и без этих подключений. Взаимодействие через порты USB и RS-232 С помощью кабеля USB из комплекта (см. ) и/или последовательного кабеля DB9 (см. ) подключите коммуникационный...
  • Seite 31 Основной режим работы Кнопка "MUTE/TEST" ("ОТКЛЮЧЕНИЕ ЗВУКА/ТЕСТ") Для отключения (или "заглушения") звуковых сигналов ИБП: нажмите и сразу отпустите кнопку MUTE/TEST.* Для выполнения внутреннего теста: на подключенном к сети и включенном ИБП нажмите и удерживайте кнопку MUTE/TEST. Продолжайте удерживать кнопку до того момента, как ИБП издаст несколько...
  • Seite 32 Основной режим работы СИДы "OUTPUT LOAD LEVEL" ("УРОВЕНЬ ВЫХОДНОЙ НАГРУЗКИ"): эти светодиодные индикаторы показывают приблизительную электрическую нагрузку, создаваемую оборудованием, подключенным к розеткам переменного тока ИБП. Их цвет может быть зеленым (при легкой нагрузке), желтым (при средней нагрузке) или красным (при перегрузке). Если индикатор имеет красный цвет (непрерывно горящий...
  • Seite 33: Замена Батарей

    Основной режим работы DIP-переключатели напряжения: эти переключатели позволяют настраивать ИБП на фактический 240V уровень входного напряжения. В случае установки DIP-переключателей напряжения на уровень, 230V 220V находящийся выше или ниже фактического уровня входного напряжения, ИБП будет воспринимать 230V входное напряжение как непрерывно повышенное или пониженное напряжение и автоматически корректировать...
  • Seite 34: Хранение И Техническое Обслуживание

    Хранение и техническое обслуживание Хранение Перед помещением ИБП на хранение полностью отключите его. При включенном ИБП с питанием от сети нажмите и удерживайте кнопку "ON/OFF/STANDBY" в течение одной секунды (по прошествии этого периода ИБП издаст один короткий сигнал); затем отключите ИБП...
  • Seite 35: Besitzerhandbuch

    Besitzerhandbuch SmartPro ® Intelligentes USV-System mit aktivem Standby-Modus • 220/230/240 V Sinuskurve für Eingang und Ausgang Agenturmodelle AG-0020, AG-0021, AG-0022 Nicht geeignet für Mobilanwendungen. Wichtige Sicherheitsinstruktionen Schnellinstallation Optionale Installation Grundbetrieb Austausch der Batterie Lagerung und Service English Español Français Русский 1111 W.
  • Seite 36: Wichtige Sicherheitsinstruktionen

    Wichtige Sicherheitsinstruktionen BEWAHREN SIE DIESE INSTRUKTIONEN AUS Dieses Handbuch enthält wichtigen Instruktionen, die bei Installation, Betrieb und Lagerung aller Tripp Lite USV-Systeme zu befolgen sind. Bei Nichtbeachtung dieser Warnhinweise wird Ihre Garantie ungültig. Warnhinweis zum Aufstellungsort der USV • Beim Heben der USV vorsichtig vorgehen. •...
  • Seite 37: Schnellinstallation

    Schnellinstallation Die USV muss vom Stromnetz abgetrennt SMX750SLT, 240V sein. Setzen Sie mit einem kleinen SMX1050SLT 230V & SMX1500SLT Werkzeug die DIP-Schalter auf Ihre 220V 230V Eingangsspannung. (Alle Modelle sind ab Werk auf 230 V eingestellt.) Stecken Sie eine vom Benutzer bereitgestellte Elektroschnur (mit länderspezifischem Stecker) in die AC-Steckerbuchse des USV-Systems.
  • Seite 38: Optionale Installation

    Installation rapide Schalten Sie die USV ein. Drücken Sie die Taste „ON/OFF/STANDBY“ (EIN/AUS/ STANDBY) eine Sekunde lang. Der Alarmton ertönt einmal kurz nach Ablauf einer Sekunde. Lassen Sie die Taste los. Hinweis: Das UPS-System funktioniert nach dem ersten Start ordnungsgemäß. Die maximale Laufzeit der Batterie wird jedoch erst erreicht, nachdem diese 24 Stunden lang aufgeladen wurde.
  • Seite 39 Grundbetrieb Tasten (Vorderes Bedienfeld) Taste „ON/OFF/STANDBY“ (EIN/AUS/STABNDBY) • Zum EINschalten der USV: Die USV wird an eine stromführende AC-Wandsteckdose* angeschlossen. Drücken Sie die Taste „ON/OFF/STANDBY“ (EIN/AUS/STANDBY) eine Sekunde lang. ** Lassen Sie die Taste wieder los. Wenn kein Netzstrom verfügbar ist, können Sie die USV „kalt starten“ (d.h.: Schalten Sie die USV EIN und drücken Sie die Taste „ON/OFF/STANDBY“...
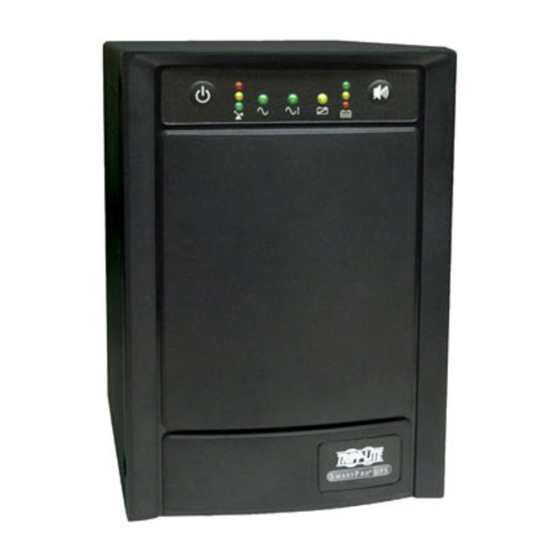
  • Seite 40: Grundbetrieb

    Grundbetrieb Anzeigeleuchten (Vorderes Bedienfeld) Alle Beschreibungen für Anzeigeleuchten gelten immer dann, wenn die USV an eine Wandsteckdose angeschlossen und eingeschaltet ist. LED „POWER“ (STROM): Diese grüne LED leuchtet immer dann auf, wenn die USV EINgeschaltet ist und angeschlossene Geräte mit Netzstrom versorgt. Die LED blinkt und es ertönt ein Alarm (4 kurze Piepstöne gefolgt von einer Pause), um anzuzeigen, dass die USV während eines Stromausfalls oder erheblichen Spannungsabfalls von ihren internen Akkus mit Strom versorgt wird.
  • Seite 41 Grundbetrieb Sonstige USV-Funktionsmerkmale (Rückseite) AC-Steckbuchsen: Ihre USV verfügt über IEC-320-C13-Ausgänge. Ihre angeschlossenen Geräte werden über diese Ausgangssteckbuchsen im Normalbetrieb mit Netzstrom und während Stromausfällen und Spannungsabfällen mit Akkustrom versorgt. Die USV schützt Geräte, die an diesen Steckbuchsen angeschlossen sind, vor schädlichen Überlasten und Leitungsrauschen.
  • Seite 42: Austausch Der Batterie

    Ein Batterieaustausch sollte nur von qualifiziertem Fachpersonal durchgeführt werden. Lesen Sie dazu die Anmerkungen unter “Batteriewarnungen” im Abschnitt mit den Sicherheitsanweisungen. Sollte Ihr UPS einen Batterietausch benötigen, so finden Sie auf der Tripp-Lite-Webseite unter www.tripplite.com/support/battery/index.cfm Informationen zur entsprechenden Autauschbatterie für Ihr UPS.
  • Seite 43 Lagerung und Service Service Tripp Lite bietet verschiedene Pläne für die Garantieverlängerung und Vor-Ort-Service an. Weitere Informationen zum Service finden Sie unter www.tripplite.com/support. Bevor Sie Ihr Produkt zur Reparatur zurücksenden, führen Sie die folgenden Schritte aus: 1. Überprüfen Sie die Installations- und Betriebsverfahren, die in diesem Handbuch beschrieben sind, um sicherzustellen, dass das Problem nicht durch falsche Handhabung verursacht wurde.
  • Seite 44 1111 W. 35th Street, Chicago, IL 60609 USA • www.tripplite.com/support 18-09-244 93-3152_revC 18-09-244-933152.indb 44 5/31/2019 5:02:44 PM...

Inhaltsverzeichnis