Herunterladen Inhalt Inhalt Diese Seite drucken
Inhaltsverzeichnis

Werbung

Verfügbare Sprachen
  • DE

Verfügbare Sprachen

  • DEUTSCH, seite 70
Riello Dialog Vision Rack UPS available from EcoPowerSupplies
For more information visit: www.ecopowersupplies.com/riello-ups

Werbung

Inhaltsverzeichnis
loading

Inhaltszusammenfassung für Riello Dialog Vision Rack

  • Seite 1 Riello Dialog Vision Rack UPS available from EcoPowerSupplies For more information visit: www.ecopowersupplies.com/riello-ups...
  • Seite 3 MANUALE D’USO...
  • Seite 4: Descrizione Del Sistema

    ONTENUTO INTRODUZIONE PRESENTAZIONE ARATTERISTICHE ISTA ANTERIORE ISTA POSTERIORE INSTALLAZIONE ’ PERTURA DELL IMBALLAGGIO DI UN UPS E VERIFICA DEL SUO CONTENUTO ’ PERTURA DELL IMBALLAGGIO DI UN ATTERY OX E VERIFICA DEL SUO CONTENUTO ’ ERIFICA DELL APPARECCHIATURA OLLOCAZIONE ’UPS NSTALLAZIONE DELL NSTALLAZIONE VERTICALE DEI MODELLI NSTALLAZIONE VERTICALE DEI MODELLI...
  • Seite 5: Inhaltsverzeichnis

    ONTENUTO RS232 NTERFACCIA ORTA RESA DI COMUNICAZIONE SOFTWARE OFTWARE DI MONITORAGGIO E CONTROLLO OFTWARE DI CONFIGURAZIONE ALLARMI E SEGNALAZIONI SOSTITUZIONE BATTERIA IALOG ISION OWER IALOG ISION IALOG ISION SPECIFICHE...
  • Seite 6 NTRODUZIONE Vi ringraziamo per la scelta del nostro prodotto. La nostra azienda è prettamente specializzata nello sviluppo e nella produzione di gruppi statici di continuità (UPS). Gli UPS di questa serie sono prodotti di alta qualità, attentamente progettati e costruiti allo scopo di garantire le migliori prestazioni.
  • Seite 7: Presentazione

    RESENTAZIONE Questo manuale descrive un gruppo di continuità (UPS) appartenente alla famiglia Dialog Vision (DVT, DVR, DVD) e al relativo battery box. Questa famiglia è composta da UPS di tipo line-interactive. L' UPS garantisce protezione, alle apparecchiature ad esso collegate, da: a) mancanze di tensione di rete b) sovratensioni di tipo impulsivo provenienti dalla rete di alimentazione c) fluttuazioni del valore della tensione di rete...
  • Seite 8: Vista Anteriore

    RESENTAZIONE Dialog Vision Tower Dialog Vision Rack Dialog Vision Dual 1100 1500 2000 1100 1500 2200 3000 Potenza nominale [VA] 1100 1500 2000 1100 1500 2200 3000 Potenza nominale [W] 1050 1350 1050 1540 2100 Tensione nominale di [Vac] 200/208/220/230/240...
  • Seite 9: Vista Posteriore

    RESENTAZIONE ISTA POSTERIORE DVT 500/800/1100 DVT 1500/2000 DVR 500/800/1100 DVD 1500...
  • Seite 10 RESENTAZIONE DVD 2200/3000 Dialog Vision Battery Box Interfaccia seriale RS232 Ventola di raffreddamento Protezione Net/Tel Protezione termica d’ingresso Spina di ingresso rete IEC Presa d’uscita IEC (max 10A) Slot di espansione per schede interfaccia Connettore espansione batteria Presa d’uscita IEC (max 16A) Protezione termica di uscita Porta USB Fusibile...
  • Seite 11 NSTALLAZIONE ’ PERTURA DELL IMBALLAGGIO DI UN UPS E VERIFICA DEL SUO CONTENUTO Dopo l’apertura dell’imballo, per prima cosa procedere alla verifica del contenuto. L’imballaggio deve contenere:   Supporti plastici (Solo per modello DVD)  Cavo di alimentazione IEC 10A (IEC 16A solo per ...
  • Seite 12 NSTALLAZIONE ’ PERTURA DELL IMBALLAGGIO DI UN ATTERY OX E VERIFICA DEL SUO CONTENUTO Dopo l’apertura dell’imballo, per prima cosa procedere alla verifica del contenuto. L’imballaggio deve contenere:  Battery Box  Kit maniglie  Cavo di connessione UPS – Battery Box ...
  • Seite 13: Installazione Dell 'Ups

    NSTALLAZIONE ’ ERIFICA DELL APPARECCHIATURA Controllare bene l’UPS ricevuto. Se l’UPS è stato danneggiato durante la spedizione, tenere la scatola e l’imballo. Avvisare il corriere e il venditore immediatamente. OLLOCAZIONE Questo UPS deve essere installato al coperto con adeguato flusso d’aria, posizionato in un ambiente pulito, al coperto, lontano dall’umidità, da liquidi infiammabili e dalla luce diretta del sole.
  • Seite 14 NSTALLAZIONE NSTALLAZIONE VERTICALE DEI MODELLI CON BATTERY BOX 1. Assemblare i supporti assieme alla prolunga come indicato in figura. 2. Mettere l’UPS e il battery box in posizione verticale e posizionare i due supporti in prossimità degli stessi. 3. Infilare l’UPS e il battery box nei due supporti con attenzione.
  • Seite 15 NSTALLAZIONE RIENTAMENTO DISPLAY PER MODELLI Il display LCD dei modelli DVD può essere ruotato per adattarlo al tipo di installazione (rack o tower). Le successive indicazioni spiegano come è possibile ruotare il display: A. Da Rack a Tower B. Da Tower a Rack 1.
  • Seite 16: In Armadio Rack

    NSTALLAZIONE NSTALLAZIONE MODELLI IN ARMADIO RACK I modelli DVR e DVD possono essere installati in un armadio rack da 19”. La seguenti indicazioni descrivono come eseguire l’installazione 1. Allineare e fissare con le viti le maniglie sui fianchi dell’UPS. 2. Fissare le guide ai supporti dell’armadio rack con le viti. 3.
  • Seite 17: Power Share

    NSTALLAZIONE OLLEGAMENTO Collegare mediante il cavo di ingresso l’UPS alla rete. Collegare i carichi alle prese dell’UPS con i cavi IEC-IEC o con un cavo analogo di lunghezza massima 10 metri. Nota: non collegare carichi che assorbono più di 10A alla presa IEC da 10A. Questi carichi possono essere collegati esclusivamente alla presa IEC da 16A quando questa è...
  • Seite 18 NSTALLAZIONE (EPO) NSTALLAZIONE MERGENCY OWER Le serie DVR e DVD sono dotate del contatto EPO. L’EPO consente lo spegnimento immediato dell’UPS senza aspettare che sia completata la procedura di spegnimento. Nota: Dopo che l'UPS è stato spento, usando questo ingresso, anche se il contatto EPO viene chiuso, l’apparecchiatura non si riaccenderà...
  • Seite 19: Accensione Da Batteria

    NSTALLAZIONE 2. Quindi collegare l’altra estremità del cavo al connettore di batteria sul retro dell’UPS. 3. Per aggiungere ulteriori batterie (fino ad una capacità complessiva massima di 120Ah), ripetere i punti precedenti. Nota: Quando viene installato un battery box , l’UPS deve essere impostato con la corretta capacità totale delle batterie (usando il software UPSTools) al fine di calcolare correttamente l’autonomia residua e la carica della batteria.
  • Seite 20: Descrizione Del Sistema

    ESCRIZIONE DEL SISTEMA ANNELLO FRONTALE Sul pannello frontale oltre al display sono pesenti i tasti “ON”, “OFF” e “SELECT”. ISPLAY LCD...
  • Seite 21 ESCRIZIONE DEL SISTEMA Il display può mostrare due misure contemporaneamente, selezionabili tra quelle disponibili nella parta A e nella parte B del display. Descrizione dettagliata per la Parte A (a sinistra): Parte A ① INPUT-VAC: tensione d’ingresso (unità: Volt) ② INPUT-Hz: frequenza d’ingresso (unità: Hz) ③...
  • Seite 22 ESCRIZIONE DEL SISTEMA ’ NDICAZIONI DELL Questo capitolo da una descrizione dettagliata di tutti gli indicatori nel display. ICONE STATO DESCRIZIONE Fisso Indica la presenza di un’anomalia (vedi tabella 3) Lampeggiante L’UPS è in stato di stand-by Fisso L’UPS sta funzionando da rete L’UPS sta funzionando da batteria.
  • Seite 23 ESCRIZIONE DEL SISTEMA Tabella 1 Livello batteria 0%~20% 20%~40% 40%~60% 60%~80% 80%~100% Tabella 2 Livello carico applicato 0~5% 5~25% 25%~50% 50%~75% 75%~102% >102% flashing In caso di sovraccarico, l’UPS fornisce comunque energia ai carichi applicati (per un tempo dipendente dall’entità del sovraccarico) e immediatamente segnala l’evento mediante l’allarme (beep ad intervalli regolari di un secondo).
  • Seite 24 ESCRIZIONE DEL SISTEMA NDICAZIONE ANOMALIE Tutti modelli Dialog Vision sono dotati di un sistema di autodiagnosi in grado di segnalare eventuali anomalie o guasti sul display. Di seguito sono riportati i simboli con la descrizione e le possibili soluzioni per verificare le anomalie.
  • Seite 25 ESCRIZIONE DEL SISTEMA A titolo esemplificativo viene riportato di seguito la procedura per impostare il display in modo da avere nella parte sinistra del display (Parte A) la “Tensione d’ingresso”, e nella parte destra (Parte B) la “Carico in percentuale”. Esempio di configurazione: Premere SELECT per cambiare...
  • Seite 26: Indicazioni Acustiche

    ESCRIZIONE DEL SISTEMA NDICAZIONI ACUSTICHE SEGNALE DESCRIZIONE STATO BUZZER ACUSTICO a) Anomalia (es. per sovratemperatura o ventola Continuo guasta) 1 2 3 4 5 6 7 8 9 10 b) Batteria sovraccarica Continuo 1 2 3 4 5 6 7 8 9 10 Intermittente c) Sovraccarico (1s on/1s off)
  • Seite 27: Porta Di Comunicazione

     Agente di rete Ethernet con protocollo TCP/IP, HTTP e SNMP  Porta RS232 + RS485 con protocollo JBUS / MODBUS Per verificare la disponibilità di nuove versioni software più aggiornate e per maggiori informazioni riguardo gli accessori disponibili, consultare il sito web www.riello-ups.com.
  • Seite 28: Software

     Collegare la porta di comunicazione USB dell’UPS ad una porta di comunicazione USB del PC tramite il cavo in dotazione.  Seguire le istruzioni per l’installazione indicate nel manuale del software presente nella cartella UPSTools scaricabile dal sito web www.riello-ups.com. Per verificare la disponibilità di una versione del software più aggiornata consultare il sito del produttore.
  • Seite 29: Allarmi E Segnalazioni

    LLARMI E SEGNALAZIONI TABELLE SEGNALAZIONI ACUSTICHE UPS Segnalazione Causa Soluzone Beep ogni 4 L’UPS sta funzionando da Controllare la tensione di ingresso secondi batteria La batteria si sta Salvare il lavoro e spegnere l’apparecchiatura Beep ogni scaricando secondo Controllare l’indicatore del livello di carica e rimuovere Sovraccarico in uscita alcuni carichi Controllare la tabella segnalazioni ed eventualmente...
  • Seite 30: Sostituzione Batteria

    OSTITUZIONE BATTERIA Quando l’indicatore di batteria guasta è acceso e l’UPS suona in modo intermittente (1s on/1s off), la batteria potrebbe dover essere sostituita. Controllare il collegamento della batteria oppure contattare il rivenditore per ordinarne una nuova. Attenzione: Una batteria è pericolosa in quanto può generare una scarica elettrica o un corto circuito. Le seguenti precauzioni devono essere esaminate attentamente prima di sostituire le batterie.
  • Seite 31: Dialog Vision Rack

    OSTITUZIONE BATTERIA IALOG ISION 1. Staccare il pannello frontale dell’UPS tirando con entrambe le mani. 2. Scollegare il cavo delle batterie dell’UPS. 3. Rimuovere la piastra che blocca le batterie dopo aver svitato le viti che fissano il supporto all’UPS. 4.
  • Seite 32: Dialog Vision Dual

    OSTITUZIONE BATTERIA IALOG ISION 1. Staccare il pannello frontale dell’UPS tirando con entrambe le mani. 2. Svitare il supporto della batteria dall’UPS e rimuovere la piastra che fissa le batterie. 3. Scollegare il cavo. 4. Estrarre le batterie sopra una superficie piana. 5.
  • Seite 33: Specifiche

    PECIFICHE Dialog Vision Tower MODELLO DVT 500 DVT 800 DVT 1100 DVT 1500 DVT 2000 1100 1500 2000 POTENZA NOMINALE Watt 1050 1350 Tensione nominale 230VAC 160VAC ± 3% INGRESSO Range di tensione 294VAC ± 3% Frequenza 50/60Hz Selezione automatica Precisione tensione ( in 230V +5%, -10% funzionamento da batteria)
  • Seite 34 PECIFICHE Dialog Vision Rack Dialog Vision Dual MODELLO DVR 500 DVR 800 DVR 1100 DVD 1500 DVD 2200 DVD 3000 1100 1500 2200 3000 POTENZA NOMINALE Watt 1050 1540 2100 Tensione nominale 230VAC 160VAC ± 3% INGRESSO Range di tensione 294VAC ±...
  • Seite 35 USER MANUAL...
  • Seite 36: System Description

    ONTENTS INTRODUCTION PRESENTATION HARACTERISTICS RONT VIEW EAR VIEW INSTALLATION PENING THE UPS PACKAGING AND CHECKING THE CONTENTS PENING THE ATTERY OX PACKAGING AND CHECKING THE CONTENTS HECKING THE EQUIPMENT LACING THE UPS NSTALLING THE ERTICAL INSTALLATION OF THE MODELS ERTICAL INSTALLATION OF THE MODELS WITH BATTERY BOX OSITIONING THE RONT...
  • Seite 37 ONTENTS RS232 INTERFACE PORT OMMUNICATION SOCKET SOFTWARE ONITORING AND CONTROL SOFTWARE ONFIGURATION SOFTWARE ALARMS AND INDICATORS REPLACING THE BATTERY IALOG ISION OWER IALOG ISION IALOG ISION SPECIFICATIONS...
  • Seite 38 NTRODUCTION Thank you for choosing our Uninterruptible Power Supply (UPS). Our company is highly specialised in the development and production of uninterruptible power supplies (UPS). The UPS in this range are high quality products, designed and built with care to ensure optimum performance. This equipment can be installed by anyone, subject to a CAREFUL AND THOROUGH READING OF THIS MANUAL.
  • Seite 39: Presentation

    RESENTATION This manual describes the Dialog Vision UPS family (DVT, DVR, DVD) and their related battery box. The Dialog Vision is a line-interactive UPS. The UPS protects equipment connected to it from: a) mains power supply failures b) surges c) sags and brownouts The UPS automatically corrects its output for small fluctuations in the mains power supply.
  • Seite 40: Front View

    RESENTATION Dialog Vision Tower Dialog Vision Rack Dialog Vision Dual 1100 1500 2000 1100 1500 2200 3000 Nominal power [VA] 1100 1500 2000 1100 1500 2200 3000 Nominal power 1050 1350 1050 1540 2100 Nominal output [Vac] 200/208/220/230/240 voltage Dimensions...
  • Seite 41: Rear View

    RESENTATION EAR VIEW DVT 500/800/1100 DVT 1500/2000 DVR 500/800/1100 DVD 1500...
  • Seite 42 RESENTATION DVD 2200/3000 Dialog Vision Battery Box 1. RS232 serial interface 2. Cooling fan 3. Net/Tel protection 4. Input thermal protection 5. IEC network input plug 6. IEC output plug (max 10A) 7. Expansion slots for interface cards 8. Battery expansion connector 9.
  • Seite 43 NSTALLATION PENING THE UPS PACKAGING AND CHECKING THE CONTENTS After opening the packaging, check the contents. The packaging should contain the following:   Plastic supports (DVD model only)  IEC 10A power cable (IEC 16A for DVD models  Handles kit (models DVR and DVD only) 2200/3000 only) 2 IEC 10A connection cables...
  • Seite 44 NSTALLATION PENING THE ATTERY OX PACKAGING AND CHECKING THE CONTENTS After opening the packaging, check the contents. The packaging should contain the following:  Battery Box  Handles kit  UPS – Battery Box connection cable  User manual + Safety manual + Warranty card ...
  • Seite 45: Installing The Ups

    NSTALLATION HECKING THE EQUIPMENT Check the UPS carefully. If the UPS has been damaged during transit, keep the box and the packaging. Let the carrier and the supplier know immediately. LACING THE UPS This UPS must have an adequate airflow. It must be placed in a clean indoor environment with no humidity, away from flammable liquids and direct sunlight.
  • Seite 46 NSTALLATION ERTICAL INSTALLATION OF THE MODELS WITH BATTERY BOX 1. Assemble the supports and the extension as shown in the figure. 2. Put the UPS and the battery box in a vertical position and place the two supports close to them. 3.
  • Seite 47 NSTALLATION OSITIONING THE RONT ANEL MODELS The DVD LCD can be rotated to suit the kind of installation (rack or tower). The information below explains how to rotate the display: A. From Rack to Tower B. From Tower to Rack 1.
  • Seite 48: Nstalling Dvr And Dvd Models In A Rack Cabinet

    NSTALLATION NSTALLING MODELS IN A RACK CABINET The DVR and DVD models can be installed in a 19” rack cabinet. The installation procedure is described below: 1. Align and screw the handles onto the sides of the UPS. 2. Secure the guides onto the rack cabinet supports with the screws. 3.
  • Seite 49: Powershare

    NSTALLATION ONNECTION Connect the UPS to the mains power supply using the input supply cable. Connect the loads to the UPS sockets with the IEC-IEC cables or with a similar cable with a maximum length of 10 metres. Note: do not connect loads that draw more than 10A, to the 10A IEC sockets. These loads can only be connected to the 16A IEC socket (where fitted).
  • Seite 50: Installing An Additional Battery Box

    NSTALLATION (EPO) NSTALLING THE MERGENCY OWER The DVR and DVD range are provided with an EPO contact. This allows the UPS to be shut down immediately without having to wait for the shutdown procedure to be completed. Note: When the UPS has been switched off using this input, it is not be possible to switch the device back on again (even if the EPO contact is closed) until the UPS has been restarted manually.
  • Seite 51: Start - Up /Shutdown

    NSTALLATION 2. Then connect the other end of the cable to the battery connector at the back of the UPS. 3. To add further battery boxes (up to a total maximum capacity of 120Ah), repeat the previous steps. Note: When a battery box is installed, the UPS must be configured for the correct total capacity of the batteries (using UPSTools software) in order to calculate correctly the remaining back-up time and the battery charge.
  • Seite 52: System Description

    YSTEM DESCRIPTION RONT PANEL The front panel consists of a display and “ON”, “OFF” and “SELECT” keys. Front panel ON button OFF button SELECT button Part A Part B Part D Part C...
  • Seite 53 YSTEM DESCRIPTION The display can show two values at the same time, which can be selected from those available in part A and part B of the display. Detailed description for Part A (on the left): Part A ① INPUT-VAC: input voltage (unit: Volt) ②...
  • Seite 54 YSTEM DESCRIPTION INDICATORS This chapter provides a detailed description of all the display indicators. ICON STATE DESCRIPTION Steady on Indicates a fault (see table 3) Flashing The UPS is in stand-by mode Steady on The UPS is operating in mains mode The UPS is operating in battery mode.
  • Seite 55 YSTEM DESCRIPTION Table 1 Battery level 0%~20% 20%~40% 40%~60% 60%~80% 80%~100% Table 2 Applied load level 0~5% 5~25% 25%~50% 50%~75% 75%~102% >102% flashing In the event of an overload, the UPS will continue to power the load for a set period of time. The UPS will emit an alarm to signal that it can no longer support the overload (a beep at regular one-second intervals).
  • Seite 56: Fault Signalling

    YSTEM DESCRIPTION AULT SIGNALLING All Dialog Vision models are provided with a self-check system that can indicate any faults or failures on the display. The symbols are shown below, together with a description and the possible solutions to rectify the problem.
  • Seite 57 YSTEM DESCRIPTION Shown below is an example of the procedure to set the display to show the “Input voltage” on the left side of the display (Part A) and “Capacity as a percentage of the battery” on the right side (Part B). Configuration example: Press SELECT to change the field...
  • Seite 58: Acoustic Signals

    YSTEM DESCRIPTION COUSTIC SIGNALS DESCRIPTION BEEP BUZZER STATUS a) Fault (e.g. due to overheating or fan failure) Continuous 1 2 3 4 5 6 7 8 9 10 b) Battery overcharged Continuous 1 2 3 4 5 6 7 8 9 10 Intermittent c) Overload (1s on/1s off)
  • Seite 59: Rs232 Interface

     Ethernet network agent with TCP/IP, HTTP and SNMP protocol  RS232 + RS485 port with JBUS / MODBUS protocol To check whether new, more up-to-date software versions are available and for more information about the accessories available, consult the website: www.riello-ups.com.
  • Seite 60: Software

     Follow the installation instructions shown within the software manual which can be located in the UPSTools directory or downloaded from the web site www.riello-ups.com. Visit the manufacturer’s website to check whether a more recent version of the software is available.
  • Seite 61: Alarms And Indicators

    LARMS AND INDICATORS UPS ACOUSTIC SIGNAL TABLES Signal Cause Solution 1 beep every 4 The UPS is operating in Check the input voltage seconds battery mode 1 beep per The battery is discharging Save your work and switch off the equipment second Overload in output Check the charge level indicator and remove some loads...
  • Seite 62: Replacing The Battery

    EPLACING THE BATTERY When the battery fault indicator illuminates and the UPS emits an intermittent beep (one second on/ one second off), the battery may need to be replaced. Check the battery connection or contact the reseller to order a new battery.
  • Seite 63: Dialog Vision Rack

    EPLACING THE BATTERY IALOG ISION 1. Remove the front panel of the UPS by pulling with both hands. 2. Disconnect the UPS battery cable. 3. Undo the screws securing the support to the UPS and remove the plate securing the batteries. 4.
  • Seite 64: Dialog Vision Dual

    EPLACING THE BATTERY IALOG ISION 1. Remove the front panel of the UPS by pulling with both hands. 2. Undo the screws securing the support to the UPS and remove the plate securing the batteries. 3. Disconnect the cable. 4. Remove the batteries on a flat surface. 5.
  • Seite 65: Specifications

    PECIFICATIONS Dialog Vision Tower MODEL DVT 500 DVT 800 DVT 1100 DVT 1500 DVT 2000 1100 1500 2000 NOMINAL POWER Watt 1050 1350 Nominal voltage 230VAC 160VAC ± 3% INPUT Voltage range 294VAC ± 3% Frequency 50/60Hz Automatic selection Voltage stability ( in battery 230V +5%, -10% mode) Frequency...
  • Seite 66 PECIFICATIONS Dialog Vision Rack Dialog Vision Dual MODEL DVR 500 DVR 800 DVR 1100 DVD 1500 DVD 2200 DVD 3000 1100 1500 2200 3000 NOMINAL POWER Watt 1050 1540 2100 Nominal voltage 230VAC 160VAC ± 3% INPUT Voltage range 294VAC ± 3%...
  • Seite 67 BEDIENUNGSANLEITUNG...
  • Seite 68 NHALTSVERZEICHNIS EINLEITUNG BESCHREIBUNG ECHNISCHE NGABEN ORDERSEITE ÜCKSEITE INSTALLATION Ö USV-A FFNEN DER ERPACKUNG DER NLAGE UND ONTROLLE DES NHALTS Ö FFNEN DER ERPACKUNG EINER ATTERIE OX UND ONTROLLE DES NHALTS ONTROLLE DES ERÄTES UFSTELLUNG NSTALLATION DER ENKRECHTE NSTALLATION DER ODELLE ENKRECHTE NSTALLATION DER ODELLE...
  • Seite 69 NHALTSVERZEICHNIS RS232 CHNITTSTELLE USB-A NSCHLUSS OMMUNIKATIONS TECKPLATZ SOFTWARE Ü BERWACHUNGS TEUER OFTWARE ONFIGURATIONS OFTWARE ALARME UND ANZEIGEN BATTERIEWECHSEL IALOG ISION OWER IALOG ISION IALOG ISION TECHNISCHE DATEN...
  • Seite 70: Einleitung

    INLEITUNG Wir möchten uns zunächst bei Ihnen dafür bedanken, dass sie sich für ein Produkt aus unserem Hause entschieden haben. Unser Unternehmen hat sich auf die Entwicklung und Produktion von unterbrechungsfreien Stromversorgungen (USV) spezialisiert. Die USV-Anlagen dieser Baureihe sind Produkte von höchster Qualität, die speziell zur Absicherung von hochverfügbaren Systemen entwickelt und produziert wurden.
  • Seite 71: Beschreibung

    ESCHREIBUNG Diese Bedienungsanleitung beschreibt eine unterbrechungsfreie Line-interaktiven USV-Anlage, die zur Produktfamilie Dialog Vision (DVT, DVR, DVD) gehört, sowie das eventuell zugehörige Batteriegehäuse. Die USV gewährleistet den an ihr angeschlossenen Geräten einen Schutz vor: a) Ausfall der Netzspannung b) Spannungsspitzen aus dem Versorgungsnetz c) Spannungsschwankungen im Versorgungsnetz Kleinere Spannungsschwankungen im Netz werden von der USV automatisch ausgeglichen.
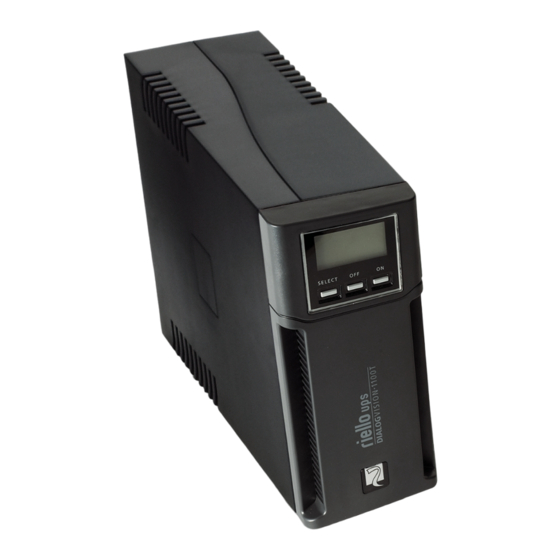
  • Seite 72: Vorderseite

    ESCHREIBUNG Dialog Vision Tower Dialog Vision Rack Dialog Vision Dual 1100 1500 2000 1100 1500 2200 3000 Nennleistung [VA] 1100 1500 2000 1100 1500 2200 3000 Wirkleistung 1050 1350 1050 1540 2100 Ausgangs- [Vac] 200/208/220/230/240 Nennspannung Abmessungen 438X44X460 438X88X582 [mm]...
  • Seite 73: Rückseite

    ESCHREIBUNG ÜCKSEITE DVT 500/800/1100 DVT 1500/2000 DVR 500/800/1100 DVD 1500...
  • Seite 74 ESCHREIBUNG DVD 2200/3000 Dialog Vision Batterie Box Serielle Schnittstelle RS232 Lüfter Telefon-/ Netzwerkschutz Thermosicherung Eingang Netz-Eingangsstecker IEC Ausgangsstecker IEC (max. 10A) Erweiterungs-Steckplatz für Schnittstellen-Karten Anschluss Batterie-Erweiterung Ausgangsstecker IEC (max. 16A) 10. Thermosicherung Ausgang 11. USB-Anschluss 12. EPO (Emergency Power Off) 13.
  • Seite 75: Kontrolle Des Inhalts

    NSTALLATION Ö USV-A FFNEN DER ERPACKUNG DER NLAGE UND ONTROLLE DES NHALTS Nach dem Öffnen der Verpackung muss als erstes der Inhalt geprüft werden. Die Verpackung muss folgendes enthalten:   Plastikhalter (nur für Modell DVD)  Netzkabel IEC 10A (IEC 16A nur für Modelle DVD ...
  • Seite 76 NSTALLATION Ö FFNEN DER ERPACKUNG EINER ATTERIE OX UND ONTROLLE DES NHALTS Nach dem Öffnen der Verpackung muss als erstes der Inhalt geprüft werden. Die Verpackung muss folgendes enthalten:  Batterie Box  Griff-Satz  Anschlusskabel USV – Batterie Box ...
  • Seite 77: Kontrolle Des Gerätes

    NSTALLATION ONTROLLE DES ERÄTES Die erhaltene USV gut kontrollieren. Ist die USV während des Transportes beschädigt worden, bitte unbedingt die Verpackung aufbewahren und sofort den Transportunternehmer und den Verkäufer benachrichtigen. UFSTELLUNG Diese USV muss an einem trockenen, gut belüfteten und vor direkter Sonneneinstrahlung geschütztem Ort installiert werden.
  • Seite 78 NSTALLATION ENKRECHTE NSTALLATION DER ODELLE ATTERY 1. Die Halter wie in der Abbildung gezeigt mit der Verlängerung zusammensetzen. 2. Die USV und die Batterie Box senkrecht aufstellen und die beiden Halter in der Nähe anbringen. 3. Die USV und die Batterie Box vorsichtig in die beiden Halter einsetzen.
  • Seite 79: Ausrichten Des Lcd-D

    NSTALLATION LCD-D USRICHTEN DES ISPLAY FÜR ODELLE Das LCD-Display der Modelle DVD kann gedreht werden, um es an die Installationsart (Rack oder Tower) anzupassen. Die nachstehenden Angaben erläutern, wie das Display gedreht werden kann. A. Von Rack zu Tower B. Von Tower zu Rack 1.
  • Seite 80 NSTALLATION NSTALLATION DER ODELLE CHRANK Die Modelle DVR und DVD können in einem 19" Rack-Schrank installiert werden. Die nachstehenden Angaben erläutern, wie die Installation erfolgen muss. 1. Die Griffe an der Seite der USV ausrichten und mit den Schrauben befestigen. 2.
  • Seite 81: Anschluss

    NSTALLATION NSCHLUSS Die USV mit dem Netzkabel an das Stromnetz anschließen. Die Lasten mit dem IEC-IEC Anschusskabel oder mit einem ähnlichen Kabel mit einer maximalen Länge von 10 Metern an die Stecker der USV anschließen. Anmerkung: Keine Lasten mit einer Stromaufnahme von mehr als 10A an den IEC Stecker mit 10A anschließen.
  • Seite 82: Emergency Power Off (Epo)

    NSTALLATION (EPO) NSTALLATION MERGENCY OWER Die Serie DVR und DVD sind mit einem EPO-Kontakt ausgestattet. Der EPO ermöglicht eine Sofortabschaltung der USV, ohne dass die Beendigung des Abschaltverfahren abgewartet werden muss. Anmerkung: Wird dieser Eingang genutzt, nachdem die USV abgeschaltet wurde, schaltet sich das Gerät, auch wenn der EPO-Kontakt geschlossen wird, solange nicht ein, bis die USV manuell neu gestartet wird.
  • Seite 83 NSTALLATION 2. Anschließend das andere Kabelende an den Batterieanschluss auf der Rückseite der USV anschließen. 3. Für den Anschluss weiterer Batterie Boxen (bis zu einer Gesamtleistung von maximal 120Ah) die vorstehenden Punkte wiederholen. Anmerkung: Wenn eine Batterie Box installiert wird, muss die USV über die Software UPSTools auf die richtige Batterie-Gesamtleistung eingestellt werden, so dass die Restautonomie und der Ladezustand der Batterie richtig berechnet werden kann.
  • Seite 84: Beschreibung Des Systems

    ESCHREIBUNG DES SYSTEMS EDIENFELD Am Bedienfeld befinden sich außer dem Display die Tasten "ON", "OFF" und "SELECT". Bedienfeld LCD-Display Taste Taste Taste LCD-D ISPLAY...
  • Seite 85 ESCHREIBUNG DES SYSTEMS Am Display können zwei Messwerte gleichzeitig angezeigt werden, die zwischen den im Bereich A und B zur Verfügung stehenden Werten ausgewählt werden müssen. Detaillierte Beschreibung für den Bereich A (links): Bereich A ① INPUT-VAC: Eingangsspannung (Maßeinheit: Volt) ②...
  • Seite 86 ESCHREIBUNG DES SYSTEMS LCD-A NZEIGEN Dieses Kapitel gibt eine detaillierte Beschreibung aller Display-Anzeigen. SYMBOL STATUS BESCHREIBUNG Dauernd Zeigt eine Störung an (siehe Tabelle 3) Blinkend Die USV ist in Stand-by Dauernd Die USV ist in Netzbetrieb Die USV ist in Batteriebetrieb. In diesem Status ertönt in Dauernd regelmäßigen Abständen alle 4 Sekunden ein Ton (Beep).
  • Seite 87 ESCHREIBUNG DES SYSTEMS Tabelle 1 Batterie-Ladezustand 0%~20% 20%~40% 40%~60% 60%~80% 80%~100% Tabelle 2 Angelegtes Lastniveau 0~5% 5~25% 25%~50% 50%~75% 75%~102% >102% Blinkend Bei Überlast versorgt die USV die angelegten Lasten trotzdem mit Strom (die Versorgungsdauer hängt vom Ausmaß der Überlast ab) und zeigt diesen Zustand sofort mit einem Alarm an (Beep in regelmäßigen Abständen von 1 Sekunde).
  • Seite 88: Störungsanzeige

    ESCHREIBUNG DES SYSTEMS TÖRUNGSANZEIGE Alle Modelle Dialog Vision sind mit einem Autodiagnosesystem ausgestattet, das eventuelle Störungen oder Fehler am Display anzeigt. Nachstehend die Symbole mit der Beschreibung und möglichen Lösungen zur Fehlersuche und Behebung. Tabelle 3 Störungsliste Symbole im Bereich A am Beschreibung Mögliche Lösung Die USV befindet sich in...
  • Seite 89 ESCHREIBUNG DES SYSTEMS Als Beispiel wird anschließend das Verfahren für die Display-Einstellung angegeben, so dass am linken Displaybereich (Bereich A) die "Eingangsspannung" und am rechten Bereich (Bereich B) das "Lastniveau in Prozent" angezeigt wird. Konfigurations-Beispiel: SELECT drücken, um das Feld zu wechseln SELECT für 3 Sekunden drücken...
  • Seite 90: Akustische Anzeigen

    ESCHREIBUNG DES SYSTEMS KUSTISCHE NZEIGEN AKUSTISCHES BESCHREIBUNG STATUS BUZZER SIGNAL a) Störung (z.B. bei Überhitzung oder defektem Dauernd Kühlgebläse) 1 2 3 4 5 6 7 8 9 10 b) Batterie überlastet Dauernd 1 2 3 4 5 6 7 8 9 10 Aussetzend (1 Sek.
  • Seite 91: Computer - Schnittstellen

     Ethernet Netzanschluss mit Protokoll TCP/IP, HTTP und SNMP  Anschluss RS232 + RS485 mit Protokoll JBUS / MODBUS Um das Vorliegen aktuellerer Versionen der Software zu überprüfen und für nähere Informationen über das erhältliche Zubehör, bitten wir Sie, die Website www.riello-ups.com zu besuchen.
  • Seite 92: Software

     Den USB-Anschluss der USV mit dem mitgelieferten Kabel an den USB-Anschluss am PC verbinden.  Folgen sie den Anweisungen der Installationsanleitung, die sich im gleichen Verzeichnis befindet, wie die Software UPSTools. Alternativ kann die Anleitung von der Webseite www.riello-ups.com heruntergeladen werden.
  • Seite 93: Alarme Und Anzeigen

    LARME UND ANZEIGEN TABELLE AKUSTISCHE ANZEIGEN USV Anzeige Ursache Lösung Beep alle 4 Die USV ist in Die Eingangsspannung kontrollieren Sekunden Batteriebetrieb Die Batterie entlädt sich Die Anwendung beenden und das Gerät ausschalten Beep jede Die Anzeige Lastniveau kontrollieren und die Last Sekunde Überlast am Ausgang reduzieren.
  • Seite 94: Batteriewechsel

    ATTERIEWECHSEL Wenn die Batterie-Fehleranzeige eingeschaltet ist und an der USV abwechselnd Warntöne (1Sek. ein/ 1Sek. aus) ertönen, kann es sein, dass die Batterie gewechselt werden muss. Den Batterieanschluss kontrollieren oder beim Lieferanten eine neue Batterie bestellen. Achtung: Eine Batterie ist gefährlich, weil sie Stromschlag oder Kurzschluss verursachen kann. Vorm Wechseln einer Batterie die folgenden Vorsichtsmaßnahmen sorgfältig durchlesen.
  • Seite 95: Dialog Vision Rack

    ATTERIEWECHSEL IALOG ISION 1. Die USV-Frontblende zum Ausbau mit beiden Händen an der linken Seite abziehen. 2. Das USV-Batteriekabel trennen. 3. Die Schrauben, mit denen die Halterung an der USV befestigt ist abschrauben und die Batteriehalterung ausbauen. 4. Die Batterie auf eine ebene Unterlage herausziehen. 5.
  • Seite 96: Dialog Vision Dual

    ATTERIEWECHSEL IALOG ISION 1. Die USV-Frontblende zum Ausbau mit beiden Händen an der linken Seite abziehen. 2. Die Batteriehalterung von der USV abschrauben und die Batteriehalterung ausbauen. 3. Das Kabel trennen. 4. Die Batterie auf eine ebene Unterlage herausziehen. 5. Eine neue Batterie in die USV einsetzen. 6.
  • Seite 97 ECHNISCHE DATEN Dialog Vision Tower MODELL DVT 500 DVT 800 DVT 1100 DVT 1500 DVT 2000 1100 1500 2000 WIRKLEISTUNG Watt 1050 1350 Nennspannung 230VAC 160VAC ± 3% EINGANG Spannungsbereich 294VAC ± 3% Frequenz 50/60Hz Automatische Einstellung Spannungsbereich (im 230V +5%, -10% Batteriebetrieb) Frequenz 50/60Hz Automatische Einstellung (Einstellung wie am Eingang)
  • Seite 98: Technische Daten

    ECHNISCHE DATEN Dialog Vision Rack Dialog Vision Dual MODELL DVR 500 DVR 800 DVR 1100 DVD 1500 DVD 2200 DVD 3000 1100 1500 2200 3000 WIRKLEISTUNG Watt 1050 1540 2100 Nennspannung 230VAC 160VAC ± 3% EINGANG Spannungsbereich 294VAC ± 3%...
  • Seite 99 MANUEL DE L’UTILISATEUR...
  • Seite 100 ONTENU INTRODUCTION PRESENTATION ARACTERISTIQUES UE DE FACE UE ARRIERE INSTALLATION ’ ’ UVERTURE DE L EMBALLAGE DE L ONDULEUR ET VERIFICATION DE SON CONTENU ’ ’ UVERTURE DE L EMBALLAGE DE L ARMOIRE BATTERIE ET VERIFICATION DE SON CONTENU ’ ERIFICATION DE L APPAREIL ISE EN PLACE...
  • Seite 101 ONTENU RS232 NTERFACE RISE DE COMMUNICATION LOGICIEL OGICIEL DE SURVEILLANCE ET DE CONTROLE OGICIEL DE CONFIGURATION ALARMES ET SIGNALISATIONS REMPLACEMENT DE LA BATTERIE IALOG ISION OWER IALOG ISION IALOG ISION DONNEES TECHNIQUES...
  • Seite 102 NTRODUCTION Nous vous remercions d’avoir choisi notre produit. Notre entreprise est spécialisée dans le développement et la production d’onduleurs. Les onduleurs de cette série sont des produits de haute qualité, attentivement conçus et construits afin de garantir les meilleures performances Cet appareil peut être installé...
  • Seite 103: Presentation

    RESENTATION Le présent manuel décrit un onduleur appartenant à la famille Dialog Vision (DVT, DVR, DVD) ainsi que son armoire batterie. Cette famille est composée d’onduleurs de type line-interactive. L'onduleur garantit une protection aux appareils qui y sont reliés contre: a) les coupures de tension de réseau b) les surtensions de type impulsif provenant du réseau d’alimentation c) les fluctuations de la valeur de la tension de réseau...
  • Seite 104 RESENTATION Dialog Vision Tower Dialog Vision Rack Dialog Vision Dual 1100 1500 2000 1100 1500 2200 3000 Puissance [VA] 1100 1500 2000 1100 1500 2200 3000 nominale Puissance 1050 1350 1050 1540 2100 nominale Tension nominale [Vac] 200/208/220/230/240 de sortie...
  • Seite 105: Vue Arriere

    RESENTATION UE ARRIERE DVT 500/800/1100 DVT 1500/2000 DVR 500/800/1100 DVD 1500...
  • Seite 106 RESENTATION DVD 2200/3000 Dialog Vision Armoire batterie Interface série RS232 Ventilateur de refroidissement Protection Net/Tel Protection thermique d’entrée Fiche d’entrée réseau IEC Prise de sortie IEC (10A maxi) Slot d’extension pour cartes interface Connecteur d’extension batterie Prise de sortie IEC (16A maxi) 10.
  • Seite 107 NSTALLATION ’ ’ UVERTURE DE L EMBALLAGE DE L ONDULEUR ET VERIFICATION DE SON CONTENU Après avoir ouvert l’emballage, commencer par vérifier son contenu. L’emballage doit contenir:  Onduleur  Supports en plastique (Pour modèle DVD seulement)  Câble d’alimentation IEC 10A (IEC 16A pour ...
  • Seite 108 NSTALLATION ’ ’ UVERTURE DE L EMBALLAGE DE L ARMOIRE BATTERIE ET VERIFICATION DE SON CONTENU Après avoir ouvert l’emballage, commencer par vérifier son contenu. L’emballage doit contenir:  Armoire batterie  Kit poignées  Câble de raccordement Onduleur – Armoire ...
  • Seite 109 NSTALLATION ’ ERIFICATION DE L APPAREIL Contrôler soigneusement l’onduleur reçu. Si l’onduleur a été endommagé pendant l’expédition, garder la boîte et l’emballage. Avertir immédiatement le transporteur et le distributeur. ISE EN PLACE Cet onduleur doit être installé dans un local fermé et aéré de manière adéquate, il doit être placé dans un environnement propre, loin de sources d’humidité, de liquides inflammables et de la lumière directe du soleil.
  • Seite 110 NSTALLATION NSTALLATION VERTICALE DES MODELES AVEC ARMOIRE BATTERIE 1. Assembler les supports avec la rallonge selon les indications de la figure. 2. Mettre l’onduleur et l’armoire batterie en position verticale et placer les deux supports à proximité de ceux-ci. 3. Enfiler avec soin l’onduleur et l’armoire batterie dans les deux supports.
  • Seite 111 NSTALLATION ’ RIENTATION DE L AFFICHEUR POUR MODELES L’afficheur LCD des modèles DVD peut être orienté pour l’adapter au type d’installation (rack ou tour). Les indications suivantes expliquent la façon d’orienter l’afficheur: A. De Rack à Tour B. De Tour à Rack 1.
  • Seite 112 NSTALLATION ’ NSTALLATION DES MODELES DANS L ARMOIRE RACK Les modèles DVR et DVD peuvent être installés dans une armoire rack de 19”. Les indications suivantes décrivent les différentes phases d’installation. 1. Aligner et fixer poignées à l’aide des vis les sur les côtés de l’onduleur. 2.
  • Seite 113: Power Share

    NSTALLATION ACCORDEMENT Raccorder l’onduleur au réseau à l’aide du câble d’entrée. Brancher les charges aux prises de l’onduleur au moyen des câbles IEC-IEC ou d’un câble analogue d’une longueur maximum de 10 mètres. Note: ne pas brancher de charges qui absorbent plus de 10A à la prise IEC de 10A. Ces charges peuvent être branchées exclusivement à...
  • Seite 114 NSTALLATION (EPO) NSTALLATION MERGENCY OWER Les séries DVR et DVD sont munies du contact EPO. L’EPO permet d’arrêter immédiatement l’onduleur sans attendre que la procédure d’arrêt soit terminée. Note: Après que l’onduleur soit éteint, si l’on utilise cette entrée, même si le contact EPO est fermé, l’appareil ne se remettra pas en marche tant que l’onduleur ne sera pas rallumé...
  • Seite 115: Mise En Marche Sur Batterie

    NSTALLATION 2. Brancher ensuite l’autre extrémité du câble au connecteur de batterie situé à l’arrière de l’onduleur. 3. Pour ajouter d’autres batteries (jusqu’à une capacité totale maximum de 120Ah), répéter les points précédents. Note: En cas d’installation d’une armoire batterie, l’onduleur doit être configuré avec la capacité totale correcte des batteries (à...
  • Seite 116: Description Du Systeme

    ESCRIPTION DU SYSTEME ANNEAU FRONTAL Sur le panneau frontal se trouvent les touches “ON”, “OFF” et “SELECT”. Panneau frontal Afficheur LCD Bouton ON Bouton OFF Bouton SELECT FFICHEUR LCD Partie A Partie B Partie D Partie C...
  • Seite 117 ESCRIPTION DU SYSTEME L’afficheur peut visualiser deux mesures en même temps, sélectionnables parmi celles qui sont disponibles dans la partie A et dans la partie B de l’afficheur. Description détaillée de la Partie A (à gauche): Partie A ① INPUT-VAC: tension d’entrée (unité: Volt) ②...
  • Seite 118 ESCRIPTION DU SYSTEME ’ NDICATIONS DE L AFFICHEUR LCD Ce chapitre décrit de manière détaillée toutes les informations pouvant être visualisées sur l’afficheur LCD. ICONE ETAT DESCRIPTION Fixe Indique la présence d’une anomalie (voir tableau 3) Clignotante L’onduleur est en stand-by Fixe L’onduleur fonctionne sur réseau L’onduleur fonctionne sur batterie.
  • Seite 119 ESCRIPTION DU SYSTEME Tableau 1 Niveau batterie 0%~20% 20%~40% 40%~60% 60%~80% 80%~100% Tableau 2 Niveau charge appliquée 0~5% 5~25% 25%~50% 50%~75% 75%~102% >102% flashing En cas de surcharge, l’onduleur fournit quand même de l’énergie aux charges appliquées (pendant un temps qui dépend de l’ampleur de la surcharge) et signale immédiatement l’événement à...
  • Seite 120 ESCRIPTION DU SYSTEME NDICATION DES ANOMALIES Tous les modèles Dialog Vision sont munis d’un système d’autodiagnostic en mesure de signaler sur l’afficheur les anomalies ou les pannes éventuelles. Les symboles de signalisation sont reportés ci-dessous ainsi que la description et les solutions possibles. Tableau 3: Liste des anomalies Symboles visualisés dans...
  • Seite 121 ESCRIPTION DU SYSTEME Nous reportons ci-après, à titre d’exemple, la procédure de configuration de l’afficheur de manière à avoir dans la partie gauche de ce dernier (Partie A) la “Tension d’entrée” et dans la partie droite (Partie B) la “Charge en pourcentage”.
  • Seite 122: Test Batterie

    ESCRIPTION DU SYSTEME NDICATIONS SONORES SIGNAL DESCRIPTION ETAT BUZZER SONORE a) Anomalie (ex. pour cause de surchauffe Continu ou de panne ventilateur) 1 2 3 4 5 6 7 8 9 10 b) Surcharge batterie Continu 1 2 3 4 5 6 7 8 9 10 Intermittent c) Surcharge...
  • Seite 123: Port De Communication

     Agent de réseau Ethernet à protocole TCP/IP, HTTP et SNMP  Port RS232 + RS485 à protocole JBUS / MODBUS Pour vérifier la disponibilité de nouvelles versions de software mises à jour et pour plus d’informations concernant les accessoires disponibles, consulter le site web www.riello-ups.com.
  • Seite 124: Logiciel

     Pour vérifier si de nouvelles versions du logiciel plus actualisées sont disponibles et pour plus d'informations concernant les accessoires disponibles, consulter le site web www.riello-ups.com. Pour vérifier la disponibilité d’une version du logiciel plus actuelle, consulter le site du fabricant.
  • Seite 125: Alarmes Et Signalisations

    LARMES ET SIGNALISATIONS TABLEAU DES SIGNAUX SONORES ONDULEUR Signal Cause Solution Bip toutes les 4 L’onduleur fonctionne sur Contrôler la tension d’entrée secondes batterie La batterie est en train de Sauvegarder le travail et arrêter l’appareil Bip toutes les se décharger secondes Contrôler l’indicateur du niveau de charge et enlever Surcharge en sortie...
  • Seite 126: Remplacement De La Batterie

    EMPLACEMENT DE LA BATTERIE Lorsque le voyant lumineux de panne batterie est allumé et que l’onduleur sonne par intermittence (1s on/1s off), il se peut que la batterie doive être remplacée. Contrôler le raccordement de la batterie ou contacter le revendeur pour en commander une nouvelle. Attention: Une batterie est dangereuse dans la mesure où...
  • Seite 127: Ialog Ision Ack

    EMPLACEMENT DE LA BATTERIE IALOG ISION 1. Enlever le panneau frontal de l’onduleur en tirant des deux mains. 2. Débrancher de l’onduleur le câble des batteries. 3. Enlever la plaque qui bloque les batteries après avoir dévissé les vis qui fixent le support de l’onduleur. 4.
  • Seite 128: Ialog Ision Ual

    EMPLACEMENT DE LA BATTERIE IALOG ISION 1. Enlever le panneau frontal de l’onduleur en tirant des deux mains. 2. Dévisser le support de la batterie de l’onduleur et enlever la plaque qui fixe les batteries. 3. Débrancher le câble. 4. Dégager les batteries et les placer sur une surface plane. 5.
  • Seite 129: Donnees Techniques

    ONNEES TECHNIQUES Dialog Vision Tower MODELE DVT 500 DVT 800 DVT 1100 DVT 1500 DVT 2000 1100 1500 2000 PUISSANCE NOMINALE Watts 1050 1350 Tension nominale 230VCA 160VCA ± 3% ENTRÉE Plage de tension 294VCA ± 3% Fréquence 50/60Hz Sélection automatique Précision tension (en 230V +5%, -10% fonctionnement sur batterie)
  • Seite 130 ONNEES TECHNIQUES Dialog Vision Rack Dialog Vision Dual MODELE DVR 500 DVR 800 DVR 1100 DVD 1500 DVD 2200 DVD 3000 1100 1500 2200 3000 PUISSANCE NOMINALE Watts 1050 1540 2100 Tension nominale 230VCA 160VCA ± 3% ENTRÉE Place de tension 294VCA ±...
  • Seite 131 MANUAL DE USO...
  • Seite 132 ONTENIDO INTRODUCCIÓN PRESENTACIÓN ARACTERÍSTICAS ISTA DELANTERA ISTA POSTERIOR INSTALACIÓN PERTURA DEL EMBALAJE DE UN SAI Y COMPROBACIÓN DEL CONTENIDO PERTURA DEL EMBALAJE DE UN ACK DE BATERÍAS Y COMPROBACIÓN DEL CONTENIDO ERIFICACIÓN DEL APARATO OSICIÓN NSTALACIÓN DEL NSTALACIÓN VERTICAL DE LOS MODELOS NSTALACIÓN VERTICAL DE LOS MODELOS CON PACK DE BATERÍAS RIENTACIÓN DE LA PANTALLA...
  • Seite 133 ONTENIDO RS232 NTERFAZ UERTO OMA DE COMUNICACIÓN SOFTWARE OFTWARE DE SUPERVISIÓN Y CONTROL OFTWARE DE CONFIGURACIÓN ALARMAS Y SEÑALES SUSTITUCIÓN DE LA BATERÍA IALOG ISION OWER IALOG ISION IALOG ISION CARACTERÍSTICAS TÉCNICAS...
  • Seite 134 NTRODUCCIÓN Le agradecemos que haya elegido nuestro producto. Nuestra empresa es especialista en el diseño y producción de sistemas de alimentación ininterrumpida (SAI). Los SAI de esta serie son productos de alta calidad, diseñados cuidadosamente y construidos con la finalidad de garantizar las mejores prestaciones.
  • Seite 135: Características

    RESENTACIÓN Este manual describe un SAI que pertenece a la familia Dialog Vision (DVT, DVR, DVD) y a su correspondiente pack de baterías. Esta familia está compuesta de SAI del tipo line-interactive. El SAI garantiza protección a los aparatos que se le conectan de: a) ausencia de tensión de red b) sobretensiones de tipo impulsivo de la red de alimentación c) fluctuaciones del valor de la tensión de red...
  • Seite 136: Vista Delantera

    RESENTACIÓN Dialog Vision Tower Dialog Vision Rack Dialog Vision Dual 1100 1500 2000 1100 1500 2200 3000 Potencia nominal [VA] 1100 1500 2000 1100 1500 2200 3000 Potencia nominal 1050 1350 1050 1540 2100 Tensión nominal [Vac] 200/208/220/230/240 de salida...
  • Seite 137: Vista Posterior

    RESENTACIÓN ISTA POSTERIOR DVT 500/800/1100 DVT 1500/2000 DVR 500/800/1100 DVD 1500...
  • Seite 138 RESENTACIÓN DVD 2200/3000 Pack de baterías Dialog Vision 1. Interfaz serial RS232 2. Válvula de refrigeración 3. Protección Net/Tel 4. Protección térmica de entrada 5. Clavija de entrada de red IEC 6. Toma de salida IEC (máx. 10A) 7. Ranura de expansión para tarjetas de interfaz 8.
  • Seite 139 NSTALACIÓN PERTURA DEL EMBALAJE DE UN SAI Y COMPROBACIÓN DEL CONTENIDO Tras la apertura del embalaje, compruebe el contenido antes que nada. El embalaje debe contener:   Soportes de plástico (solo para el modelo DVD)  Cable de alimentación IEC 10A (IEC 16A solo ...
  • Seite 140 NSTALACIÓN PERTURA DEL EMBALAJE DE UN ACK DE BATERÍAS Y COMPROBACIÓN DEL CONTENIDO Tras la apertura del embalaje, compruebe el contenido antes que nada. El embalaje debe contener:  Pack de baterías  Conjunto de tiradores  Cable de conexión USB – Pack de baterías ...
  • Seite 141 NSTALACIÓN ERIFICACIÓN DEL APARATO Compruebe que el SAI se ha recibido en perfectas condiciones. Si se ha dañado el SAI durante el envío, conserve la caja y el embalaje. Avise al transportista y al vendedor inmediatamente. OSICIÓN Este SAI se debe instalar a cubierto con un flujo de aire adecuado, situado en un entorno limpio, alejado de zonas húmedas, de líquidos inflamables y de la luz directa del sol.
  • Seite 142 NSTALACIÓN NSTALACIÓN VERTICAL DE LOS MODELOS CON PACK DE BATERÍAS 1. Ensamble los soportes junto al alargador como se indica en la figura. 2. Ponga el SAI y el pack de baterías en posición vertical y coloque los dos soportes cerca de los equipos.
  • Seite 143: Orientación De La Pantalla

    NSTALACIÓN RIENTACIÓN DE LA PANTALLA PARA MODELOS La pantalla LCD de los modelos DVD se puede girar para adaptarla al tipo de instalación (rack o torre). Las siguientes indicaciones explican cómo se puede girar la pantalla: A. De rack a torre B.
  • Seite 144 NSTALACIÓN NSTALACIÓN DE LOS MODELOS EN UN ARMARIO RACK Los modelos DVR y DVD se pueden instalar en un armario rack de 19”. Las indicaciones que vienen a continuación describen cómo se debe realizar la instalación 1. Alinee y fije con los tornillos los tiradores en los lados del SAI. 2.
  • Seite 145 NSTALACIÓN ONEXIÓN Conecte el SAI a la red mediante el cable de entrada. Conecte las cargas a las tomas del SAI con los cables IEC-IEC o con un cable análogo que tenga una longitud máxima de 10 metros. Nota: no conecte cargas que absorban más de 10A a la toma IEC de 10A. Estas cargas se pueden conectar únicamente a la toma IEC de 16A cuando ésta esté...
  • Seite 146 NSTALACIÓN (EPO) NSTALACIÓN DEL MERGENCY OWER Las series DVR y DVD traen de serie el contacto EPO. El EPO permite el apagado inmediato del SAI sin esperar a que se haya completado el proceso de apagado. Nota: Una vez que se haya apagado el SAI empleando esta entrada, a pesar de que se cierre el contacto EPO, el aparato no se volverá...
  • Seite 147: Encendido Con La Batería

    NSTALACIÓN 2. Por lo tanto, conecte el otro extremo del cable al conector de batería en la parte trasera del SAI. 3. Para agregar más baterías (hasta una capacidad global máxima de 120Ah), repita los puntos anteriores. Nota: Cuando se instala un pack de baterías, el SAI se debe configurar con la capacidad correcta total de las baterías (empleando el software UPSTool) con el fin de calcular correctamente la autonomía residual y la carga de la batería.
  • Seite 148: Descripción Del Sistema

    ESCRIPCIÓN DEL SISTEMA ANEL FRONTAL En el panel frontal, además de la pantalla, están presentes los botones “ON”, “OFF” y “SELECT”. Panel frontal Display LCD Botòn ON Botòn OFF Botòn SELECT ANTALLA LCD...
  • Seite 149 ESCRIPCIÓN DEL SISTEMA La pantalla puede mostrar dos medidas al mismo tiempo, seleccionables entre las que están disponibles en la parte A y en la parte B de ésta. Descripción detallada para la parte A (a la izquierda): Parte A ①...
  • Seite 150 ESCRIPCIÓN DEL SISTEMA NDICACIONES DEL LCD Este capítulo ofrece una descripción detallada de todos los indicadores presentes en la pantalla. ICONOS ESTADO DESCRIPCIÓN Fijo Indica la presencia de una anomalía (véase el cuadro 3) Parpadeando El SAI se encuentra en modo de stand-by Fijo El SAI está...
  • Seite 151 ESCRIPCIÓN DEL SISTEMA Cuadro 1 Nivel de la batería 0%~20% 20%~40% 40%~60% 60%~80% 80%~100% Cuadro 2 Nivel de carga aplicada 0~5% 5~25% 25%~50% 50%~75% 75%~102% >102% flashing Si se produce una sobrecarga, el SAI suministra energía en cualquier caso a las cargas aplicadas (durante un intervalo que depende de la entidad de la sobrecarga) e indica inmediatamente el evento mediante la alarma (bip a intervalos regulares de un segundo).
  • Seite 152 ESCRIPCIÓN DEL SISTEMA NDICACIÓN DE ANOMALÍAS Todos los modelos Dialog Vision traen de serie un sistema de autodiagnóstico capaz de señalar posibles anomalías o averías en la pantalla. A continuación, se especifican los símbolos con la descripción y las posibles soluciones para comprobar las anomalías.
  • Seite 153 ESCRIPCIÓN DEL SISTEMA A continuación se muestra como ejemplo el procedimiento para configurar la pantalla de forma que tenga en la parte izquierda de la pantalla (Parte A) la “Tensión de entrada”, y en la parte derecha (Parte B), la “Capacidad en tantos por ciento de la batería”.
  • Seite 154 ESCRIPCIÓN DEL SISTEMA NDICACIONES ACÚSTICAS ESTADO DEL DESCRIPCIÓN SEÑAL ACÚSTICA ZUMBADOR a) Anomalía (por ej., por sobrecalentamiento Continuo o avería de la válvula) 1 2 3 4 5 6 7 8 9 10 b) Batería con sobrecarga Continuo 1 2 3 4 5 6 7 8 9 10 c) Sobrecarga Intermitente (1 s suena/1 s no)
  • Seite 155: Puerto De Comunicación

    Agente de red Ethernet con protocolo TCP/IP, HTTP y SNMP  Puerto RS232 + RS485 con protocolo JBUS / MODBUS Para verificar la disponibilidad de nuevas versiones software más actualizadas y para mayores informaciones con respecto a los accesorios disponibles, consultar el sitio web www.riello-ups.com.
  • Seite 156: Software

     Siga las instrucciones del programa de instalación.  Para verificar la disponibilidad de otros accesorios consultar la página web www.riello-ups.com. Para comprobar si existe una versión del software más actualizada, consulte la página del fabricante. OFTWARE DE CONFIGURACIÓN El software UPSTools permite la configuración y una completa visualización de los parámetros y del estado del SAI a través del puerto USB.
  • Seite 157: Alarmas Y Señales

    LARMAS Y SEÑALES CUADRO DE SEÑALES ACÚSTICAS DEL SAI Señal Causa Solución Bip cada 4 El SAI está funcionando Compruebe la tensión de entrada segundos con la batería La batería se está Guarde el trabajo y apague el aparato Bip cada descargando segundo Compruebe el indicador del nivel de carga y quite algunas...
  • Seite 158: Sustitución De La Batería

    USTITUCIÓN DE LA BATERÍA Cuando el indicador de batería averiada esté encendido y el SAI suene de forma intermitente (1 s suena/1 s no), se debería poder sustituir la batería. Revise la conexión de la batería o contacte con el vendedor para pedir una nueva.
  • Seite 159: Dialog Vision Rack

    USTITUCIÓN DE LA BATERÍA IALOG ISION 1. Retire el panel frontal del SAI tirando con ambas manos. 2. Desconecte el cable de las baterías del SAI. 3. Retire la placa que bloquea las baterías una vez que haya desatornillado los tornillos que anclan el soporte al SAI.
  • Seite 160: Ialog Ision Ual

    USTITUCIÓN DE LA BATERÍA IALOG ISION 1. Retire el panel frontal del SAI tirando con ambas manos. 2. Desatornille el soporte de la batería del SAI y retire la placa que fija las baterías. 3. Desconecte el cable. 4. Extraiga las baterías y colóquelas en una superficie plana. 5.
  • Seite 161: Características Técnicas

    ARACTERÍSTICAS TÉCNICAS Dialog Vision Tower MODELO DVT 500 DVT 800 DVT 1100 DVT 1500 DVT 2000 1100 1500 2000 POTENCIA NOMINAL Vatios 1050 1350 Tensión nominal 230VAC 160VAC ± 3% ENTRADA Rango de tensión 294VAC ± 3% Frecuencia 50/60Hz selección automática Precisión de la tensión (cuando 230V +5%, -10% funciona con la batería)
  • Seite 162 ARACTERÍSTICAS TÉCNICAS Dialog Vision Rack Dialog Vision Dual MODELO DVR 500 DVR 800 DVR 1100 DVD 1500 DVD 2200 DVD 3000 1100 1500 2200 3000 POTENCIA NOMINAL Vatios 1050 1540 2100 Tensión nominal 230VAC 160VAC ± 3% ENTRADA Rango de tensión 294VAC ±...

Inhaltsverzeichnis