
Verwandte Anleitungen für geo-FENNEL Multi-Digit Pro +


Inhaltszusammenfassung für geo-FENNEL Multi-Digit Pro +
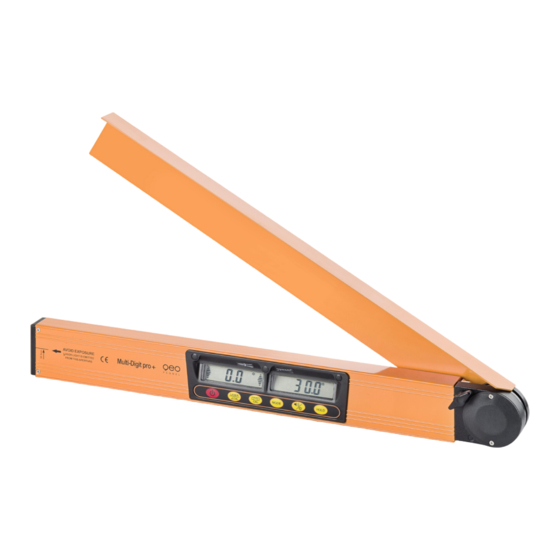
- Seite 1 DE | EN | FR Multi-Digit Pro + BEDIENUNGSANLEITUNG USER MANUAL MODE D‘EMPLOI www.geo-fennel.de www.geo-fennel.com www.geo-fennel.fr...
-
Seite 2: Lieferumfang
Sehr geehrter Kunde, vielen Dank für das Vertrauen, welches Sie uns beim Erwerb Ihres neuen geo-FENNEL-Gerätes ent- gegengebracht haben. Dieses hochwertige Qualitätsprodukt wurde mit größter Sorgfalt produziert und qualitätsgeprüft. Die beigefügte Anleitung wird Ihnen helfen, das Gerät sachgemäß zu bedienen. Bitte lesen Sie ins- besondere auch die Sicherheitshinweise vor der Inbetriebnahme aufmerksam durch. -
Seite 3: Stromversorgung
Technische Daten Messbereich Winkel 0° - 180° Auflösung 0,1° Genauigkeit Winkel ± 0,1° Messbereich Neigung 0° - 90° oder 0% - 100% Auflösung 0,1° oder 0,1% Genauigkeit Neigung 0,2° Reichweite Laser 20 m Genauigkeit Laser ± 0,5 mm / 1 m Wellenlänge 650 nm Laserklasse... -
Seite 4: Bedienelemente
BEDIENELEMENTE 1) ON/OFF Taste kurz drücken, um den Multi Digit Pro + ein- / ausschalten. 2) LASER / CAL Taste kurz drücken, um den Laserstrahl ein- / ausschalten. Taste lang drücken, um die Winkelkalibrierung zu aktivieren (siehe „Überprüfung und Kalibrierung“). 3) CAL Taste lang drücken, um die Kalibrierung des Horizontalwinkels zu aktivieren (siehe „Überprüfung und Kalibrierung“). -
Seite 5: Zusatzfunktionen
ZUSATZFUNKTIONEN Automatische Abschaltung Wenn 20 Min. lang keine Tastenbedienung erfolgt, schaltet sich das Gerät automatisch ab. Tonsignal Tonsignal einschalten. Das Gerät zeigt nun durch einen immer intensiver werdenden Ton an, dass man sich der horizontalen oder vertikalen Position nähert. Wenn das Gerät exakt horizontal oder vertikal ausgerichtet ist, erfolgt ein Dauerton. -
Seite 6: Kalibrierung Der Neigungsmessung
KALIBRIERUNG DER NEIGUNGSMESSUNG Gerät auf die gleiche waagerechte Fläche legen und einschalten. Taste CAL gedrückt halten, bis im Display „-0-“ erscheint. Dann ca. 3 Sek. warten und Taste CAL erneut drücken, bis im Display „-1-“ angezeigt wird. Gerät um 180° drehen und wieder an der gleichen Stelle aufsetzen. Ca. 3 Sek. warten und Taste CAL erneut drücken, bis im Display „-2-“... -
Seite 7: Neigungsmessung
NEIGUNGSMESSUNG Multi-Digit Pro + einschalten. Im linken Display wird die Neigung in Grad (°) angezeigt (kann mit Taste „MODE“ auf Prozent umge- stellt werden). Für Messungen Gerät grundsätzlich nur mit der geschliffenen Unterseite auflegen. Die beiden Pfeile zeigen an, in welche Richtung der Multi-Digit pro + gedreht werden muss, um die Waagerechte bzw. -
Seite 8: Sicherheitshinweise
SICHERHEITSHINWEISE UMSTÄNDE, DIE DAS MESSERGEBNIS VERFÄLSCHEN KÖNNEN Messungen durch Glas- oder Plastikscheiben; verschmutzte Laseraustrittsfenster; Sturz oder starker Stoß. Bitte Genauigkeit überprüfen. Große Temperaturveränderungen: Wenn das Gerät aus warmer Umgebung in eine kalte oder umgekehrt gebracht wird, vor Benutzung einige Minuten warten. UMGANG UND PFLEGE Messinstrumente generell sorgsam behandeln. -
Seite 9: Bestimmungsgemässe Verwendung
Das Gerät entspricht der Lasersicherheitsklasse 2 gemäß der Norm DIN EN 60825-1:2014. Das Gerät darf ohne weitere Sicherheitsmaßnahmen eingesetzt werden. Das Auge ist bei zufälligem, kurzzeitigem Hineinsehen in den Laserstrahl durch den Lidschlussreflex geschützt. Laserwarnschilder der Klasse 2 sind gut sichtbar am Gerät angebracht. www.geo-fennel.de G ERMAN Y Laser IEC 60825-1:2014 P ≤... - Seite 10 Dear customer, Thank you for your confidence in us having purchased a geo-FENNEL instrument. This manual will help you to operate the instrument appropriately. Please read the manual carefully - particularly the safety instructions. A proper use only guarantees a longtime and reliable operation.
-
Seite 11: Technical Data
Technical Data Working range angle 0° - 180° Resolution 0,1° Accuracy angle ± 0,1° Working range inclination 0° - 90° or 0% - 100% Resolution 0,1° or 0,1% Accuracy inclination 0,2° Range of laser 20 m Accuracy of laser ± 0,5 mm / 1 m Laser wave length 650 nm Laser class... - Seite 12 FEATURES 1) ON/OFF Press the button short to switch on/off Multi Digit Pro +. 2) LASER / CAL Press the button short to switch on/off the laser beam. Press the button long to activate the angle calibration procedure (see „Check and calibration“). 3) CAL Press the button long to activate the calibration of the horizontal angle (see „Check and calibration“).
-
Seite 13: Additional Functions
ADDITIONAL FUNCTIONS Automatic shut-off If no button is used for 20 min. the instrument will switch off automatically. Sound Switch the sound function on. The instrument will now show by a sound signal if the horizontal or vertical position approaches. The closer the position is the denser the sound signal will be. If the instrument is in correct vertical or horizontal position the sound will be continuous. - Seite 14 CALIBRATION OF SLOPE MEASUREMENT Set the instrument down on the same flat and even surface and switch it on. Press the button CAL until the display shows „-0-“ . Wait approx. 3 sec. and press the button CAL again until the display shows „-1-“ . Turn the unit by 180°...
-
Seite 15: Laser Beam
SLOPE MEASUREMENT Switch on Multi-Digit Pro +. The measured inclination value is shown in the left display. The standard unit of measurement is degrees (°) – this can be changed to percent (%) by pressing the button „MODE“ . Lay down the unit on the surface with the blank bottom side only. -
Seite 16: Safety Notes
SAFETY NOTES SPECIFIC REASONS FOR ERRONEOUS MEASURING RESULTS Measurements through glass or plastic windows; dirty laser emitting windows; after the instrument has been dropped or hit. Please check the accuracy. Large fluctuation of temperature: If instrument will be used in cold areas after it has been stored in warm areas (or the other way round) please wait some minutes before carrying out measurements. -
Seite 17: Intended Use Of Instrument
It is allowed to use the unit without further safety precautions. The eye protection is normally secured by the aversion responses and the blink reflex. The laser instrument is marked with class 2 warning labels. www.geo-fennel.de G ERMAN Y Laser IEC 60825-1:2014 P ≤... -
Seite 18: Livré Comme Suit
Cher client, Nous tenons à vous remercier pour la confiance que vous avez témoignée, par l‘acquisition de votre nouvel instrument geo-FENNEL. Les instructions de service vous aideront à vous servir de votre instrument de manière adéquate. Nous vous recommandons de lire avec soin tout particulièrement les consignes de sécurité de ladite notice avant la mise en service de votre appareil. -
Seite 19: Données Techniques
Données techniques Plage de mesure d‘angle 0° - 180° Résolution 0,1° Précision d‘angle ± 0,1° Plage de mesure d‘inclinaison 0° - 90° ou 0% - 100% Résolution 0,1° ou 0,1% Précision d‘inclinaison 0,2° Portée du laser 20 m Précision de laser ±... -
Seite 20: Clavier Et Affichage
CLAVIER ET AFFICHAGE 1) ON/OFF Mettre le Multi-Digit Pro + en marche ou en arrêt. 2) LASER / CAL Appuyez court pour mettre le faisceau laser en marche/arrêt. Appuyez long pour activer le calibrage de l‘angle (voir en bas). 3) CAL Appuyez long pour activer le calibrage de l‘angle horizontal (voir ci-après). -
Seite 21: Fonctions Supplémentaires
FONCTIONS SUPPLÉMENTAIRES Arrêt automatique Aprés 20 min. sans opération l‘instrument se met en arrêt automatiquement. Signal sonore Mettre en circuit le signal sonore. Par un son d’intensité qui va grandissant, l’instrument indique u’il s’approche d’une position horizontale ou verticale. Puis un son continue retentit lorsque l’instrument est exactement ajusté... - Seite 22 CALIBRAGE DE MESURAGE D‘INCLINAISON Placer l‘appareil sur la même surface horizontale et mettre l‘appareil en marche. Presser la touche CAL (affichage à l‘écran „0“). Attendre 3 sec. et presser à nouveau la touche CAL (affichage à l‘écran „1“). Faire tourner l‘appareil de 180° et placer l’appareil sur la même surface comme avant. Attendre 3 sec. et presser à...
-
Seite 23: Faisceau Laser
MESURAGE D‘INCLINAISON Mettre le Multi-Digit Pro + en marche. L ‘écran de gauche affiche la valeur de l‘inclinaison en degrés (°); possibilité d‘inverser la valeur exprimée en pour cent, en pressant la touche „MODE“ . En principe, poser l‘appareil seulement sur la face inférieure polie avant d‘effectuer des mesures. -
Seite 24: Consignes De Sécurité
CONSIGNES DE SÉCURITÉ CIRCONSTANCES POUVANT FAUSSER LES RÉSULTATS DE MESURES Mesures effectuées à travers des plaques de verre ou de matière plastique; mesures effectuées à travers la fenêtre de sortie du faisceau laser lorsqu‘elle est sale. Mesures après que le niveau soit tombé ou ait subi un choc très fort. Mesures effectuées pendant de grandes différences de température - p. - Seite 25 être utilisé sans avoir recours à d’autres mesures de sécurité. Au cas où l’utilisateur a regardé un court instant le faisceau laser, les yeux sont tout de même protégés par le réflexe de fermeture des paupières. Les pictogrammes de danger de la classe 2 sont bien visibles sur le niveau. www.geo-fennel.de G ERMAN Y Laser IEC 60825-1:2014 P ≤...
- Seite 28 GmbH Technische Änderungen vorbehalten. Kupferstraße 6 All instruments subject to technical changes. D-34225 Baunatal Sous réserve de modifications techniques. Tel. +49 561 / 49 21 45 +49 561 / 49 72 34 info@geo-fennel.de 01/2016 www.geo-fennel.de Precision by tradition.