Herunterladen Inhalt Inhalt Diese Seite drucken
Mima xari Gebrauchsanleitung Und Gewährleistung
Vorschau ausblenden Andere Handbücher für xari:
Inhaltsverzeichnis

Werbung

Verfügbare Sprachen
  • DE

Verfügbare Sprachen

  • DEUTSCH, seite 46
Gebrauchsanleitung und Gewährleistung
®
user manual & warranty
manual de usuario y garantía
manual do usuário e garantia
handleiding & garantie
mode d'emploi et garantie
manuale dell'utente e garanzia
ES
PT
NL
DE
FR
IT
1

Werbung

Inhaltsverzeichnis
loading

Inhaltszusammenfassung für Mima xari

  • Seite 1 user manual & warranty manual de usuario y garantía manual do usuário e garantia handleiding & garantie Gebrauchsanleitung und Gewährleistung mode d’emploi et garantie manuale dell’utente e garanzia ®...
  • Seite 2: Inhaltsverzeichnis

    Our products are designed and developed with great care for your own comfort and safety and that of your child. We hope you enjoy xari. Please read these instructions carefully before using the pushchair for the first time, this will guarantee safe usage of the product and enable you to find out about all its handy features.
  • Seite 3: What You Get

    WHAT YOU GET You have received 2 boxes. Please make sure that they contain all the parts that are listed below. If anything is missing, please contact your supplier. Box 1: Box 2: 1 chassis with 2 baskets attached 1 seat pad with safety harness 1 seat with carrycot inside 1 apron flap 1 safety bar...
  • Seite 4: Please Note

    • Do not use the stroller if any parts are damaged or • It may be dangerous to leave your child unattended. missing. It may be unsafe to use replacement parts that or not supplied by mima. • Ensure that all the locking devices are engaged before use.
  • Seite 5: First Steps

    Insert the wheel rod into the wheel fitting and push in until it clicks. 5. Front wheel swivel lock Use the front wheel swivel lock when you are using xari on rough terrain. Push down the swivel lock button to activate. Pull it up again to deactivate.
  • Seite 6: Handlebar Height

    (don’t force the front fork in advance). Rotate the handlebar into the desired position. 9. Fold chassis (with seat attached) • xari can be folded with the seat attached (i.e. in its upright position and forward facing). • cannot be folded with the carrycot attached.
  • Seite 7: Stage 1: Baby

    STAGE 1: BABY CARRYCOT • When using for children under the age of 6 xari months, we recommend using the supplied carrycot until the child can sit unaided. 11. Set up carrycot Zip open the seat and take out the carrycot.
  • Seite 8: Stage 2: Toddler

    STAGE 2: TODDLER SAFETY HARNESS • Whenever a child is placed in the seat, ensure that the safety harness is correctly fitted. • The shoulder straps can be set at two different height positions. Choose the position closest to the top of the child´s shoulders.
  • Seite 9: Accessories

    ACCESSORIES SAFETY BAR • Always use the safety bar for the safety of your child. 24. Remove safety bar covers Push in the buttons and slide the covers off. Keep the covers in a safe place for future use. 25. Attach safety bar While pressing the two buttons on the outside of the 25 + 26 safety bar, push it down onto the seat frame, until it clicks.
  • Seite 10: Apron

    Stretch the rain cover over the seat or carrycot and fix the velcro straps around the seat brackets. OTHER ACCESSORIES We frequently develop new accessories for xari. For more details please visit www.mimakids.com or contact your retailer.
  • Seite 11: Care And Maintenance

    CARE AND MAINTENANCE • To keep in perfect condition please go through the xari following steps regularly. • Fabrics and plastics conform to the highest grade of colourfastness. But excessive exposure to the sun can cause premature fading of plastics and fabrics.
  • Seite 12: Warranty

    WARRANTY REGISTER YOUR PRODUCT ONLINE AT WWW.MIMAKIDS.COM This will activate your warranty and help us keep you informed about any possible product updates. Your product complies with the current safety requirements and is guaranteed to be free from any manufacturing or material defects at the time of purchase.
  • Seite 13 El diseño y desarrollo de nuestros productos se realiza con gran cuidado, teniendo en cuenta tanto la comodidad y seguridad de vuestro hijo como la vuestra. Esperamos que disfrutéis de xari. Por favor, leer estas instrucciones atentamente antes de utilizar el cochecito por primera vez. Os permitirá conocer todas las caraterísticas y garantizaran un uso seguro.
  • Seite 14 COMPONENTES Has recibido dos cajas. Por favor, comprueba que las cajas contengan todas las piezas enumeradas a continuación. En caso de que falte algo, por favor ponte en contacto con tu vendedor. Caja 1: Caja 2: 1 chasis con 2 cestas incorporadas 1 almohadilla para el asiento con arnés de seguridad 1 asiento con capazo en el interior 1 solapa cubrepies...
  • Seite 15: Presta Atención

    • No permita que su niño juegue con este producto. proporcionado por mima. • El capazo es adecuado para un niño que no pueda • En cuanto tu hijo pueda sentarse en el asiento mantenerse sentado por sí...
  • Seite 16: Primeros Pasos

    5. Bloqueo antigiro de las ruedas delanteras Utiliza el bloqueo antigiro de las ruedas delanteras cuando utilices xari por un terreno agreste. Presiona el botón de bloqueo antigiro para activarlo. Vuelve a subirlo para desactivarlo.
  • Seite 17: Freno De Estacionamiento

    Mueve el manillar a la posición deseada. 9. Plegado del chasis (con el asiento) • xari puede plegarse con el asiento puesto (es decir, en su posición vertical y viendo hacia delante). • no puede plegarse con el capazo puesto.
  • Seite 18 FASE 1: BEBÉ CAPAZO • Para utilizar con niños menores de 6 meses, xari recomendamos utilizar el capazo suministrado hasta que el niño pueda sentarse sin ayuda. 11. Montaje del capazo Abre las cremalleras del asiento y retira el capazo.
  • Seite 19 FASE 2: NIÑO PEQUEÑO ARNÉS DE SEGURIDAD • Siempre que coloques a un niño en el asiento, asegúrate de que el arnés de seguridad esté ajustado correctamente. • Las correas para los hombros pueden ponerse en dos alturas diferentes. Escoge la posición más próxima a la parte superior de los hombros del niño.
  • Seite 20: Barra De Seguridad

    ACCESORIOS BARRA DE SEGURIDAD • Por la seguridad de tu hijo, utiliza siempre la barra de seguridad. 24. Retirada de las fundas de la barra de seguridad Presiona los botones y retira las fundas. Guarda las fundas en un lugar seguro para usos futuros. 25.
  • Seite 21: Protector De Lluvia

    Extiende el protector de lluvia sobre el asiento o capazo y fija las correas de velcro alrededor de los soportes del asiento. OTROS ACCESORIOS Desarrollamos nuevos accesorios para xari con frecuencia. Para más detalles, por favor visita www.mimakids.com ponte en contacto con tu vendedor.
  • Seite 22: Cuidado Y Mantenimiento

    CUIDADO Y MANTENIMIENTO • Para conservar el cochecito en perfectas xari condiciones, por favor sigue los siguientes pasos de manera regular. • Los tejidos y plásticos cumplen el más alto nivel de resistencia del color. Pero una excesiva exposición al sol puede causar el desteñido prematuro de los plásticos...
  • Seite 23: Condiciones De La Garantía

    GARANTÍA REGISTRA TU PRODUCTO ONLINE EN WWW.MIMAKIDS.COM Esto activará tu garantía y nos permitirá mantenerte informado de posibles actualizaciones del producto. Tu producto cumple con los actuales requisitos de seguridad y se garantiza que en el momento de su compra está libre de defectos de fabricación y materiales.
  • Seite 24 Projetamos e desenvolvemos nossos produtos cuidadosamente, tendo em mente o conforto e segurança para si e seu filho. Esperamos que goste de usar o xari. Por favor, leia estas instruções com cuidado antes de utilizá-lo pela primeira vez. Desta forma, poderá observar todas as características e garantir um uso seguro.
  • Seite 25 COMPONENTES Recebera duas caixas. Favor verificar se tem todas as peças listadas abaixo. Se estiver a faltar alguma coisa, favor entrar em contacto com o revendedor. Caixa 1: Caixa 2: 1 chassi com 2 cestas 1 almofada de assento com cinto de segurança 1 assento com berço embutido 1 aba de tapa-pés 1 barra de segurança...
  • Seite 26 Pode ser perigoso usar peças mm. Não adicione um colchão adicional no berço, use de reposição que não são fornecidas pela mima. apenas o que foi fornecido pela mima. • Não permita que o seu filho brinque com este produto.
  • Seite 27: Como Começar

    5. Travar o pino giratório da roda dianteira • Utilize a trava do pino giratório da roda traseira quando estiver utilizando o em terreno irregular. xari Aperte o botão de trava do pino giratório para baixo para ativar. Aperte para cima novamente para desativar.
  • Seite 28: Dobrar E Desdobrar

    9. Dobrar o chassi (com o assento acoplado) • pode ser dobrado com o assento acoplado (ou xari seja, em sua posição vertical e com a face para frente). • não pode ser dobrado com o berço acoplado. xari Gire o guiador até...
  • Seite 29 FASE 1: BEBÉ BERÇO • Quando utiliza por crianças abaixo de 6 meses, xari recomendamos o uso do berço fornecido com a unidade, até que a criança possa sentar-se sem ajuda. 11. Montar o berço Abra o zíper do assento e tire o berço para fora.
  • Seite 30: Cinto De Segurança

    FASE 2: CRIANÇA PEQUENA CINTO DE SEGURANÇA • Quando a criança estiver sentada no assento, certifique-se de que o cinto de segurança esteja atado correctamente. • As tiras do ombro podem ser colocadas em duas posições diferentes. Escolha a posição mais próxima à parte de cima dos ombros da criança.
  • Seite 31 ACESSÓRIOS BARRA DE SEGURANÇA • Sempre use a barra de segurança para a segurança do seu filho. 24. Remover as tampas da barra de segurança Aperte os botões e puxe as tampas para fora. Guarde-as em um lugar seguro para uso futuro. 25.
  • Seite 32: Capa De Chuva

    Estique a capa de chuva sobre o assento ou berço e prenda as tiras de velcro ao redor das hastes do assento. OUTROS ACESSÓRIOS Frequentemente desenvolvemos novos acessórios para o xari. Para mais detalhes, visite nosso site www.mimakids.com ou entre em contacto com o seu revendedor.
  • Seite 33: Cuidados E Manutenção

    CUIDADOS E MANUTENÇÃO • Observe os seguintes passos regularmente a fim de manter xari em perfeitas condições. • Os tecidos e partes plásticas estão de acordo com os mais altos padrões de tratamento de cores. Entretanto, exposição excessiva ao sol pode causar desbotamento prematuro de partes plásticas e tecidos.
  • Seite 34: Condições Da Garantia

    GARANTIA REGISTRE SEU PRODUTO ON-LINE EM WWW. MIMAKIDS.COM Este procedimento ativará sua garantia e permitirá que nós o informemos sobre todas as atualizações possíveis do produto. Seu produto atende aos requisitos atuais de segurança e é garantido contra defeitos de mão de obra de fabricação e defeitos de materiais no momento da compra.
  • Seite 35 Bij de ontwikkeling van dit product heeft de veiligheid, het comfort en gebruiksgemak van u en uw kind steeds voorop gestaan. Wij hopen dat u veel plezier zult hebben van xari. Lees deze gebruikshandleiding zorgvuldig door voordat xari voor de eerste keer gebruikt. Op deze manier kunt u uzelf vertrouwd maken met alle kenmerken van dit product en het veilig gebruiken.
  • Seite 36: Wat U Ontvangt

    WAT U ONTVANGT U hebt twee dozen gekregen. Controleer of alle onderstaande onderdelen meegeleverd zijn. Neem contact op met uw leverancier indien een onderdeel ontbreekt. Doos 1: Doos 2: 1 chassis met twee mandjes 1 zitkussen met veiligheidsharnas 1 zitje met kinderwagenbak 1 dekklep 1 veiligheidsbeugel 1 kinderwagenmatras...
  • Seite 37: Let Op

    LET OP BELANGRIJK! • Lees deze instructies zorgvuldig door voordat u xari • Alles wat u aan de duwer hangt maakt xari minder voor de eerste keer gebruikt. Bewaar deze instructies stabiel en vergroot het kantelgevaar. op een veilige plaats voor latere verwijzing. De •...
  • Seite 38: Beginnen

    Steek de wielstang in de wielfitting en duw totdat het op zijn plaats kllikt. 5. Zwenkvergrendeling voorwielen Gebruik de zwenkvergrendeling voor de voorwielen wanneer u xari op ruig terrein gebruikt. Duw de zwenkvergrendelingsknop naar beneden om te activeren. Trek het omhoog om het te desactiveren. 6. Voorwielen verwijderen Schuif de ontgrendelingsknop zijwaarts en trek het voorwiel eruit.
  • Seite 39: Duwerhoogte

    Nooit de vooras met kracht lostrekken. Draai de duwer tot de gewenste positie. 9. Chassis opvouwen (met zitje bevestigd) • kan opgevouwen worden zonder eerst het zitje xari te verwijderen (d.w.z. in de rechtopstaande positie en naar voren wijzend). • xari kan niet opgevouwen worden wanneer de kinderwagenbak bevestigd is.
  • Seite 40: Fase 1: Baby

    FASE 1: BABY KINDERWAGENBAK • Wanneer xari voor kinderen jonger dan 6 maanden wordt gebruikt, adviseren wij dat u de meegeleverde kinderwagenbak gebruikt totdat het kind zonder hulp kan zitten. 11. Kinderwagenbak opzetten Rits het zitje open en haal de kinderwagenbak eruit.
  • Seite 41: Fase 2: Peuter

    FASE 2: PEUTER VEILIGHEIDSHARNAS • Wanneer een kind in het zitje wordt geplaatst, is het belangrijk te controleren of het veiligheidsharnas goed is bevestigd. • De schoudergordels kunnen op twee verschillende hoogtes worden ingesteld. Kies de positie het dichtstbij de bovenkant van de schouders van het kind. 17.
  • Seite 42: Accessoires

    ACCESSOIRES VEILIGHEIDSBEUGEL • Gebruik de veiligheidsbeugel altijd in het belang van de veiligheid van uw kind. 24. De doppen van de veiligheidsbeugel verwijderen Druk op de knoppen en schuif de doppen los. Bewaar de doppen op een veilige plaats voor toekomstig gebruik. 25.
  • Seite 43: Kinderwagendekje

    Span de regenhoes over het zitje of de kinderwagenbak en maak de klittenbanden om de zitconsoles heen vast. OVERIGE ACCESSOIRES Wij ontwikkelen voortdurend nieuwe accessoires voor het xari assortiment. www.mimakids.com of neem contact op met uw leverancier voor meer informatie.
  • Seite 44: Zorg En Onderhoud

    ZORG EN ONDERHOUD • Loop regelmatig de volgende stappen door om xari perfecte staat te behouden. • Stoffen en kunststoffen voldoen aan de hoogste klasse van kleurechtheid. Buitengewone blootstelling aan de zon kan echter in het voortijdig verkleuren van kunststoffen en stoffen resulteren.
  • Seite 45: Garantie

    GARANTIE REGISTREER UW PRODUCT ONLINE OP WWW. MIMAKIDS.COM Registreer dit product online om de garantie te activeren en meer informatie te ontvangen over eventuele updates van producten. Dit product voldoet aan de huidige veiligheidsvoorschriften. De fabrikant staat er borg voor dat dit product geen enkel gebrek vertoont op gebied van samenstelling en fabricage op het moment van aankoop.
  • Seite 46 Ihr Kind und so praktisch wie möglich für Sie selbst zu machen. Wir hoffen daher, dass Sie viel Freude mit Ihrem xari haben werden. Bitte lesen Sie diese Gebrauchsanleitung vor der ersten Verwendung sorgfältig durch, um sich mit sämtlichen Funktionen vertraut zu machen und einen sicheren Umgang mit dem Produkt zu gewährleisten.
  • Seite 47: Produktübersicht

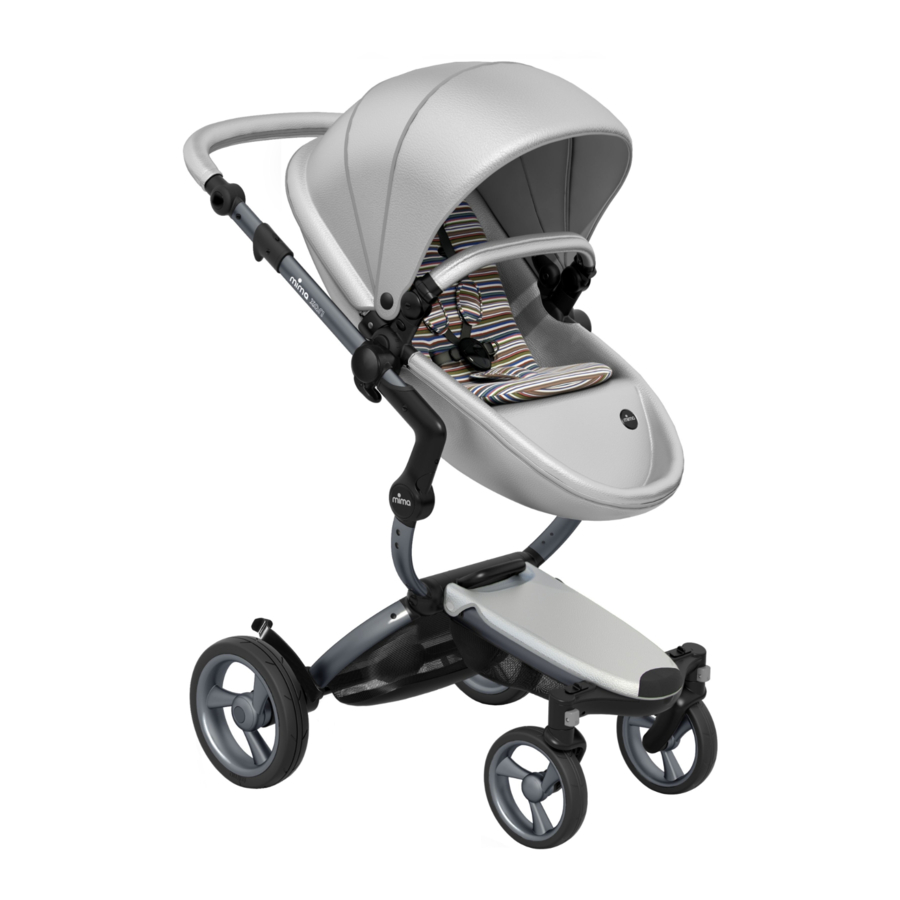
    PRODUKTÜBERSICHT Sie haben zwei Boxen erhalten. Bitte vergewissern Sie sich, dass alle unten aufgeführten Teile darin enthalten sind. Sollte etwas fehlen, wenden Sie sich bitte an Ihren Händler. Box 1: Box 2: 1 Gestell mit 2 befestigten Körben 1 Sitzeinlage mit Sicherheitsgurt 1 Sportwagensit mit Tragetasche 1 Abdeckungklappe 1 Sicherheitsbügel...
  • Seite 48: Wichtige Hinweise

    • Fügen Sie keine Matratze hinzu, die dicker als 20 darf der Wagen nicht länger verwendet werden. Bei mm ist. Legen Sie keine zusätzliche Matratze in die Verwendung von Ersatzteilen, die nicht von mima Tragetasche, sondern verwenden Sie ausschließlich die geliefert wurden, kann die Sicherheit beeinträchtigt mima mitgelieferte Matratze.
  • Seite 49: In Betrieb Nehmen

    4. Anbringen der Vorderräder Schieben Sie die Radstange in das Radbefestigungsloch, bis sie einrastet. 5. Schwenkarretierung der Vorderräder Wenn Sie den xari über unebenes Gelände schieben, empfiehlt es sich, den Schwenkmechanismus der Vorderräder zu arretieren. Drücken Sie hierzu den Schwenkarretierungsknopf nach unten.
  • Seite 50: Schieberhöhe

    Ziehen Sie nie der Vorachse vor es auseinandergeklappt ist. 9. Zusammenklappen des Gestells (mit Sportwagensitz) • Der kann mit befestigtem Sportwagensitz (d. xari h. in aufrechter Position und nach vorne zeigend) zusammengeklappt werden. • Der xari kann nicht mit befestigter Tragetasche zusammengeklappt werden.
  • Seite 51: Phase 1: Baby

    PHASE 1: BABY TRAGETASCHE • Für Kinder bis zu 6 Monaten empfehlen wir die Verwendung der mitgelieferten Tragetasche, bis das Kind ohne Hilfe sitzen kann. 111. Vorbereitung der Tragetasche Öffnen Sie den Reißverschluss des Sportwagensitzes und holen Sie die Tragetasche heraus. Drücken Sie die beiden Klappen unter den Wannenrand.
  • Seite 52: Phase 2: Kleinkind

    PHASE 2: KLEINKIND SICHERHEITSGURT • Achten Sie darauf, dass der Sicherheitsgurt jederzeit korrekt angelegt ist, wenn ein Kind im Wagen sitzt. • Für die Schultergurte gibt es jeweils zwei Befestigungsschlitze in unterschiedlicher Höhe. Wählen Sie die Schlitze, die der Schulterhöhe des Kindes am nächsten sind.
  • Seite 53: Zubehör

    ZUBEHÖR SICHERHEITSBÜGEL • Verwenden Sie zur Sicherheit Ihres Kindes stets den Sicherheitsbügel. 24. Entfernen der Lochstopfen Drücken Sie auf die Knöpfe und ziehen Sie die Lochstopfen ab. Bewahren Sie die Stopfen zur späteren Verwendung gut auf. 25 + 26 25. Anbringen des Sicherheitsbügels Halten Sie die beiden Knöpfe an der Außenseite des Sicherheitsbügels gedrückt und stecken Sie den Bügel auf den Sitzrahmen, bis er einrastet.
  • Seite 54: Tragetaschenabdeckung

    Spannen Sie die Regenhaube über den Sportwagensitz oder die Tragetasche und befestigen Sie die Klettverschlussteile um die Sitzhalterung. SONSTIGES ZUBEHÖR Wir entwickeln ständig neues Zubehör für den xari. Weitere Informationen finden Sie auf unserer Website unter www.mimakids.com oder fragen Sie Ihren Fachhändler.
  • Seite 55: Pflege Und Instandhaltung

    PFLEGE UND INSTANDHALTUNG • Führen Sie bitte regelmäßig die folgenden Schritte aus, um den xari in perfektem Zustand zu halten. • Alle Materialien und Kunststoffe entsprechen den höchsten Standards für Farbechtheit. Bei übermäßiger Sonneneinwirkung kann es jedoch zu vorzeitigem Verblassen der Farben kommen.
  • Seite 56: Gewährleistung

    GEWÄHRLEISTUNG REGISTRIEREN SIE IHR PRODUKT ONLINE UNTER WWW.MIMAKIDS.COM Dies wird Ihre Garantie aktivieren und uns ermöglichen, Sie über mögliche Produktaktualisierungen zu informieren. Ihr Produkt entspricht den aktuellen Sicherheitsanforderungen und ist beim Kauf garantiert frei von Material- und Verarbeitungsfehlern. Sollte es jedoch nach dem Kauf innerhalb der Gewährleistungsfrist trotz einer normalen und wie in der Gebrauchsanleitung beschriebenen Verwendung Material- und/oder Verarbeitungsfehler aufweisen, wenden Sie sich bitte an Ihren Fachhändler.
  • Seite 57 ! Nous avons conçu et développé nos produits avec le plus grand soin pour vous garantir confort et sécurité. Nous espérons que vous apprécierez votre xari. Veuillez lire attentivement des instructions avant votre première utilisation. Vous pourrez ainsi profiter pleinement de toutes ses fonctions en toute sécurité.
  • Seite 58: Éléments Fournis

    ÉLÉMENTS FOURNIS Vous avez reçus deux cartons. Veuillez vous assurer que tous les éléments énumérés ci-dessous sont bien fournis. Si un élément est manquant, veuillez contacter votre distributeur. Carton 1: Carton 2: 1 châssis avec 2 paniers fixés 1 coussin de siège avec harnais de sécurité 1 siège contenant une nacelle 1 tablier du housse 1 arceau de sécurité...
  • Seite 59: Attention

    Il peut être dangereux d’utiliser des pièces de rechange non fournies par • N’ajoutez pas de matelas d’une épaisseur supérieure à mima. 20 mm. N’ajoutez pas de matelas supplémentaire dans la nacelle, utilisez uniquement celui qui est fourni par •...
  • Seite 60: Pour Commencer

    5. Blocage des roues pivotantes avant Utilisez le blocage de roues avant pivotantes si vous utilisez votre xari sur un terrain accidenté. Appuyez sur le bouton de blocage des roues pivotantes pour activer cette fonction.
  • Seite 61: Hauteur Du Guidon

    Évitez forcer la fourche avant le dépliage. 9. Plier le châssis (avec le siège fixé) peut être plié avec le siège fixée (c.-à.-d. à la • xari verticale et en position face route). • ne peut pas être plié avec la nacelle fixée. xari fig.
  • Seite 62: Phase 1 : Bébé

    PHASE 1 : BÉBÉ NACELLE • En cas d’utilisation de pour des enfants de moins xari de 6 mois, nous conseillons d’utiliser la nacelle fournie jusqu’à ce que l’enfant soit en âge de s’asseoir seul. 11. Installer la nacelle Ouvrez la fermeture éclair du siège et sortez la nacelle.
  • Seite 63: Phase 2 : Tout-Petit

    PHASE 2 : UN TOUT-PETIT HARNAIS DE SÉCURITÉ • Veillez à ce que le harnais de sécurité soit toujours correctement fixé quand un enfant est assis dans le siège. • Les sangles pour les épaules peuvent être réglées dans deux positions de hauteur. Choisissez la position la plus proche du haut des épaules de l’enfant.
  • Seite 64: Accessoires

    ACCESSOIRES ARCEAU DE SÉCURITÉ • Veillez à toujours utiliser l´arceau de sécurité pour la sécurité de votre enfant. 24. Enlever les housses de l´arceau de sécurité Appuyez sur les boutons et enlevez les housses en les faisant glisser. Garder les housses dans un endroit sûr pour toute utilisation ultérieure.
  • Seite 65: Housse

    Étirez l’habillage de pluie pardessus le siège ou la nacelle et fixez les sangles en velcro autour des pattes du siège. AUTRES ACCESSOIRES Nous concevons régulièrement de nouveaux accessoires pour xari. Pour plus de détails, venez visiter notre site sur www. mimakids.com ou contactez votre distributeur.
  • Seite 66: Entretien

    ENTRETIEN • Afin de préserver le bon état de xari, il est important de suivre les étapes suivantes régulièrement. • Les tissus et les plastiques répondent aux exigences les plus strictes en matière de solidité des couleurs Toute exposition excessive au soleil peut toutefois entraîner une décoloration prématurée des plastiques et des...
  • Seite 67: Garantie

    GARANTIE ENREGISTREZ VOTRE PRODUIT EN LIGNE SUR WWW. MIMAKIDS.COM Cela activera votre garantie et nous permettra de vous tenir informé de toute nouveauté de produit éventuelle. Votre produit répond à toutes les normes de sécurité en vigueur et il est garanti contre tout défaut de fabrication et de façon et de matériau au moment de l’achat.
  • Seite 68 ALTRI ACCESSORI PULIZIA E MANUTENZIONE ........77 Cari genitori, nonni, amici, GARANZIA ..............78 Grazie per aver accolto xari nella vostra famiglia! I nostri prodotti sono progettati e sviluppati con grande attenzione al comfort e alla sicurezza, sia vostra che del bambino.
  • Seite 69: Componenti Dell' Articolo

    COMPONENTI DELL’ ARTICOLO Avete ricevuto 2 scatole. Assicuratevi che contengano tutte le componenti di seguito elencate. Qualora mancasse qualche elemento, vi invitiamo a contattare il vostro fornitore. Scatola 1: Scatola 2: 1 telaio con 2 cestelli incorporati 1 imbottitura passegginocon cintura di sicurezza 1 seduta con sistema “carrycot inside”...
  • Seite 70: Informazione Importante

    • Qualsiasi peso attaccato all’impugnatura compromette la stabilità di xari e aumenta il rischio di accidentale • Questo passeggino è adatto per bambini dalla nascita ribaltamento dello stesso.
  • Seite 71: Primi Passi

    5. Dispositivo di bloccaggio ruote anteriori piroettanti Utilizzare il dispositivo di bloccaggio delle ruote anteriori piroettanti quando si adopera xari su terreni accidentati. Spingere verso il basso il dispositivo di bloccaggio per attivarlo. Tirarlo nuovamente verso l’alto per disattivarlo.
  • Seite 72: Altezza Del Manico

    Solleva il manico fino a quando non è fissato in posizione. 9. Chiudere il telaio (con seggiolino agganciato) • può essere chiuso con il seggiolino attaccato (in xari posizione diritta e rivolto in avanti). • xari non può essere chiuso con la navicella attaccata.
  • Seite 73: Fase 1: Neonato

    FASE 1: NEONATO NAVICELLA • Quando si utilizza per bambini di età inferiore a 6 xari mesi, si raccomanda l’uso della navicella in dotazione fino a quando il bambino non sarà in grado di sedersi senza aiuto. 11. Agganciare la navicella Premere i due lembi al di sotto della navicella.
  • Seite 74: Fase 2: Bambino

    FASE 2: BAMBINO CINTURE DI SICUREZZA • Quando un bambino è all’interno del seggiolino, assicuratevi che le cinture di sicurezza siano fissate. • Le cinture di sicurezza per le spalle possono essere posizionate su due differenti altezze. Scegliere la posizione più vicina alle spalle del bambino. 17.
  • Seite 75: Accessori

    ACCESSORI MANIGLIONE DI SICUREZZA • Utilizzare sempre il maniglione per la sicurezza del vostro bambino. 24. Rimuovere i rivestimenti del maniglione di sicurezza Aprire i bottoni ed estrarre i rivestimenti. Riporre i rivestimenti in un luogo sicuro per il futuro utilizzo. 25.
  • Seite 76: Coprigambe

    Stendere il parapioggia lungo il seggiolino o la navicellae fissare i lembi del velcro attorno ai ganci del seggiolino. ALTRI ACCESSORI Sviluppiamo frequentemente nuovi accessori per xari. Per maggiori dettagli vi invitiamo a visitare il sito www.mimakids.com o contattare il vostro rivenditore.
  • Seite 77: Pulizia E Manutenzione

    PULIZIA E MANUTENZIONE • Per conservare in condizioni ottimali, vi invitiamo xari a osservare regolarmente le seguenti raccomandazioni. • Il colore delle parti in tessuto o plastica ha la massima resistenza. Tuttavia, l’eccessiva esposizione al sole può causare un prematuro deterioramento del colore dei materiali.
  • Seite 78: Garanzia

    GARANZIA REGISTRATE IL VOSTRO PRODOTTO ON-LINE SUL SITO WWW.MIMAKIDS.COM In questo modo attiverete la vostra garanzia e noi saremo in grado di informarvi circa i possibili aggiornamenti del prodotto. Il vostro prodotto è conforme agli attuali requisiti di sicurezza ed è privo di difetti di fabbricazione o dei materiali al momento dell’acquisto.
  • Seite 79 NOTES...
  • Seite 80 All rights reserved © Mima International Ltd. 2013...

Inhaltsverzeichnis