Herunterladen Inhalt Inhalt Diese Seite drucken
Videotec HTG Bedienungsanleitung
Vorschau ausblenden Andere Handbücher für HTG:
Inhaltsverzeichnis

Werbung

Verfügbare Sprachen
  • DE

Verfügbare Sprachen

  • DEUTSCH, seite 41
English - Instruction manual
EN
Italiano - Manuale di istruzioni
IT
Français - Manuel d'instructions
FR
Deutsch - Bedienungsanleitung
DE
Русский - Руководство по эксплуатации
RU
Large housing for thermal cameras
HTG

Werbung

Inhaltsverzeichnis
loading

Inhaltszusammenfassung für Videotec HTG

  • Seite 1 Large housing for thermal cameras English - Instruction manual Italiano - Manuale di istruzioni Français - Manuel d’instructions Deutsch - Bedienungsanleitung Русский - Руководство по эксплуатации...
  • Seite 3 ENGLISH Large housing for thermal cameras English - Instruction manual...
  • Seite 5: Inhaltsverzeichnis

    Contents E N G L I S H 1 About this manual ......................4 1.1 Typographical conventions ..........................4 2 Notes on copyright and information on trademarks ..........4 3 Safety rules........................4 4 Identification ........................5 4.1 Product description and type designation..................... 5 4.2 Product marking ..............................
  • Seite 6: About This Manual

    1 About this manual 3 Safety rules Read all the documentation supplied carefully before CAUTION! Device installation and installing and using this unit. Keep the manual in a maintaining must be performed by convenient place for future reference. specialist technical staff only. 1.1 Typographical conventions •...
  • Seite 7: Identification

    4 Identification 5.2 Unpacking When the product is delivered, make sure that the 4.1 Product description and type package is intact and that there are no signs that it designation has been dropped or scratched. If there are obvious signs of damage, contact the This housing has been designed to fit thermal supplier immediately.
  • Seite 8: Installation

    6 Installation 6.2 How to install the camera 6.1 How to open the housing Power supply can be provided by the board supplied with the product. Make sure the Unscrew the screws on the rear cover plate and voltage values are appropriate. loosen the 2 dowels on the outer slide.
  • Seite 9: Board Description

    6.3 Board description 6.4 Connection of the power supply line The board may appear different to that illustrated. CAUTION! The type of cable used must be compatible with the planned use. Comply Depending on the product version, the with the national regulations in force on board may not be equipped with all electrical installation.
  • Seite 10: Installation Of The Version With Double Filter For Air Renewal

    6.5 Installation of the version 6.7 Replacement of the with double filter for air renewal germanium window Unscrew the front window fastening screws using the During installation pay attention to the hexagonal wrench included in the supply. Remove orientation of the air inlet filter fins. the window and position the replacement part, making sure the seal remains in its seat.
  • Seite 11: Accessories

    7 Accessories 8 Maintenance and cleaning For further details on configuration and Before doing any technical work on the use, refer to the relative manual. device, disconnect the power supply. 7.1 Heater 8.1 Cleaning 7.1.1 Heater installation 8.1.1 Cleaning the window and plastic parts At the end of istallation, connect the wiring to the terminal (heater power supply, 6.3 Board description,...
  • Seite 12: Technical Data

    10 Technical data 10.4 Electrical Supply voltage/Current consumption (version with 10.1 General heater, Ton 15°C±3°C (59°F ±5°F), Toff 22°C±3°C (72°F±5°F)): Die-cast aluminium back and front cover plates • 12Vdc, 1.6A max Extruded aluminium body and external slide • 24Vac, 0.85A max, 50/60Hz Epoxypolyester powder painting, RAL9002 colour •...
  • Seite 13: Technical Drawings

    11 Technical drawings The dimensions of the drawings are in millimetres. FRONT FLANGE USABLE AREA A - A C - C USABLE AREA B - B Fig. 8 HTG. MNVCHTG_1702_EN...
  • Seite 14 Email: info@videotec.com Tel. +33 1 60491816 - Fax +33 1 69284736 Email: info.fr@videotec.com Asia Pacific Videotec (HK) Ltd Americas Videotec Security, Inc. Flat 8, 19/F. On Dak Industrial Building, No. 2-6 Wah Sing Street Gateway Industrial Park, 35 Gateway Drive, Suite 100 Kwai Chung, New Territories - Hong Kong Plattsburgh, NY 12901 - U.S.A.
  • Seite 15: Custodia Di Grandi Dimensioni Per Telecamere Termiche

    ITALIANO Custodia di grandi dimensioni per telecamere termiche Italiano - Manuale di istruzioni...
  • Seite 17 Sommario I T A L I A N O 1 Informazioni sul presente manuale ................4 1.1 Convenzioni tipografiche ............................. 4 2 Note sul copyright e informazioni sui marchi commerciali ........4 3 Norme di sicurezza ......................4 4 Identificazione ....................... 5 4.1 Descrizione e designazione del prodotto .......................
  • Seite 18: Informazioni Sul Presente Manuale

    1 Informazioni sul presente 3 Norme di sicurezza manuale ATTENZIONE! L'installazione e la manutenzione del dispositivo deve Prima di installare e utilizzare questa unità, leggere essere eseguita solo da personale tecnico attentamente tutta la documentazione fornita. Tenere specializzato. il manuale a portata di mano per consultazioni successive.
  • Seite 19: Identificazione

    4 Identificazione 5.2 Disimballaggio Alla consegna del prodotto verificare che l'imballo 4.1 Descrizione e designazione sia integro e non presenti segni evidenti di cadute o del prodotto abrasioni. In caso di danni evidenti all'imballo contattare Questa custodia è adatta ad alloggiare telecamere immediatamente il fornitore.
  • Seite 20: Installazione

    6 Installazione 6.2 Installazione della telecamera 6.1 Apertura della custodia L'alimentazione può essere fornita dalla scheda in dotazione al prodotto. Accertarsi Svitare le viti poste sul fondo posteriore e allentare i che i valori di tensione siano adeguati. 2 grani posti sulla slitta esterna. Sfilare il corpo della Aprire la custodia come descritto nel relativo capitolo custodia.
  • Seite 21: Descrizione Della Scheda

    6.3 Descrizione della scheda 6.4 Collegamento della linea di alimentazione L'aspetto della scheda potrebbe differire da quello illlustrato. ATTENZIONE! La tipologia di cavo utilizzata deve essere compatibile con l'impiego La scheda, a seconda della versione del previsto. Attenersi alle regole nazionali in prodotto, potrebbe non essere dotata di vigore riguardanti le installazioni elettriche.
  • Seite 22: Installazione Della Versione Con Doppio Filtro Per Ricambio Dell'aria

    6.5 Installazione della versione 6.7 Sostituzione della finestra in con doppio filtro per ricambio germanio dell'aria Svitare le viti di fissaggio della finestra frontale utilizzando la chiave esagonale in dotazione. Durante l'installazione prestare attenzione Rimuovere la finestra e posizionare il ricambio, all'orientamento delle alette del filtro di facendo attenzione che la guarnizione rimanga in ingresso dell'aria.
  • Seite 23: Accessori

    7 Accessori 8 Manutenzione e pulizia Per ulteriori dettagli sulla configurazione Prima di effettuare interventi tecnici e l’utilizzo fare riferimento al manuale del sull’apparecchio togliere l’alimentazione relativo accessorio. elettrica. 7.1 Riscaldamento 8.1 Pulizia 7.1.1 Installazione del riscaldamento 8.1.1 Pulizia della finestra e delle parti in plastica Terminata l'installazione, collegare il cablaggio al morsetto (alimentazione del riscaldamento, 6.3...
  • Seite 24: Dati Tecnici

    10 Dati tecnici 10.4 Elettrico Tensione di alimentazione/Corrente assorbita 10.1 Generale (versione con riscaldamento, Ton 15°C±3°C, Toff 22°C±3°C): Pressofusioni frontale e posteriore in alluminio • 12Vdc, 1.6A max Estrusione di alluminio del corpo e della slitta esterna • 24Vac, 0.85A max, 50/60Hz Verniciatura a polveri di epossipoliestere, colore RAL9002 •...
  • Seite 25: Disegni Tecnici

    11 Disegni tecnici Le dimensioni dei disegni sono espresse in millimetri. FLANGIA FRONTALE AREA UTILE A - A C - C AREA UTILE B - B Fig. 8 HTG. MNVCHTG_1702_IT...
  • Seite 26 Email: info@videotec.com Tel. +33 1 60491816 - Fax +33 1 69284736 Email: info.fr@videotec.com Asia Pacific Videotec (HK) Ltd Americas Videotec Security, Inc. Flat 8, 19/F. On Dak Industrial Building, No. 2-6 Wah Sing Street Gateway Industrial Park, 35 Gateway Drive, Suite 100 Kwai Chung, New Territories - Hong Kong Plattsburgh, NY 12901 - U.S.A.
  • Seite 27 FRANÇAIS Caisson de grandes dimensions pour caméras thermiques Français - Manuel d’instructions...
  • Seite 29 Sommaire F R A N Ç A I S 1 À propos de ce mode d’emploi ..................4 1.1 Conventions typographiques ..........................4 2 Notes sur le copyright et informations sur les marques de commerce ..... 4 3 Normes de securité ......................4 4 Identification ........................
  • Seite 30: Propos De Ce Mode D'emploi

    1 À propos de ce mode 3 Normes de securité d’emploi ATTENTION! L’installation et l’entretien du dispositif doivent être effectués Avant d'installer et d'utiliser cette unité, lire exclusivement par un personnel technique attentivement toute la documentation fournie. qualifié. Garder le manuel à portée de main pour des consultations successives.
  • Seite 31: Identification

    4 Identification 5.2 Déballage Lors de la livraison du produit, vérifier que 4.1 Description et désignation du l’emballage est en bon état et l’absence de tout signe produit évident de chute ou d’abrasion. En cas de dommages évidents, contacter Ce caisson est adapté pour loger des caméras immédiatement le fournisseur.
  • Seite 32: Installation

    6 Installation 6.2 Installation de la caméra 6.1 Ouverture du caisson L'alimentation peut être dotée de la carte fournie avec le produit fournie. Desserrer les vis placées sur le panneau postérieur S'assurer que les valeurs de tension soient ainsi que les 2 vis sans tête de la glissière externe. appropriées.
  • Seite 33: Description De La Carte

    6.3 Description de la carte 6.4 Connexion de la ligne d'alimentation L'aspect de la carte pourrait être différer de celui qui est illustré. ATTENTION! Le type de câble utilisé doit être compatible avec l'usage prévu. La carte, selon la version du produit, Respectez les règles nationales en vigueur pourrait ne pas être munie de toutes les en matière d'installations électriques.
  • Seite 34: Installation De La Version Avec Double Filtre Pour Le Changement D'air

    6.5 Installation de la version avec 6.7 Remplacement de la fenêtre double filtre pour le changement en germanium d'air Dévissez les vis de fixation sur la fenêtre avant à l'aide de la clé hexagonale fournie. Retirez la fenêtre et Durant l'installation prêter l'installation à placez la pièce de rechange, en veillant à...
  • Seite 35: Accessoires

    7 Accessoires 8 Entretien et nettoyage Pour de plus amples informations sur la Sectionner l’alimentation électrique avant configuration et l'utilisation, consulter le toute intervention technique sur l’appareil. manuel de l'accessoire correspondant. 8.1 Nettoyage 7.1 Chauffage 8.1.1 Nettoyage de la fenêtre et des 7.1.1 Installation du chauffage parties en plastique Après l'installation, raccorder les câbles à...
  • Seite 36: Données Techniques

    10 Données techniques 10.4 Électrique Tension d’alimentation/Courant absorbé (version 10.1 Généralités avec chauffage, Ton 15°C±3°C, Toff 22°C±3°C): Face avant et arrière en fonte d’aluminium • 12Vdc, 1.6A max Corps du caisson et chariot extérieur en profilé • 24Vac, 0.85A max, 50/60Hz d’aluminium •...
  • Seite 37: Dessins Techniques

    11 Dessins techniques Les dimensions des dessins sont exprimées en millimètres. FLASQUE FRONTALE SURFACE UTILE A - A C - C SURFACE UTILE B - B Fig. 8 HTG. MNVCHTG_1702_FR...
  • Seite 38 Email: info@videotec.com Tel. +33 1 60491816 - Fax +33 1 69284736 Email: info.fr@videotec.com Asia Pacific Videotec (HK) Ltd Americas Videotec Security, Inc. Flat 8, 19/F. On Dak Industrial Building, No. 2-6 Wah Sing Street Gateway Industrial Park, 35 Gateway Drive, Suite 100 Kwai Chung, New Territories - Hong Kong Plattsburgh, NY 12901 - U.S.A.
  • Seite 39 DEUTSCH Grossgehäuse für Wärmebildkameras Deutsch - Bedienungsanleitung...
  • Seite 41 Inhaltsverzeichnis D E U T S C H 1 Allgemeines ........................4 1.1 Schreibweisen ................................4 2 Anmerkungen zum Copyright und Informationen zu den Handelsmarken ..... 4 3 Sicherheitsnormen ......................4 4 Identifizierung ....................... 5 4.1 Beschreibung und Bezeichnung des Produktes ................... 5 4.2 Kennzeichnung des Produkts..........................
  • Seite 42: Allgemeines

    1 Allgemeines 3 Sicherheitsnormen Vor Installation und Anwendung der Einheit ist die ACHTUNG! Die Installation und Wartung gesamte gelieferte Dokumentation aufmerksam zu der Vorrichtung ist technischen Fachleuten lesen. Zum späteren Nachschlagen das Handbuch in vorbehalten. Reichweite aufbewahren. • Der Hersteller lehnt jede Haftung für eventuelle 1.1 Schreibweisen Schäden ab, die aufgrund unsachgemäßer Anwendung der in diesem Handbuch erwähnten...
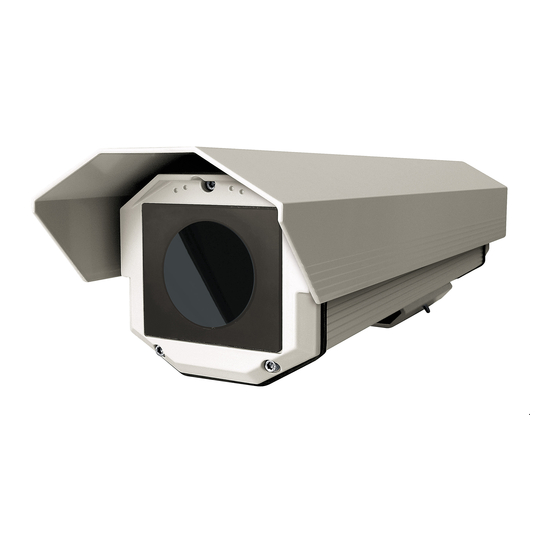
  • Seite 43: Identifizierung

    4 Identifizierung 5.2 Entfernen der Verpackung Bei der Lieferung des Produktes ist zu prüfen, ob die 4.1 Beschreibung und Verpackung intakt ist oder offensichtliche Anzeichen Bezeichnung des Produktes von Stürzen oder Abrieb aufweist. Bei offensichtlichen Schadensspuren an der Dieses Gehäuse eignet sich für die Aufnahme von Verpackung muss umgehend der Lieferant Wärmebildkameras mit großen Objektiven, die eine verständigt werden.
  • Seite 44: Installation

    6 Installation 6.2 Installation der Kamera 6.1 Öffnung des Schutzgehause Die Stromversorgung muss über die Karte erfolgen, die im Lieferumfang des Werden die Schrauben aus der hinteren Abdeckplatte Geräts enthalten ist. Prüfen, dass die entfernt und die 2 Gewindestifte auf dem Spannungswerte angemessen sind.
  • Seite 45: Beschreibung Der Karte

    6.3 Beschreibung der Karte 6.4 Anschluss der Stromversorgung Die Abbildung kann von der tatsächlichen Karte abweichen. ACHTUNG! Der verwendete Kabeltyp muss mit dem vorgesehenen Einsatz kompatibel Je nach Geräteausführung verfügt die Karte sein. An die geltenden nationalen möglicherweise nicht über alle Funktionen. Vorschriften in Bezug auf elektrische Installationen halten.
  • Seite 46: Installation Der Version Mit Doppelfilter Für Den Luftaustausch

    6.5 Installation der Version 6.7 Einbau des Germanium- mit Doppelfilter für den Austauschfensterscheibe Luftaustausch Die Befestigungsschrauben der Frontscheibe mithilfe des im Lieferumfang enthaltenen Während der Installation auf die Sechskantschlüssels ausdrehen. Die Scheibe Ausrichtung der Luftklappen am entfernen und das Ersatzteil ausrichten. Lufteinlassfilter achten.
  • Seite 47: Zubehör

    7 Zubehör 8 Wartung und Reinigung Für weitere Details zur Konfiguration und Vor technischen Eingriffen am Gerät zum Gebrauch beachten Sie bitte das muss die Stromversorgung unterbrochen Handbuch des entsprechenden Geräts. werden. 7.1 Heizung 8.1 Reinigung 7.1.1 Installation der Heizung 8.1.1 Reinigung des Fensters und der Kunststoffteile Am Ende der Montage die Verkabelung an die...
  • Seite 48: Technische Daten

    10 Technische Daten 10.4 Elektrik Versorgungsspannung/Stromaufnahme (Ausführung 10.1 Allgemeines mit Heizung, Ton 15°C±3°C, Toff 22°C±3°C): Druckgußteile aus Aluminium, Vorder- und • 12Vdc, 1.6A max Hinterseite • 24Vac, 0.85A max, 50/60Hz Korpus und externer Schlitten aus Fließpress- • 120Vac, 0.35A max, 50/60Hz Aluminium •...
  • Seite 49: Technische Zeichnungen

    11 Technische Zeichnungen Die Abmessungen der Zeichnungen sind in Millimeter angegeben. VORDERFLANSCHE NUTZFLÄCHE A - A C - C NUTZ- FLÄCHE B - B Abb. 8 HTG. MNVCHTG_1702_DE...
  • Seite 50 Email: info@videotec.com Tel. +33 1 60491816 - Fax +33 1 69284736 Email: info.fr@videotec.com Asia Pacific Videotec (HK) Ltd Americas Videotec Security, Inc. Flat 8, 19/F. On Dak Industrial Building, No. 2-6 Wah Sing Street Gateway Industrial Park, 35 Gateway Drive, Suite 100 Kwai Chung, New Territories - Hong Kong Plattsburgh, NY 12901 - U.S.A.
  • Seite 51 РУССКИЙ Большой кожух для тепловизоров Русский - Руководство по эксплуатации...
  • Seite 53 Комплект оборудования Р У С С К И Й 1 О настоящем руководстве ..................4 1.1 Типографские условные обозначения ......................4 2 Примечания в отношении авторского права и информация о торговых марках ..........................4 3 Правила техники безопасности ................4 4 Обозначение...
  • Seite 54: О Настоящем Руководстве

    1 О настоящем 3 Правила техники руководстве безопасности Внимательно ознакомьтесь со всей ПРЕДУПРЕЖДЕНИЕ! Установка документацией, входящей в комплект поставки, и обслуживание устройства перед тем как приступить к установке и должны осуществляться только эксплуатации данного оборудования. Всегда специализированным персоналом. держите руководство под рукой, чтобы им можно было...
  • Seite 55: Обозначение

    4 Обозначение 5.2 Распаковка При доставке устройства убедитесь, что упаковка 4.1 Описание и обозначение не повреждена и не имеет явных признаков типа устройства падения или царапин. В случае наличия видимых повреждений Этот корпус разработан для тепловизоров с большими незамедлительно свяжитесь с поставщиком. объективами, которые...
  • Seite 56: Монтаж

    6 Монтаж 6.2 Установка камеры 6.1 Как открыть кожух Питание может обеспечиваться платой, предоставляемой вместе с устройством Отвинтите винты, установленные в задней Убедитесь в правильности значений части днища и ослабьте 2 установочных винта, напряжения. установленных н внешних салазках. Снимите Откройте кожух, следуя указаниям в корпус...
  • Seite 57: Описание Платы

    6.3 Описание платы 6.4 Подключение линии питания Плата может отличаться от той, что указана на рисунке. ПРЕДУПРЕЖДЕНИЕ! Тип используемого кабеля должен быть совместимым с Плата, в зависимости от версии предполагаемым видом использования. устройства, может не обладать всеми Соблюдайте действующие в вашей функциями.
  • Seite 58: Установка Модели С Двойным Фильтром Для Воздухообмена

    6.5 Установка модели с 6.7 Замена германиевого двойным фильтром для стекла воздухообмена Открутите крепежные винты переднего окна, используя прилагаемый шестигранный ключ. Во время установки обратите внимание Извлеките окно и установите запчасть, следя на направление ребер впускного за тем, чтобы прокладка оставалась на месте. воздушного...
  • Seite 59: Комплектующие

    7 Комплектующие 8 Техническое обслуживание и очистка Дополнительная информация по конфигурации и использованию Отключите источник питания, перед тем представлена в соответствующем как приступить к проведению каких- руководстве. либо технических работ на устройстве. 7.1 Нагреватель 8.1 Очистка 7.1.1 Установка нагревателя 8.1.1 Чистка окна и пластмассовых По...
  • Seite 60: Технические Характеристики

    10 Технические 10.4 Электрические характеристики характеристики Напряжение сети питания/Потребляемый ток 10.1 Общие сведения (модель с нагревателем, Ton 15°C±3°C, Toff 22°C±3°C): Передняя и задняя крышка изготовлена из • 12Vdc, 1.6A max штампованного алюминия • 24Vac, 0.85A max, 50/60Hz Корпус и внешняя направляющая из прессованного...
  • Seite 61: Технические Чертежи

    11 Технические чертежи Размеры на чертежах указаны в миллиметрах. FRONT FLANGE USABLE AREA A - A C - C USABLE AREA B - B Рис. 8 HTG. MNVCHTG_1702_RU...
  • Seite 62 Email: info@videotec.com Тел.: +33 1 60491816 - факс: +33 1 69284736 Email: info.fr@videotec.com Азиатско-Тихоокеанский регион Videotec (HK) Ltd. Americas Videotec Security, Inc. Flat 8, 19/F. On Dak Industrial Building, No. 2-6 Wah Sing Street Gateway Industrial Park, 35 Gateway Drive, Suite 100 Kwai Chung, New Territories - Hong Kong Plattsburgh, NY 12901 - U.S.A.
  • Seite 64 Email: info@videotec.com Tel. +33 1 60491816 - Fax +33 1 69284736 Email: info.fr@videotec.com Asia Pacific Videotec (HK) Ltd Americas Videotec Security, Inc. Flat 8, 19/F. On Dak Industrial Building, No. 2-6 Wah Sing Street Gateway Industrial Park, 35 Gateway Drive, Suite 100 Kwai Chung, New Territories - Hong Kong Plattsburgh, NY 12901 - U.S.A.

Inhaltsverzeichnis