Inhaltsverzeichnis
Werbung
Verfügbare Sprachen
Verfügbare Sprachen
Quicklinks
Istruzioni per installazione, uso e manutenzione
Montage und Bedienungsanleitung
Manuel d'entretien
Installation, use and maintenance instructions
Bruciatore di gasolio
I
Öl-Gebläsebrenner
D
Brûleur fioul
F
Light oil burner
GB
Funzionamento monostadio
Einstufiger Betrieb
Fonctionnement à 1 allure
One stage operation
CODICE
CODE
3738850
MODELLO - MODELL
MODELE - MODEL
BG5
TIPO - TYP
TYPE
388 T1
2902320 (7)
Werbung
Inhaltsverzeichnis

Verwandte Anleitungen für Riello Burners Gulliver BLU BG5 Typ 388 T1


Inhaltszusammenfassung für Riello Burners Gulliver BLU BG5 Typ 388 T1
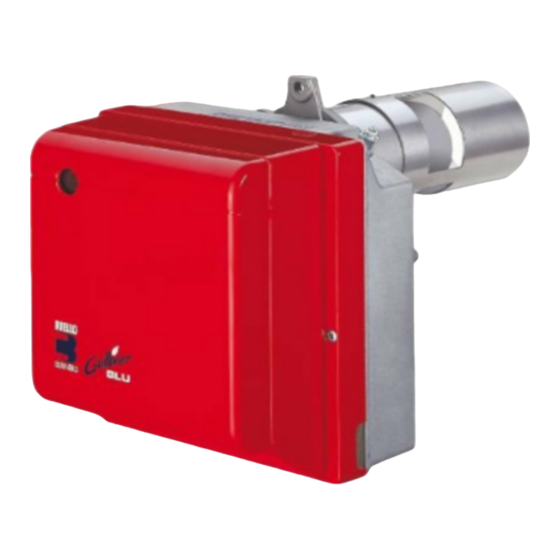
- Seite 1 Istruzioni per installazione, uso e manutenzione Montage und Bedienungsanleitung Manuel d’entretien Installation, use and maintenance instructions Bruciatore di gasolio Öl-Gebläsebrenner Brûleur fioul Light oil burner Funzionamento monostadio Einstufiger Betrieb Fonctionnement à 1 allure One stage operation CODICE MODELLO - MODELL TIPO - TYP CODE MODELE - MODEL...
- Seite 2 Dichiarazione del produttore secondo la normativa 1. BImSchV, 1996 RIELLO S.p.A. dichiara che i seguenti prodotti rispettano i valori limite degli NOx imposti dalla normativa 1. BImSchV, 1996, § 7 (2): Herstellerbescheinigung gemäß 1. BImSchV, 1996 RIELLO S.p.A. bestätigt, daß folgende Produkte, die von der 1. BImSchV, 1996, § 7 (2) geforderten NOx - Grenzwerte einhalten: Déclaration du producteur selon la directive 1.
-
Seite 3: Inhaltsverzeichnis
INDICE DESCRIZIONE DEL BRUCIATORE ..1 FUNZIONAMENTO ....6 Materiale a corredo....1 Regolazione della combustione . -
Seite 4: Dati Tecnici
DATI TECNICI DATI TECNICI TIPO 388 T1 ÷ ÷ Portata - Potenza termica 6,1 kg/h – 72,3 kW ÷ Combustibile Gasolio, viscosità 4 6 mm /s a 20°C ± Alimentazione elettrica Monofase, 230 V 50Hz Motore 1,8 A assorbiti – 2750 g/min – 289 rad/s 6,3 µF Condensatore Trasformatore d’accensione... -
Seite 5: Installazione
INSTALLAZIONE L’INSTALLAZIONE DEL BRUCIATORE DEVE ESSERE EFFETTUATA IN CONFORMITÀ ALLE LEGGI E NORMATIVE LOCALI. FISSAGGIO ALLA CALDAIA Inserire sulla flangia (1) la vite e i due dadi (vedi fig. 3). Allargare, se necessario, i fori dello schermo isolante (5) (vedi fig. 4). Fissare alla portina della caldaia (4) la flangia (1) mediante le viti (2) e (se necessario) i dadi (3) interpo- nendo lo schermo isolante (5) (vedi fig. -
Seite 6: Impianti Idraulici
IMPIANTI IDRAULICI ATTENZIONE: Accertarsi, prima di mettere in funzione il bruciatore, che il tubo di ritorno del combustibile non abbia occlusioni. Una eccessiva contropressione provocherebbe la rottura dell’organo di tenuta della pompa. La pompa è predisposta per funzionamento bitubo. Per il funzionamento monotubo è necessario svitare il perno (2), togliere la vite di by-pass (3) e quindi riavvitare il perno (2) (vedi fig. -
Seite 7: Collegamenti Elettrici
COLLEGAMENTI ELETTRICI NOTE: ATTENZIONE – Sezione dei conduttori: min. 1 mm NON SCAMBIARE IL NEUTRO CON LA FASE (Salvo diverse indicazioni di norme e leggi locali). 230V 50Hz – I collegamenti elettrici eseguiti dall’installatore devono rispettare le norme vigenti nel paese. (Vedi pag. -
Seite 8: Funzionamento
FUNZIONAMENTO REGOLAZIONE DELLA COMBUSTIONE In conformità con la Direttiva Rendimento 92/42/CEE, l’applicazione del bruciatore alla caldaia, la regolazione e il collaudo, devono essere eseguiti nell’osservanza del manuale d’istruzione della caldaia stessa, compreso il controllo della concentrazione di CO e CO nei fumi, della loro temperatura e di quella media dell’acqua della caldaia. -
Seite 9: Pressione Pompa E Portata Aria
PRESSIONE POMPA E PORTATA ARIA Il bruciatore per assicurare un’avviamento regolare con qualsiasi tipo di caldaia è dotato di un dispositivo idraulico, indipendente dall’apparecchiatura, che riduce la portata del combustibile e dell’aria. All’accensione la pressione all’ugello è di 12 bar. Dopo 3 - 9 secondi passa automaticamente a 14 bar. La portata dell’aria inizialmente tarata sulla piccola fiamma, si porta automaticamente al cambio di pressione sulla portata necessaria alla grande fiamma. -
Seite 10: Regolazione Elettrodi
REGOLAZIONE ELETTRODI Fig. 15 ATTENZIONE ATTENZIONE Le misure devono essere rispet- tate così come la posizione verso Appoggiare gli isolatori (1) al l’alto. disco (2), (vedi fig. 15). 0,5 mm Per accedere agli elettrodi eseguire l’operazione descritta al capitolo 4.1 – alla voce “UGELLI DA UTI- LIZZARE”... -
Seite 11: Programma Di Avviamento
PROGRAMMA DI AVVIAMENTO Blocco per mancata Blocco per Normale accensione mancato spegnimento Termostato Riscaldatore Motore Trasf. d’accensione Valvola Piccola fiamma Grande fiamma Spia blocco Blocco per mancato ÷ ÷ ÷ ÷ ÷ ÷ spegnimento 150s 150s 150s D5531 Segnalato dalla spia sull’apparecchiatura di comando e controllo (3, fig. 1, pag. 1). In questo caso il bruciatore non parte più... -
Seite 12: Anomalie / Rimedi
ANOMALIE / RIMEDI Si elencano alcune cause e i possibili rimedi a una serie di anomalie che potrebbero verificarsi e portare ad un mancato o non regolare funzionamento del bruciatore. Un’anomalia, nel funzionamento nella maggior parte dei casi, porta alla accensione della segnalazione all’in- terno del pulsante di sblocco dell’apparecchiatura di comando e controllo (pos. -
Seite 13: Beschreibung Des Brenners
INHALT BESCHREIBUNG DES BRENNERS ..1 BETRIEB ......1.1 Mitgeliefertes Zubehör ....1 4.1 Einstellung der Brennerleistung. -
Seite 14: Technische Merkmale
TECHNISCHE MERKMALE TECHNISCHE DATEN 388 T1 ÷ ÷ Durchsatz - Brennerleistung 6,1 kg/h – 72,3 kW ÷ Brennstoff Heizöl-EL, Viskosität 4 6 mm /s bei 20°C ± Stromversorgung Einphasig, 230 V 50Hz Motor Stromaufnahme 1,8 A – 2750 U/min – 289 rad/s 6,3 µF Kondensator Zündtransformator... -
Seite 15: Brennstoffversorgung
INSTALLATION DIE INSTALLATION DES BRENNERS MUSS IN ÜBEREINSTIMMUNG MIT DEN ÖRTLICHEN GESETZEN UND VORSCHRIFTEN AUSGEFÜHRT WERDEN. BRENNERMONTAGE Die Schraube und die beiden Muttern am Flansch (1) montieren (siehe Abb. 3). Falls erforderlich, die Bohrungen der Isolierdichtung (5) erweitern (siehe Abb. 4). Mit den Schrauben (2) und (falls erforderlich) den Muttern (3) den Flansch (1) an der Kesseltür (4) mit Isolierdichtung (5) montieren (siehe Abb. -
Seite 16: Auffüllen Der Pumpe Mit Heizöl
ÖLVERSORGUNGSANLAGE WICHTIGER HINWEIS: Es muß sichergestellt werden, daß die Ölrücklauf-Leitung ohne Verengung und Verstopfung frei in den Tank zurückge- führt wird. Durch Druckerhöhung von mehr als 0,5 bar im Rücklauf wird die Ölpumpe undicht. Die Pumpe ist werksseitig für den Zweirohr-Betrieb einge- richtet. -
Seite 17: Elektrisches Verdrahtungsschema
ELEKTRISCHES VERDRAHTUNGSSCHEMA ANMERKUNGEN: WICHTIGER HINWEIS – Leiterdurchmesser: min. 1 mm NULLEITER NICHT MIT DER PHASE VERWECHSELN (Außer im Falle anderslautender Angaben 230V 50Hz durch Normen und örtliche Gesetze). – Die vom Installateur ausgeführten elektrischen Verbindungen müssen den Lokalen Bestim- mungen entsprechen . (Siehe Seite 4). -
Seite 18: Betrieb
BETRIEB EINSTELLUNG DER BRENNERLEISTUNG In Konformität mit der Wirkungsgradrichtlinie 92/42/EWG müssen die Anbringung des Brenners am Heizkessel, die Einstellung und die Inbetriebnahme unter Beachtung der Betriebsanleitung der Heizkessels ausgeführt werden, einschließlich Kontrolle der Konzentration von CO und CO in den Abgasen, ihrer Temperatur und der mittlenen Kesseltemperatur. -
Seite 19: Pumpendruck Und Luftdurchsatz
PUMPENDRUCK UND LUFTDURCHSATZ Der Brenner ist, um auf jedem beliebigen Kessel einen gleichmässigen Anlauf zu gewährleisten, mit einer vom Steuergerät unabhängigen hydraulischen Vorrichtung versehen, welche den Durchsatz des Brennstoffes und der Luft verringert. Während der Zündung beträgt der Druck an der Düse 12 bar. Nach 3 - 9 Sekunden geht er automatisch auf 14 bar über. -
Seite 20: Elektrodeneinstellung
ELEKTRODENEINSTELLUNG WICHTIGER HINWEIS WICHTIGER HINWEIS Die Abstände und die Abb. 15 Stellung nach oben müssen Die Isolatoren der Zündelektro- eingehalten werden. den (1) an der Scheibe (2) bis 0,5 mm zum Anschlag bringen. (Siehe Abb. 15). Um Zugang zu den Elektroden zu erhalten, die im Kapitel 4.1 unter d e m S t i c h p u n k t “... -
Seite 21: Den Kundendienst Rufen
BETRIEBSABLAUF Störabschaltung wegen Störabschaltung Normal Nichtzündung wegen Nichtabschaltens Thermostat Vorwärmer Motor Zündtransformator Ventil Kleine Flamme Grosse Flamme Störlampe Störabschaltung ÷ ÷ ÷ ÷ ÷ ÷ wegen nicht erfolgter 150s 150s 150s Zündung D5531 Wird durch die Kontrollampe am Steuer- und Überwachungsgerät signalisiert (3, Abb. 1, S. 1). In diesem Fall fährt der Brenner nicht wieder an, da eine besonders schwerwiegende Störung vorliegt. -
Seite 22: Störungen / Abhilfe
STÖRUNGEN / ABHILFE Nachfolgend finden Sie einige denkbare Ursachen und Abhilfemöglichkeiten für Störungen, die den Betrieb des Brenners beeinflussen oder einen nicht ordnungsgemäßen Betrieb des Brenners verursachen könnten. In den meisten Fällen führt eine Störung zum Aufleuchten der Kontrolleuchte in der Entstörtaste des Steuergeräts (3, Abb. -
Seite 23: Description Du Bruleur
SOMMAIRE DESCRIPTION DU BRULEUR..1 FONCTIONNEMENT....1.1 Matériel fourni ..... 1 4.1 Réglage de la combustion . -
Seite 24: Donnees Techniques
DONNEES TECHNIQUES DONNEES TECHNIQUES TYPE 388 T1 ÷ ÷ Débit - Puissance thermique 6,1 kg/h – 72,3 kW ÷ Combustible Fioul domestique, viscosité 4 6 mm /s à 20°C ± Alimentation électrique Monophasée, 230 V 50Hz Moteur 1,8 A absorbés – 2750 t / min – 289 rad/s 6,3 µF Condensateur Transformateur d’allumage... -
Seite 25: Alimentation Du Combustible
INSTALLATION LE BRÛLEUR DOIT ÊTRE INSTALLÉ CONFORMÉMENT AUX LOIS ET AUX RÉGLEMENTATIONS LOCALES. FIXATION A LA CHAUDIERE Insérer sur la bride (1) la vis et deux écrous, (voir fig. 3). Elargir, si nécessaire, les trous dans le joint isolant (5), (voir fig. 4). Fixer sur la plaque de la chaudière (4) la bride (1) par l’intermédiaire des vis (2) et (si nécessaire) des écrous (3) en interposant le joint isolant (5), (voir fig. -
Seite 26: Installation Hydraulique
INSTALLATION HYDRAULIQUE IMPORTANT: Avant de mettre en fonction le brûleur il faut s’assurer que le tube de retour du combustible ne soit pas obstrué. Une contre-pression excessive provoquerait la rupture de l’organe d’étanchéité de la pompe. La pompe est prévue pour un fonctionnement en bitube. Pour le fonctionnement en mono-tube, il faut dévisser le rac- cord (2), enlever la vis de by-pass (3) et ensuite revisser le raccord (2), (voir fig. -
Seite 27: Raccordements Electriques
RACCORDEMENTS ELECTRIQUES NOTES: ATTENTION – Section conducteurs: min. 1 mm NE PAS INVERSER LE NEUTRE AVEC LA PHASE (Sauf des indications différentes prévues par les 230V 50Hz normes et les lois locales). – Les branchements électriques exécutés par l’installateur doivent respecter le règlement en vigueur dans le Pays. - Seite 28 FONCTIONNEMENT REGLAGE DE LA COMBUSTION Conformément à la Directive rendement 92/42/CEE, suivre les indications du manuel de la chaudière pour monter le brûleur, effectuer le réglage et l’essai, contrôler la concentration de CO et CO , dans les fumées, leur température et celle moyenne de l’eau de la chaudière.
- Seite 29 PRESSION POMPE ET DEBIT D’AIR Pour assurer un démarrage régulier sur tout type de chaudière, le brûleur est muni d’un dispositif hydrauli- que, indépendant de la boîte de contrôle, qui réduit les débits du combustible et de l’air. Au moment de l’allumage la pression au gicleur est de 12 bar. Après, 3 - 9 secondes, elle augmente automa- tiquement à...
- Seite 30 REGLAGE DES ELECTRODES ATTENTION ATTENTION Ces distances doivent être res- Fig. 15 Mettre en contact les isola- pectées ainsi que la position teurs (1) avec le disque (2), vers le haut. 0,5 mm (voir fig. 15). Pour accéder aux électrodes, exé- cuter l’opération décrite au chapi- tre 4.1 –...
-
Seite 31: Programme De Mise En Marche
PROGRAMME DE MISE EN MARCHE Mise en sécurité due Mise en sécurité due Normal à non allumage à non extinction Thermostat Réchauffeur Moteur Transf. d’allumage Vanne Petite flamme Grande flamme Mise en sécurité Mise en sécurité ÷ ÷ ÷ ÷ ÷... -
Seite 32: Cause Possible
PANNES / REMEDES La liste ci-dessous donne un certain nombre de causes d’anomalies et leurs remèdes. Problèmes qui se traduisent par un fonctionnement anormal du brûleur. Un défaut, dans la grande majorité des cas, se traduit par l'allumage du signal sur le bouton de réar- mement manuel de la boîte de commande et de contrôle (3, fig. -
Seite 33: Burner Description
INDEX BURNER DESCRIPTION ... . . 1 WORKING ..... . . 1.1 Burner equipment. -
Seite 34: Technical Data
TECHNICAL DATA TECHNICAL DATA TYPE 388 T1 Output - Thermal power 4.3 – 6.1 kg/h 51 – 72.3 kW Fuel Light oil, viscosity 4 – 6 mm /s at 20 °C ± Electrical supply Single phase, 230 V 50Hz Motor Run current 1.8 A –... -
Seite 35: Boiler Fixing
INSTALLATION THE BURNER MUST BE INSTALLED IN CONFORMITY WITH LEGISLATION AND LOCAL STANDARDS. BOILER FIXING Put on the flange (1) the screw and two nuts (see fig. 3). Widen, if necessary, the insulating gasket holes (5) (see fig. 4). Fix the flange (1) to the boiler door (4) using screws (2) and (if necessary) the nuts (3) interposing the insulating gasket (5) (see fig. -
Seite 36: Hydraulic Systems
HYDRAULIC SYSTEMS WARNING: Before starting the burner make sure that the return pipe- line is not clogged. An excessive back pressure would cause the damage of the pump seal. The pump is designed to allow working with two pipes. In order to obtain one pipe working it is necessary to uns- crew the pin (2), remove the by-pass screw (3) and then screw again the pin (2), (see fig. -
Seite 37: Electrical Wiring
ELECTRICAL WIRING NOTES: WARNING – Wires of min. 1 mm section. (Unless requested oth- DO NOT EXCHANGE NEUTRAL WITH PHASE erwise by local standards and legislation). 230V 50Hz – The electrical wiring carried out by the installer must be in compliance with the rules in force in the Country. (See page 4). -
Seite 38: Combustion Adjustment
WORKING COMBUSTION ADJUSTMENT In conformity with Efficiency Directive 92/42/EEC the application of the burner on the boiler, adjustment and testing must be carried out observing the instruction manual of the boiler, including verification of the CO and concentration in the flue gases, their temperatures and the average temperature of the water in the boiler. To suit the required appliance output, choose the proper nozzle, adjust the pump pressure and the air damp- er opening in accordance with the following schedule. -
Seite 39: Pump Pressure And Air Output
PUMP PRESSURE AND AIR OUTPUT The burner, in order to guarantee good smooth starts, irrespective of the type of boiler, is fitted with a hydrau- lic device which, independently of the control-box, reduces the fuel- and air-flow. At ignition, the pressure at the nozzle is 12 bar. After 3 - 9 seconds, it automatically increases to 14 bar. The air-flow, initially adjusted to the low setting, is, at the change-over of pressure, automatically brought to the air-flow required for the big flame. -
Seite 40: Electrodes Adjustment
ELECTRODES ADJUSTMENT ATTENTION Measures must be respected and ATTENTION Fig. 15 also the upwards position. Lean insulators (1) to disc (2), (see fig. 15). 0.5 mm To have access to the electrodes carry out operation as described in chapter 4.1 (page 6) “NOZZLES TO BE USED”. -
Seite 41: Burner Start-Up Cycle
BURNER START-UP CYCLE Lock-out due to Lock-out due to Normal failure to light failure to shut-down Thermostat Heating Motor Ignition transformer Valve Low-flame High-flame Lock-out lamp Lock-out due to failure to shut-down – – – – – – 150s 150s 150s D5531 Lock out is indicated by a lamp on the control box (3, fig. - Seite 42 FAULTS / SOLUTIONS Here below you can find some causes and the possible solutions for problems that could cause a failure to start or a bad working of the burner. A fault usually makes the lock-out lamp light which is situated inside the reset button of the control box (3, fig.