Herunterladen Inhalt Inhalt Diese Seite drucken
Inhaltsverzeichnis

Werbung

Verfügbare Sprachen

Verfügbare Sprachen

Betriebs- und Installationsanweisung
Edelstahl Fleischreife Kühlschrank
TS 801 und TS 801 G
KBS Gastrotechnik GmbH - Johannes-Kepler-Str. 14 - 55129 Mainz
www.kbs-gastrotechnik.de
Stand Oktober 2018

Werbung

Kapitel

Inhaltsverzeichnis
loading

Inhaltszusammenfassung für kbs TS 801

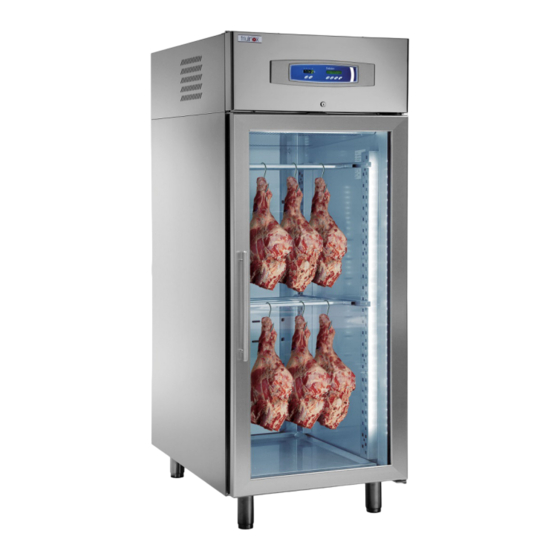
  • Seite 1 Betriebs- und Installationsanweisung Edelstahl Fleischreife Kühlschrank TS 801 und TS 801 G KBS Gastrotechnik GmbH - Johannes-Kepler-Str. 14 - 55129 Mainz www.kbs-gastrotechnik.de Stand Oktober 2018...
  • Seite 2 FR7N C0 111GC6 0 Co d . Re v. 0 6 -0 2 -2 0 17 AH _ FROLLATORE A A A H FROLLATO O AH FROLLATORE AH FROLLATORE H H H H H H FROLLATO O _ FROLLATO FROLLATOR FROLLATORE R R R R O O O O...
  • Seite 3 IT - 3 I NDI CE 1. NORME E AVVERTENZE GENERALI 1. NORME E AVVERTENZE GENERALI 1.1. COLLAUDO 1.1. Collaudo I l prodotto viene spedito dopo il superamento dei collaudi: visivo, elettri- 1.2. Garanzia co e funzionale. 1.3. Premessa 1.4. Predisposizione a carico del cliente 1.2.
  • Seite 4: Dati Tecnici

    4 - IT Predisporre, nel caso di apparecchiature con condensazione ad acqua Le nostre apparecchiature frigorifere sono macchine agroalimentari o di apparecchiature con controllo diretto dell’umidità, l’allacciamento (Regolamento CE n° 1935/ 2004), destinate al trattamento dei prodotti alla rete idrica. alimentari.
  • Seite 5: Manutenzi One Ordi Nari A E Programmata

    IT - 5 RI SCHI DOVUTI AL RUMORE 4.3. PULI ZI A DELL’APPARECCHI ATURA L eq nel punto più rumoroso a 1m in condizioni operative < 70 dB(A) Prima di qualsiasi operazione di pulizia, isolare l’apparecchiatura L pc a 1m in condizioni operative <...
  • Seite 6: Smaltimento

    6 - IT 6.2. DESCRI ZI ONI DELLE OPERAZI ONI DI MESSA I N OPERA Prima di scollegare l’unità recuperare, se presenti: fi - gas refrigerante; Si consiglia dopo aver tolto l’imballo dall’apparecchiatura di veri care - soluzioni incongelabili presenti nei circuiti idraulici. l’integrità...
  • Seite 7: I Struzi Oni Per L'uti Li Zzatore

    IT - 7 7. I STRUZI ONI PER L’UTI LI ZZATORE 7.1. PANNELLO DI COMANDO ENTER MENU 7.1.1 DESCRI ZI ONE PANNELLO COMANDO 7.1.2 DESCRI ZI ONE SI MBOLOGI A MASCHERI NA appar ecchiat ur a in OFF, se premuto permette l’accensione della Display LCD stessa per informazioni...
  • Seite 8: Messa I N Funzi One Dell'apparecchi Atura

    8 - IT 7.2 MESSA I N FUNZI ONE DELL’APPARECCHI ATURA L’accensione della scheda avviene collegando l’apparecchiatura alla rete elettrica. fi Se è stata spenta con il tasto on/ off, sul display comparirà la scritta off, questo signi ca che il pannello comandi è...
  • Seite 9: I Mpostazi One Data E Ora

    IT - 9 ENTER Premere il tasto per confermare la lingua selezionata. MENU fi Completata la modi ca dei valori, premere il tasto per due volte per uscire dal menù, oppure non operare. 7.3.4 SCORRI MENTO DI SPLAY E’ possibile scorrere il display LCD della scheda visualizzando le seguenti maschere: t 13 °C Ur 75% t 13 °C Ur 75% ENTER...
  • Seite 10 10 - IT 7.3.6 SCELTA PROGRAMMI I l controllo consente di scegliere fra una lista di programmi. MENU fi Premere no a posizionarsi su: Menu 03 Menu 03 Premendo il tasto si visualizza il programma impostato. ENTER scelta programmi Premendo il tasto si seleziona il programma desiderato.
  • Seite 11 IT - 11 fi I n qualsiasi momento si possono modi care i valori del tempo, delle fasi, la temperatura, l’umidità relativa ed il ricircolo, le modi fi che avranno effetto immediato dopo la programmazione, o non operando per 15 secondi. I l ventilatore per il ricambio aria può...
  • Seite 12: Sbri Namento Manuale

    12 - IT 7.3.7 SBRI NAMENTO MANUALE I n caso di necessità, la scheda permette di effettuare uno sbrinamento manuale Menu 02 Posizionarsi su: ENTER Menu 02 Premendo il tasto si visualizza il programma. sbrinamento ENTER MENU sbrina? Premendo il tasto si esce dal menù...
  • Seite 13 IT - 13 L’allarme appare se l’evaporatore non è riuscito a pulirsi nel massimo tempo previsto. Si può presentare, ad esempio, se la porta è rimasta aperta accidentalmente per un periodo abbastanza lungo o se si sono guastate le resistenze di sbrinamento. ESEGUI RE UNO SBRI NAMENTO MANUALE E SE I L PROBLEMA SUSSI STE CHI AMARE L’ASSI STENZA.
  • Seite 14 14 - IT 7.6. TELECOMANDO ( optional) Per accendere il telecomando premere per un tempo prolungato il tasto K1 o K2, al momento dell’accensione il telecomando suona eil led si accende e lampeggia. Dopo 30 secondi che il telecomando non viene utilizzato si spegne. UPLOAD PARAMETRI Trasferimento dati dal controllo al telecomando.
  • Seite 15: Inhaltsverzeichnis

    EN - 15 1. STANDARDS AND GENERAL I NSTRUCTI ONS TABLE OF CONTENTS 1. PRESCRI PTI ONS AND GENERAL I NSTRUCTI ONS 1.1. TESTI NG 1.1. Testing The product is dispatched after visual, electrical and operating tests 1.2. Guarantee have been passed. 1.3.
  • Seite 16: Prerequisites Supplied By The Customer

    16 - EN 3. OPERATI ON 1.4. PREREQUI SI TES SUPPLI ED BY THE CUSTOMER Provide a high sensitivity differential magnet circuit breaker switch (30 mA). 3.1. APPLI CATI ONS, PURPOSE, DECLARED AND NON- DE- Provide a wall socket with earth of the type used in the country in CLARED USE, AUTHORI SED USE which the machine is operated.
  • Seite 17: Safety Devices

    EN - 17 RI SKS CAUSED BY NOI SE L eq at the noisiest point at 1m in operating conditions < 70 dB(A) USE CO FI RE EXTI NGUI SHER (CARBON DI OXI DE) AND COOL L pc at 1m in operating conditions <...
  • Seite 18: Storage

    18 - EN Before disconnecting the unit collect, if there are any: 6.2. DESCRI PTI ON OF COMMI SSI ONI NG OPERATI ONS - refrigerant gas; After removing the packaging from the machine, it is advisable to - non-freezing solutions present in hydraulic circuits. verify the integrity of the machine and the absence of damage due to transport.
  • Seite 19: User I Nstructi Ons

    EN - 19 7. USER I NSTRUCTI ONS 7.1. CONTROL PANEL ENTER MENU 7.1.1 DESCRI PTI ON OF THE CONTROL PANEL 7.1.2 DESCRI PTI ON SYMBOLS MASK With the appliance OFF , if pressed it allows the former to be switched LCD Display for information With appliance ON, if it is pressed for...
  • Seite 20: Starting The Appliance

    20 - EN 7.2 STARTI NG THE APPLI ANCE The board is switched on by connecting the appliance to the mains electricity. I f it has been switched-off using the on/ off key, the word off will appear on the display. This means that the control panel is in stand-by but the functions are not yet activated.
  • Seite 21: Scrolling The Dispaly

    EN - 21 ENTER fi Press the key to con rm the language selected. MENU fi Completes the modi cation of the values. Press the key twice to exit the menu, or do not operate. 7.3.4 SCROLLI NG THE DI SPLAY I t is possible to scroll the LCD , displaying the following masks: t 13 °C Ur 75% ENTER...
  • Seite 22: Selecting Programs

    22 - EN 7.3.6 SELECTI NG PROGRAMS The control allows to select from a list of programs. MENU Menu 03 Press until positioned on: ENTER Menu 03 By pressing the key, the program set is displayed. select programs By pressing the key, select the desired program.
  • Seite 23: Programs Customisation

    EN - 23 At any time it is possible to modify the time, phases, temperature, relative humidity and recirculation values. The modi fi cations will have immediate effect after programming or by not operating for 15 seconds. ENTER The fresh air fan can also be activated or deactivated manually by pressing the key for a prolonged period.
  • Seite 24: Manual Defrosting

    24 - EN 7.3.7 MANUAL DEFROSTI NG I f necessary, the board allows to perform manual defrosting Menu 02 Positioned on: Menu 02 ENTER By pressing the key, the program is displayed. defrosting ENTER defrost? MENU By pressing the key, escape the defrosting menu. defrosting or with the key, activate defrosting.
  • Seite 25: Printer (Optional)

    EN - 25 The alarm appears if the evaporator has not managed to clean itself in the maximum time envisioned. For example, it can happen if the door has remained open accidentally for a AL Tim e Out Def period long enough or if the defrosting resistances are broken. PERFORM MANUAL DEFROSTI NG AND CALL THE AFTER-SALES ASSI STANCE I F THE PROBLEM PERSI STS.
  • Seite 26: Remote Control (Optional)

    26 - EN 7.6. REMOTE CONTROL ( optional) To switch the remote control on, press key K1 or K2 for a prolonged period. On switch-on the remote control rings fl and the LED switches on and ashes. The remote control switches off after 30 seconds if not used. PARAMETERS UPLOAD Data transfer from the control to the remote control.
  • Seite 27 DE - 27 I NHALTSVERZEI CHNI S 1. ALLGEMEI NE VORSCHRI FTEN UND HI NWEI SE 1.1. ABNAHME 1. ALLGEMEI NE VORSCHRI FTEN UND HI NWEI SE Das Erzeugnis wird nach erfolgter folgender Abnahmen versandt: 1.1. Abnahme Sicht-, Elektrik- und Funktionskontrolle. 1.2.
  • Seite 28: Anweisungen Für Eingriffsanforderungen

    28 - DE 1.5. ANWEI SUNGEN FÜR EI NGRI FFSANFORDERUNGEN um die Sicherheit und die Gesundheit des Benutzers zu gewährleisten. Oft haben die Betriebsstörungen, die sich ereignen können, eine ba- Unsere Geräte sind nicht zur Aufbewahrung von Arzneimitteln, Chemi- nale Ursache, der fast immer persönlich abgeholfen werden kann; kalien oder anderen Produkten, die keine Lebensmittel sind, geeignet.
  • Seite 29: Verwendete Sicherheitsvorrichtungen

    DE - 29 GERÄUSCHRI SI KO Während der ordentlichen Wartungseingriffe ist es untersagt, die Ab- L eq an der alutesten Stelle in 1m Abstand unter Betriebsbedingungen deckungen bzw. die Sicherheitsvorrichtungen (Schutzgitter, Aufkleber, < 70 dB(A) usw.) zu entfernen. L pc in 1 m Abstand unter Betriebsbedingungen <...
  • Seite 30: Entsorgung

    30 - DE 5. ENTSORGUNG AUFGRUND DES NI CHT MI T DEM GEOMETRI SCHEN MI TTELPUNKTS DES GERÄTS ÜBEREI NSTI MMENDEN SCHWERPUNKTES I ST AUF DI E NEI GUNG WÄHRENDE DES HANDLI NG ZU ACHTEN. 5.1. ANSCHLÜSSE ABTRENNEN fi Nur quali ziertes Technikpersonal ist dazu befugt das Gerät von den Versorgungsnetzen abzutrennen.
  • Seite 31: Bedienfeld

    DE - 31 7. ANLEI TUNG FÜR DEN BEDI ENER 7.1. BEDI ENFELD ENTER MENU 7 .1.1 BESCHREI BUNG DES BEDI ENFELDES 7.1.2 BESCHREI BUNG DER SYMBOLE DER MASKE Bef in d et sich d as Ger ät im OFF- LCD-Display Zust and, kann es mit dieser Tast e für I nformationen...
  • Seite 32: I Nbetriebnahme Des Geräts

    32 - DE 7.2 I NBETRI EBNAHME DES GERÄTS Die Einschaltung der Karte erfolgt mit dem Anschluss des Geräts an das Stromnetz. Wenn es mit der on/ off-Taste ausgeschaltet wurde, erscheint auf dem Display die Schrift off. Das fi heißt, dass sich das Bedienfeld im Stand-by be ndet, die Funktionen aber noch nicht aktiviert wurden.
  • Seite 33: Blättern Auf Dem Display

    DE - 33 ENTER Taste drücken, um die ausgewählte Sprache zu bestätigen. MENU Nach der Änderung der Werte, zweimal die Taste drücken oder nichts tun, um das Menü zu verlassen. 7.3.4 BLÄTTERN AUF DEM DI SPLAY Auf dem LCD-Display der Karte kann geblättert werden, wobei die folgenden Masken angezeigt werden: t 13 °C Ur 75% ENTER Durch Drücken der Taste...
  • Seite 34: Programmauswahl

    34 - DE 7.3.6 PROGRAMMAUSWAHL Die Steuerung ermöglicht die Auswahl aus einer Liste von Programmen. MENU Menu 03 drücken, um auf das folgende Menü zu gehen: ENTER Menu 03 Durch Drücken der Taste wird das ausgewählte Programm angezeigt. programmwahl Durch Drücken der Taste wählt man das gewünschte Programm aus.
  • Seite 35: Personalisierung Der Programme

    DE - 35 Die Werte der Zeit, der Phasen, der Temperatur, der relativen Feuchtigkeit und der Umluft können jederzeit geändert werden. Die Änderungen sind unmittelbar nach der Programmierung gültig oder wenn für 15 Sekunden nichts getan ENTER wird. Das Gebläse für den Luftwechsel kann auch manuell durch längeres Drücken der Taste aktiviert oder deaktiviert werden.
  • Seite 36: Manuelles Abtauen

    36 - DE 7.3.7 MANUELLES ABTAUEN Sollte es notwendig sein, ist es möglich, eine manuelle Abtauung auszuführen. Menu 02 Positionieren auf: ENTER Menu 02 Durch Drücken der Taste wird das Programm angezeigt. Abtauung ENTER MENU abtauen? Durch Drücken der Taste oder verlässt man das Abtauprogramm.
  • Seite 37 DE - 37 Der Alarm erscheint, wenn sich der Verdampfer nicht innerhalb der maximal vorgesehenen ALARM Abschalt Abt Zeit gereinigt hat. Das kann zum Beispiel passieren, wenn die Tür unbeabsichtigt lange genug offen geblieben ist oder wenn die Widerstände für das Abtauen defekt sind. EI NE MANUELLE ABTAUUNG AUSFÜHREN UND, WENN DAS PROBLEM BESTEHEN BLEI BT, DEN KUNDENDI ENST RUFEN.
  • Seite 38: Fernsteuerung (Optional)

    38 - DE 7.6. FERNSTEUERUNG ( optional) Um die Fernsteuerung aufzurufen die Taste K1 oder K2 für eine längere Zeit drücken. Bei der Einschaltung gibt die Fernbedienung ein Tonsignal aus und die LED schaltet sich ein und blinkt. Wenn die Fernbedienung 30 Sekunden nicht verwendet wird, schaltet sie sich aus.
  • Seite 39: Garantie

    NL - 39 I NHOUDSOPGAVE 1. VOORSCHRI FTEN EN ALGEMENE WAARSCHUWI NGEN 1.1. Testen 1.2. Garantie 1.3. Voorwoord 1.4. Opstelling door de klant 1.5. I nstructies voor verzoek om technische bijstand 1.6. I nstructies voor reserveonderdelen 2. TECHNI SCHE GEGEVENS 2.1.
  • Seite 40 40 - NL FU N CT I ON ELE BESCH RI J V I N G ON T VAN GST EN ON T M AN T ELI N G TOEGESTANE GEBRUIK OPGEPAST Het apparaat is niet bestemd om gebruikt te worden door mensen (met TIJDENS DE VERPLAATSING NIET ONDERSTEBOVEN KE inbegrip van kinderen) met gereduceerde geestelijke of motorische OF KANTELEN.
  • Seite 41: I N Werk I N G Z Et T En

    NL - 41 I N WERK I N G Z ET T EN STOP BELAN GRI J K VOORALEER HET APPARAAT AAN TE SLUITEN, VERZEKER U ERVAN DAT DE GEGEVENS OP HET LABEL IN OVEREENSTEMING ZIJN MET DEZE VAN HET ELEKTRISCHE NET HET REGISTRATIELABEL MET VERMELDING VAN DE ELEKTRISCHE GEGEVENS NOODZAKELIJK VOOR DE INSTALLATIE BEVINDT ZICH TER HOOGTE VAN DE KANT BOVENAAN RECHTS VAN HET BEDIENINGSPANEEL VOORAAN OF OP DE RECHTERFLANK VAN DE CEL.
  • Seite 42: Beschri Jvi Ng Van Het Bedi Eni Ngspaneel

    42 - IT NL - 42 7. GEBRUI KSAANWI JZI NG 7.1. BEDI ENI NGSPANEEL ENTER MENU 7.1.1 BESCHRI JVI NG VAN HET BEDI ENI NGSPANEEL 7.1.2 BESCHRI JVI NG SYMBOLEN SCHERMEN Als het apparaat OFF is, kan het apparaat door hierop te drukken worden aangezet Als het apparaat ON is, kan door hier langere Display LCD...
  • Seite 43: I Nschakelen/ Ui Tschakelen

    43 - NL IT - 43 7.2 I NBEDRI JFSTELLI NG VAN HET APPARAAT De besturingskaart wordt ingeschakeld door het apparaat op het elektriciteitsnet aan te sluiten. Als het apparaat met de on/ off knop wordt uitgeschakeld, verschijnt de melding "off ": dit betekent dat het bedieningspaneel in standby staat maar de functies nog niet geactiveerd zijn.
  • Seite 44 44 - IT NL - 44 ENTER Druk op de toets om de geselecteerde taal te bevestigen. MENU Nadat de wijziging van de instellingen voltooid is, drukt u tweemaal op de toets als u het menu wilt sluiten. 7.3.4 SCROLLEN VAN HET DI SPLAY U kunt door het LCD-display van de kaart scrollen om de volgende schermen te bekijken: t 13 °C Ur 75% ENTER...
  • Seite 45 45 - NL IT - 45 7.3.6 PROGRAMMA’S SELECTEREN De functie staat toe een selectie te maken in een lijst van programma’s. MENU Menu 03 Druk op tot het kiezen van: Druk op de toets voor toegang tot de selectiepagina programma’s. Menu 03 ENTER Programma’s selecteren...
  • Seite 46 46 - IT NL - 46 Wanneer de ventilator actief is verschijnt er op het display een punt na het opschrift Ri. 7.3.6b PERSONALSATI E VAN PROGRAMMA'S Er kunnen programma's op maat gecreëerd worden om te voldoen aan de diverse behoeften voor uitharding. De personalisatie bestaat uit het creëren van de juiste omstandigheden voor wat betreft temperatuur, relatieve luchtvochtigheid en luchtcirculatie in 6 programmeerbare tijdsruimtes.
  • Seite 47: Handmati G Ontdooi En

    47 - NL IT - 47 7.3.7 HANDMATI G ONTDOOI EN I n geval van nood maakt de besturingskaart het mogelijk om handmatige ontdooiing uit te voeren. Menu 02 Ga naar: Menu 02 ENTER Door te drukken op toets wordt het programma weergegeven. defrosting defrost? ENTER...
  • Seite 48 48 - IT NL - 48 Het alarm wordt weergegeven als de verdamper niet binnen de maximale toegestane tijd gereinigd is. Dit kan bijvoorbeeld gebeuren als de deur toevallig vrij lange tijd open is AL Tim e Out Def gebleven, of als de zekeringen voor ontdooien kapot zijn. HANDMATI GE ONTDOOI I NG UI TVOEREN EN ALS HET PROBLEEM AANHOUDT DE TECHNI SCHE DI ENST BELLEN.
  • Seite 49: Afstandsbedi Eni Ng ( Optioneel)

    49 - NL IT - 49 7.6. AFSTANDSBEDI ENI NG ( optioneel) Om de afstandsbediening in te schakelen, drukt u langere tijd op toets K1 of K2: bij het aanzetten klinkt de afstandsbediening en gaat de LED branden en knipperen. Als de afstandsbediening 30 seconden niet gebruikt wordt, wordt deze uitgeschakeld.
  • Seite 50 SPECIFICHE TECNICHE TECHNICAL SPECIFICATIONS -------------------------------------------- SCHEMI ELETTRICI WIRING DIAGRAMS...
  • Seite 51: Configurazione

    IT - 51 Posizionarsi sul menù 04 Password = 255 DESCRIZIONE DEFAULT ALLARMI Differenziale allarme bassa temperatura (relativo al SetPoint) -4°C -50°C 0°C Differenziale allarme alta temperatura (relativo al SetPoint) 8°C 0°C 50°C Ritardo allarme temperatura da accensione scheda o fi ne defrost 90 min 0 min 300 min...
  • Seite 52 52 - IT DESCRIZIONE DEFAULT REGOLAZIONE Isteresi per attivazione compressore e resistenza 2°C 0°C 20°C Tempo minimo tra 2 accensioni successive del compressore 0 min 0 min 30 min Ritardo attivazione del compressore dall’attivazione della scheda 30 sec 0 sec 300 sec Tempo minimo tra l’accensione e lo spegnimento del compressore 60 sec...
  • Seite 53: Configuration

    EN - 53 Positioned on menu 04 Password = 255 DESCRIPTION DEFAULT ALARMS Low temperature alarm differential (relative to the SetPoint) -4°C -50°C 0°C High temperature alarm differential (relative to the SetPoint) 8°C 0°C 50°C Temperature alarm delay from board switch-on or defrost end 90 min 0 min 300 min...
  • Seite 54 54 - EN DESCRIPTION DEFAULT REGULATION Hysteresis for compressor and resistance activation 2°C 0°C 20°C Minimum time between 2 successive compressor switch-ons 0 min 0 min 30 min Compressor activation delay from board activation 30 sec 0 sec 300 sec Minimum time between compressor switch-on/off 60 sec 0 sec...
  • Seite 55: Konfiguration

    DE - 55 Positionieren Menu 04 gehen Password = 255 BESCHREIBUNG DEFAULT ALARME Differenzial Minimaltemperaturalarm (bezüglich dem Sollwert) -4°C -50°C 0°C Differenzial Maximaltemperaturalarm (bezüglich dem Sollwert) 8°C 0°C 50°C Verzögerung Temperaturalarm ab Einschaltung der Karte oder Abtauende 90 Min 0 Min 300 Min Verzögerung Maximal- oder Minimaltemperaturalarm 60 Min...
  • Seite 56 56 - DE BESCHREIBUNG DEFAULT EINSTELLUNG Hysterese für die Aktivierung des Verdichters und des Widerstandes 2°C 0°C 20°C Minimale Zeit zwischen 2 aufeinander folgende Einschaltungen des Verdichters 0 Min 0 Min 30 Min Verzögerung der Aktivierung des Verdichters ab der Aktivierung der Steuerkarte 30 Sek 0 Sek 300 Sek...
  • Seite 57 IT - 57 STAGI ON AT U RA SALU M I a CARN E M ACI N ATA: SALAM E CALI BRO 5 0 -6 0 m m inserita sul programma P7 fase temperatura durata ricambio aria 24 °C 60 % 10 h 20 % 22 °C...
  • Seite 58 58 - EN SEASON I N G PREPARED M EAT PRODU CT S a nd M I N CED M EAT S: SALAM E SI Z E 5 0 -6 0 m m inserted into program P7 phase temperature duration air changing 24 °C 60 %...
  • Seite 59 DE - 59 REI FU N G VON WU RST WAREN a us H ACK FLEI SCH : WU RST K ALI BER 5 0 -6 0 m m bei Programm P7 eingeschaltet Phase Temperatur Dauer Luftwechsel 24 °C 60 % 10 h 20 % 22 °C...
  • Seite 60 ARMADIO EN2 FROLLATORE EN2 HANGER/HOLDER CABINET SEASONER/ HOLDER CABINET AS EN2 - AS EN2 VTR M ode llo AH EN 2 M ode l AH EN 2 V T R Dimensions Dept with 90° door Doors Climatic class Operating temperature Relative humidity Refrigerant Refrigerant capacity...
  • Seite 61 YELLOW BLACK BLACK room evap. cond. BLACK B1 B2 B4 BLACK water conden. only -V +V -V +V 230 V 12 V Converter Printer 26 25 24 INTERFACCIA SERIALE door micro-switch probes com neon Compressor evap.UR% room heat Air Extractor Power Supply 230V/1Ph/50Hz RS-485...
  • Seite 62 LEGENDA GENERALE / GENERAL KEY ALLGEMEINE ZEICHENERKLAERUNGEN / LEGENDE GENERALE LEYENDA GENERAL / ALGEMENE LEGENDE Alimentateur Alimentatore Power supply unit Netzteil Alimentador Voeding Alimentateur clignotant Alimentatore lampeggiante Lamp power supply unit Lampennetzteil Alimentador intermitente Voeding knippert Alimentateur imprimante Alimentatore stampante Printer power supply unit Druckernetzteil Alimentador impresora...
  • Seite 63 Motovent. supplementare Additional motorised fan Hilfsventilator Motov. complémentaire Motoventi. suplementario Supplem. motoventilator Attuatore lineare Linear actuator Linearantrieb Actionneur linéaire Actuador lineal Lineaire aandrijver Motoventilatore Heiz- und Motoventilateur Motoventil. calentamiento Ventilator verwarming en riscaldamento e deumidif. cation fan Entfeuchtungs-luefter chauffage et déshumid. ontvochting Neutro Neutral...

Diese Anleitung auch für:

Ts 801 g

Inhaltsverzeichnis