kbs 326 G Bedienungsanleitung
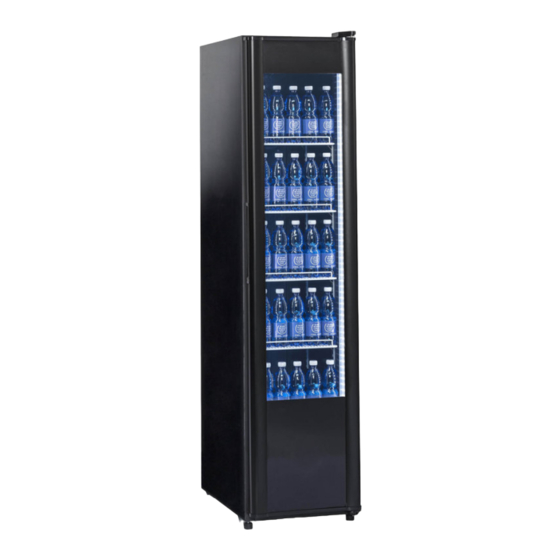
Getränkekühlschrank

Verwandte Anleitungen für kbs 326 G


Inhaltszusammenfassung für kbs 326 G
- Seite 1 BEDIENUNGSANLEITUNG Getränkekühlschrank KBS 326 G KBS Gastrotechnik GmbH - Johannes-Kepler-Str. 14 - 55129 Mainz www.kbs-gastrotechnik.de Stand Juli 2018...
- Seite 2 Instruction Manual Bedienungsanleitung Ma uel d’utilisatio Manual de instrucciones Manual de instruções Ist uzio i d’uso P2M004STD-Ver1.4...
- Seite 17 P2M004STD-Ver1.4...
- Seite 18 P2M004STD-Ver1.4...
- Seite 19 Übersetzung der Originalbetriebsanleitung Sehr geehrte Kundin, sehr geehrter Kunde, herzlichen Glückwunsch zum Kauf dieses Produktes. Bitte nehmen Sie sich einige Minuten Zeit, bevor Sie das Gerät in Betrieb nehmen und lesen Sie die nachfolgende Gebrauchsanweisung durch. Inhaltsverzeichnis Produktübersicht......................19 Sicherheitshinweise...................... 20 Bestimmungsgemäßer Gebrauch..................
-
Seite 20: Produktübersicht
Produktübersicht Article Description Glastü kühls h a k – Me ha is hes The ostat Glastü kühls h a k – Digitales The ostat P2M004STD-Ver1.4... -
Seite 21: Sicherheitshinweise
Sicherheitshinweise WICHTIG: Lesen Sie diese Anleitung zu Ihrer persönlichen Sicherheit sorgfältig durch, bevor Sie das Gerät installieren oder in Betrieb nehmen. Bewahren Sie die Anleitung gut auf, um jederzeit darauf zurückgreifen zu können. In den folgenden Punkten muss das Gerät die landesüblichen Vorschriften erfüllen: 1. - Seite 22 Sicherheitshinweise 14. Dieses Gerät kann von Kindern über 8 Jahren sowie von Personen mit verringerten physischen, sensorischen oder mentalen Fähigkeiten oder Mangel an Erfahrung und Wissen benutzt werden, wenn sie beaufsichtigt oder bezüglich des sicheren Gebrauchs des Gerätes unterwiesen wurden und die daraus resultierenden Gefahren verstehen.
-
Seite 23: Bestimmungsgemäßer Gebrauch
Sicherheitshinweise 28. Um einen sicheren Betrieb des Gerätes zu gewährleisten, muss dieses wie in dieser Anleitung beschrieben aufgestellt und angeschlossen werden. 29. Reparaturen und Wartungsarbeiten dürfen ausschließlich vom Kundendienst/ qualifizierten Technikern ausgeführt werden. 30. Der Schlüssel zum Schaltschrank muss außerhalb der Reichweite von Kindern und Benutzern aufbewahrt werden. -
Seite 24: Platzierung Und Installation
Platzierung und Installation Packen Sie das Gerät aus. Achten Sie darauf, dass Kunststoffschutzfolien und Schutzschichten vollständig von allen Oberflächen entfernt werden. Um Verletzungen zu vermeiden und Beschädigungen des Gerätes vorzubeugen, wird empfohlen, dass das Gerät von zwei Personen ausgepackt und installiert. ... -
Seite 25: Funktion Und Handhabung
Funktion und Handhabung Das Gerät einschalten Schließen Sie die Tür des Gerätes. Der Netzschalter muss sich in der Position [O] befinden. Stecken Sie den Netzstecker in eine geeignete Steckdose. Schalten Sie den Netzschalter auf die Position [I]. Die gegenwärtige Temperatur im Geräteinneren wird angezeigt. - Seite 26 Funktion und Handhabung Temperatureinstellung und Bedienpanel (Mechanischer Thermostat) Das Bedienpanel des Thermostats: Eingestellte Temperatur verändern Drehen Sie den Regler des Mechanischen Thermostats, um die Temperatur zu verändern Drehen Sie im Uhrzeigersinn um die Temperatur zu verringern Drehen Sie entgegen des Uhrzeigersinns um die Temperatur zu erhöhen ...
- Seite 27 Funktion und Handhabung Temperatureinstellung und Bedienpanel (DIXELL) Das Bedienpanel des Thermostats: 1. Abtauindikator 2. Kompressorfunktionsindikator 3. SET Taste 4. Temperatureinstellungstasten 5. Abtautaste Eingestellte Temperatur ablesen Drücken Sie einmal kurz die SET-Taste. Der Sollwert wird angezeigt. Drücken Sie die SET-Taste erneut und lassen Sie sie sofort los oder warten Sie für 15 Sekunden damit die normale Betriebsanzeige wiedererscheint.
- Seite 28 Funktion und Handhabung Temperatureinstellung und Bedienpanel (EVCO) Die Vorderseite des Thermostates 1. LED Kompressor 2. LED Abtauen 3. LED Energiesparfunktion 4. LED Stand-by 5. Programmiertaste (nur Kundendienst) 6. Maschine /Stand -by (gedrückt halten) 7. Manuelle s Abtauen (gedrückt halten) Sperren/ Entriegeln der Tastatur (»Loc» message) STAND-BY Modus ...
- Seite 29 Funktion und Handhabung Temperatureinstellung und Bedienpanel (CAREL) Die Vorderseite des Thermostates 1. Maschine /Stand -by (gedrückt halten) 2. Programmiertaste (nur Kundendienst) 3. Manuelle s Abtauen (gedrückt halten) Sperren / Entriegeln der Tastatur (»Loc» message) 4. LED Abtauen 5. LED Kompressor STAND-BY Modus ...
-
Seite 30: Reinigung, Pflege Und Wartung
Reinigung, Pflege und Wartung Routinemäßige Wartung Schalten Sie das Gerät vor der Reinigung aus und ziehen Sie den Netzstecker. Reinigen Sie das Gehäuse und das Innere des Gerätes so oft wie möglich. Wischen Sie das Gerät mit einem feuchten Tuch ab. Achten Sie darauf, dass Schalter, Bedienfeld, Kabel und Netzstecker nicht nass werden. -
Seite 31: Fehlerbehebung
Fehlerbehebung Störung Mögliche Ursache Fehlerbehebung Der Gerät Das Gerät ist nicht eingeschaltet. Vergewissern Sie sich, dass das Gerät mit funktioniert dem Stromnetz verbunden und nicht. eingeschaltet ist Stecker oder Kabel sind beschädigt. Kontaktieren Sie einen unserer Mitarbeiter oder einen qualifizierten Techniker Sicherung im Stecker beschädigt Kontaktieren Sie einen unserer Mitarbeiter oder einen qualifizierten Techniker... -
Seite 32: Entsorgung
Entsorgung Wenn das Gerät nicht länger verwendet wird und Sie es entsorgen möchten, entfernen Sie die Türen, um zu verhindern, dass kleine Kinder im Innern eingesperrt werden. Entsorgen Sie das Gerät auf umweltfreundliche Weise. Kontaktieren Sie einen qualifizierten Service- Techniker 1. -
Seite 33: Technische Daten
Technische Daten Modell Glastürkühlschrank Klimaklasse Kühlmittel Kühlmittelmenge Temperaturbereich(°C) Die genauen technischen Daten Ihres Geräts finden Nennleistung Sie auf dem Typenschild. Dieses finden Sie auf der Nennfrequenz Rückseite Ihres Geräts sowie im Inneren des Geräts. Nennspannung Der Schaltplan ist ebenfalls auf Rückseite und sowie Innere Kapazität Inneren des Geräts angebracht. - Seite 34 P2M004STD-Ver1.4...
- Seite 49 P2M004STD-Ver1.0...
- Seite 50 P2M004STD-Ver1.4...
- Seite 66 P2M004STD-Ver1.4...
- Seite 81 P2M004STD-Ver1.4...
- Seite 82 P2M004STD-Ver1.4...