Herunterladen Inhalt Inhalt Diese Seite drucken
ZENEC ZE-080DVD Installationsanleitung

ZENEC ZE-080DVD Installationsanleitung

1/2 din dvd & mp3/wma stand alone player

Werbung

Verfügbare Sprachen

Verfügbare Sprachen

MODEL NO:
ZE-080DVD
INSTRUCTION MANUAL

Werbung

Kapitel

Inhaltsverzeichnis
loading

Inhaltszusammenfassung für ZENEC ZE-080DVD

  • Seite 1 MODEL NO: ZE-080DVD INSTRUCTION MANUAL...
  • Seite 2: Ausstattungsmerkmale

    ½ DIN DVD & MP3/WMA STAND ALONE PLAYER Vielen Dank für den Kauf dieses ZENEC Produktes Mit dem Kauf des ZE-080DVD haben Sie sich für ein Produkt entschieden, das Ihnen aufgrund der Verwendung von hochwertigen Materialien und Bauteilen eine lange Lebensdauer garantiert.
  • Seite 3: Inhaltsverzeichnis

    Deutsch INHALTSVERZEICHNIS SICHERHEITSHINWEISE ....................... 4 PFLEGE VON CD’S UND DVD’S ................... 5 GRUNDGERÄT ........................6 INSTALLATION DES GERÄTES ....................7 FERNBEDIENUNG ....................... 8/9 VORBEREITUNG DER FERNBEDIENUNG ................9 GRUNDFUNKTIONEN ..................... 10/11 AUDIO/VIDEO EINGANG ...................... 12 ON-SCREEN DISPLAY FUNKTIONEN (OSD) ............... 12 WEITERE FUNKTIONEN ....................
  • Seite 4: Sicherheitshinweise

    Sichtweite des Fahrers montiert ■ Solide Montage: ist während der Fahrt nicht betrieben werden, Befestigen Sie den ZE-080DVD in Ihrem eige- da er den Fahrer vom Verkehrsgeschehen ab- nen Interesse auf einem soliden Untergrund, lenkt. Beachten Sie unbedingt die geltenden...
  • Seite 5: Pflege Von Cd's Und Dvd's

    Deutsch PFLEGE VON CD’S UND DVD’S HANDHABUNG Sie die rauen Kanten entfernen (siehe Skizze). Drücken Sie dazu den Stift gegen die innere ■ Schmutz, Staub und Kratzer können Fehl- und äußere Kante der Disc und fahren daran funktionen bei der Wiedergabe verursa- entlang.
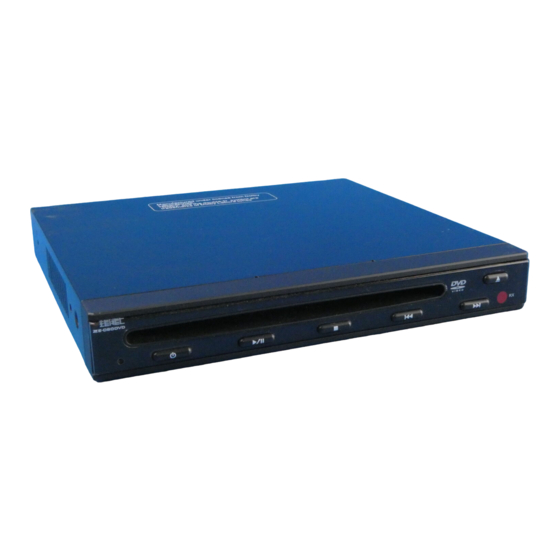
  • Seite 6: Grundgerät

    GRUNDGERÄT BEDIENTEIL ➀ ➄ POWER – Taste EJECT – Taste ■ Drücken Sie die POWER–Taste um das ■ Drücken Sie die EJECT–Taste um eine Disc Gerät ein- bzw. auszuschalten. aus dem Laufwerk auszuwerfen. ➁ ➅ PLAY/PAUSE – Taste IR – Sensor ■...
  • Seite 7: Installation Des Gerätes

    Deutsch INSTALLATION DES GERÄTES ALLGEMEIN Vermeiden Sie es das Gerät an Stellen zu installieren, wo es einer hohen Umgebungstemperatur ausgesetzt ist, was beispielsweise durch direkte Sonneneinstrahlung oder heiser Luft der Heizung verursacht wird. Zusätzlich sollte es vermieden werden, das Gerät an Stellen zu installieren wo es Schmutz, Staub und starken Vibrationen ausgesetzt ist.
  • Seite 8: Fernbedienung

    FERNBEDIENUNG 6. VOL – Tasten ■ Drücken Sie eine der VOL–Tasten um die Lautstärke entsprechend zu verändern. 7. NUMERISCHE – Tasten ■ Numerische Tasten. 8. 10+ – Taste ■ Drücken Sie die 10+ –Taste um die Num- merntaste um eine 10er Stelle zu erwei- tern.
  • Seite 9: Vorbereitung Der Fernbedienung

    Deutsch 17. STOP – Taste 23. GOTO – Taste ■ Drücken Sie die STOP–Taste um die Wie- ■ Drücken Sie die GOTO–Taste um mit der dergabe zu beenden. Kombination der numerischen Tasten di- rekt an einen bestimmten Abschnitt einer – Taste Disc zu gelangen.
  • Seite 10: Grundfunktionen

    GRUNDFUNKTIONEN EINLEGEN EINER DISC ändert sich die Geschwindigkeit wie folgt (ab- hängig vom Format der Disc): 1. Schalten Sie die Zündung ein (ACC). Normale Wiedergabe ➞ 1/2x ➞ 1/4 ➞ ➞ 2. Drücken Sie die POWER–Taste. ➞ Normale Wiedergabe... 3. Legen Sie die Disc mit dem Label nach oben in das Laufwerk des Gerätes ein.
  • Seite 11: Hauptmenü Einer Dvd

    Deutsch ZOOM EIN- UND AUSSCHALTEN DES GERÄTES Drücken Sie während der Wiedergabe einer Drücken Sie die POWER–Taste um das Gerät Disc die ZOOM–Taste um das Bild zu zoomen ein- oder auszuschalten. (abhängig von der DVD). BETRIEBSMODUS HAUPTMENÜ EINER DVD Drücken Sie die AUX–Taste um zwischen dem Drücken Sie während der Wiedergabe einer integrierten DVD–Player und dem A/V–Eingang Disc die TITLE–Taste um das Hauptmenü...
  • Seite 12: Audio/Video Eingang

    Gerätes mit AUDIO IN L und AUDIO IN R verbinden. Anschließend den Videoausgang des externen Gerätes mit VIDEO IN verbinden. 2. Schalten Sie das externe Gerät und den ZE-080DVD ein. 3. Drücken Sie die AUX–Taste um den A/V–Eingang des Gerätes auszuwählen.
  • Seite 13: Weitere Funktionen

    Deutsch WEITERE FUNKTIONEN AUSWAHL VON VERSCHIEDENEN AUFRUFEN DES TITELMENÜS EINER TONSPUREN DISC (NUR DVD) Wenn der Inhalt einer DVD in verschiedene Ti- tel unterteilt ist, können Sie im Titelmenü der Drücken Sie während der Wiedergabe die AU- Disc den jeweiligen Titel direkt auswählen. DIO–Taste um zwischen den verschiedenen 1.
  • Seite 14: Wiedergabe Von Mp3/Mpeg/Jpg Discs

    merapositionen auf der Disc vorhanden sind, erscheint beim drücken der Angle–Taste das folgende Symbol oben links auf dem Monitor: = Diese Aktion kann im Moment nicht aus- geführt werden bzw. wird von dem gerade wie- dergegebenen Medium nicht unterstützt. WIEDERGABE VON MP3/MPEG/JPG DISCS Normalerweise sind MP3–Tracks in verschie- denen Ordnern auf einer Disc gespeichert.
  • Seite 15: Hauptmenü (Setup)

    Deutsch HAUPTMENÜ (SETUP) 1. Drücken Sie nachdem Sie die Wiedergabe Language Video Rating gestoppt haben die Setup–Taste. 2. Das Setup wird angezeigt. 3. Wählen Sie mit den CURSOR–Tasten den OSD Menu English gewünschten Menüpunkt aus. 4. Drücken Sie die ENTER–Taste um Ihre Subtitle Auswahl zu bestätigen.
  • Seite 16: Spracheinstellungen (Language Setup)

    SPRACHEINSTELLUNGEN (LANGUAGE SETUP) OSD Menu Language Video Rating Wählen Sie die gewünschte Sprache, in wel- cher das OSD–Menü angezeigt werden soll. Benutzen Sie hierfür die CURSOR–Tasten und OSD Menu English English bestätigen Sie die Auswahl durch drücken der Subtitle Francais ENTER–Taste.
  • Seite 17: Videoeinstellungen (Video Setup)

    Deutsch VIDEOEINSTELLUNGEN (VIDEO SETUP) BILDFORMAT (TV DISPLAY) Language Video Rating Wählen Sie das passende Bildformat (4:3 oder 16:9) in Abhängigkeit des angeschlossenen Monitors aus. TV Display Wide Normal/ PS Normal/ LB TV Type NTSC Normal / PS (für 4:3 Monitore) Wide Wiedergabe der Disc im Pan &...
  • Seite 18: Ratingeinstellungen

    RATINGEINSTELLUNGEN PASSWORT Language Language Video Video Audio Rating Rating Geben Sie das alte Passwort ein (Ausliefe- rungszustand 0000), um danach eine von Ih- nen ausgesuchte Zahlenkombination (vierstel- lig) einzugeben. * * * * **** **** Password Password Password Rating Rating Rating 1.
  • Seite 19: Zusätzliche Informationen

    Deutsch ZUSÄTZLICHE INFORMATIONEN ■ Um Kurzschlüsse zu vermeiden, sollten Sie ■ CD-R / CD-RW Disc die mit einem CD–Re- vor Beginn der Installationsarbeiten das korder aufgenommen wurden, können auf +12V Kabel der Batterie abhängen. diesem Gerät abgespielt werden. ■ Um eine Endstufe oder andere Geräte ■...
  • Seite 20: Zubehör

    ZUBEHÖR Abbildung Menge Artikel Bedienungsanleitung User Manual Fernbedienung A/V-Anschlusskabel Anschlusskabel IR-Sensor Gummifüße Montagematerial 1 Set BITTE BEACHTEN ■ Bei der Benutzung von Zubehör welches nicht zum Lieferumfang gehört, kann es zu einer Beschädigung des Gerätes kommen. Seien Sie sicher dass Sie nur das Zubehör benutzen, das auf der oberen Zeichnung abgebildet ist.
  • Seite 21: Technische Daten

    Deutsch TECHNISCHE DATEN Supply Voltage: 12 VDC (10.8V ~ 16V), test voltage 13.2V, negative ground Environment Temperature: 0°C ~ 45°C Chassis Dimensions: 183.4 x 178 x 50 (mm) Current Consumption: Less than 2A Quiescent < 5mA Video System: NTSC/PAL/AUTO Discs Played: (1) DVD-VIDEO Disc 5”...
  • Seite 22: Audio Systems

    RCA interconnects, power the interior a chance to cool down before cables, and speaker wire. Thank you for starting playback. choosing a ZENEC product for your mobile entertainment system. Use the proper Power Supply This product is designed to operate with 12 volt DC and negative chassis ground.
  • Seite 23 English CONTENTS SAFETY INFORMATION ......................24 DISC NOTES ..........................25 INSTALLATION ........................26/27 REMOTE CONTROL ........................28 PREPARING THE REMOTE CONTROL ...................29 LOADING A DVD/VCD/CD DISC .....................29 EJECTING A DISC ......................30/31 ON-SCREEN DISPLAY FUNCTION ..................32 MULTI-AUDIO LANGUAGE FUNCTION ................33/34 INITIAL SETUP .........................35 LANGUAGE SETUP .........................36 VIDEO SETUP ..........................37 RATING SETUP ........................38 ADDITIONAL INFORMATION ....................39...
  • Seite 24: Safety Information

    SAFETY INFORMATION Region Management Caution: This DVD player is a class A laser product. Information: However this mobile DVD player uses a This mobile DVD player is designed and visible/invisible laser beam which could cause manufactured to respond to the region mana- hazardous radiation exposure if directed into gement information that is recorded on a DVD the eyes.
  • Seite 25: Disc Cleaning

    English DISC CLEANING Preparing New Discs with Use a dry soft cloth to wipe the surface. If the disc is quite dirty, use a soft cloth slightly Rough Spots moistured with isopropyl (rubbing) alcohol. A new disc may have rough edges on its Never use solvents such as benzine, thinner or inside and outside edges.
  • Seite 26: Installation

    INSTALLATION Front panel POWER Turn the power on/off PLAY/PAUSE Begin disc play/Pause disc play ( Note :To start playback DVD discs,press the PLAY button of the Remote Controller) STOP Stop disc play SKIP Use to skip a scene or music A disc is ejected by this button EJECT Remote Sensor...
  • Seite 27 English General Avoid installing and operating the unit in direct sunlight or near hot air vents. If the internal temperature of the vehicle is extremely high, a short cooling down period is necessary before operating the unit. Notes: ■ Use only the supplied mounting material. Failure to follow the instructions will invalidate your warranty.
  • Seite 28: Remote Control

    REMOTE CONTROL 10. Changes the AUDIO soundtrack on multiaudio soundtrack DVD disc. Changing of the sound mode of the VCD/CD disc 11. Switch the Repeat mode of DVD/VCD/ CD/MP3 disc 12. Changes the SUBTITLE language on multi-subtitle language DVD disc 13.
  • Seite 29: Preparing The Remote Control

    English PREPARING THE REMOTE CONTROL Inserting the Battery 1. Open the battery compartment cover. 2. Insert the new battery (3V Cr2025). Make sure that the positive and negative terminals of the battery are oriented as indicated. 3. Close the cover Using the Remote Control Point the remote control toward the front of the player (at the remote receiver “eye”)
  • Seite 30: Ejecting A Disc

    EJECTING A DISC Press @ (EJECT) button to eject the disc. SVCD/VCD/CD/MP3: Press the REPEAT button to select repeat Stopping play mode as follows. ■ 1. Press the (Stop) button to stop ➞ Repeat Single ➞ Repeat ALL ➞ OFF ➞ playback Press the (play) button for playback.
  • Seite 31 English Remote Sensor (IR) Point the remote handset to the remote sensor. Receive the signal from remote handset Turning the player on/off Press the POWER button on front of panel or press POWER button on remote control to turn the player on or off. Mode Whenever you press AUX button, input condition is to be changed as follows.
  • Seite 32: On-Screen Display Function

    ON-SCREEN DISPLAY FUNCTION Press the DISPLAY button during playback to display the contents of the current disc on the screen. Example: (1) Press DISPLAY for the first time: SVCD VCD CD: Disc type, elapsed time, remain time Track Number, Total Track Number of the disc currently being played will shown on the screen.
  • Seite 33: Multi-Audio Language Function

    English MULTI-AUDIO LANGUAGE FUNCTION Multi-Subtitle Language DVD: Function (For DVD only) Press AUDIO during playback. Each time the button is pressed, number of Press SUBTITLE during playback. the audio soundtrack language changes in Each time the button is pressed, number of the sequential order.
  • Seite 34 In the playback, use to skip an item ahead or back. When the STOP, use . Move the 5634 cursor to MODE, press ENTER button to change the mode. Use SUBTITLE button to return the upper window. Note: Press TITLE button to enter the preview mode when playing JPG...
  • Seite 35: Initial Setup

    English INITIAL SETUP SETUP MENU - MAIN PAGE Language Video Rating 1. Press SETUP in the stop mode. 2. The initial SETUP menu is displayed. OSD Menu English 3. Select the preferred item by using the Subtitle buttons. 4. Press ENTER buttons. Audio English 5.
  • Seite 36: Language Setup

    LANGUAGE SETUP Subtitle Language Video Rating Select the preferred SUBTITLE language by using the cursor buttons and confirm by pressing ENTER. OSD Menu English English Subtitle Disc Menu Francais Audio English Select the preferred DISC MENU language Espanol by using the cursor buttons and confirm by Disc Menu English Deutsch...
  • Seite 37: Video Setup

    English VIDEO SETUP TV Display This is to select the appropriate TV aspect (4:3 Language Video Rating or 16:9) according to the connected TV set. TV Display Wide Normal/ PS Normal/PS (For 4:3 TV) Normal/ LB TV Type NTSC Wide Played back in the PAN &...
  • Seite 38: Rating Setup

    RATING SETUP Password Language Language Video Video Audio Rating Rating Type the old password (The initial factory code is null) and key in a new four character password of your choice to confirm * * * * **** **** Password Password Password Rating...
  • Seite 39: Additional Information

    English ADDITIONAL INFORMATION Notes: CD - Extra discs can be played back as music To avoid shorts in the electrical system, be CD‘s. sure to disconnect the power cable before beginning installation. Normal playable discs are CD-R/CD-RW other than those recorded with a music CD Refer to the owner´s manual for details on recorder.
  • Seite 40: Accessories And Hardware

    ACCESSORIES AND HARDWARE Diagram Quantity N o. Item User Manual User Manual Remote Control A/V Connections Power Supply Connections External Remote Sensor Rubber Foot Mounting Material 1 Set The use of any accessories except for those provided might result in damage to the unit.
  • Seite 41: Technical Specifications

    English TECHNICAL SPECIFICATIONS Supply Voltage: 12 VDC (10.8V ~ 16V), test voltage 13.2V, negative ground Environment Temperature: 0°C ~ 45°C Chassis Dimensions: 183.4 x 178 x 50 (mm) Current Consumption: Less than 2A Quiescent < 5mA Video System: NTSC/PAL/AUTO Discs Played: (1) DVD-VIDEO Disc 5”...
  • Seite 42: Garantiebestimmungen

    2 YEARS LIMITED WARRANTY Dear customer Thank you for purchasing this ZENEC product. It is advisable to keep the original packing material for any future transporting of the product. Should your ZENEC product require warranty service, please return it to the retailer from whom it was purchased or the distributor in your country.
  • Seite 43 ZENEC MODEL: ZE-080DVD Serial Number: ..........................Date of Purchase: ......................... Your name: ........................... Your address: ..........................City: .............................. State: ........ZIP or Postal Code ................ Country: ............................Dealer’s address & stamp...

Inhaltsverzeichnis