Herunterladen Inhalt Inhalt Diese Seite drucken
Inhaltsverzeichnis

Werbung

Verfügbare Sprachen

Verfügbare Sprachen

DVD & MP3/ WMA
RDS RECEIVER
ZE-160DVD
CAR DVD RECEIVER
MODEL NO:
ZE-160DVD
INSTRUCTION MANUAL

Werbung

Kapitel

Inhaltsverzeichnis
loading

Inhaltszusammenfassung für ZENEC ZE-160DVD

  • Seite 1 DVD & MP3/ WMA RDS RECEIVER ZE-160DVD CAR DVD RECEIVER MODEL NO: ZE-160DVD INSTRUCTION MANUAL...
  • Seite 2 Section Contents Thank you for buying this product. Please read through these operating instructions, so you will know how to operate your headunit properly. After you have finished reading the instructions, put them away in a safe place for future reference.
  • Seite 4: Inhaltsverzeichnis

    Section Contents Before You Start Select Audio Track (language) General Function ........1 --only DVD .......... 13 Cautions ..........2 Select Camera Angle ......13 Region Numbers ........2 Fast Forward/Fast Backward ..... 13 What the Marks on DVD Indicate ..3 Select rearplay ........
  • Seite 5: Before You Start

    Section Before You Start Sound effect of Dolby TV Type: NTSC, PAL or Auto Surround 2 channel—layout diagram of speakers Video output: Pan&Scan, Letter box, Wide General Function: Type of supported discs: Audio output: DVD-5, DVD-9, DVD-10, SVCD, DVCD, VCD, •...
  • Seite 6: Cautions

    Section Before You Start Cautions: • Video system of a connected component • Keep the volume low to concentrate on This product is NTSC/PAL system traffic and road conditions for driving compatible. When connecting other safety. components to this product, be sure components are compatible with the •...
  • Seite 7: What The Marks On Dvd Indicate

    Section Before You Start What the marks on DVDs Video CD and CD/MP3 Indicate On CDs/MP3 and Video CDs, the contents are divided into tracks. One track usually The marks below can be found on DVD disc corresponds to one song. On some discs, labels and packages.
  • Seite 8: Protecting Your Unit From Theft

    Section Before You Start Protecting your unit from Note: theft • Never use force or grip the display and the buttons tightly when removing or attaching. The front panel can be detached from the head unit and stored in the protective case •...
  • Seite 9: What's What

    Section Before You Start What‘s what Head Unit: 15 16 1 7 • Press [ ] to scan the stored station OPEN button for tuning. • Press to open the front panel. • Press [ ] and hold over 2 sec to scan current band and auto store SELECT/LOCAL button the available stations.
  • Seite 10 Section Before You Start NEXT ( : ) / FORWARD 6/STOP button ( 8 ) button • Press to preset tuning and stop playback when using built-in DVD • Press to go to the next track player. (chapter) or seek tuning increase frequency automatically while the tuner is playing as a source BAND/ENT button...
  • Seite 11: Remote Control

    Section Before You Start Remote Control: Use and care of the remote control Installing the battery • Slide the tray out on the back of the Disp D is p Mo d e remote control and insert the battery with the plus (+) and minus (-) poles pointing in S et u p Men u...
  • Seite 12: Basic Operation

    Section Basic Operation Power ON/OFF Note: • Press [POWER/MUTE] button to turn the • When the unit is in standby state, only unit on. current time be displayed on LCD if the • Press and hold [POWER/MUTE] button clock display is enabled. until the unit is turned off.
  • Seite 13: System Setup

    Section Basic Operation System setup Balance and Fader Control • In Balance mode, rotate the knob: to • When the unit is power on and current adjust the volume proportion from left display mode isn‘t Clock mode, press side to right side. and hold [DISP] button to enter system setup mode.
  • Seite 14: Tuner Operation

    Section Tuner Operation Select Tuner Function Store Current Station • Press [MODE] button and select RADIO • Under current frequency, press one of the Mode, then the unit will be switched to six number buttons a little longer to store tuning status.
  • Seite 15: Dvd Operation

    Section DVD Operation Before Operation Eject Out Disc • Before applying laser disc operation, • First press [OPEN] button to put down please make sure monitor has been the front panel. Then press [ @ ] button, properly connected to the unit. if a disc is in the unit, the disc will be ejected.
  • Seite 16: Select Zoom

    Section DVD Operation Select Zoom Select Chapter/Track or Play • Press [4/ZOOM] once, Zoom Play will be time changed once according to the following • Press [GOTO] button in remote control sequence: to select play time (for CD/VCD) or select 1X →...
  • Seite 17: Select Subtitle Language--Only Dvd

    Section DVD Operation Select Subtitle Language Fast Forward & Fast ---only DVD Backward • When disc is playing back, subtitle • Press and hold [:]/[9] on front panel or language is in disc initiation setting. press [8]/[7] button on remote control Press [SUB-TITLE] button on the remote to fast forward and fast backward play control to switch among disc-supported...
  • Seite 18: Dual Zone (Real Playback)

    Section Dual Zone (Rear Playback) Operation What is Dual Zone Playback output of the rear side from the amplifier will be enabled automatically (it is usually This car DVD receiver has a function Dual disabled during dual zone playback). Zone Playback. Dual Zone means the front please refer to the illustrations (2) next side and the rear side in the car.
  • Seite 19: Disable Dual Zone Playback

    Section Dual Zone (Rear Playback) Operation Note: FRO NT L 1. When Dual Zone playback is disabled, then the speaker out for rear side from the amplifier will be enabled (please refer FRO NT R to the illustration (2); 2. If the front side is not playing DVD, then REAR L the audio line output of RL and RR will have no output, and vice versa they will...
  • Seite 20: Built-In Player Setup

    Section Built-in Player Setup Set Language Lang uage Vid eo Au dio R ating • Insert DVD disc and press [STOP] until the screen displays ”stop2”. OSD Men u Eng lish Sub title Eng lish • Press [SETUP] which is in the remote Aud io Eng lish Eng lish...
  • Seite 21: Set Video

    Section Built-in Player Setup Set Video Language Video Audio Rating • Press [SETUP] which is on the remote control to enter setup menu, Select TV shape 16:9 [Video]. TV system NTSC Brightness • Set TV shape to 4:3 ps / 4:3 LB /16:9 and Edges press [ENTER] to confirm.
  • Seite 22 Section Built-in Player Setup Section Lang uage V ideo A udio Rat ing • Press [SETUP] which is on the remote control to enter setup menu, select Analog O ut Digital O ut [Audio]. 2 Chann el MP3/WMA 2 Chann el •...
  • Seite 23: Set Rating

    Section Built-in Player Setup Lang uage V ideo A udio Rat ing Lang uage V ideo A udio Rat ing Analog Out Digital Out 2 Channel **** Password MP3/WMA 2 Channel Rating 1. Kid Safe Others 2 Channel Restore default 2 Channel Lang uage V ideo...
  • Seite 24: Cd Changer Operation

    Section CD Changer Operation Mode Switch Repeated Play • Press [MODE] button to switch from other • Press [5/REPT] button to repeatedly modes to CDC mode (switch sequence: playback current track; press it again to playback current disc; press it the third RADIO →...
  • Seite 25: Installation & Connection

    Section Installation & Connection Installation Notes • Power supply for the unit is 12V negative (-) grounded voltage. • Before finally installing the unit, connect the wiring temporarily, making sure it is all • Carefully read instruction manual connected up properly, and the unit and and installation specification before the system work properly.
  • Seite 26: Installation Procedure

    Section Installation & Connection Installation Procedure Unit installation If the car has the function of car DVD player on dashboard (Thickness: 5mm-6mm), directly install the unit into the car. • Insert Mounting Bracket into dashboard and bend mounting tabs outwards with a screwdriver.
  • Seite 27: Cables Connection

    Section Installation & Connection Cables Connection YELLOW YELLOW REAR VIDEO FRONT VIDEO WHITE BLUE DIGITAL AUDIO REAR L BROWN SUB.W REAR R AUX IN/R FRONT OUT R WHITE AUX IN/L WHITE FRONT OUT L TEL. MUTE Battery Cable (Yellow) Connect to car storage battery: DC 12V power supply ACC Cable (Red) ILLUMI Connect to electric terminal controlled by ignition switch (12V DC)
  • Seite 28 Section Installation & Connection Parking Brake Cable (blue) Connected to parking brake switch used to detect the ON/OFF status of the parking brake. Parking Brake switch Parking Brake Cord Brake Lamp Battery...
  • Seite 29: Speakers Connection

    Section Installation & Connection Speaker Connection Rig ht+ Rig ht- Le ft+ Le ft- Fro nt White G rey G rey/Bla c k White /Bla c k Sp e a ke r Re a r G ree n Purple Purple /Bla c k G ree n/Bla c k Sp e a ke r Note:...
  • Seite 30: Outlet Power Amplifier Connection

    Section Installation & Connection Outlet Power Amplifier Connection: • Please connect power amplifier correctly according to the following connection diagram. Incorrect connection will cause incorrect vocalization and damage speakers. FRONT OUT R FRONT OUT R POWER BROWN SUB.W SUB.W FRONT OUT L WHITE FRONT OUT L REAR R...
  • Seite 31: Additional Information

    Section Additional lnformation Warning Troubleshooting • Do not directly expose the machine to • If such problem arises during your usage, rain or moisture in order to reduce the risk the troubleshooting guide will settle down of fire and electric shock. all your problems immediately.
  • Seite 32 Section Additional lnformation • Speakers connected to this unit must be Note: highpower types with minimum rating • This unit is for vehicles with a 12-volt of 40W and impedance of 4 to 8 ohms. battery and negative grounding. Before Connecting speakers with output and/or installing it in a vehicle, truck, or bus, impedance values other than those noted...
  • Seite 33 Section Additional lnformation • With some DVD-Video discs, you may not • Playback of music CD-R/CD-RW discs be able to use certain functions. even than those recorded with a music CD recorder, may not be possible with this unit due to disc characteristics or •...
  • Seite 34: Care Of Discs

    Section Additional lnformation Care of discs • Do not touch the face of the information side. • Do not scratch the disc. • Do not bend the disc. • When not in use, put away the disc. • Do not use irregular and deformed discs. •...
  • Seite 35: Specification

    Section Additional lnformation Specification Power Supply power voltage: 12V DC (10.5~16V DC allowable) MAX Current: 10~13A Audio S/N Ratio: 80dB Dynamic Range: 80dB Output power: 30W 4 4 Ω Load Impedance: THD: 0.1% FM Tuner Frequency range: 87.5M ~ 108 Mhz Usable Sensitivity (S/N: 30dB) 20 dBu Frequency Response:...
  • Seite 36: Warranty

    Thank you for purchasing this ZENEC product. It is advisable to keep the original packing material for any future transporting of the product. Should your ZENEC product require warranty service, please return it to the retailer from whom it was purchased or the distributor in your country.
  • Seite 38 Lesen Sie sich vor allem die Garantiebestimmungen genau durch, um im Falle eines Defektes den optimalen Service und Kundendienst nutzen zu können. Sollten Sie dennoch Fragen haben, wenden Sie sich bitte an Ihren ZENEC – Händler oder den jeweiligen Landesvertrieb.
  • Seite 40 Section INHALTSVERZEICHNIS Tonspuren .......... 13 BEVOR SIE STARTEN Auswahl des Kamerawinkels ....13 Generelle Funktionen ......1 Schneller Vorlauf & Rücklauf ..... 13 Vorsicht ..........2 Auswahl der Rear – Play – Funktion ... 13 Regional Code ........2 Auswählen von verschiedenen Bedeutung der verschiedenen Ordnern ..........
  • Seite 41: Bevor Sie Starten

    Section BEVOR SIE STARTEN GENERELLE FUNKTIONEN: • Hohe Video Auflösung durch Verwendung von Video DAC’s höchster Qualität • DVD & MP3/WMA RDS Receiver mit abnehmbarem Bedienteil • Volle MP3 CD-R/RW Kompatibilität – mit ID3v1 Tag On-Screen Anzeige • DVD – Laufwerk mit Selbstlademechanismus und 16MB •...
  • Seite 42: Vorsicht

    Section BEVOR SIE STARTEN • Das Gerät sollte in horizontaler Lage VORSICHT: mit der Vorderseite nach oben in einem • Die Lautstärke im Inneren Ihres zweckmäßigen Winkel, aber nicht über Fahrzeuges sollte nur so hoch sein, 15° montiert werden. das Sie sich weiterhin auf den Verkehr konzentrieren können.
  • Seite 43: Bedeutung Der Verschiedenen Symbole Einer Dvd

    Section BEVOR SIE STARTEN BEDEUTUNG DER STRUKTURELLER AUFBAU VERSCHIEDENEN SYMBOLE DES INHALTS EINER CD/ EINER DVD: VIDEO CD/MP3 Disk: Die verschiedenen Symbole finden Sie auf • Der Inhalt von CD, MP3 und Video Disks dem Label oder der Verpackung der DVD. ist in Tracks aufgeteilt.
  • Seite 44: Schützen Sie Das Gerät Vor Diebstahl

    Section BEVOR SIE STARTEN SCHÜTZEN SIE DAS GERÄT BITTE BEACHTEN: VOR DIEBSTAHL: • Versuchen Sie niemals das Bedienteil mit Gewalt abzunehmen. • Um einen Diebstahl zu erschweren, können Sie das Bedienteil abnehmen und • Setzen Sie das Bedienteil keinen es in der dafür vorgesehenen Schutzhülle extremen Stößen aus.
  • Seite 45: Bedienungselemente Grundgerät

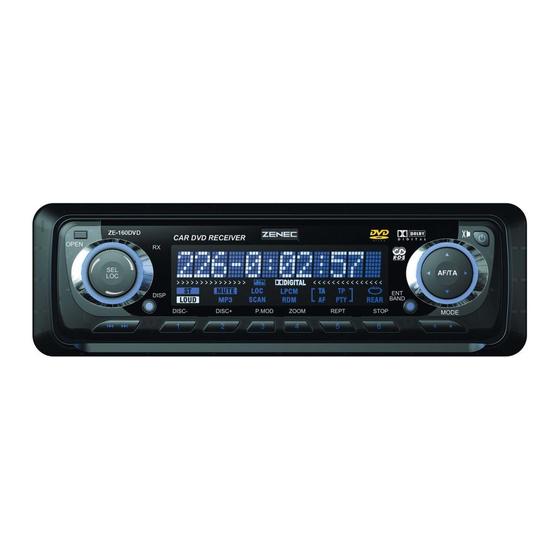
    Section BEVOR SIE STARTEN Bedienungselemente Grundgerät: 15 16 1 7 OPEN – Taste: (5634) /AS/PS Taste: • Drücken Sie die Open – Taste um • Benutzen Sie die Taste(n) um den das Bedienteil zu öffnen. Cursor im Setup zu bewegen. •...
  • Seite 46 Section BEVOR SIE STARTEN Nächste ( : ) /Vorwärts ( 8 ) Taste: 5 / REPT – Taste: • Durch drücken dieser Taste • Zum anwählen eines gespeicherten gelangen Sie zum nächsten Senders oder zum aktivieren Track oder Kapitel, oder der der Repeat –...
  • Seite 47: Nutzung Der Fernbedienung

    Section BEVOR SIE STARTEN FERNBEDIENUNG: NUTZUNG DER FERNBEDIENUNG: Batterie einsetzen • Ziehen Sie das kleine Batteriefach auf der Disp D is p Mo d e Rückseite der Fernbedienung zurück und setzen Sie die Batterie ein. Achten Sie S et u p Men u P au se aber auf die richtige Polung!
  • Seite 48: Grundfunktionen

    Section GRUNDFUNKTIONEN POWER ON/OFF: springt die Anzeige wieder automatisch zu dem voreingestellten Wert des • Drücken Sie die [POWER/MUTE] Taste jeweiligen Modus zurück. um das Gerät einzuschalten. • Drücken Sie die [POWER/MUTE] Tuner: Taste 2 Sekunden lang, um das Gerät Frequenz (voreingestellt) →...
  • Seite 49: System-Einstellungen

    Section GRUNDFUNKTIONEN SYSTEM – EINSTELLUNGEN: BASS UND TREBLE • Wenn das Gerät eingeschaltet ist und EINSTELLUNGEN: der Modus für die Zeiteinstellung nicht • Durch drehen des Lautstärkereglers aktiv ist, gelangen Sie durch längeres können Sie folgende Einstellungen drücken der [DISP] Taste in das System vornehmen: –...
  • Seite 50: Tuner - Bedienung

    Section TUNER – BEDIENUNG AKTIVIEREN DES TUNERS: AUSWAHL VON • Drücken Sie die [MODE] Taste und GESPEICHERTEN SENDERN: wählen Sie den Tunermodus um den • Drücken Sie eine der folgenden Stations- eingebauten RDS – Tuner zu aktivieren. tasten um die entsprechenden Sender auszuwählen die Sie gespeichert haben: AUSWAHL DES [1/DISC-], [2/DISC+], [3/P.MODE]...
  • Seite 51: Dvd - Bedienung

    Section DVD – BEDIENUNG VOR DER INBETRIEBNAHME: AUSWERFEN EINER DISK: • Bevor Sie die DVD – Wiedergabe starten, • Drücken Sie die [OPEN] Taste um das vergewissern Sie sich das der Monitor Bedienteil zu öffnen. Nachdem Sie die richtig am Gerät angeschlossen ist. [@] Taste gedrückt haben wird die Disk ausgeworfen.
  • Seite 52: Zoom - Funktion

    Section DVD – BEDIENUNG ZOOM – FUNKTION: die Funktion deaktiviert und entsprechend im LCD – Display angezeigt. • Drücken Sie die [4/ZOOM] Taste um das Bild zu zoomen. Mit jedem weiteren Tastendruck ändert sich der Zoom AUSWAHL VON – Faktor wie folgt: KAPITEL/TRACK UND 1X →...
  • Seite 53: Auswahl Der Sprache Des Untertitels

    Section DVD – BEDIENUNG AUSWAHL DER SPRACHE Bitte beachten: DES UNTERTITELS Sollte nach 5 Sekunden keine Bedienung (NUR DVD): erfolgen, wird die Aktion abgebrochen. • Während der Wiedergabe einer DVD kann SCHNELLER VORLAUF & die Sprache des Untertitels ausgewählt werden. SCHNELLER RÜCKLAUF: •...
  • Seite 54: Dual Zone

    Section DUAL ZONE (REAR PLAYBACK) BEDIENUNG WAS IST DUAL ZONE Bitte beachten: WIEDERGABE: Wenn die Dual Zone Funktion aktiviert ist, sind die Lautsprecherausgänge Rear R und Dieses Gerät unterstützt die Funktion Dual Rear L inaktiv, um die hinteren Passagiere Zone. Mit Dual Zone ist der vordere und während der DVD –...
  • Seite 55: Bedienung Während Die Dual Zone Funktion Aktiviert Ist

    Section DUAL ZONE (REAR PLAYBACK) BEDIENUNG Bedienteil gedrückt halten. FRO NT L • Das REAR – Icon auf dem LCD – Display verschwindet. FRO NT R • Wenn die DVD – Wiedergabe gerade auch für den vorderen Bereich aktiv ist, wird die DVD - Wiedergabe trotz des REAR L deaktivieren der Dual Zone Funktion...
  • Seite 56: Dvd Einstellungen

    Ö Ð Î Ä Section DVD - EINSTELLUNGEN EINSTELLUNGEN SPRACHE: Lang uage Video Aud io R ating • Legen Sie eine DVD ein und drücken Sie die [STOP] Taste 2x bis auf dem OSD Men u Eng lish Eng lish Sub title Eng lish Chin ese...
  • Seite 57: Einstellungen Video

    Section DVD - EINSTELLUNGEN EINSTELLUNGEN VIDEO: Language Video Audio Rating • Drücken Sie auf der Fernbedienung die [SETUP] Taste um in das 4:3 PS TV shape 16:9 Einstellungsmenü zu kommen. TV system 4:3LB NTSC Brightness 16:9 • Wählen Sie den Menüpunkt Video aus Edges und drücken Sie die [ENTER] Taste um die Auswahl zu bestätigen.
  • Seite 58: Einstellungen Audio

    Section DVD - EINSTELLUNGEN EINSTELLUNGEN AUDIO: Lang uage V ideo A udio Rat ing • Drücken Sie auf der Fernbedienung die [SETUP] Taste um in das Analog O ut Digital O ut 2 Chann el Einstellungsmenü zu kommen. MP3/WMA 2 Chann el Others 2 Chann el •...
  • Seite 59: Ratingeinstellungen

    Section DVD - EINSTELLUNGEN Lang uage V ideo A udio Rat ing Lang uage V ideo A udio Rat ing Analog Out Digital Out 2 Channel **** Password MP3/WMA 2 Channel Rating 1. Kid Safe Others 2 Channel Restore default 2 Channel Lang uage V ideo...
  • Seite 60: Bedienung Eines Externen Cd - Wechslers

    Section BEDIENUNG EINES EXTERNEN CD – WECHSLER BETRIEBSMODUS: RANDOM / SCAN • Drücken Sie die [MODE] Taste bis Sie in WIEDERGABE: den CDC – Modus gelangen: • Drücken Sie die [3/P.MODE] Taste um RADIO → DVD → CDC → AUX → RADIO einen entsprechenden Wiedergabe –...
  • Seite 61: Installation & Anschlüsse

    Section INSTALLATION & ANSCHLÜSSE entsprechenden Temperaturen auch Bemerkungen zur Installation beschädigt werden kann, sollten Sie es • Wenden Sie sich wenn möglich an vermeiden das Gerät in der Nähe von qualifiziertes Fachpersonal um das Gerät Hitzequellen wie z.B den Austrittskanälen zu installieren.
  • Seite 62: Installation Des Gerätes

    Section INSTALLATION & ANSCHLÜSSE Installation des Gerätes • Wenn Ihr Fahrzeug über einen 1-DIN Geräteschacht verfügt, können Sie das Gerät ohne weitere Anpassungen oder Montagearbeiten direkt in dem vorhandenen DIN-Schacht montieren. • Schieben Sie den Montagerahmen vollständig in den DIN-Schacht und verankern ihn durch umbiegen der Blechlaschen, welche sich am Montagerahmen befinden.
  • Seite 63: Anschluss-Schema

    Section INSTALLATION & ANSCHLÜSSE Anschluss-Schema YELLOW YELLOW REAR VIDEO FRONT VIDEO WHITE BLUE DIGITAL AUDIO REAR L BROWN SUB.W REAR R AUX IN/R FRONT OUT R WHITE AUX IN/L WHITE FRONT OUT L TEL. MUTE Batterie (gelb) ILLUMI • Anschluss an die Batterie Ihres Fahr- zeuges (+12V DC).
  • Seite 64 Section INSTALLATION & ANSCHLÜSSE Parking Brake (blau) • Anschluss an den Schalter der Handbremse. Parking Brake switch Parking Brake Cord Brake Lamp Battery...
  • Seite 65: Anschlussbelegung Lautsprecher

    Section INSTALLATION & ANSCHLÜSSE ANSCHLUSSBELEGUNG LAUTSPRECHER: Rig ht+ Rig ht- Le ft+ Le ft- Fro nt White G rey G rey/Bla c k White /Bla c k Sp e a ke r Re a r G ree n Purple Purple /Bla c k G ree n/Bla c k Sp e a ke r Bitte beachten:...
  • Seite 66: Anschluss Eines Externen Verstärkers

    Section INSTALLATION & ANSCHLÜSSE ANSCHLUSS EINES EXTERNEN VERSTÄRKERS: • Bitte schließen Sie einen externen Verstärker gemäß der folgenden Abbildung korrekt an. Eine falsche Zuordnung der diversen Anschlüsse kann die Lautsprecher beschädigen oder das Audiosignal wird verfälscht. FRONT OUT R FRONT OUT R POWER BROWN SUB.W...
  • Seite 67: Zusätzliche Informationen

    Section ZUSÄTZLICHE INFORMATIONEN WARNUNG: • Wenn Sie das Fahrzeug im direkten • Schützen Sie den Player vor Wasser oder Sonnenlicht parken, kann die Temperatur anderen Flüssigkeiten, die ins Innere des in der Fahrgastzelle sehr stark ansteigen. Gerätes eindringen können. Ein Kurz- Sorgen Sie dafür dass die Luft etwas schluss mit Brandfolge könnte daraus abkühlt, bevor Sie das Gerät in Betrieb...
  • Seite 68: Anmerkungen

    Section ZUSÄTZLICHE INFORMATIONEN sich bitte an den Händler, bei dem Sie die ANMERKUNGEN: entsprechende Software gekauft haben. • Um Kurzschlüsse zu vermeiden, sollten Sie vor Beginn der Installationsarbeiten • CD – Extra Disks können als Musik das +12V Kabel der Batterie abhängen. –...
  • Seite 69: Pflege Von Cd's Und Dvd's

    Section ZUSÄTZLICHE INFORMATIONEN PFLEGE VON CD’S UND DVD’S Handhabung: • Schmutz, Staub und Kratzer können Fehlfunktionen bei der Wiedergabe verursachen. • Platzieren Sie keine Aufkleber auf der Disk und verursachen Sie auch keine Kratzer auf der Oberfläche. • Verbiegen Sie die Disk nicht. •...
  • Seite 70 Section ZUSÄTZLICHE INFORMATIONEN Specification Power Supply power voltage: 12V DC (10.5~16V DC allowable) MAX Current: 10~13A Audio S/N Ratio: 80dB Dynamic Range: 80dB Output power: 30W 4 4 Ω Load Impedance: THD: 0.1% FM Tuner Frequency range: 87.5M ~ 108 Mhz Usable Sensitivity (S/N: 30dB) 20 dBu Frequency Response:...
  • Seite 71 Thank you for purchasing this ZENEC product. It is advisable to keep the original packing material for any future transporting of the product. Should your ZENEC product require warranty service, please return it to the retailer from whom it was purchased or the distributor in your country.
  • Seite 72: Warranty

    WARRANTY / GARANTIE ZENEC Model: ZE–160DVD Serial Number: ............................ Date of Purchase: ..........................Your name: ............................Your address: ............................. City: ..............................State: ........ZIP or Postal Code ................Country: ............................. Dealer’s address & stamp...

Inhaltsverzeichnis