WIKA A2G-10 Betriebsanleitung
Druckmessgeräte
Vorschau ausblenden
Andere Handbücher für A2G-10:
- Betriebsanleitung (64 Seiten) ,
- Betriebsanleitung (56 Seiten) ,
- Betriebsanleitung (60 Seiten)
Inhaltsverzeichnis
Verfügbare Sprachen
Verfügbare Sprachen
Quicklinks
Differential Pressure Gauges Model A2G-10/15
Druckmessgeräte für Differenzdruck Typ A2G-10/15
Manomètres pour Pression Différentielle Type A2G-10/15
Manómetros de presión diferencial Modelo A2G-10/15
Manometri per pressione differenziale Tipo A2G-10/15
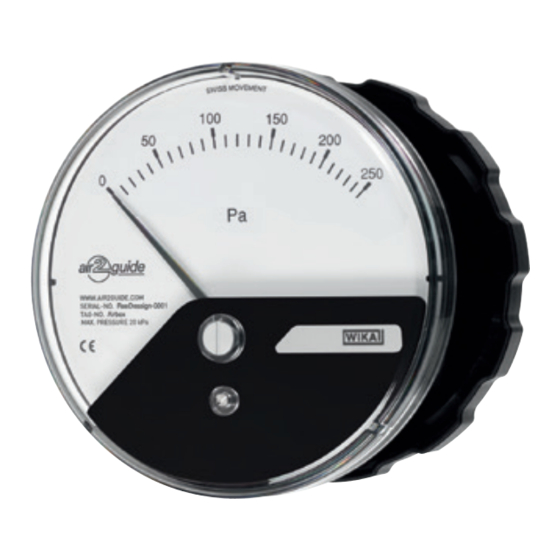
Differential Pressure Gauge air2guide P
Model A2G-10
Operating Instructions
Betriebsanleitung
Mode d´emploi
Manual de instrucciones
Instruzioni per l'uso
GB
D
F
E
I
Kapitel
Inhaltsverzeichnis

Verwandte Anleitungen für WIKA A2G-10


Inhaltszusammenfassung für WIKA A2G-10
- Seite 1 Manual de instrucciones Instruzioni per l'uso Differential Pressure Gauges Model A2G-10/15 Druckmessgeräte für Differenzdruck Typ A2G-10/15 Manomètres pour Pression Différentielle Type A2G-10/15 Manómetros de presión diferencial Modelo A2G-10/15 Manometri per pressione differenziale Tipo A2G-10/15 Differential Pressure Gauge air2guide P Model A2G-10...
- Seite 2 Operating instructions Model A2G-10/15 Page Betriebsanleitung Typ A2G-10/15 Seite 11-17 Mode d´emploi Type A2G-10/15 Page 19-25 Manual de instrucciones Modelo A2G-10/15 Página 27-33 Instruzioni per l'uso Tipo A2G-10/15 Pagina 35-41 WIKA Operating instructions air2guide Models A2G-10 and A2G-15...
- Seite 11 Verwendung Installation Inbetriebnahme Analoges Ausgangssignal (air2guide P+E) Nullpunkteinstellung Optionen und Zubehör Lagerung Wartung und Reinigung Reparaturen Entsorgung Warnung! Dieses Symbol warnt Sie vor Handlungen, die Schäden an Personen oder am Gerät verursachen können. WIKA Betriebsanleitung air2guide Typen A2G-10 und A2G-15...
-
Seite 12: Allgemeines
Sie mit den zutreffenden landesspezifischen Richtlinien vertraut sind und die entsprechende Qualifikation besitzen. 3. Beschreibung Diese Betriebsanleitung ist gültig für die Typen: Differenzdruckmessgeräte Typ A2G-10 Datenblatt PM 07.40 und Typ A2G-15 Datenblatt PV 17.40 WIKA Betriebsanleitung air2guide Typen A2G-10 und A2G-15... -
Seite 13: Technische Daten Und Bestimmungsgemäße
Um zusätzliche Aufheizungen zu vermeiden, dürfen die Geräte im Betrieb keiner direkten Sonneneinstrahlung ausgesetzt sein Die air2guide Standardgeräte sind in vertikaler Lage der Membra- ne justiert und sollten deshalb auch so montiert werden um die WIKA Betriebsanleitung air2guide Typen A2G-10 und A2G-15... -
Seite 14: Installation
Verstellung der Nullpunktkorrektur in anderer Position als vertikal eingesetzt werden. Wandmontage Zum Anschrauben sind die drei vorgestanzten Löcher mit einem Schraubenzieher durchzustoßen Tafeleinbau Bei Einbau mit Schraubring ist das Durchstoßen der Löcher nicht notwendig WIKA Betriebsanleitung air2guide Typen A2G-10 und A2G-15... - Seite 15 Nach dem Einsetzen des Messelementes in das Gehäuse kann das Messelement im Uhrzeiger- und Gegenuhrzeigersinn jeweils 15 Winkelgrade verstellt werden um eine exakte waagrechte Positio- nierung des Gerätes zu gewährleisten. Detaillierte Montageschritte der Wandmontage Detaillierte Montageschritte für den Tafeleinbau WIKA Betriebsanleitung air2guide Typen A2G-10 und A2G-15...
-
Seite 16: Inbetriebnahme
Messgenauigkeit Sensor ±3 % vom Messbereichsendwert Elektrischer Anschluss M12 Kabelverschraubung mit Schraubklemmen Klemmenbelegung Ausgangssignal 4 … 20 mA, 2-Leiter Hilfsenergie 14 ... 35 V DC Ausgangssignal 0 … 10 V, 3-Leiter Hilfsenergie 15 ... 35 V DC WIKA Betriebsanleitung air2guide Typen A2G-10 und A2G-15... -
Seite 17: Nullpunkteinstellung
Wandmontage gerader Einschraubstutzen G 1/8 für Innendurchmesser 4 oder 6 mm für Tafeleinbau Winkel-Einschraubstutzen G 1/8 für Innendurchmesser 4 oder 6 mm Messschlauch Kunststoff, für Innendurchmesser 4 oder 6 mm, Länge 1 bis 3 m WIKA Betriebsanleitung air2guide Typen A2G-10 und A2G-15... -
Seite 18: Lagerung
Reinigen der Geräte mit einem (in Seifenlauge) angefeuchteten Tuch. 12. Reparaturen Reparaturen sind nur vom Hersteller oder entsprechend geschultem Personal durchzuführen. Weitere technische Daten entnehmen Sie bitte dem WIKA Datenblatt PM 07.40 und PV 17.40. 13. Entsorgung Entsorgen Sie Gerätekomponenten und Verpackungsmaterialien entsprechend den einschlägigen landesspezifischen Abfallbehand- lungs- und Entsorgungsvorschriften. -
Seite 43: Wika Global
Phone: (+54-11) 4730 18 00 E-mail: info@wika.com.ar Romania WIKA Instruments S.R.L., Bucuresti Brazil Phone: (+40) 21-456 31 38 WIKA do Brasil Ind. e Com. Ltda. E-mail: m.anghel@wika.ro Phone: (+55) 15-3266 16 55 E-mail: marketing@wika.com.br Russia ZAO WIKA MERA, 127015 Moscow... - Seite 44 E-mail: process@itl.pil.co.nz Technische Änderungen vorbehalten. Sous réserve de modifications techniques. Se reserva el derecho de modificaciones técnicas. Si riservano modificazioni tecniche. WIKA Alexander Wiegand GmbH & Co. KG Alexander-Wiegand-Straße 30 63911 Klingenberg • Germany (+49) 93 72/132-0 (+49) 93 72/132-406 E-Mail info@wika.de...