Herunterladen Inhalt Inhalt Diese Seite drucken
EuroLite TC-3 Bedienungsanleitung

EuroLite TC-3 Bedienungsanleitung

Dmx farbwechsler
Vorschau ausblenden Andere Handbücher für TC-3:
Inhaltsverzeichnis

Werbung

Verfügbare Sprachen

Verfügbare Sprachen

BEDIENUNGSANLEITUNG
USER MANUAL
MODE D'EMPLOI
MANUAL DEL USUARIO
TC-3
DMX Color Changer
Version 2.0
Für weiteren Gebrauch aufbewahren!
Keep this manual for further needs!
Gardez ces instructions pour des utilisations ultérieurs!
Guarde este manual para posteriores usos.
© COPYRIGHT
Nachdruck verboten!
All rights reserved!
Réproduction interdite!
Prohibida toda reproducción!

Werbung

Inhaltsverzeichnis
loading

Inhaltszusammenfassung für EuroLite TC-3

  • Seite 1 BEDIENUNGSANLEITUNG USER MANUAL MODE D'EMPLOI MANUAL DEL USUARIO TC-3 DMX Color Changer Version 2.0 Für weiteren Gebrauch aufbewahren! Keep this manual for further needs! Gardez ces instructions pour des utilisations ultérieurs! Guarde este manual para posteriores usos. © COPYRIGHT Nachdruck verboten! All rights reserved! Réproduction interdite!
  • Seite 2: Inhaltsverzeichnis

    MULTI-LANGUAGE-INSTRUCTIONS Inhaltsverzeichnis Table of contents Sommaire Contenido EINFÜHRUNG ..............................4 SICHERHEITSHINWEISE..........................4 BESTIMMUNGSGEMÄßE VERWENDUNG..................... 5 GERÄTEBESCHREIBUNG..........................6 Features ................................. 6 Geräteübersicht.............................. 6 INSTALLATION ..............................7 Lampeninstallation/Lampenwechsel ......................7 Projektormontage............................8 Master/Slave-Betrieb............................9 Blackout-Buchse ............................10 Anschluss an den DMX-512 Controller / Verbindung Projektor - Projektor ..........10 Adressierung des Projektors ........................
  • Seite 3 INTRODUCTION ............................. 25 INSTRUCTIONS DE SÉCURITÉ ........................25 EMPLOI SELON LES PRESCRIPTIONS ....................... 26 DESCRIPTION DE L'APPAREIL........................27 Features ............................... 27 Aperçue des parties ............................. 27 INSTALLATION .............................. 28 Installer/Remplacer la lampe ........................28 Montage du projecteur ..........................29 Opération Master/Slave ..........................30 Douille Blackout ............................
  • Seite 4: Einführung

    - entsprechend qualifiziert sein - diese Betriebsanleitung genau beachten. EINFÜHRUNG Wir freuen uns, dass Sie sich für einen EUROLITE TC-3 entschieden haben. Sie haben hiermit ein lei- stungsstarkes und vielseitiges Gerät erworben. Nehmen Sie den TC-3 aus der Verpackung. Prüfen Sie zuerst, ob Transportschäden vorliegen. In diesem Fall nehmen Sie das Gerät nicht in Betrieb und setzen sich bitte mit Ihrem Fachhändler in Verbindung.
  • Seite 5: Bestimmungsgemäße Verwendung

    Lassen Sie die Netzleitung nicht mit anderen Kabeln in Kontakt kommen! Seien Sie vorsichtig beim Umgang mit Netzleitungen und -anschlüssen. Fassen Sie diese Teile nie mit nassen Händen an! Vergewissern Sie sich, dass die anzuschließende Netzspannung nicht höher ist als auf der Rückseite ange- geben.
  • Seite 6: Gerätebeschreibung

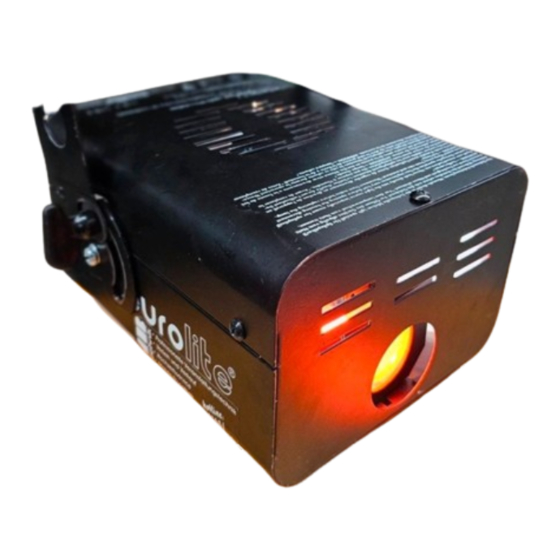
    Controller • Belegt 1 DMX-Kanal • Musikgetaktet über eingebautes Mikrofon • Mikrofon- empfindlichkeit über Drehregler einstellbar • Master-/Slave-Funktion • 1 hochwertiger Steppermotor • Automatische Lampenabschaltung im Blackout oder bei fehlendem Musikpegel • EFR 15 V/150 W Lampe im Lieferumfang enthalten Geräteübersicht eurolite ®...
  • Seite 7: Installation

    (1) Gehäusedeckel (2) Gehäuseschrauben (3) Hängebügel (4) Loch für Sicherheitsfangseil (5) Lüfter (6) Feststellschraube (7) Service-Klappe (8) Fokus-Schraube (9) Objektivlinse LIGHTING CONTROL PROTOCOL DMX-512 Sensitivity Blackout Microphone Setting the DMX- DIP-switch no. starting address: Projector number 64 128 256 Starting address &...
  • Seite 8: Projektormontage

    ACHTUNG! Die Lampe muss gewechselt werden, wenn diese beschädigt ist oder sich durch Wärme verformt hat! Die verwendete Lampe erreicht Temperaturen von bis zu 600° C. Vor dem Wechseln der Lampe diese unbedingt erst abkühlen lassen (ca. 5 Minuten) und das Gerät allpolig von der Netzspannung trennen (Netzstecker ziehen).
  • Seite 9: Master/Slave-Betrieb

    Im Master/Slave-Betrieb lassen sich mehrere Geräte synchronisieren, die dann von einem Mastergerät gesteuert werden. An der Rückseite des TC-3 befindet sich eine XLR-Einbaubuchse (DMX Out) und ein XLR-Einbaustecker (DMX In), über die sich mehrere Geräte miteinander verbinden lassen. Wählen Sie das Gerät aus, das zur Steuerung der Effekte dienen soll. Dieses Gerät arbeitet dann als Master-Gerät und steuert alle weiteren Slave-Geräte, die über eine symmetrische Mikrofonleitung mit dem...
  • Seite 10: Belegung Der Dip-Schalter

    Belegung der DIP-Schalter: 1 2 3 4 5 6 7 8 9 1 2 3 4 5 6 7 8 9 1 2 3 4 5 6 7 8 9 1 2 3 4 5 6 7 8 9 Projector 1 Projector 2 Projector 3 Projector 4...
  • Seite 11: Adressierung Des Projektors

    Die Startadresse ist der erste Kanal, auf den der Projektor auf Signale vom Controller reagiert. Bitte vergewissern Sie sich, dass sich die Steuerkanäle nicht mit anderen Geräten überlappen, damit der TC-3 korrekt und unabhängig von anderen Geräten in der DMX-Verbindung funktioniert. Werden mehrere TC-3 auf eine Adresse definiert, arbeiten sie synchron.
  • Seite 12: Bedienung

    Lichteffekte sollten im Allgemeinen nicht über Dimmerpacks geschaltet werden. BEDIENUNG Wenn Sie das Gerät an die Spannungsversorgung angeschlossen haben, nimmt der TC-3 den Betrieb auf. Während des Reset justieren sich die Motoren aus und das Gerät ist nach ca. 20 Sekunden betriebsbereit.
  • Seite 13: Reinigung Und Wartung

    REINIGUNG UND WARTUNG Der Unternehmer hat dafür zu sorgen, dass sicherheitstechnische und maschinentechnische Einrichtungen mindestens alle vier Jahre durch einen Sachverständigen im Umfang der Abnahmeprüfung geprüft werden. Der Unternehmer hat dafür zu sorgen, dass sicherheitstechnische und maschinentechnische Einrichtungen mindestens einmal jährlich durch einen Sachkundigen geprüft werden. Dabei muss unter anderem auf folgende Punkte besonders geachtet werden: 1) Alle Schrauben, mit denen das Gerät oder Geräteteile montiert sind, müssen fest sitzen und dürfen nicht korrodiert sein.
  • Seite 14: Technische Daten

    Wenn die Anschlussleitung dieses Gerätes beschädigt wird, muss sie durch eine besondere Anschluss- leitung ersetzt werden, die von Ihrem Fachhändler erhältlich ist. Sollten Sie noch weitere Fragen haben, steht Ihnen Ihr Fachhändler jederzeit gerne zur Verfügung. TECHNISCHE DATEN Spannungsversorgung: 230 V AC, 50 Hz Gesamtanschlusswert: 200 W DMX-Steuerkanäle:...
  • Seite 15: Introduction

    - be qualilfied - follow the instructions of this manual INTRODUCTION Thank you for having chosen a EUROLITE TC-3. You will see you have acquired a powerful and versatile device. Unpack your TC-3. Before you initial start-up, please make sure that there is no damage caused by transportation. Should there be any, consult your dealer and do not use the device.
  • Seite 16: Operating Determinations

    Never let the power-cord come into contact with other cables! Handle the power-cord and all connections with the mains with particular caution! Make sure that the available voltage is not higher than stated on the rear panel. Make sure that the power-cord is never crimped or damaged by sharp edges. Check the device and the power-cord from time to time.
  • Seite 17: Description Of The Device

    • Master/Slave-function • 1 high-quality stepping-motor • Automatic lamp off during blackout or when sound-signal is missing • EFR 15 V/150 W lamp included in the delivery Overview eurolite ® (1) Housing cover (2) Housing screws...
  • Seite 18: Installation

    (5) Ventilation fan (6) Fixation screw (7) Service-lid (8) Focus-screw (9) Objective lens LIGHTING CONTROL PROTOCOL DMX-512 Sensitivity Blackout Microphone Setting the DMX- DIP-switch no. starting address: Projector number 64 128 256 Starting address & channels Fuse: Projector 1 - channel 1 DMX In T 2 A, 250 V Projector 2 - channel 2...
  • Seite 19: Rigging

    During the operation, the lamp reaches temperatures of up to 600° C. Before replacing the lamp, unplug mains lead and let the lamp cool down (approx. 5 minutes). During the installation do not touch the glass-bulbs bare-handed! Please follow the lamp manufacturer's notes! Do not install lamps with a higher wattage! Lamps with a higher wattage generate temperatures the device was not designed for.
  • Seite 20: Master/Slave-Operation

    The master/slave-operation enables that several devices can be synchronized and controlled by one master- device. On the rear panel of the TC-3 you can find an XLR-jack (DMX Out) and an XLR-plug (DMX In), which can be used for connecting several devices.
  • Seite 21: Dmx-512 Connection / Connection Between Fixtures

    Occupation mono 1/4“ jack-plug: Sleeve In Phase (+) Ground DMX-512 connection / connection between fixtures XLR-occupation: DMX-output DMX-input XLR mounting-socket: XLR mounting-plug: DMX-512 Controller 1: Ground 1: Ground 2: Signal (–) 2: Signal (–) 3: Signal (+) 3: Signal (+) LIGHTING CONTROL LIGHTING CONTROL LIGHTING CONTROL...
  • Seite 22: Addressing

    The starting address is defined as the first channel from which the TC-3 will respond to the controller. Please make sure that you don’t have any overlapping channels in order to control each TC-3 correctly and independently from any other fixture on the DMX data link.
  • Seite 23: Dmx-Controlled Operation

    If you have connected a footswitch to the Blackout-socket, you can lock the light output (Blackout-mode) and turn it on again. Please note: If you wish to change from one operating mode into another, you either have to switch off the lamp/activate Blackout-mode or unplug the projector from the mains and plug it again.
  • Seite 24: Replacing The Fuse

    The objective lens will require weekly cleaning as smoke-fluid tends to building up residues, reducing the light-output very quickly. The cooling-fan and the venting slots should be cleaned monthly. The dichroic colour-filters should be cleaned monthly. The interior of the device should be cleaned at least annually using a vacuum-cleaner or an air-jet. There are no serviceable parts inside the device except for the lamp and the fuse.
  • Seite 25: Introduction

    - être suffisamment qualifiée - suivre strictement les instructions de service suivantes. INTRODUCTION Nous vous remercions d'avoir choisi un EUROLITE TC-3. Vous êtes en possession d'un effet lumineux puissant aux possibilités multiples. Sortez le TC-3 de son emballage. Avant tout, assurez vous que l'appareil n'a pas subi de dommages lors de son transport. Si tel était le cas, contactez immédiatement votre revendeur.
  • Seite 26: Emploi Selon Les Prescriptions

    Ne laissez pas les câbles d'alimentation en contact avec d'autres câbles. Soyez prudent; lorsque vous manipulez les câbles et les connexions, vous êtes soumis à des risques d'électrocutions! Ne manipulez jamais les partys sous tension avec les mains mouillées! Assurez-vous que la tension électrique ne soit pas supérieure à celle indiquée au dos de l’appareil. Mettez le câble d'alimentation seulement dans des prises adaptées.
  • Seite 27: Description De L'appareil

    • Sénsibilité du microphone réglable grâce au régulateur rotatif • Fonction “Master/Slave” • 1 moteur pas à pas de haute qualité • Lamp off automatique en mode Blackout ou sans signal de musique • Lampe EFR 15 V/150 W incluse Aperçue des parties eurolite ®...
  • Seite 28: Installation

    (1) Couvercle de boîtier (2) Vis de boîtier (3) Lyre de fixation (4) Trou pour l'élingue de sécurité (5) Ventilateur (6) Vis de la lyre (7) Volet de service (8) Vis de foyer (9) Objectif LIGHTING CONTROL PROTOCOL DMX-512 Sensitivity Blackout Microphone Setting the DMX-...
  • Seite 29: Montage Du Projecteur

    ATTENTION! La lampe doit être remplacée lorsqu'elle a été endommagée ou déformée par la chaleur! La lampe utilisée a une température moyenne de 600° C. Avant le remplacement de l'ampoule, toujours laisser refroidir (env. 5 minutes) celle-ci et débrancher l'appareil. Ne jamais manipuler l'ampoule directement avec les doigts.
  • Seite 30: Opération Master/Slave

    matériel d’installation utilisé et des inspections de sécurité régulières du matériel utilisé et du projecteur. N’essayez jamais à procéder à une installation vous-même, si vous ne disposez pas d’une telle qualification, mais en commissionnez un installateur professionnel. Des installations incorrectes peuvent causer des blessures et/ou l’endommagement de propriété.
  • Seite 31: Douille Blackout

    Douille Blackout Si vous voulez verrouiller la sortie de lumière, par ex. par un interrupteur sur pieds (mode Blackout), s'il vous plaît connectez votre interrupteur sur pieds à la douille Blackout par un jack 6,35 mm mono. Occupation Jack 6,35 mm mono Sleeve Point chaud (+)
  • Seite 32: Codage Du Projecteur

    L'adresse initiale est le premier canal à partir le projecteur répond au contrôleur DMX. Assurez-vous qu'il n' y ait pas de canaux entrelacés pour assurer un contrôle correct et indépendant d'autres appareils DMX. Lorsque deux ou plus projecteurs TC-3 sont codés à la même adresse initiale, ils fonctineront synchronement.
  • Seite 33: Maniement

    MANIEMENT Le TC-3 commençera à fonctionner dès que vous le brancherez au secteur. Durant le Reset (réinitialisation), les moteurs s’ajusteront automatiquement et l’appareil sera prêt à fonctionner après environ 20 secondes. Contrôle par le son/Opération Master/Slave La lampe s'allume automatiquement, aussitôt que le microphone à condenseur recoive des signaux de musique.
  • Seite 34: Remplacer Le Fusible

    L'appareil doit être nettoyé régulièrement de contaminations comme de la poussière etc. Pour le nettoyage, utilisez un torchon non pelucheux humide. Ne pas utiliser un aucun cas de l’alcool ou des détergents pour le nettoyage. ATTENTION! La lentille endommagée doit être remplacée pour que la qualité du rayon ne soit pas amoindrie par les fissures ou rayures éventuelles! La lentille d’objectif doit être nettoyée toutes les semaines, car des résidus de liquide de brouillard se déposent rapidement.
  • Seite 35: Introducción

    -seguir las instrucciones de este manual INTRODUCCIÓN Gracias por haber elegido un EUROLITE TC-3. Verá que ha adquirido un aparato potente y versátil. Desembale su TC-3. Antes de la puesta en marcha inicial, por favor asegúrese de que no hay daños causados durante el transporte.
  • Seite 36: Instrucciones De Manejo

    ¡No deje que el cable de alimentación entre en contacto con otros cables! ¡Maneje los cables de corriente alterna y las conexiones de corriente alterna con mucha precaución! Asegúrese de que la tensión de alimentación no es mayor que la indicada en el panel trasero. Preste atención que el cable de alimentación no esté...
  • Seite 37: Descripción Del Aparato

    • Sensibilidad del microfono ajustable mediante regulador • Función “Master/Slave” • 1 motor paso a paso de alta calidad • Apagado automatico de la lámpara en modo Blackout o si no hay música • Lámpara EFR 15 V/150 W incluida Descripción de las partes eurolite ®...
  • Seite 38: Instalación

    (1) Cubierta de la caja (2) Tornillos de caja (3) Lyra de montaje (4) Orificio para el cable de anclaje (5) Ventilador (6) Tornillo de fijación (7) Tapa de servicio (8) Tornillo del foco (9) Objetivo LIGHTING CONTROL PROTOCOL DMX-512 Sensitivity Blackout Microphone...
  • Seite 39: Montaje Del Proyector

    ¡PRECAUCION! ¡La lámpara debe ser reemplazada cuando esté deteriorada o deformada debido al calor! Al operar las lámparas de este tipo llegan a temperaturas de hasta 600° C. Antes de reemplazar la lámpara, desenchufe-lo de la corriente y deje que la lámpara se enfrie. ¡Durante la instalación no toque las bombillas de cristal con las manos sin protección! ¡Por favor siga las indicaciones del fabricante de las lámparas! No instalar una lámpara con más vatios.
  • Seite 40: Operación Master/Slave

    En el modoMaster/Slave se puede sincronizar algunos aparatos que estén controlados por el aparato "Master". En el panel trasero del TC-3 hay un casquillo XLR incorporado (DMX Out) y una clavija XLR incorporada (DMX In) para conectar algunos aparatos. Seleccione el aparto responsable para el control de los efectos. Este aparato funciona como aparato "Master"...
  • Seite 41: Casquillo Blackout

    Casquillo Blackout Cuando quiere cerrar la salida de luz (modo Blackout) - por ejemplo mediante un interruptor de pie opcional - conecte su interruptor de pie mediante un clavija jack mono con el casquillo Blackout. Ocupación clavija jack mono: Sleeve Fase positivo (+) Tierra Conexión al controlador DMX / conexión proyector - proyector...
  • Seite 42: Direccionamiento Del Proyector

    En general los efectos de luz no deben ser conectados a dimming-packs. OPERACIÓN Tras la conexión del aparato a la red, el TC-3 comienza a funcionar. Durante el Reset, los motores se ajustan y el aparato está listo para ser usado en aproximadamente 20 segundos.
  • Seite 43: Control Por Dmx

    Cuando Vd. ha conectado su interruptor de pie con el casquillo Blackout, Vd. puede cerrar la salida de luz (modo Blackout) y abrirlo otra vez. Atención: Cuando quiere cambiar de un modo de servicio al otro, tiene que apagar la lámpara/activar el modo Blackout o desconectar el proyector y conectarlo otra vez.
  • Seite 44: Reemplazar El Fusible

    reduciendo la emisión de luz muy rápidamente. El ventilador y la rejilla de ventilación debe ser limpiado mensualmente. Los filtros de color dicróico deben ser limpiados cada 3 meses. El interior del proyector debe ser limpiado al menos una vez al año utilizando un aspirador o aire a presión. No hay piezas que necesiten de servicio dentro del aparato excepto la lámpara y el fusible.

Inhaltsverzeichnis