Herunterladen Inhalt Inhalt Diese Seite drucken

Werbung

Verfügbare Sprachen
  • DE

Verfügbare Sprachen

Werbung

Inhaltsverzeichnis
loading

Inhaltszusammenfassung für JB Systems Led Rainbow

  • Seite 3: Before Use

     Standalone: sound activated with internal mic  Master/slave: wonderful synchronized shows  DMX-master/slave, 1MSL: thanks to this revolutionary new feature several LED Rainbow units, working in master/slave, can still be controlled by DMX! Even while connected in a DMX chain! (optional mini DMX splitter required) ...
  • Seite 4  The housing and the lenses must be replaced if they are visibly damaged.  Please use the original packing when the device is to be transported.  Due to safety reasons it is prohibited to make unauthorized modifications to the unit. JB SYSTEMS 2/55 LED RAINBOW ®...
  • Seite 5 15. Mains output with IEC socket: you can use a special IEC power cable to connect this output with the mains input of the next LED RAINBOW for easier linking. 16. Mains input with IEC socket and integrated fuse holder, connect the supplied mains cable here.
  • Seite 6 To go back to the main menu without any change press the MENU button shortly. Press the MENU button for about 2 seconds to exit the menu and to go back to the normal running mode. JB SYSTEMS 4/55 LED RAINBOW ®...
  • Seite 7  Press the ENTER button to show the software version on the display.  To go back to the functions press the MENU button. Press the MENU button for about 2 seconds to exit the menu and to go back to the normal running mode. JB SYSTEMS 5/55 LED RAINBOW ®...
  • Seite 8: Overhead Rigging

    Electrical installation for two or more units in DMX-master/slave: In this mode the units will show a synchronized show, working to the rhythm of the beat but you can still control some functions on the master by 1 DMX channel. JB SYSTEMS 6/55 LED RAINBOW ®...
  • Seite 9 So please refer to the user manual of your DMX-controller to find out which starting addresses you must set. JB SYSTEMS 7/55 LED RAINBOW ®...
  • Seite 10 ENGLISH OPERATION MANUAL DMX-CONFIGURATION JB SYSTEMS 8/55 LED RAINBOW ®...
  • Seite 11 ENGLISH OPERATION MANUAL JB SYSTEMS 9/55 LED RAINBOW ®...
  • Seite 12: Maintenance

     Clean with a soft cloth using normal glass cleaning products.  Always dry the parts carefully. Attention: We strongly recommend internal cleaning to be carried out by qualified personnel! JB SYSTEMS 10/55 LED RAINBOW ®...
  • Seite 13: Specifications

    Size: 424 x 251 x 65 cm (with bracket: 138mm) Weight: 3,6kg The information might be modified without prior notice You can download the latest version of this user manual on our website: www.jb-systems.eu JB SYSTEMS 11/55 LED RAINBOW ®...
  • Seite 14: Caractéristiques

     Maître/Esclave contrôlés par DMX : Grâce à cette nouvelle fonctionnalité révolutionnaire, plusieurs unités LED Rainbow, fonctionnant en maître / esclave, peuvent toujours être contrôlées par DMX ! Même lorsqu'elles sont connectées à une chaîne DMX ! (Un mini répartiteur DMX en option est nécessaire)
  • Seite 15: Instructions De Sécurité

     Afin d'éviter un choc électrique, n'ouvrez aucun panneau. L'appareil ne contient aucun composant réparable par l'utilisateur.  Ne réparez jamais un fusible et ne court-circuitez jamais le porte-fusible. Remplacez toujours un fusible endommagé par un fusible du même type ayant les mêmes spécifications électriques ! JB SYSTEMS 13/55 LED RAINBOW ®...
  • Seite 16: Menu Principal

    15. Sortie secteur avec prise IEC : vous pouvez utiliser un câble d'alimentation IEC spécial pour raccorder cette sortie à l'entrée secteur du LED RAINBOW suivant pour faciliter le raccordement. 16. Entrée secteur avec prise IEC et porte-fusible intégré. branchez le câble secteur ici.
  • Seite 17 Pour retourner au menu principal sans aucun changement appuyez brièvement sur la touche MENU. Maintenez enfoncée la touche MENU pendant environ 2 secondes pour quitter le menu et retourner au mode de fonctionnement normal. JB SYSTEMS 15/55 LED RAINBOW ®...
  • Seite 18 Utilisé pour afficher le nombre d'heures de fonctionnement de l'appareil.  Appuyez sur la touche MENU jusqu'à ce que "FhrS" s'affiche à l'écran.  Appuyez sur la touche ENTER pour afficher le nombre d'heures de fonctionnement à l'écran. JB SYSTEMS 16/55 LED RAINBOW ®...
  • Seite 19: Montage Au Plafond

    Installation électrique de deux ou plusieurs unités en maître/esclave : Dans ce mode, les shows des unités seront synchronisés, fonctionnant au rythme de la musique.  Connectez les unités ensemble à l'aide de câbles microphone symétrique de bonne qualité. La première JB SYSTEMS 17/55 LED RAINBOW ®...
  • Seite 20  Assurez-vous que toutes les unités sont branchées au secteur.  Chaque effet de lumière dans la chaîne doit avoir sa propre adresse de départ afin qu'il sache quelles commandes du contrôleur à décoder. JB SYSTEMS 18/55 LED RAINBOW ®...
  • Seite 21 Malheureusement il est impossible de vous dire dans ce manuel quelles adresses de départ vous devez définir parce que cela dépend entièrement du contrôleur que vous allez utiliser. Reportez-vous alors au manuel de votre contrôleur DMX pour savoir quelles adresses de départ vous devez définir. CONFIGURATION DMX JB SYSTEMS 19/55 LED RAINBOW ®...
  • Seite 22 FRANCAIS GUIDE D’UTILISATION JB SYSTEMS 20/55 LED RAINBOW ®...
  • Seite 23: Entretien

    5 effets.  RF-8R : un petit récepteur RF qui doit être connecté à la DIN 5 broches d'entrée du LED RAINBOW. Reportez-vous au manuel d'installation du récepteur pour plus d'informations. Maintenant, vous pouvez contrôler toutes les unités connectées : Blackout Mettre en mode Blackout l'unité...
  • Seite 24: Spécifications

    424 x 251 x 65 cm (avec support : 138mm) Poids : 3,6kg Les informations peuvent être modifiées sans préavis Vous pouvez télécharger la dernière version de ce manuel sur notre site web : www.jb-systems.eu JB SYSTEMS 22/55 LED RAINBOW ®...
  • Seite 25: Gebruiksaanwijzing

     Standalone: geluidgestuurd via de ingebouwde microfoon.  Master/Slave: prachtige gesynchroniseerde shows  DMX-master/slave: dankzij deze revolutionaire nieuwe functie kunnen meerdere LED Rainbow- apparaten die in master/slave werken, nog steeds met DMX worden bestuurd! Zelfs terwijl ze zijn aangesloten op een DMX-keten! (optionele mini DMX-splitter nodig) ...
  • Seite 26: Veiligheidsinstructies

     Deze armatuur moet worden geaard om aan de veiligheidsvoorschriften te voldoen.  Sluit het apparaat niet aan op een dimmerpack.  Gebruik bij het installeren van het apparaat altijd een geschikte en gecertificeerde veiligheidskabel. JB SYSTEMS 24/55 LED RAINBOW ®...
  • Seite 27 (zie paragraaf “Hijsen boven personen”). 15. Lichtnetuitgang met IEC-busaansluiting: u kunt een speciale IEC-voedingskabel gebruiken om deze uitgang met de lichtnetingang van de volgende LED RAINBOW aan te sluiten voor eenvoudiger koppelen. 16. Lichtnetingang met IEC-aansluiting en geïntegreerde zekeringhouder, sluit hier het meegeleverde netsnoer op aan.
  • Seite 28 Om zonder enige wijziging naar het hoofdmenu terug te gaan, druk kort op de “MENU”-knop. Druk op en houd de “MENU”-knop ongeveer 2 seconden ingedrukt om het menu te verlaten en naar de normale werkingsmodus terug te keren. JB SYSTEMS 26/55 LED RAINBOW ®...
  • Seite 29  Om naar de functies terug te gaan, druk op de “MENU”-knop. Druk op en houd de “MENU”-knop ongeveer 2 seconden ingedrukt om het menu te verlaten en naar de normale werkingsmodus terug te keren. JB SYSTEMS 27/55 LED RAINBOW ®...
  • Seite 30 ELEKTRISCHE INSTALLATIE + ADRESSERING Belangrijk: De elektrische installatie dient alleen door gekwalificeerd personeel te worden uitgevoerd, in overeenstemming met de voorschriften voor elektrische en mechanische veiligheid in uw land. JB SYSTEMS 28/55 LED RAINBOW ®...
  • Seite 31  De DMX-protocol is een veel gebruikte hoge snelheidsignaal om intelligent lichtapparatuur te bedienen. U moet uw DMX-controller in “daisychain” koppelen en alle aangesloten apparaten met een goede kwaliteit gebalanceerde kabel linken.  Zowel XLR-3-pins en XLR-5-pins connectors worden gebruikt, maar de XLR-3-pins is populairder omdat JB SYSTEMS 29/55 LED RAINBOW ®...
  • Seite 32 Dus raadpleeg de gebruikershandleiding van uw DMX-controller om te achterhalen welke startadressen u moet instellen. DMX-CONFIGURATIE JB SYSTEMS 30/55 LED RAINBOW ®...
  • Seite 33 NEDERLANDS GEBRUIKSAANWIJZING JB SYSTEMS 31/55 LED RAINBOW ®...
  • Seite 34  RF-8T: Een kleine RF-zender dat maximaal 5 effecten kan bedienen.  RF-8R: een kleine RF-ontvanger dat op de DIN-5-pins ingang van de LED RAINBOW moet worden aangesloten. Zie de installatiehandleiding van de ontvanger voor meer informatie. Nu kunt u alle aangesloten units bedienen:...
  • Seite 35 Afmetingen: 424 x 251 x 65 cm (met beugel: 138 mm) Gewicht: 3,6kg De informatie kan zonder voorafgaande kennisgeving worden gewijzigd U kunt de nieuwste versie van deze handleiding van onze website downloaden: www.jb-systems.eu JB SYSTEMS 33/55 LED RAINBOW ®...
  • Seite 36: Vor Der Erstbenutzung

     Einzelbetrieb: Musikgesteuert mit eingebautem Mikro.  Master/Slave: Wundervolle synchronisierte Shows.  DMX-Master/Slave: Dank dieser neuen revolutionären Funktion können mehrere LED Rainbow- Geräte im Master/Slave Modus arbeiten, gesteuert von einem DMX Controller! Auch während dem Anschluss in einer DMX Kette! (ein optionaler Mini DMX Splitter ist erforderlich) ...
  • Seite 37: Sicherheitshinweise

     Zur Einhaltung der Sicherheitsbestimmungen muss das Gerät geerdet sein.  Das Gerät nicht an einen Dimmer anschließen.  Ausschließlich vorschriftsmäßige Kabel zur Installation verwenden.  Zur Vorbeugung gegen elektrische Schläge keine Abdeckungen entfernen. Im Geräteinneren befinden sich keine zu wartenden Teile. JB SYSTEMS 35/55 LED RAINBOW ®...
  • Seite 38  Drücken Sie zur Auswahl einer Funktion die Taste ENTER (Anzeige beginnt zu blinken).  Zur Modusänderung verwenden Sie bitte die Tasten DOWN und UP.  Wenn der gewünschte Modus eingestellt ist, bestätigen Sie diesen mit ENTER. JB SYSTEMS 36/55 LED RAINBOW ®...
  • Seite 39  Drücken Sie die Taste MENU, bis „SLMd“ auf dem Display angezeigt wird.  Drücken Sie die ENTER Taste. Das Display beginnt nun zu blinken.  Wenn der gewünschte Modus eingestellt ist, speichern Sie diesen mit ENTER. JB SYSTEMS 37/55 LED RAINBOW ®...
  • Seite 40 Zur Aktivierung der eingebauten „Selbsttest“-Funktion, die alle Funktionen des Geräts überprüft.  Drücken Sie die Taste MENU, bis „teSt“ auf dem Display angezeigt wird.  Starten Sie das interne Selbstestprogramm über die Taste ENTER. JB SYSTEMS 38/55 LED RAINBOW ®...
  • Seite 41: Überkopf-Montage

    Hinweis 2: Wenn keine Ausgabe erfolgt, vergewissern Sie sich, dass das Gerät in den Master-Modus eingestellt ist und der Blackout-Modus auf „NO“ (Nicht) und die Musikaktivierung auf „On“ (Ein) gesetzt wurde (siehe voriges Kapitel). Die elektrische Installation für zwei oder mehr Geräte in Master/Slave-Modus: JB SYSTEMS 39/55 LED RAINBOW ®...
  • Seite 42 Signal (+) ~ Pins 4+ 5 nicht benutzt.  Um durch Interferenzen verursachte Fehlfunktionen der Lichteffekte zu vermeiden, müssen Sie die Kette mit einem 90Ω bis 120Ω Abschlusswiderstand abschließen. Verwenden Sie niemals Y-Splitter-Kabel, das funktioniert einfach nicht! JB SYSTEMS 40/55 LED RAINBOW ®...
  • Seite 43 Startadresse jeder Einheit ist von großer Wichtigkeit. Leider ist es unmöglich, Ihnen hier schon die richtigen Adressen mitzuteilen, denn die Startadressen, die für Ihre Anlage einzustellen sind, hängen vom Controller ab, den Sie benutzen. Schauen Sie deswegen bitte im Handbuch Ihres DMX-Controllers nach, welche Startadressen Sie einstellen müssen. DMX-KONFIGURATION JB SYSTEMS 41/55 LED RAINBOW ®...
  • Seite 44 DEUTSCH BEDIENUNGSANLEITUNG JB SYSTEMS 42/55 LED RAINBOW ®...
  • Seite 45: Betrieb Mit Ca8 Oder Rf8Set

     RF-8T: Kleiner RF-Transmitter, der bis zu 5 Effekte steuern kann.  RF-8R: Kleiner Funkempfänger, der an den 5-poligen DIN- Eingang des LED RAINBOW angeschlossen wird. Für weitere Informationen siehe die Bedienungsanleitung des Empfängers. Nun können Sie alle angeschlossenen Einheiten steuern: Blackout Blackout des Geräts...
  • Seite 46: Technische Daten

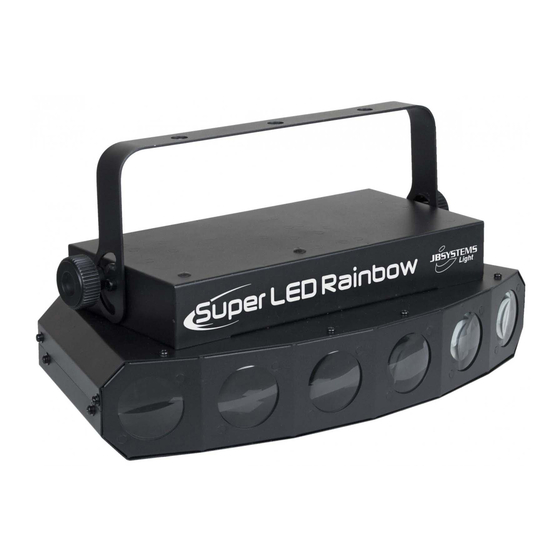
    6x 3Watt dreifarbige LEDs Abmessungen: 424 x 251 x 65 cm (mit Bügel: 138mm) Gewicht: 3,6kg Technische Änderungen können auch ohne Vorankündigung vorgenommen werden Sie können sich die neueste Version dieses Benutzerhandbuches von unserer Website herunterladen: www.jb-systems.eu JB SYSTEMS 44/55 LED RAINBOW ®...
  • Seite 47: Antes Del Uso

    ESPAÑOL MANUAL DE INSTRUCCIONES MANUAL DE INSTRUCCIONES Gracias por comprar este producto JB Systems®. Para aprovechar al máximo todas las posibilidades y para su propia seguridad, lea cuidadosamente este manual de instrucciones antes de comenzar a utilizar la unidad. CARACTERÍSTICAS Esta unidad tiene supresión de radio interferencia.
  • Seite 48: Instrucciones De Seguridad

     Este accesorio debe conectarse a tierra para cumplir con las regulaciones de seguridad.  No conecte la unidad a un dispositivo de atenuación.  Cuando instale la unidad utilice siempre un cable de seguridad apropiado y certificado. JB SYSTEMS 46/55 LED RAINBOW ®...
  • Seite 49 (consulte el párrafo "elevación sobre cabeza". 15. Salida de alimentación con conector IEC: puede utilizar un cable de alimentación especial IEC para conectar esta salida con la entrada de alimentación del siguiente LED RAINBOW, para enlazarlos fácilmente. 16. Entrada de alimentación con receptáculo IEC y portafusibles integrado; conecte aquí el cable de alimentación que se suministra...
  • Seite 50: Menú Principal

     Una vez que se muestre en el visualizador el modo correcto, presione el botón ENTER para guardarlo. Para regresar al menú principal sin efectuar ningún cambio, pulse brevemente el botón MENU. Pulse el botón MENU durante unos 2 segundos para salir del menú y regresar al modo de funcionamiento normal. JB SYSTEMS 48/55 LED RAINBOW ®...
  • Seite 51 Pulse el botón MENU durante unos 2 segundos para salir del menú y regresar al modo de funcionamiento normal. Autocomprobación Utilizada para activar el programa interno "self-test" (autocomprobación) el cual verifica todas las posibilidades de la unidad.  Presione el botón MENU hasta que se muestre en el visualizador "teSt". JB SYSTEMS 49/55 LED RAINBOW ®...
  • Seite 52 Observación 2: Si no hay salida, asegúrese de configurar la unidad en el modo maestro y establezca el modo de apagado (blackout) en "NO" y el Modo de sonido (Sound Mode) en "On" (consulte el capítulo anterior) JB SYSTEMS 50/55 LED RAINBOW ®...
  • Seite 53 90Ω a 120Ω al final de la cadena. Nunca utilice cables repartidores Y, ¡esto simplemente no funcionará!  Asegúrese de que todas las unidades estén conectadas a la alimentación. JB SYSTEMS 51/55 LED RAINBOW ®...
  • Seite 54 Desafortunadamente, es imposible decirle en este manual de usuario cuáles direcciones de inicio tiene que establecer, porque esto depende completamente del controlador que utilice. De manera que consulte el manual de usuario de su controlador DMX para averiguar cuáles direcciones de inicio debe establecer. CONFIGURACIÓN DMX JB SYSTEMS 52/55 LED RAINBOW ®...
  • Seite 55 ESPAÑOL MANUAL DE INSTRUCCIONES JB SYSTEMS 53/55 LED RAINBOW ®...
  • Seite 56: Mantenimiento

     RF-8T: transmisor RF pequeño puede controlar hasta 5 efectos.  RF-8R: pequeño receptor RF que debe conectarse a la entrada DIN de 5 pines del LED RAINBOW. Consulte el manual de instalación del receptor para más información. Ahora puede controlar todas las unidades conectadas:...
  • Seite 57: Especificaciones

    424 x 251 x 65 cm (con soporte: 138mm) Peso: 3,6kg La información podría modificarse sin aviso previo Puede descargar la versión más reciente de este manual de usuario en nuestro sitio Web: www.jb-systems.eu JB SYSTEMS 55/55 LED RAINBOW ®...

Inhaltsverzeichnis