Herunterladen Inhalt Inhalt Diese Seite drucken

Werbung

Verfügbare Sprachen
  • DE

Verfügbare Sprachen

  • DEUTSCH, seite 35

Werbung

Inhaltsverzeichnis
loading

Inhaltszusammenfassung für JB Systems PLANO SPOT 7TC

  • Seite 3: Before Use

    ENGLISH OPERATION MANUAL OPERATION MANUAL ® Thank you for buying this JB Systems product. To take full advantage of all possibilities and for your own safety, please read these operating instructions very carefully before you start using this unit. FEATURES This unit is radio-interference suppressed.
  • Seite 4: Safety Instructions

     In the event of serious operating problems, stop using the fixture and contact your dealer immediately.  The housing and the lenses must be replaced if they are visibly damaged. JB SYSTEMS 2/65 PLANO SPOT 7TC ®...
  • Seite 5: Electrical Installation

     Done! Remark: You can connect a CA-8 remote controller to the master unit if you want to have more control over the master/slave operation. You can also connect the LEDCON 02 remote controller JB SYSTEMS 3/65 PLANO SPOT 7TC ®...
  • Seite 6: Overhead Rigging

    Program a DMX start address in 1 unit:  Press the MENU button until is shown on the display.  Press the ENTER button to select.  Use DOWN and UP buttons to change the DMX512 address. JB SYSTEMS 4/65 PLANO SPOT 7TC ®...
  • Seite 7  Except for the random show (Show 0) you will also be asked to select a running speed for the static mode. With the UP/DOWN buttons you can select (slow) to (fast).  Once the right show is selected, press the ENTER button to confirm. JB SYSTEMS 5/65 PLANO SPOT 7TC ®...
  • Seite 8 (green): press ENTER. Then use the DOWN and UP buttons to set the value between 000 and 255. Confirm with the ENTER button. Use the DOWN and UP buttons to select the next color. JB SYSTEMS 6/65 PLANO SPOT 7TC ®...
  • Seite 9  Press the MENU button until is shown on the display.  Press the ENTER button to show the software version of the unit.  Press the MENU button for about 2 seconds to return to running mode. JB SYSTEMS 7/65 PLANO SPOT 7TC ®...
  • Seite 10 DMX-input of the first unit (master). Make sure that the PLANO SPOT projectors are all set to channel mode1 (Md 1). Now you can control all the connected units in 4 or 8channel mode. Refer to the user manual of the LEDCON-02 controller for more information and automatic addressing. JB SYSTEMS 8/65 PLANO SPOT 7TC ®...
  • Seite 11: Maintenance

     Clean with a soft cloth using normal glass cleaning products.  Always dry the parts carefully. Attention: We strongly recommend internal cleaning to be carried out by qualified personnel! JB SYSTEMS 9/65 PLANO SPOT 7TC ®...
  • Seite 12: Specifications

    Size: see drawing below Weight: 2.5 kg Every information is subject to change without prior notice You can download the latest version of this user manual on our website: www.jb-systems.eu JB SYSTEMS 10/65 PLANO SPOT 7TC ®...
  • Seite 13: Caractéristiques

    FRANCAIS GUIDE D’UTILISATION GUIDE D’UTILISATION ® Nous vous remercions d'avoir acheté ce produit JB Systems . Pour tirer pleinement profit de toutes les possibilités et pour votre propre sécurité, lisez ces instructions très attentivement avant d'utiliser cet appareil. CARACTÉRISTIQUES Cet appareil ne produit pas d’interférences radio. Ce produit répond aux exigences des directives européennes et nationales actuelles.
  • Seite 14: Instructions De Securite

     Ne connectez pas l'appareil à aucun variateur de lumière.  Utilisez toujours un câble de sécurité approprié et certifié lors de l'installation de l'appareil.  Afin d'éviter un choc électrique, n'ouvrez aucun panneau. L'appareil ne contient aucun composant réparable par l'utilisateur. JB SYSTEMS 12/65 PLANO SPOT 7TC ®...
  • Seite 15: Installation Électrique

     Connectez 2 à un maximum de 16 unités ensemble à l'aide de câbles microphone symétrique de bonne qualité. L'unité qui n'a pas de câble connecté à son entrée DMX est le "maître", les autres sont les unités esclaves.  Assurez-vous que toutes les unités sont branchées au secteur. JB SYSTEMS 13/65 PLANO SPOT 7TC ®...
  • Seite 16: Montage Au Plafond

     Sélectionnez la fonction avec la touche ENTER. L'affichage se met à clignoter.  Utilisez les touches BAS et HAUT pour choisir l'option souhaitée.  Une fois l'option souhaitée est sélectionnée, appuyez sur la touche ENTER pour sélectionner. JB SYSTEMS 14/65 PLANO SPOT 7TC ®...
  • Seite 17  Appuyez sur la touche ENTER pour sélectionner.  Utilisez les touches BAS et HAUT pour sélectionner un des modes canal disponibles.  Une fois le mode est sélectionné, appuyez sur la touche ENTER pour confirmer. JB SYSTEMS 15/65 PLANO SPOT 7TC ®...
  • Seite 18 Réglez toujours sur “No Blackout” lorsque l'appareil est utilisé en mode autonome ou master (maître/esclave) !  Appuyez sur la touche MENU jusqu'à ce que soit affiché à l'écran.  Appuyez sur la touche ENTER. JB SYSTEMS 16/65 PLANO SPOT 7TC ®...
  • Seite 19  Appuyez sur la touche MENU jusqu'à ce que soit affiché à l'écran.  Appuyez sur la touche ENTER, l'affichage se met à clignoter.  Utilisez les touches BAS et HAUT pour sélectionner (rouge) ou (vert) ou (bleu). JB SYSTEMS 17/65 PLANO SPOT 7TC ®...
  • Seite 20: Instructions D'utilisation

     N'oubliez pas de régler le mode Blackout sur "NO Blackout" autrement rien ne se passe. Remarque : Vous pouvez connecter une télécommande CA-8 ou LEDCON-02 à l'unité maître, si vous voulez avoir plus de contrôle sur le fonctionnement maître/esclave. JB SYSTEMS 18/65 PLANO SPOT 7TC ®...
  • Seite 21  Branchez toutes les unités au secteur et allumez le contrôleur DMX. Etant donné que chaque unité possède sa propre adresse DMX, vous pouvez les contrôler individuellement. Rappelez-vous que chaque unité utilise 4 canaux DMX, comme indiqué dans le tableau DMX ci-dessous : JB SYSTEMS 19/65 PLANO SPOT 7TC ®...
  • Seite 22: Entretien

     Nettoyez avec un chiffon doux en utilisant des produits de nettoyage pour verre normal.  Séchez toujours les pièces soigneusement. Attention : Nous vous conseillons fortement de faire effectuer le nettoyage interne par un personnel qualifié ! JB SYSTEMS 20/65 PLANO SPOT 7TC ®...
  • Seite 23: Spécifications

    Voir ci-dessous Dimensions : Voir dessin ci-dessous Poids : 2,5 kg Toutes les informations peuvent être modifiées sans préavis Vous pouvez télécharger la dernière version de ce manuel sur notre site web : www.jb-systems.eu JB SYSTEMS 21/65 PLANO SPOT 7TC ®...
  • Seite 24: Gebruiksaanwijzing

    NEDERLANDS GEBRUIKSAANWIJZING GEBRUIKSAANWIJZING ® Hartelijk dank voor de aankoop van dit JB Systems product .Om ten volle van alle mogelijkheden te profiteren en voor uw eigen veiligheid, lees deze gebruiksaanwijzing zorgvuldig voordat u met dit apparaat start. KENMERKEN Dit apparaat is radio-interferentie onderdrukt .Dit product voldoet aan de eisen van de huidige Europese en nationale richtlijnen .Overeenstemming is vastgesteld en de desbetreffende verklaringen en documenten zijn...
  • Seite 25: Veiligheidsinstructies

     Laat het netsnoer nooit met andere kabels in contact komen!  Deze armatuur moet worden geaard om aan de veiligheidsvoorschriften te voldoen.  Sluit het apparaat niet aan op een dimmerpack. JB SYSTEMS 23/65 PLANO SPOT 7TC ®...
  • Seite 26: Elektrische Installatie

     Zie het hoofdstuk “HOE IN TE STELLEN” om te leren hoe tussen de statische en geluidsmodus te schakelen. Opmerking: U kunt een CA-8-afstandsbediening op de unit aansluiten als u meer controle wilt hebben. JB SYSTEMS 24/65 PLANO SPOT 7TC ®...
  • Seite 27 De installaties moeten ieder jaar door een vakman worden geïnspecteerd om er zeker van te zijn dat de veiligheid nog steeds optimaal is. JB SYSTEMS 25/65 PLANO SPOT 7TC ®...
  • Seite 28 Voorbeeld: de eerste projector was ingesteld op DMX- adres 100  als u de automatische adressering uitvoert, krijgen de andere projectoren in de DMX-keten de adressen: 104, 108, 112, 116, … JB SYSTEMS 26/65 PLANO SPOT 7TC ®...
  • Seite 29  Gebruik de “DOWN”- en “UP”-knoppen om één van de beschikbare modi te selecteren:  (geluidmodus ON)  de shows worden door de interne microfoon geactiveerd.  (geluidmodus OFF)  de shows worden geactiveerd door de snelheid geselecteerd met de shows. JB SYSTEMS 27/65 PLANO SPOT 7TC ®...
  • Seite 30  Druk op de “MENU”-knop tot de display de display weergeeft.  Druk op de “ENTER”-knop, de display begint te knipperen.  Gebruik de “DOWN”- en “UP”-knoppen om (display inversie) of (normale weergave) te selecteren. JB SYSTEMS 28/65 PLANO SPOT 7TC ®...
  • Seite 31  Zodra de modus is geselecteerd, druk op de “ENTER”-knop om te bevestigen.  Druk op en houd de “MENU”-knop ongeveer 2 seconden ingedrukt om naar de werkingsmodus terug te keren. JB SYSTEMS 29/65 PLANO SPOT 7TC ®...
  • Seite 32 (Md 1) zijn ingesteld. Nu kunt u alle aangesloten apparaten in de 4 of 8 kanaalsmodus besturen. Raadpleeg de handleiding van de LEDCON-02-controller voor meer informatie en automatisch adressering. JB SYSTEMS 30/65 PLANO SPOT 7TC ®...
  • Seite 33  Reinig met een zachte doek met behulp van normale reinigingsmiddelen voor glas.  Droog de onderdelen altijd zorgvuldig. Opgelet: Wij raden nadrukkelijk aan om het inwendig reinigen door gekwalificeerd personeel uit te laten voeren! JB SYSTEMS 31/65 PLANO SPOT 7TC ®...
  • Seite 34 Lichtsterkte: zie tabel hieronder: Afmetingen: zie tekening hieronder Gewicht: 2,5 kg Alle informatie is onderhevig aan verandering zonder voorafgaande kennisgeving. U kunt de nieuwste versie van deze handleiding van onze website downloaden: www.jb-systems.eu. JB SYSTEMS 32/65 PLANO SPOT 7TC ®...
  • Seite 35: Vor Der Erstbenutzung

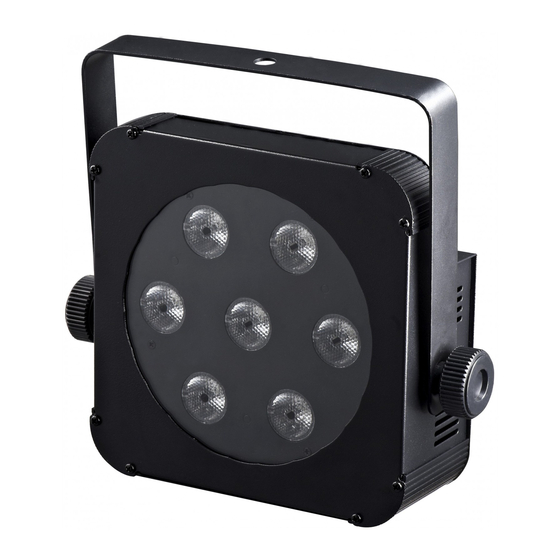
    Verkauf oder sonstiger Weitergabe des Geräts bitte die Bedienungsanleitung beifügen. Packungsinhalt prüfen: Bitte überprüfen Sie, ob die Verpackung folgende Artikel enthält:  Bedienungsanleitung  PLANO SPOT 7TC  Bügel zum Aufhängen  2 Knöpfe zum Befestigen der Bügel zum Aufhängen JB SYSTEMS...
  • Seite 36: Sicherheitshinweise

     Lassen Sie das Netzkabel niemals mit anderen Kabeln in Berührung kommen!  Zur Einhaltung der Sicherheitsbestimmungen muss das Gerät geerdet sein.  Das Gerät nicht an einen Dimmer anschließen.  Ausschließlich vorschriftsmäßige Kabel zur Installation verwenden. JB SYSTEMS 34/65 PLANO SPOT 7TC ®...
  • Seite 37: Elektrische Installation

     Schlagen Sie im Kapitel „EINSTELLUNGSANLEITUNG“ nach, um zu erfahren, wie man zwischen statischem und Sound-Modus wechselt. Hinweis: Sie können eine CA-8 Fernbedienung an das Gerät anschließen, wenn Sie weitere Steuerungsmöglichkeiten verwenden möchten. JB SYSTEMS 35/65 PLANO SPOT 7TC ®...
  • Seite 38: Überkopf-Montage

     Die Ventilationsöffnungen nicht abdecken, da Überhitzungsgefahr.  Der Betreiber muss sicherstellen, dass die sicherheitsrelevanten und technischen Installationen vor Erstbetrieb fachmännisch vorgenommen worden sind. Installationen sollten jährlich durch qualifiziertes Fachpersonal überprüft werden, um jederzeit einen sicheren Betrieb zu gewährleisten. JB SYSTEMS 36/65 PLANO SPOT 7TC ®...
  • Seite 39: Einstellungsanleitung

    Sekunden gedrückt, um in den Betriebsmodus zurückzukehren. Beispiel: Der erste Projektor wurde auf die DMX- Adresse 100 eingestellt  wenn Sie die automatische Adressierung durchführen, erhalten anderen Projektoren in der DMX-Kette die Adressen: 104, 108, 112, 116, … JB SYSTEMS 37/65 PLANO SPOT 7TC ®...
  • Seite 40 (Sound-Modus OFF)  Die Show wird über die Geschwindigkeit ausgelöst, die mit den Shows gewählt wurde.  Wenn der richtige Modus gewählt wurde, bestätigen Sie mit ENTER.  Halten Sie MENU ungefähr 2 Sekunden gedrückt, um in den Betriebsmodus zurückzukehren. JB SYSTEMS 38/65 PLANO SPOT 7TC ®...
  • Seite 41  Verwenden Sie DOWN (Abwärts) und UP (Aufwärts), um (Display-Umkehrung) oder (normales Display) zu wählen.  Wenn der gewünschte Modus eingestellt ist, bestätigen Sie diesen mit ENTER.  Halten Sie MENU ungefähr 2 Sekunden gedrückt, um in den Betriebsmodus zurückzukehren. JB SYSTEMS 39/65 PLANO SPOT 7TC ®...
  • Seite 42  Verwenden Sie DOWN (Abwärts) und UP (Aufwärts), um oder zu wählen.  Wenn der gewünschte Modus eingestellt ist, bestätigen Sie diesen mit ENTER.  Halten Sie MENU ungefähr 2 Sekunden gedrückt, um in den Betriebsmodus zurückzukehren. JB SYSTEMS 40/65 PLANO SPOT 7TC ®...
  • Seite 43: Bedienungshinweise

    PLANO SPOT-Projektoren alle auf Kanalmodus 1 (Md 1) eingestellt wurden. Nun können Sie alle angeschlossenen Einheiten im 4- oder 8-Kanalmodus steuern. Schlagen Sie in der Bedienungsanleitung des LEDCON-02-Controllers für weitere Informationen und über die automatische Adressierung nach. JB SYSTEMS 41/65 PLANO SPOT 7TC ®...
  • Seite 44: Wartung

    Umgebung führen zu größerer Verschmutzung auf den Linsen.  Mit einem weichem Tuch und gewöhnlichem Glasreiniger säubern.  Alle Teile stets gut abtrocknen. Achtung: Wir empfehlen dringend, die Reinigung des Geräteinneren nur von qualifiziertem Personal durchführen zu lassen! JB SYSTEMS 42/65 PLANO SPOT 7TC ®...
  • Seite 45: Technische Daten

    25° Lichtstärke: Siehe Tabelle unten Abmessungen: Siehe Abbildung unten Gewicht: 2,5 kg Diese Angaben können sich ohne gesonderten Hinweis ändern. Sie können sich die neueste Version dieses Benutzerhandbuches von unserer Website herunterladen: www.jb-systems.eu. JB SYSTEMS 43/65 PLANO SPOT 7TC ®...
  • Seite 46: Antes Del Uso

    ESPAÑOL MANUAL DE INSTRUCCIONES MANUAL DE INSTRUCCIONES Gracias por comprar este producto JB Systems®. Para aprovechar al máximo todas las posibilidades y para su propia seguridad, lea cuidadosamente este manual de instrucciones antes de comenzar a utilizar la unidad. CARACTERÍSTICAS Esta unidad tiene supresión de radio interferencia.
  • Seite 47: Instrucciones De Seguridad

     ¡Nunca permita que el cable de alimentación haga contacto con otros cables!  Este accesorio debe conectarse a tierra para cumplir con las regulaciones de seguridad. JB SYSTEMS 45/65 PLANO SPOT 7TC ®...
  • Seite 48: Instalación Eléctrica

     Consulte el capítulo CÓMO CONFIGURARLO para aprender a alternar entre los modos estático y sonido. Observación: Puede conectar a la unidad un mando a distancia CA-8 si desea tener un mayor control. JB SYSTEMS 46/65 PLANO SPOT 7TC ®...
  • Seite 49 Las instalaciones deben inspeccionarse anualmente por una persona con experiencia para asegurarse de que la seguridad es óptima. JB SYSTEMS 47/65 PLANO SPOT 7TC ®...
  • Seite 50 Ejemplo: el primer proyector se ha establecido en la dirección DMX 100  cuando realice el direccionamiento automático, los demás proyectores de la cadena DMX recibirán las direcciones: 104, 108, 112, 116, … JB SYSTEMS 48/65 PLANO SPOT 7TC ®...
  • Seite 51 (modo de sonido OFF)  los espectáculos se disparan por la velocidad seleccionada con los espectáculos.  Una vez haya seleccionado el modo correcto, pulse el botón ENTER para confirmar.  Pulse el botón MENU durante unos 2 segundos para volver al modo activo. JB SYSTEMS 49/65 PLANO SPOT 7TC ®...
  • Seite 52 (inversión de pantalla) o (pantalla normal).  Una vez haya seleccionado el modo, pulse el botón ENTER para confirmar.  Pulse el botón MENU durante unos 2 segundos para volver al modo activo. JB SYSTEMS 50/65 PLANO SPOT 7TC ®...
  • Seite 53  Utilice los botones ABAJO y ARRIBA para seleccionar  Una vez haya seleccionado el modo, pulse el botón ENTER para confirmar.  Pulse el botón MENU durante unos 2 segundos para volver al modo activo. JB SYSTEMS 51/65 PLANO SPOT 7TC ®...
  • Seite 54: Instrucciones De Funcionamiento

    PLANO SPOT estén todos establecidos en el modo 1 de canal (Md 1). Ahora usted puede controlar todas las unidades conectadas en modo de 4 u 8 canales. Consulte el manual de usuario del mando LEDCON-02 para más información y direccionamiento automático. JB SYSTEMS 52/65 PLANO SPOT 7TC ®...
  • Seite 55: Mantenimiento

     Límpielo con un paño suave utilizando productos normales para la limpieza del vidrio.  Siempre seque cuidadosamente las piezas. Atención: ¡Recomendamos enfáticamente que la limpieza se lleve a cabo por personal cualificado! JB SYSTEMS 53/65 PLANO SPOT 7TC ®...
  • Seite 56: Especificaciones

    Tamaño: ver la siguiente imagen Peso: 2.5 kg Esta información está sujeta a cambios sin notificación previa. Puede descargar la versión más reciente de este manual de usuario en nuestro sitio Web: www.jb-systems.eu JB SYSTEMS 54/65 PLANO SPOT 7TC ®...
  • Seite 57: Manual De Funcionamento

    MANUAL DE FUNCIONAMENTO MANUAL DE FUNCIONAMENTO ® Obrigado por adquirir este produto da JB Systems . Para tirar o máximo rendimento das suas possibilidades e para sua própria segurança, por favor leia cuidadosamente estas instruções de funcionamento antes de começar a utilizar esta unidade.
  • Seite 58: Instruções De Segurança

     De forma a não correr risco de choque eléctrico não abra a cobertura da unidade. No interior não existem peças que possam ser substituídas pelo utilizador.  Nunca repare um fusível nem tente operar a unidade sem fusível. Substitua sempre um fusível danificado por outro com as mesmas características! JB SYSTEMS 56/65 PLANO SPOT 7TC ®...
  • Seite 59: Instalação Eléctrica

     Certifique-se que todas as unidades estão ligadas à rede eléctrica.  Consulte o capítulo CONFIGURAÇÃO para obter mais informações.  Está concluído! Observação: Pode conectar um controlador remoto CA-8 à unidade master se quiser ter mais controlo JB SYSTEMS 57/65 PLANO SPOT 7TC ®...
  • Seite 60 As instalações devem ser inspeccionados a cada ano por uma pessoa qualificada para ter a certeza de que a segurança está assegurada. JB SYSTEMS 58/65 PLANO SPOT 7TC ®...
  • Seite 61 2 segundos para voltar ao modo de execução. Exemplo: o primeiro projector foi programado para o endereço DMX 100  quando executar o endereçamento automático, os outros projetores na cadeia DMX receberão os endereços: 104, 108, 112, 116, … JB SYSTEMS 59/65 PLANO SPOT 7TC ®...
  • Seite 62 (modo de áudio desactivado)  os espectáculos são activados pela velocidade seleccionada para eles.  Uma vez seleccionado o modo desejado, pressione a tecla ENTER para confirmar.  Pressione o botão MENU durante cerca de 2 segundos para voltar ao modo de execução. JB SYSTEMS 60/65 PLANO SPOT 7TC ®...
  • Seite 63  Pressione o botão MENU durante cerca de 2 segundos para voltar ao modo de execução. Exibir Temperatura  Pressione o botão MENU até que o visor exiba  Pressione a tecla ENTER e o visor exibirá a temperatura da unidade. JB SYSTEMS 61/65 PLANO SPOT 7TC ®...
  • Seite 64: Instruções De Funcionamento

    (ver o modo slave no capítulo CONFIGURAÇÃO)  Ligue todas as unidades à rede eléctrica e coloque um pouco de música. As unidades começarão a JB SYSTEMS 62/65 PLANO SPOT 7TC ®...
  • Seite 65  Conecte todas as unidades à rede eléctrica e ligue o controlador DMX. Uma vez que cada unidade tem seu próprio endereço DMX, pode controlá-las individualmente. Recordar que cada unidade utiliza 4 canais DMX, tal como mostrado no gráfico DMX em baixo: JB SYSTEMS 63/65 PLANO SPOT 7TC ®...
  • Seite 66  Limpe com um pano macio usando produtos normais de limpeza de vidro.  Seque sempre as peças cuidadosamente. Atenção: Recomendamos que a limpeza interna seja ser realizada por pessoal qualificado! JB SYSTEMS 64/65 PLANO SPOT 7TC ®...
  • Seite 67 Tamanho: ver figura em baixo Peso: 2.5 kg Estas informações estão sujeitas a alterações sem aviso prévio. Poderá fazer o download da versão mais recente deste manual no nosso site: www.jb-systems.eu JB SYSTEMS 65/65 PLANO SPOT 7TC ®...
  • Seite 68 WWW.JB-SYSTEMS.EU Copyright © 2014 by BEGLEC NV ‘t Hofveld 2C ~ B1702 Groot-Bijgaarden ~ Belgium Reproduction or publication of the content in any manner, without express permission of the publisher, is prohibited.

Inhaltsverzeichnis