BE QUIET! STRAIGHT POWER PRO Bedienungsanleitung
350-700w
Inhaltsverzeichnis

Verwandte Anleitungen für BE QUIET! STRAIGHT POWER PRO


Inhaltszusammenfassung für BE QUIET! STRAIGHT POWER PRO
- Seite 1 Index...
-
Seite 2: Inhaltsverzeichnis
Index Deutsch 1. Einleitung ................6 2. Warnungen und Sicherheitshinweise ........7 3. Installationshinweise ............8 3.1 Bitte verfahren Sie bei einem Netzteiltausch wie folgt: ..8 3.2 Bitte bauen Sie das neue be quiet! Netzteil wie folgt ein: ...8 4. Anschluss ihrer Komponenten .........10 5. - Seite 3 Index English 1. Introduction ..............26 2. Warnings and safety instructions ........27 3. Installation instructions ...........28 3.1 Please proceed as follows by replacement of power supplies: ............28 3.2 Install the new be quiet! power supply unit as follows: ..28 4.
- Seite 4 Index Español 1. Introducción ..............46 2. Advertencias e indicaciones de seguridad ......47 3. Indicaciones para la instalación .........48 3.1 Por favor proceda de la manera siguiente al intercambiar fuentes de alimentación: ......48 3.2 Por favor monte la nueva fuente de alimentación be quiet! de la manera siguiente: .........
- Seite 5 Index Française 1. Introduction ..............66 2. Mises en garde et consignes de sécurité ......67 3. Consignes D’instalation ...........68 3.1 Veuillez procéder comme suit pour remplacer le bloc d’alimentation: ..........68 3.2 Montez maintenant le nouveau bloc d’alimentation be quiet! comme suit : ..........68 4.
-
Seite 6: Einleitung
1. EINLEITUNG Wir freuen uns, dass Sie sich entschlossen haben zukünftig ein be quiet! Netzteil der STRAIGHT POWER Serie zur Stromversorgung Ihres Rechners einzusetzen. Um Ihnen mögliche erste Fragen im Vorwege zu beantworten, haben wir die Vorteile und besonderen Eigenschaften Ihres neuen be quiet! Netzteils in diesem umfassenden Handbuch zusammengefasst. -
Seite 7: Warnungen Und Sicherheitshinweise
2. Warnungen und Sicherheitshinweise Lesen Sie bitte vor der Inbetriebnahme alle Punkte in dieser Anleitung sorgfältig durch und beachten Sie diese. Nur dann ist ein ordnungsgemäßer Betrieb des Netzteils sichergestellt und Sie werden lange Freude an diesem Produkt haben. Öffnen Sie niemals die Abdeckung des Netzteils, die dort verbauten elektronischen Bauteile erzeugen für den Menschen gefährliche Hochspannungen. -
Seite 8: Installationshinweise
3. Installationshinweise Lesen Sie bitte den Punkt „Warnungen und Sicherheitshinweise“ bevor Sie mit der Installation beginnen Anmerkung: Zum Einbau des Netzteiles wird zur Verschraubung des Netzteils im Gehäuse ein Schraubendreher benötigt. Bitte benutzen Sie die im Zubehör befindlichen Netzteilschrauben. 3.1 Bitte verfahren Sie bei einem Netzteiltausch wie folgt: 1. - Seite 9 3. Für den Fall, dass Sie über ein älteres Mainboard mit einer 20-pin Buchse verfügen, verbinden Sie nur den 20pol Stecker. 4. Verbinden Sie nun den zusätzlichen 4-Pol Stromanschluss ( 12V ) mit Ihrem Mainboard ( wird ggf. bei älteren Mainboards nicht benötigt ) 5.
-
Seite 10: Anschluss Ihrer Komponenten
4. Anschluss ihrer Komponenten Verbinden Sie nun Ihre Peripheriegeräte, wie z.B. CD-ROM, DVD-R, Festplat- ten, Grafikkarte etc. mittels der beigelegten Verbindungskabel. CD/DVD Laufwerk Bitte beachten Sie die Hinweise des jeweiligen Peripheriegeräteherstellers, um Probleme bei der Installation zu vermeiden. SATA-Stecker eignen sich nur zum Anschluss von SATA-Festplatten oder optischen SATA-Laufwerken. -
Seite 11: Kompatibilität
Überprüfen Sie den korrekten Sitz aller Steckverbindungen, bevor Sie mit dem nächsten Schritt der Installation fortfahren. Schließen Sie nun das Stromkabel an Ihr Netzteil an, und schalten Sie dieses ein (Schalter auf Position „I“). Betätigen Sie abschließend den Ein-/Ausschalter an Ihrem PC-Gehäuse, um das Netzteil in Betrieb zu nehmen. Anmerkung: Die genaue Belegung der Pins auf dem Mainboard des Ein/Ausschalters Ihres PC-Gehäuses entnehmen Sie bitte Ihrem Mainboardhandbuch. -
Seite 12: Vorteile Und Besonderheiten
6. Vorteile und Besonderheiten 6.1 Top Efficiency Ein extrem hoher Wirkungsgrad von bis zu 83% bei 50% Last hilft bei der Sen- kung Ihrer Stromkosten. Aktive PFC mit PF von bis zu 0,99 sorgt für die Sta- bilisierung und Verbesserung der Ausgangsspannungen. Das Netzteil ist nach den ROHS-Richtlinien gefertigt. -
Seite 13: Service
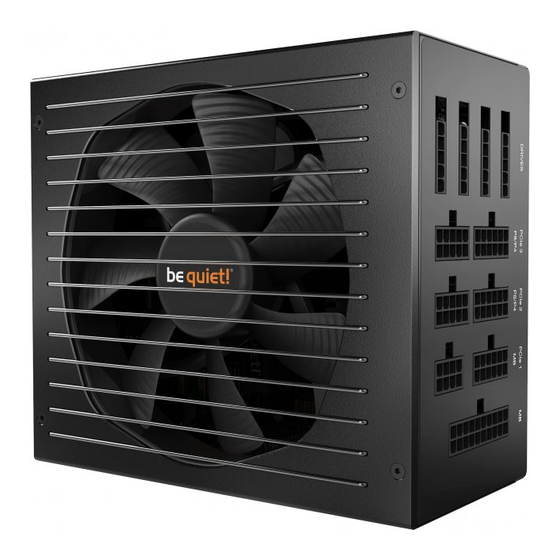
SILENT WINGS FAN In den be quiet! Netzteilen der STRAIGHT POWER Serie ist ein besonders zuverlässiger, laufruhiger 120 mm Lüfter verbaut. Dieser befindet sich auf der Unterseite des Netzteils und sorgt für eine optimale Belüftung des Netzteils. 6.3 Service 3 Jahre Garantie, davon 1 Jahr kostenloser Vorortaustausch Service innerhalb 48- Stunden an der Haustür des Endanwenders und kostenlose Servicehotline 0800-0736 736 ( innerhalb Deutschlands ). -
Seite 14: Technische Eigenschaften Und Standarts
7. Technische Eigenschaften und Standarts ATX12V VERSION 2.2 Be quiet! bietet mit der STRAIGHT POWER Serie ein Netzteil an, welches der neuesten ATX12V Spezifikation entspricht. Hierdurch steht u.a. eine separate und unbeeinflusste 12V-Leitung für den Prozessor zur Verfügung. Ab dem 550 Watt Modell sind insge- samt vier getrennte 12V Leitungen im Netzteil vorhanden, welche für eine besonders hohe Stabilität im System sorgen. -
Seite 15: Design Features
bis zu 8 SATA be quiet! Netzteile der STRAIGHT POWER Serie sind mit 8 vollbe- schalteten SATA-Stromanschlüssen inklusive 3,3V-Leitung ausge- stattet. Hiermit sind Sie auch für die Zukunft und für Erweiterun- gen Ihres Systems bestens ausgerüstet. (ab dem 500W Modell sind 8 SATA vorhanden) EMV PROTECTOR Alle be quiet! Netzteile aus der STRAIGHT POWER Serie sind mit... -
Seite 16: Artikelnummern Und Barcodes
9. Artikelnummern und Barcodes Bezeichnung Art.Nr. EAN-Code BQT E5-350W BN032 BQT E5-400W BN033 BQT E5-450W BN034 BQT E5-500W BN035... - Seite 17 Bezeichnung Art.Nr. EAN-Code BQT E5-550W BN036 BQT E5-600W BN037 BQT E5-650W BN038 BQT E5-700W BN039...
-
Seite 18: Technische Spezifikationen
10. Technische Spezifikationen Netzteile von be quiet! - ein Garant für extreme Laufruhe Häufig erzeugen diverse PC Komponenten entweder ein lautes, andauerndes Brummen, Surren oder Hochfrequenz-Pfeifen, so dass die Konzentration beim Arbeiten, der Genuss beim Spielen, Filmeschauen oder Musikhören aufs Emp- findlichste gestört wird. -
Seite 19: Spezifikationen
11. Spezifikationen AC EINGANG 110 - 240Vac 50 - 60Hz 10 - 5A DC AUSGANG 3,3V 12V1 12V2 -12V 5VSB max. Strom 0,5A 2,5A BQT E5-350W max. 350W 150W 216W 12,5W kombinierte 350W Leistung AC EINGANG 110 - 240Vac 50 - 60Hz 10 - 5A DC AUSGANG 3,3V... - Seite 20 AC EINGANG 110 - 240Vac 50 - 60Hz 10 - 5A DC AUSGANG 3,3V 12V1 12V2 12V3 12V4 -12V 5VSB max. Strom 0,5A BQT E5-550W max. 550W 170W 492W kombinierte 550W Leistung AC EINGANG 110 - 240Vac 50 - 60Hz 10 - 5A DC AUSGANG 3,3V...
-
Seite 21: Anschlussmöglichkeiten Und Kabellängen
12. Anschlussmöglichkeiten und Kabellängen Maincable Connectors *1 = available in the beginning with 450W Model *2 = available in the beginning with 500W Model 4 X 12V SPLITTING 12V1 CPU 1 12V2 PCIe 2/CPU 2 12V3 Mainboard / Drivers 12V4 PCIe1 12V3 12V3... -
Seite 22: Pin-Belegung Der Anschlüsse
13. Pin-Belegung der Anschlüsse 2 4 PI N AT X P OW E R CO N N E C TOR Color Signal Color Signal Orange +3.3VDC Orange +3.3VDC Brown +3.3V def.sense Orange +3.3VDC Blue -12VDC 20 19 18 17 16 15 14 13 Black Black Green... -
Seite 23: Fehlerbehebung
14. Fehlerbehebung BITTE BEACHTEN SIE Bei ATX-Systemen erhält das Netzteil das Signal vom angeschlossenen Main- board, um in Betrieb genommen zu werden. Daher prüfen Sie bitte, entweder mit Hilfe des Mainboards- oder des Gehäusehandbuches, ob der An- / Aus- schalter korrekt verbunden wurde. ACHTUNG: Arbeiten an Stromquellen können zu lebensbedrohlichen Verletzungen führen. -
Seite 24: Zubehör
16. Zubehör Im Lieferumfang enthalten ist neben dem Netzteil auch folgendes Zubehör: Netzanschlusskabel Kabelbinder Schrauben zur Netzteilbefestigung Bedienungsanleitung 17. Entsorgungshinweis [§9 Abs. 2 ElektroG i. V. §10 Abs. 3] Gebrauchte Elektro- und Elektronikgeräte dürfen gemäß europäischer Vorgaben [1] nicht mehr zum unsortierten Siedlungsabfall gegeben werden. Sie müssen getrennt erfasst werden. -
Seite 25: Copyright
18. Copyright Copyright © Listan GmbH & Co.KG 2006. Alle Rechte vorbehalten. Bitte beachten Sie folgende Hinweise: 1. Der Inhalt dieser Dokumentation darf ohne vorherige schriftliche Genehmigung durch Listan in keiner Form, weder ganz noch teilweise, vervielfältigt, weitergegeben, verbreitet oder gespeichert werden. 2. -
Seite 26: Introduction
1. INTroDUCTIoN We welcome your decision to use be quiet! power supplies of the STRAIGHT POWER series for your computer’s current supply in future. The advantages and special properties of your new be quiet! power supply unit have been summed up in this comprehensive handbook to provide answers to possible questions right from the outset. -
Seite 27: Warnings And Safety Instructions
2. WArNINGS AND SAFETy INSTrUCTIoNS Please read all sections of the present manual carefully before putting the unit into operation, and comply with the instructions they contain. This is the only way to make sure that the power supply unit will be operated in a technically appropriate manner for you to enjoy using it for quite a long time. -
Seite 28: Installation Instructions
3. INSTALLATIoN INSTrUCTIoNS Please read the “Warnings and safety instructions” section before starting any installation operations Note: Please use a screwdriver for installation of the power supply unit. You will find proper power supply screws within the accessory box. 3.1 Please proceed as follows by replacement of power supplies: 1. - Seite 29 3. If you should have an older mainboard which is equipped with a 20-pin socket, please use the 20-pin as mainboard connection only. 4. Connect, as a next step, the additional 4-pole supply terminal (12V) with your mainboard (it is not always required for any older mainboards). 5.
-
Seite 30: Connecting Your Components
4. CoNNECTING yoUr ComPoNENTS Connect your peripherals like CD and DVD drives, hard drives and graphic cards as shown with its designed 4-pin connectors. CD/DVD Please pay attention to the instructions of each manufacturer for the peripherals you want to use to prevent possible problems from arising during installation. -
Seite 31: Compatiblity
Please check once again the plug-in connections between all components and the power supply unit before proceeding with further installation operations. Connect the power cable to your power supply unit, and switch the power button of your power supply to „I“. Finally press the On/Off switch on your PC case to put the power supply unit into operation. -
Seite 32: Advantages And Special Features
6. ADVANTAGES AND SPECIAL FEATUrES 6.1 Top Efficiency Extremely high efficiency of >83% by 50% load is taking care that your electricity expenses will be reduced. Active PF with PF of up to 0.99 for stabilising and enhancing output voltage values. The power supply unit is manufactured in accordance with ROHS Guidelines. -
Seite 33: Service
SILENT WINGS FAN The be quiet! power supplies of the STRAIGHT POWER series incorporate one reliable and quiet-running 120-mm fan. This fan is installed in the bottom and contributes to an optimized air circulation close to the CPU. 6.3 Service A 3-year warranty, a multi-language manual and packaging, technical email support service@be-quiet.com as well as technical service hotline +49 (0)40 –... -
Seite 34: Technical Features & Standards
7. TECHNICAL FEATUrES & STANDArDS ATX12V VERSION 2.2 Be-quiet! offers with its STRAIGHT POWER Series a power supply unit complying with the latest ATX12V specification and providing therefore, among other things, a separate and unaffected 12V line for processors. As of the 550W STRAIGHT POWER items, you even have 4 separate 12V cables at your disposal, which assures an extremely stable system. -
Seite 35: Design Features
8 x SATA be quiet! Power supplies of the STRAIGHT POWER series are equipped with up to 8 x SATA connectors and 3.3V cable. 8 x SATA will be available for all versions higher than 500W. EMV PROTECTOR The surface of all be quiet! power supplies from the STRAIGHT POWER series are coated with a special finish. -
Seite 36: Arcticle Numbers And Barcodes
9. ArCTICLE NUmBErS AND BArCoDES Description Art.No. EAN-Code BQT E5-350W BN032 BQT E5-400W BN033 BQT E5-450W BN034 BQT E5-500W BN035... - Seite 37 Description Art.No. EAN-Code BQT E5-550W BN036 BQT E5-600W BN037 BQT E5-650W BN038 BQT E5-700W BN039...
-
Seite 38: Technical Specifications
10. TECHNICAL SPECIFICATIoNS Power supplies from be quiet! are a warranty for best running smoothness Often various PC components generate either loud, constant humming, whirring or high-frequency whistling noises, which exasperatingly disturb the user‘s concentration at work or while playing games, watching movies or listening to downloaded music. -
Seite 39: Specifications
11. SPECIFICATIoNS AC INPUT 110 - 240Vac 50 - 60Hz 10 - 5A DC OUTPUT 3,3V 12V1 12V2 -12V 5VSB max. Power 0,5A 2,5A BQT E5-350W max. 350W 150W 216W 12,5W combined 350W Power AC INPUT 110 - 240Vac 50 - 60Hz 10 - 5A DC OUTPUT 3,3V... - Seite 40 AC INPUT 110 - 240Vac 50 - 60Hz 10 - 5A DC OUTPUT 3,3V 12V1 12V2 12V3 12V4 -12V 5VSB max. Power 0,5A BQT E5-550W max. 550W 170W 492W combined 550W Power AC INPUT 110 - 240Vac 50 - 60Hz 10 - 5A DC OUTPUT 3,3V...
-
Seite 41: Cable Lenghts And Wiring Diagram
12. CABLE LENGHTS AND WIrING DIAGrAm Maincable Connectors *1 = available in the beginning with 450W Model *2 = available in the beginning with 500W Model 4 X 12V SPLITTING 12V1 CPU 1 12V2 PCIe 2/CPU 2 12V3 Mainboard / Drivers 12V4 PCIe1 12V3... -
Seite 42: Pin Assignments
13. PIN ASSIGNmENTS 2 4 PI N AT X P OW E R CO N N E C TOR Color Signal Color Signal Orange +3.3VDC Orange +3.3VDC Brown +3.3V def.sense Orange +3.3VDC Blue -12VDC 20 19 18 17 16 15 14 13 Black Black Green... -
Seite 43: Trouble-Shooting
14. TroUBLE-SHooTING PLEASE NoTE: With ATX systems, the power supplies receive the signal from the connected mainboard in order to be started up. So please check, either with the aid of the mainboard manual or the case manual, whether the ON/OFF switch has been properly connected. -
Seite 44: Accessories
16. ACCESSorIES Within the scope of supply is the following: be quiet! STRAIGHT POWER PSU unit Cold-device plug cable binders Power-supply fastening screws Multi-language User’s manual 17. INSTrUCTIoNS For DISPoSAL [§9 Sec. 2 of the German Law on Electric and Electronic Appliances §10 Sec. Used electric and electronic devices should no longer be disposed of together with unsorted domestic waste in accordance with European specifications [1]. -
Seite 45: Copyright
18. CoPyrIGHT Copyright © Listan GmbH & Co.KG 2006. All rights reserved. Please note the following points: 1. The contents of this documentation may not be duplicated, disclosed, disseminated, or stored in any form, neither in whole nor in part, without the prior written permission of Listan. 2. -
Seite 46: Introducción
1. INTroDUCCIóN Nos da mucho gusto que usted haya decidido emplear una fuente de alimenta- ción be quiet! de la serie STRAIGHT POWER para el suministro de corriente de su ordenador de ahora en adelante. Para contestarle las primeras preguntas posibles desde un principio hemos reunido las ventajas y propiedades especiales de su nueva fuente de alimentación be quiet! en este amplio manual. -
Seite 47: Advertencias E Indicaciones De Seguridad
2. ADVErTENCIAS E INDICACIoNES DE SEGUrIDAD Por favor lea todos los apartados de estas instrucciones cuidadosamente an- tes de la puesta en funcionamiento y obsérvelos. Ésta es la única manera de garantizar el funcionamiento debido de la fuente de alimentación, y usted hallará placer en este producto por un tiempo prolongado. -
Seite 48: Indicaciones Para La Instalación
3. INDICACIoNES PArA LA INSTALACIóN Por favor lea el apartado “Advertencias e indicaciones de seguridad” antes de que comience con la instalación. Nota: Para el montaje de la fuente de alimentación se requiere un destornillador para fijar la fuente de alimentación en la caja con tornillos. Por favor utilice los tornil- los para la fuente de alimentación que se encuentran incluidos en los accesori- 3.1 Por FAVor ProCEDA DE LA mANErA SIGUIENTE AL INTErCAmBIAr FUENTES DE ALImENTACIóN:... - Seite 49 3. Si dispone de un panel de control antiguo con una hembrilla de 20 clavijas, conecte únicamente el enchufe de 20 polos a su panel de control. 4. Como paso siguiente conecte la toma de corriente de 4 polos (12V) adicional con su placa base (ésta no se requiere en todas las placas base más antiguas) 5.
-
Seite 50: Conexion De Los Componentes Del Usuario
4. CoNExIoN DE LoS ComPoNENTES DEL USUArIo Conecte sus dispositivos periféricos como p. ej. unidades de CD, DVD, discos duros, tarjeta gráfica con ayuda de los cables conectores previstos para ello. CD/DVD Por favor observe las indicaciones de los respectivos fabricantes de los dis- positivos para evitar problemas durante la instalación. -
Seite 51: Compatiblidad
Vuelva a comprobar las conexiones de enchufe de todos los componentes con la fuente de alimentación antes de que continúe con la instalación. Conecte el cable eléctrico a su fuente de alimentación y conecte éste (interrup- tor en la posición “I”). Para concluir, pulse el interruptor de su caja del PC para poner en funcionamiento la fuente de alimentación. -
Seite 52: Vetajas Y Particularidades
6. VETAjAS y PArTICULArIDADES 6.1 ToP EFFICIENCy Rendimiento extremadamente alto >83% a 50% de carga para reducir sus costes de corriente. Factor de potencia activo de hasta 0,99 para estabilizar y mejorar las ten- siones de salida. La fuente de alimentación está fabricada según las directivas ROHS. -
Seite 53: Service
SILENT WINGS FAN En los fuentes de alimentación be quiet! están incorporados un ventilador de 120 mm especialmente fiables y de gran suavidad de marcha. De tal manera, el ventilador instalado en la chapa de fondo puede contribuir a una circulación óptima del aire en el área de la CPU. -
Seite 54: Technical Features & Standards
7. TECHNICAL FEATUrES & STANDArDS ATX12V VERSION 2.2 Con la serie STRAIGHT POWER, be quiet! ofrece un bloque de alimentación que cumple con las exigencias de la especificación ATX12V más reciente y por lo tanto entre otras cosas pone a la disposición un cable de 12V separado y propio para el procesador. -
Seite 55: Design Features
8 x SATA be quiet! Los bloques de alimentación de la serie STRAIGHT POWER disponen de hasta 8 conexiones de red SATA totalmente amortiguadas (según modelo), incluyendo cable de 3,3 V. (a partir del modelo 500 W = 8 x SATA) EMV PROTECTOR Todos los fuentes de alimentación be quiet! de la serie STRAIGHT POWER están recubiertos con una aleación especial. -
Seite 56: Números De Artículo Y Códigos De Barras
9. NúmEroS DE ArTíCULo y CóDIGoS DE BArrAS Description Art.No. EAN-Code BQT E5-350W BN032 BQT E5-400W BN033 BQT E5-450W BN034 BQT E5-500W BN035... - Seite 57 Description Art.No. EAN-Code BQT E5-550W BN036 BQT E5-600W BN037 BQT E5-650W BN038 BQT E5-700W BN039...
-
Seite 58: Especificación Técnica
10. ESPECIFICACIóN TéCNICA Fuentes de alimentación de be quiet! - un garante de suavidad extrema de marcha Frecuentemente hay diferentes componentes del PC que producen un ronroneo, un zumbido o un silbido de alta frecuencia intenso y permanente, el cual molesta de la manera más desagrable en la concentración al trabajar o en el placer al jugar, ver películas o escuchar música. -
Seite 59: Especificacion
11. ESPECIFICACIoN AC INPUT 110 - 240Vac 50 - 60Hz 10 - 5A DC OUTPUT 3,3V 12V1 12V2 -12V 5VSB max. Power 0,5A 2,5A BQT E5-350W max. 350W 150W 216W 12,5W combined 350W Power AC INPUT 110 - 240Vac 50 - 60Hz 10 - 5A DC OUTPUT 3,3V... - Seite 60 AC INPUT 110 - 240Vac 50 - 60Hz 10 - 5A DC OUTPUT 3,3V 12V1 12V2 12V3 12V4 -12V 5VSB max. Power 0,5A BQT E5-550W max. 550W 170W 492W combined 550W Power AC INPUT 110 - 240Vac 50 - 60Hz 10 - 5A DC OUTPUT 3,3V...
-
Seite 61: Posibilidades De Coneción Y Longitudes De Los Cables
12. PoSIBILIDADES DE CoNECIóN y LoNGITUDES DE LoS CABLES Maincable Connectors *1 = available in the beginning with 450W Model *2 = available in the beginning with 500W Model 4 X 12V SPLITTING 12V1 CPU 1 12V2 PCIe 2/CPU 2 12V3 Mainboard / Drivers 12V4... -
Seite 62: Ocupacion De Los Pines De Las Conexiones
13. oCUPACIoN DE LoS PINES DE LAS CoNExIoNES 2 4 PI N AT X P OW E R CO N N E C TOR Color Signal Color Signal Orange +3.3VDC Orange +3.3VDC Brown +3.3V def.sense Orange +3.3VDC Blue -12VDC 20 19 18 17 16 15 14 13 Black Black Green... -
Seite 63: Eliminacion De Errores
14. ELImINACIoN DE ErrorES LE ROGAMOS OBSERVE QUE: En sistemas ATX el bloque de alimentación recibe la señal de la placa base conectada para ser puesto en servicio. Por lo que, con ayuda del manual de la placa base o de la caja, se deberá verificar si el conectador/desconectador ha sido conectado correctamente. -
Seite 64: Accesorios
16. ACCESorIoS El volumen de entrega incluye los accesorios siguientes: - Conector de aparatos fríos - cables negras - Tornillos para la fijación de la fuente de alimentación - Instrucciones de servicio 17. INDICACIóN CoN rESPECTo A LA ELImINACIóN DE DESECHoS [Art. -
Seite 65: Copyright
18. CoPyrIGHT Copyright © Listan GmbH & Co.KG 2006. Nos reservamos todos los de- rechos. Le rogamos observe las indicaciones siguientes: 1. El contenido de esta documentación no se deberá reproducir, pasar a terceros, propagar o memorizar ni completo ni parcialemente sin autorización por escrito de Listan. -
Seite 66: Introduction
1. INTroDUCTIoN Nous nous félicitons de votre décision d’alimenter à l’avenir votre ordinateur en courant à l’aide d’un bloc d’alimentation be quiet! de la gamme STRAIGHT POWER. Afin d’apporter dès le départ une réponse à des premières questions éventuelles, nous avons récapitulé les avantages et les propriétés particulières de votre nouveau bloc d’alimentation be quiet! dans ce manuel détaillé. -
Seite 67: Mises En Garde Et Consignes De Sécurité
2. mISES EN GArDE ET CoNSIGNES DE SéCUrITé Veuillez lire attentivement tous les points du présent manuel avant la mise en service et conformez-vous à leurs consignes. C’est le seul moyen d’assurer une marche appropriée du bloc d’alimentation pour que vous profitiez longt- emps de ce produit. -
Seite 68: Consignes D'instalation
3. CoNSIGNES D’INSTALATIoN Veuillez lire le point « Mises en garde et consignes de sécurité » avant de commencer l’installation. remarque: Un tournevis est nécessaire à l’installation du bloc d’alimentation afin de visser le bloc d’alimentation dans le carter. Utilisez les vis de bloc d’alimentation com- prises dans les accessoires. - Seite 69 3. Si vous disposez d’une carte mère plus ancienne équipée d’une fiche femelle à 20 broches, reliez uniquement la fiche à 20 pôles avec votre carte mère. 4. Raccordez au cours de l’étape suivante la connexion électrique supplémen- taire à 4 pôles (12V) avec votre mainboard (elle n’est pas nécessaire sur tous les mainboards plus anciens).
-
Seite 70: Reccordement De Vos Composants
4. rECCorDEmENT DE VoS ComPoSANTS Raccordez vos appareils périphériques comme, par exemple, des lecteurs de CD et de DVD, des disques durs ou la carte graphique à l’aide des câbles de raccordement prévus à cet effet CD/DVD Veuillez vous conformer aux remarques de chaque fabricant d’appareils périphé- riques respectif afin de prévenir tout problème lors de l’installation. -
Seite 71: Compatobilité
Vérifiez à nouveau les raccordements à fiche de tous les composants avec le bloc d’alimentation avant de poursuivre l’installation. Raccordez le câble d’alimentation à votre bloc d’alimentation et mettez ce dernier en marche (commutateur en position « I »). Enfin, actionnez le com- mutateur marche/arrêt sur le carter de votre ordinateur pour mettre le bloc d’alimentation en service. -
Seite 72: Avantages Et Particularités
6. AVANTAGES ET PArTICULArITéS 6.1 Top Efficiency Rendement extrêmement élevé de >80% à 50% de charge pour réduction de vos frais d’électricité. PF actif à PF pouvant atteindre 0,99 pour stabilisation et amélioration des tensions de sortie. Le bloc d’alimentation est fabriqué confor- mément aux Directives ROHS. -
Seite 73: Service
SILENT WINGS FAN Ventilateur de 120 mm à marche particulièrement fiable et silenci- euse sont incorporés aux blocs d‘alimentation be quiet! Cela per- met au ventilateur installé dans la plaque de base de contribuer à une circulation d‘air optimale au sein de l‘unité centrale (CPU). 6.3 Service Garantie 3 ans, Service client:+49 40 736 76 86 - 44 (en anglais), Support technique: service@be-quiet.com , Manuel multilingue... -
Seite 74: Technical Features & Standards
7. TECHNICAL FEATUrES & STANDArDS ATX12V VERSION 2.2 Be-quiet! offre avec sa gamme STRAIGHT POWER un bloc d‘alimentation qui est conforme à la spécification ATX12V la plus récente en fournissant ainsi, entre autres, une ligne 12V séparée et non influencée destinée au processeur. A partir du modèle de 550 W, vous disposez même de 4 lignes séparées de 12 V veillant à... -
Seite 75: Design Features
8 x SATA be quiet! Les blocs d’alimentation de la série STRAIGHT POWER peuvent être équipés de 8 connexions électriques SATA (suivant le modèle) y compris une ligne de 3,3 V. (à partir du modèle 500W = 8 x SATA) EMV PROTECTOR Tous les blocs d‘alimentation be quiet! de la gamme STRAIGHT POWER sont recouverts d‘un alliage spécial. -
Seite 76: Numértos D'articles Et Codes Barres
9. NUmérToS D’ArTICLES ET CoDES BArrES Description Art.No. EAN-Code BQT E5-350W BN032 BQT E5-400W BN033 BQT E5-450W BN034 BQT E5-500W BN035... - Seite 77 Description Art.No. EAN-Code BQT E5-550W BN036 BQT E5-600W BN037 BQT E5-650W BN038 BQT E5-700W BN039...
-
Seite 78: Spécification Technique
10. SPéCIFICATIoN TECHNIqUE Blocs d‘alimentation be quiet! - garants d‘un fonctionnement extrêmement silencieux Divers composants d‘ordinateurs créent fréquemment soit un ron- ronnement et un ronflement bruyant permanent, soit un sifflement à haute fréquence qui perturbent à l‘extrême la concentration pendant le ou le plaisir de jouer, de regarder un film ou d‘écouter de la musique. -
Seite 79: Spécification
11. SPéCIFICATIoN AC INPUT 110 - 240Vac 50 - 60Hz 10 - 5A DC OUTPUT 3,3V 12V1 12V2 -12V 5VSB max. Power 0,5A 2,5A BQT E5-350W max. 350W 150W 216W 12,5W combined 350W Power AC INPUT 110 - 240Vac 50 - 60Hz 10 - 5A DC OUTPUT 3,3V... - Seite 80 AC INPUT 110 - 240Vac 50 - 60Hz 10 - 5A DC OUTPUT 3,3V 12V1 12V2 12V3 12V4 -12V 5VSB max. Power 0,5A BQT E5-550W max. 550W 170W 492W combined 550W Power AC INPUT 110 - 240Vac 50 - 60Hz 10 - 5A DC OUTPUT 3,3V...
-
Seite 81: Possiblilités De Raccorement Et Longueurs De Cãbles
12. PoSSIBLILITéS DE rACCorEmENT ET LoNGUEUrS DE CãBLES Maincable Connectors *1 = available in the beginning with 450W Model *2 = available in the beginning with 500W Model 4 X 12V SPLITTING 12V1 CPU 1 12V2 PCIe 2/CPU 2 12V3 Mainboard / Drivers 12V4 PCIe1... -
Seite 82: Attribution Des Boches De Raccordements
13. ATTrIBUTIoN DES BoCHES DE rACCorDEmENTS 2 4 PI N AT X P OW E R CO N N E C TOR Color Signal Color Signal Orange +3.3VDC Orange +3.3VDC Brown +3.3V def.sense Orange +3.3VDC Blue -12VDC 20 19 18 17 16 15 14 13 Black Black Green... -
Seite 83: Remèdes Aux Anomalies
14. rEmèDES AUx ANomALIES Attention: Sur les systèmes ATX, le bloc d‘alimentation reçoit le signal du „ mainboard „ raccordé pour la mise en route. Par conséquent, vérifiez à l‘aide du manuel du „ mainboard „ ou du carter si le commutateur marche/arrêt est correctement raccordé. -
Seite 84: Accessoires
16. ACCESSoIrES Les accessoires suivants sont compris dans le volume de fourniture : - Fiche d’appareils froids - cordons noirs pour câbles - Vis de fixation de bloc d’alimentation - Manuel d’utilisation 17. rEmArqUE SUr L’éLImINATIoN [§9 Alinéa 2 de la loi allemande sur l‘équipement électrique et électronique §10 Alinéa 3] Des appareils électriques et électroniques usagés [1] ne doivent plus être jetés avec des ordures ménagères non triées. -
Seite 85: Copyright
18. CoPyrIGHT Copyright © Listan GmbH & Co.KG 2006. Tous droits réservés Veuillez noter les remarques suivantes : 1. Il est interdit de polycopier, transmettre, divulguer ou mémoriser le contenu de la présente documentation, quelle que soit la forme, intégralement ou parti- ellement, sans l‘accord préalable écrit de la part de Listan.