roco FS 653 Handbuch
Dampflokomotive

Verwandte Anleitungen für roco FS 653


Inhaltszusammenfassung für roco FS 653
- Seite 1 72112 72113 72114 72115 78113 Handbuch Manual Manuale Symbolfoto www.roco.cc 8072112920.indd 1 24.08.2012 13:20:56...
- Seite 2 Auspacken des Modells! Unwrap model! Disimballaggio del modello! 8072112920.indd 2 24.08.2012 13:21:03...
-
Seite 3: Inhaltsverzeichnis
▪ Zusammenbau ......................10 ▪ Montage der beiliegenden Ätzschilder ................11 Der Sounddecoder (Nur für Artikel 72113, 72115 und 78113) ▪ Funktionstastenbelegung der FS 653 (Auslieferungszustand) ........12 ▪ Lokeinstellungen ......................12 ▪ CV-Liste der FS 653 ......................13 ▪ Kombinationen für CV29 ....................14 ▪... -
Seite 4: Einleitung
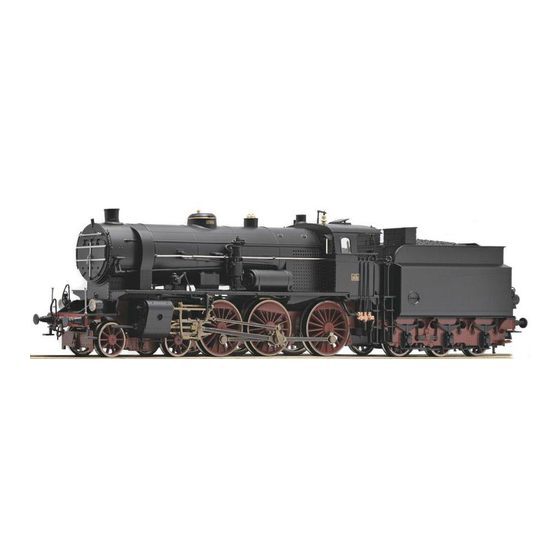
Einleitung Lieber Modellbahnfreund, vielen Dank für den Kauf unseres Modells der FS 653 Die vorliegende Betriebsanleitung soll Ihnen helfen, die umfangreichen Funktionen Ihrer FS 653 zu nutzen. Wir wünschen viel Vergnügen und eine Gute Fahrt! Ihr Roco-Team Zum Vorbild Vorbild ist eine Damp�okomotive Serie 653 der Italienischen Staatsbahnen. Nach dem Ersten Weltkrieg kamen 13 dieser Schnellzug-Schlepptenderloks der ehemaligen Südbahn Rh 109 aus... -
Seite 5: Inbetriebnahme Ihrer Lokomotive
Inbetriebnahme ihrer Lokomotive ▪ Vor der ersten Inbetriebnahme Um schlechte Laufeigenschaften oder Schäden zu vermeiden müssen die Kuppelstangenlager vor der ersten Inbetriebnahme an Ihrer Lokomotive geölt werden. Hierzu empfehlen wir den ROCO-Öler 10906 ▪ Einfahren des Modells In den ersten fünf Minuten sollte Ihre Lokomotive mit mittlerer Geschwindigkeit fahren. - Seite 6 Im beigelegten Zurüstbeutel �nden Sie auch klei- ne vorbildgetreue Steckteile für eine erweiterte Aufrüstung Ihrer Lokomotive, die Sie bitte vor- sichtig montieren. Kleben nur mit ausdrücklichen Hinweis! Kleben Wahlweise 8072112920.indd 6 24.08.2012 13:21:11...
-
Seite 7: Nachrüsten Eines Seuthe Dampfgenerators
▪ Nachrüsten eines Seuthe Dampfgenerators Zuerst den Rauchfang abnehmen und dann den Seuthe Dampfgenerator Nr. 10 (für den analogen DC-Betrieb oder Nr. 11 (für Digitalen DC-Betrieb) einbauen. Bei einem eingebauten Dampfgenerator im Di- gitalbetrieb mit einem nachgerüsteten Decoder 10880 ist mit der F1- / O�- oder Function Taste das Ein- und Ausschalten des Dampfgenerators möglich. -
Seite 8: Entkuppeln Von Lok Und Tender
Wartung und P�ege des Modells Damit Ihnen Ihre Lokomotive lange Freude bereitet, sind regelmäßig (ca. alle 30 Betriebsstunden) ge- wisse Servicearbeiten zweckmäßig. Bevor Sie mit der P�ege und Wartung des Modells beginnen entkuppeln Sie zuerst die Lokomotive vom Tender. ▪ Entkuppeln von Lok und Tender ▪... -
Seite 9: Schmierung
▪ Schmierung Versehen Sie die im Schmierplan gekennzeichne- ten Stellen mit nur kleinen Öltropfen. Wir empfeh- len den ROCO-Öler Art. Nr 10906. Zur Schmierung der Getriebeteile (Zahnräder, Schnecke) empfehlen wir das ROCO-Spezialfett 10905. Im Falle der Schmierung diese Teile bitte nicht ölen. -
Seite 10: Haftreifenwechsel
▪ Haftreifenwechsel Die Haftreifen mit einer Nadel oder mit einem fei- nen Schraubendreher abziehen. Beim Aufziehen der neuen Haftreifen bitte darauf achten, dass dieser sich nicht verdreht. ▪ Kohlebürstenwechsel Tendergehäuse abnehmen (siehe Kapitel: Schmie- rung). Danach wird der Motor ausgebaut und die Kohlebürsten ausgewechselt. -
Seite 11: Montage Der Beiliegenden Ätzschilder
Montage der beiliegenden Ätzschilder ����� ����� ����� ����� ����� ������ ������ Kleben ������� 8072112920.indd 11 24.08.2012 13:21:23... -
Seite 12: Der Sounddecoder (Nur Für Artikel 72113, 72115 Und 78113)
Der Sounddecoder ▪ Funktionstastenbelegung der FS 653 (Auslieferungszustand) Die Lok ist ab Werk auf die Adresse 03 eingestellt F-Taste Funktion Licht Spitzenlichter Fahrsound P�� kurz P�� lang Scha�nerp�� Kohleschaufeln Rangiergang Luftpumpe Speisepumpe Kupplung Generator Abschlammen P�� kurz Entwässern Mute - Taste Weichenquitschen P��... -
Seite 13: Cv-Liste Der Fs 653
▪ CV-Liste der FS 653 Name Werte Default Werte Adresse (= kurze Adresse) 01 – 99 Anfahrspannung (kleinste Kriechgeschwindigkeit) 01 – 252 Beschleunigungszeit (vom Stillstand bis Maximalgeschwindigkeit) 00 – 255 Bremszeit (von Maximalgeschwindigkeit bis Stillstand) 00 – 255 Maximalgeschwindigkeit 00 – 252 Mittengeschwindigkeit (bei mittlerer Fahrstufe) 00 –... -
Seite 14: Kombinationen Für Cv29
▪ Kombinationen für CV29 CV29 Bit 0 Bit 1 Bit 2 Bit 5 Fahrtrichtung Fahrstufen Betriebsart Wert Wert kurze Adresse lange Adresse normal digital vertauscht digital normal 28/128 digital 2 (default) vertauscht 28/128 digital normal analog+digital vertauscht analog+digital normal 28/128 analog+digital vertauscht 28/128... -
Seite 15: Betrieb Mit Märklin 6021
Mobile Station Achtung! In der Märklin Mobile Station Datenbank sind nur Märklinloks enthalten. Für das Anlegen von Roco Lokomotiven in der Märklin Mobile Station verwenden Sie dazu eine von zwei Universalnummern 36330/37962. Diese sind folgendermaßen einzustellen: Lok in der Datenbank anlegen: Der Drehregler muss auf 0 stehen „Esc“-Taste drücken. -
Seite 16: Programmieren Mit Märklin Mobile Station
Einstellen der richtigen Adresse: „Esc“-Taste drücken; Mit dem Drehregler zu Menüpunkt „Lok ändern“. Drehregler drücken; Menüpunkt „Adresse“ wählen; Drehregler drücken; Die Adresse der Lok wählen; Drehregler drücken. Sollte die Lok jetzt nicht fahren, dann die Lok aus der Datenbank löschen: „Esc“-Taste drücken;... -
Seite 45: Replacement Parts (72112, 72113 And 78113)
Ersatzteilliste Replacement Parts ����������������������� Lista dei pezzi di ricambio ��������������������� �������������������������� � � � � � � � � �� �� � �� �� �� �������� ������������ �������� ����������� ��������� ����������� ������� ������������� ��������� ����������� ������� ������������� � �������������������������������������������������������������� ������ ��... - Seite 46 ����������������������� ��������������������� �������������������������� � � �� � � �� � �� � � � �� � �� �� �������� ������������ �������� ����������� ������� ����������� ������� ������������� ��������� ����������� ������� ������������� � ��������������������������������������������������������� ������ � � ��������������������������������������� ������ � � ������������������������� ������...
- Seite 47 ����������������������� ��������������������� �������������������������� �� � � � �� � � �� � � � �� �� � �� �� �� �� �� �� �� �� �� �� �� �� �������� ������������ �������� ����������� ������� ����������� ������� ������������� ��������� ����������� ������� �������������...
- Seite 48 ����������������������� ��������������������� �������������������������� � � � � � � � � � � �� �� �� �� � � �� �������� ������������ �������� ����������� ������� ����������� ������� ������������� ��������� ����������� ������� ������������� � ���������������������������������������������������������� ������ � � ������������������������������������������������������������ ������ � �...
- Seite 49 ����������������������� ��������������������� �������������������������� � � �� � � � � �� � � �� � �� �� �� �� �� �������� ������������ �������� ����������� ������� ����������� ������� ������������� ��������� ����������� ������� ������������� � ������������������������������������������ ������ �� � ����������������������������������������������������������������������������������������� ������ �� �...
- Seite 50 ����������������������� ��������������������� �������������������������� � � � � � � � � � � �� �� �� �� �� �� �� �� �� �� �������� ������������ �������� ����������� ������� ����������� ������� ������������� ��������� ����������� ������� ������������� � �������������������������������������������������������� ������ �� � ����������������������������������������������������������������������������...
- Seite 51 ����������������������� ��������������������� �������������������������� � � � ����������������� � ������������������ ������������������ ��������������������� � �������� ������������ �������� ����������� ������� ����������� ������� ������������� ��������� ����������� ������� ������������� � �������������������������������� ������ � � �������������������������������� ������ � � �������������������������������������������� ������ �� � ������������������������������������������������������� ������ � �...
-
Seite 52: Ersatzteilliste (72114 Und 72115)
����������������������� ��������������������� �������������������������� � � � � � � � � �� �� � �� �� �� �������� ������������ �������� ����������� ��������� ����������� ������� ������������� ��������� ����������� ������� ������������� � �������������������������������������������������������������� ������ �� � ����������������������������������������������������������������������������������� ������ �� � ������������������������������������������������������������ ������ �... - Seite 53 ����������������������� ��������������������� �������������������������� � � �� � � �� � �� � � � �� � �� �� �������� ������������ �������� ����������� ������� ����������� ������� ������������� ��������� ����������� ������� ������������� � ��������������������������������������������������������� ������ � � ��������������������������������������� ������ � � ������������������������� ������...
- Seite 54 ����������������������� ��������������������� �������������������������� �� � � � �� � � �� � � � �� �� � �� �� �� �� �� �� �� �� �� �� �� �� �������� ������������ �������� ����������� ������� ����������� ������� ������������� ��������� ����������� ������� �������������...
- Seite 55 ����������������������� ��������������������� �������������������������� � � � � � � � � � � �� �� �� �� � � �� �������� ������������ �������� ����������� ������� ����������� ������� ������������� ��������� ����������� ������� ������������� � ���������������������������������������������������������� ������ � � ������������������������������������������������������������ ������ � �...
- Seite 56 ����������������������� ��������������������� �������������������������� � � �� � � � � �� � � �� � �� �� �� �� �� �������� ������������ �������� ����������� ������� ����������� ������� ������������� ��������� ����������� ������� ������������� � ������������������������������������������ ������ �� � ����������������������������������������������������������������������������������������� ������ �� �...
- Seite 57 ����������������������� ��������������������� �������������������������� � � � � � � � � � � �� �� �� �� �� �������� ������������ �������� ����������� ������� ����������� ������� ������������� ��������� ����������� ������� ������������� � �������������������������������������������������������� ������ �� � ���������������������������������������������������������������������������� ����� � � ��������������������������������������������� �����...
- Seite 58 ����������������������� ��������������������� �������������������������� � � � ����������������� � ������������������ ������������������ ��������������������� � �������� ������������ �������� ����������� ������� ����������� ������� ������������� ��������� ����������� ������� ������������� � �������������������������������� ������ � � �������������������������������� ������ � � �������������������������������������������� ������ �� � ������������������������������������������������������� ������ � �...
- Seite 59 8072112920.indd 59 24.08.2012 13:23:12...
- Seite 60 Cela implique le risque de perte de ces composants. Dans ce cas, vous pouvez commander ces pièces aux S.A.V. ROCO; nous ne pouvons cependant pas donner suite à une réclamation èventuelle à cause de ces pièces perdues.