Herunterladen Inhalt Inhalt Diese Seite drucken
JVC PD-35D30ES Bedienungsanleitung
Vorschau ausblenden Andere Handbücher für PD-35D30ES:
Inhaltsverzeichnis

Werbung

Verfügbare Sprachen
  • DE

Verfügbare Sprachen

  • DEUTSCH, seite 49
PD-42D30ES
PD-35D30ES
PDP COLOUR TELEVISION
PDP FARBFERNSEHGERÄT
PDP TELEVISEUR COULEUR
PDP KLEURENTELEVISIE
PDP TELEVISOR A COLOR
PDP TELEVISORE A COLORI
PDP TELEVISOR A CORES
1
ENGLISH
DEUTSCH
FRANÇAIS
NEDERLANDS
CASTELLANO
ITALIANO
PORTUGUÊS
INSTRUCTIONS
BEDIENUNGSANLEITUNG
MANUEL D'INSTRUCTIONS
GEBRUIKSAANWIJZING
MANUAL DE INSTRUCCIONES
ISTRUZIONI
INSTRUÇÕES

Werbung

Inhaltsverzeichnis
loading

Inhaltszusammenfassung für JVC PD-35D30ES

  • Seite 1 ENGLISH DEUTSCH FRANÇAIS NEDERLANDS CASTELLANO ITALIANO PORTUGUÊS PD-42D30ES PD-35D30ES PDP COLOUR TELEVISION INSTRUCTIONS PDP FARBFERNSEHGERÄT BEDIENUNGSANLEITUNG PDP TELEVISEUR COULEUR MANUEL D’INSTRUCTIONS PDP KLEURENTELEVISIE GEBRUIKSAANWIJZING PDP TELEVISOR A COLOR MANUAL DE INSTRUCCIONES PDP TELEVISORE A COLORI ISTRUZIONI PDP TELEVISOR A CORES...
  • Seite 2 Warning DO NOT cut off the mains plug from this equipment. If As these colours may not correspond with the coloured the plug fitted is not suitable for the power points in your marking identifying the terminals in your plug proceed as home or the cable is too short to reach a power point, then follows: obtain an appropriate safety approved extension lead or...
  • Seite 3 Thank you for buying this JVC colour television. To make sure you understand how to use your new TV, please read this manual thoroughly before you begin. WARNING: TO PREVENT FIRE OR SHOCK HAZARD, DO NOT EXPOSE THIS APPLIANCE TO RAIN OR MOISTURE.
  • Seite 4: If Burn-In Has Occurred

    Burn-in A characteristic of Plasma Display Panels (PDPs) is that displaying the same image for a long time causes a part of the image to stay on the screen (this is called phosphor burn-in). Avoid burn-in as follows. Do not display static images or characters for long periods of time. While an image is displayed With power OFF 19:03...
  • Seite 5 Point defects PDPs use collections of fine pixels to display images. While there is no problem with more than 99.99% of these pixels, please understand that a very small number of pixels may not light or may light all the time. Do not install the TV near electronic equipment that is affected by electromagnetic waves It may cause interference in images, sound, etc.
  • Seite 6: Inhaltsverzeichnis

    Using the PIP function ........20 Changing the COUNTRY setting ....40 Using the MULTI-PICTURE function ....21 Using the DECODER (EXT-2) function... 40 Operating a JVC brand VCR or DVD player ..21 Additional preparation......41 Teletext function........22 Connecting external equipment ...... 41 Basic operation ..........22...
  • Seite 7: Checking Contents Of Packages

    Power cord Speakers Speaker cord (for front speakers) × 2 Speaker cord (for subwoofer) × 1 Left and right front speakers Subwoofer Mounting screw × 6 Rubber foot for subwoofer × 4 Cord clamp × 3 (DD speakers) (only for PD-35D30ES)
  • Seite 8: Setting Up Your Tv

    Philips screwdriver. approximately 3 mm. speaker downwards. <PD-35D30ES> 2 Attach the front speakers to 3 Lock the front speakers in 1 Attach the speaker mounting screws to the back of the TV...
  • Seite 9: Installation

    Setting up your TV Preparing the subwoofer Either stand the subwoofer vertically or lay it down on its side, peel the Subwoofer paper from the supplied rubber feet, and stick the feet in the four corners on the surface to be used as the base. The rubber feet prevent slipping and resonance, and also protect the speaker cord.
  • Seite 10: Connections

    Connections Caution • Turn off all the equipment including the TV before connecting anything. Connection diagram <PD-42D30ES> AC INPUT 110-240V Cable supplied with TV • Refer to page 13 for connection details. TV (back) Right front Left front speaker speaker DISPLAY INPUT CONNECT TO SYSTEM CABLE FRONT...
  • Seite 11 Connections <PD-35D30ES> AC INPUT 110-240V Cable supplied with TV • Refer to page 13 for connection details. Left front speaker TV (back) Right front speaker DISPLAY INPUT CONNECT TO SYSTEM CABLE DISPLAY INPUT CONNECT TO SYSTEM CABLE AC INPUT 110-240V...
  • Seite 12: Connecting The Front Speakers And Subwoofer

    Connections Connecting the front speakers and subwoofer Use the supplied speaker cords to connect the speakers to the speaker terminals at the back of the TV. Connecting the speaker cord to the front speaker terminal Connect using the supplied front speaker cords. 1 Press the spring-loaded speaker input terminal 2 Press the core of the cord into the terminal and lever in the direction of the arrow...
  • Seite 13: Connecting The Tv And Receiver

    Press connector 2 firmly into place until it is locked. <PD-42D30ES> <PD-35D30ES> Disconnecting the system cable Release connector 1 by unscrewing the screws at left and right and removing it from the socket. Release connector 2 by removing it from the socket while pressing the release bottoms on either side.
  • Seite 14: Connecting The Aerial And Video Cassette Recorder (Vcr)

    Connections Connecting the aerial and video Aerial cassette recorder (VCR) 75-ohm Coaxial Cable • The connecting cables are not provided. Back of the receiver • For further details, refer to the manuals provided with the devices to be connected. EXT- EXT- If you are connecting a VCR, follow A A A A →...
  • Seite 15: Connecting The Power Cord To The Ac Outlet

    Connections Receiver rear Connecting the power cord to the AC outlet Insert the AC plugs on the power cords from the TV and receiver into AC outlets. Caution DISPLAY OUT EXT- EXT- • Operate only from the power source specified (AC 110 EXT- –...
  • Seite 16: Initial Settings

    (Standby) button again to turn your TV on. registration of all the TV channels quickly. For details of • If the JVC logo does not appear this is because your the ACI function and how to use it, see “Using the ACI TV has already been turned on for the first time: function”...
  • Seite 17: T-V Link Functions

    AC outlets. To use T-V LINK functions: A “T-V LINK compatible VCR” means a JVC video cassette recorder with the T-V LINK logo, or with one of the following logos. However, these VCRs may support some or all of the features described earlier.
  • Seite 18: Tv Buttons And Functions

    • Check that the AC plugs on the power cords from the TV and receiver are connected correctly to AC outlets. <PD-35D30ES> Choose a TV channel Press the P p p buttons to choose a programme...
  • Seite 19: Remote Control Buttons And Functions

    Remote control buttons and functions 1 Muting button 2 Number buttons 3 c button 4 3 sound button 5 Information button 6 b button 7 5 buttons 8 Standby button 9 Colour buttons 0 a button - 6 buttons = VCR/DVD/Teletext control button ~ VCR P DVD switch ! g (Text) button @ P button...
  • Seite 20: Adjust The Volume

    Remote control buttons and functions Use the PR LIST: Use the PR LIST: 1 Press the h h (information) button to display the 1 Press the h h (information) button to display the PR LIST PR LIST Pressing the h (information) button changes the display 2 Press the 5 5 and 6 6 buttons to choose an...
  • Seite 21: Zoom Function

    Remote control buttons and functions Choose the ZOOM mode ZOOM function 1 Press the c c button to display the ZOOM You can change the screen size according to the picture menu aspect ratio. Choose the optimum one from the following ZOOM modes.
  • Seite 22: Displaying The Current Time

    Remote control buttons and functions Displaying the current time Using the PIP function You can display the current time on the screen. You can view two pictures (Main-picture and sub-picture). Two different TV programmes can be watched at the same Press the h h (information) button to display the time, or a TV programme and a video programme from an...
  • Seite 23: Using The Multi-Picture Function

    2 Press the VCR/DVD control button to control your VCR or DVD player Using the MULTI-PICTURE function • If your device is not made by JVC, these buttons will not work. You can display multi-pictures so you can find a program •...
  • Seite 24: Teletext Function

    Teletext function Using the List Mode You can store the numbers of your favourite teletext pages MENU in memory and call them up quickly using the colour buttons. To store the page numbers: 1 Press B B button to go into the List mode The page numbers you have stored are displayed at the bottom of the screen.
  • Seite 25: Sub-Page

    Teletext function Sub-page Cancel Some teletext pages include sub-pages that are You can search for a teletext page while watching TV. automatically displayed. 1 Press the number button to enter a page You can hold any sub-page, or view it at any time. number, or press a colour button 1 Press the D D (Sub-page) button to operate the...
  • Seite 26: Using The Tv's Menu

    Using the TV’s menu This TV has a number of functions you can operate using 5 Press the a a button to complete the setting menus. To use all your TV’s functions, you need to The menu disappears. understand the basic menu operating techniques fully. •...
  • Seite 27: Picture Setting

    PICTURE SETTING Refer to “Using the TV’s menu” (see page 24) for details of COLOUR TEMP. displaying the menu. You can select one of three COLOUR TEMP. modes (three tones of white) to adjust the white balance of the picture. PICTURE SETTING Since white is the colour which is used as a reference for all PICTURE MODE...
  • Seite 28: Picture Features

    PICTURE FEATURES Refer to “Using the TV’s menu” (see page 24) for details of Super DigiPure displaying the menu. The Super DigiPure function uses the latest in digital PICTURE FEATURES technology to give you a natural-looking picture. The Super DigiPure function includes the following two functions. DIGITAL VNR AUTO Super DigiPure...
  • Seite 29: Colour System

    PICTURE FEATURES COLOUR SYSTEM MOVIE THEATRE The colour system is chosen automatically. However, if the The MOVIE THEATRE function displays a cinema film picture is not clear or no colour appears, choose the colour picture more smoothly and naturally on the screen. system manually.
  • Seite 30: Pip (Picture-In-Picture)

    PICTURE FEATURES PIP (picture-in-picture) PIP POSITION: You can choose one of four positions for the sub-picture. 1 Press the 6 6 buttons to choose PIP. Then press the a a button The PIP menu appears. PIP POSITION MULTI-PICTURE BACK D0061-EN 2 Press the 6 6 buttons to choose PIP POSITION 3 Press the 5...
  • Seite 31: Sound Setting

    SOUND SETTING Refer to “Using the TV’s menu” (see page 24) for details of SPEAKER displaying the menu. You can turn off the sound from the TV speakers; but you SOUND SETTING should only do this if you have connected an audio system STEREO/ to the TV instead of the TV speakers.
  • Seite 32 SOUND SETTING HEADPHONE You need to use the HEADPHONE menu to adjust the volume of the headphones. The HEADPHONE menu can also be used to set whether or not sound comes from the TV speakers when the headphones are being used and to perform the settings for the sound coming from the headphones.
  • Seite 33: Ext Setting

    EXT SETTING Refer to “Using the TV’s menu” (see page 24) for details of LIST displaying the menu. You can store a name for each of the devices connected to EXT SETTING each EXT terminal. Giving a name to an EXT terminal EXT-1 makes the EXT terminal number appear on the screen, DUBBING...
  • Seite 34 EXT SETTING 2 Press the 6 6 buttons to choose an EXT terminal or TV. Then press the a a button The arrow in the menu represents a signal flow. The left side of the arrow shows a signal source output from the EXT-2 terminal.
  • Seite 35: Features

    FEATURES To set the CHILD LOCK function Refer to “Using the TV’s menu” (see page 24) for details of displaying the menu. 1 Choose CHILD LOCK, then press the o button FEATURES “SET ID NO.” (ID number setting screen) appears. SLEEP TIMER BLUE BACK CHILD LOCK...
  • Seite 36: Decoder (Ext-2)

    FEATURES 3 Press the number buttons to enter the ID number The lock is temporarily released so you can view the TV channel. If you have forgotten the ID number: Perform step 1 of “To set the CHILD LOCK function”. After confirming the ID number, press the b button to exit the menu.
  • Seite 37: Install

    INSTALL Refer to “Using the TV’s menu” (see page 24) for details of • You can now edit the programme numbers (PR) displaying the menu. using the EDIT/MANUAL function. For details, see “EDIT/MANUAL” on page 36. • If you do not need to use the EDIT/MANUAL INSTALL function, go to the next step.
  • Seite 38: Edit/Manual

    INSTALL 3 Press the a a button to complete the settings EDIT/MANUAL The T-V LINK menu appears. The EDIT/MANUAL functions are divided into two types: • editing the current programme numbers (PR) (EDIT T-V LINK functions); and DOWNLOAD • manually storing a TV channel you want to view on a BACK particular programme number (PR) (MANUAL function).
  • Seite 39 INSTALL INSERT Preparation: 1 Press the 6 6 buttons to choose a TV channel • A CH/CC number unique to this TV and corresponding Every time you press the 6 buttons, the programme to the Channel number of a TV channel is required. Find number (PR) changes and the picture of the TV channel the corresponding CH/CC number from a table “CH/CC stored in the programme number (PR) appears on the...
  • Seite 40 INSTALL DELETE 4 Press the green or red button to search for a TV channel 1 Press the 6 6 buttons to choose a TV channel Scanning stops when the TV finds a TV channel. Then Every time you press the 6 buttons, the programme the TV channel is displayed.
  • Seite 41: Additional Menu Operations

    Additional menu operations Using the ACI function Downloading data to a VCR This TV has an ACI function which decodes the ACI You can send the latest programme numbers (PR) data to a (Automatic Channel Installation) data. VCR with the T-V LINK function. Using the ACI function allows all TV channels transmitted •...
  • Seite 42: Changing The Country Setting

    Additional menu operations Changing the COUNTRY setting Using the DECODER (EXT-2) function After the AUTO PROGRAM function is completed, you If you have a decoder connected to a T-V LINK compatible can change the country you have already set by using the VCR, which in turn is connected to the EXT-2 terminal, use AUTO PROGRAM function.
  • Seite 43: Additional Preparation

    Additional preparation Connecting external equipment Connect the equipment to the TV, making the correct rear 1 VCR (composite signal) panel and front panel connections. 2 VCR (composite signal/S-VIDEO signal) 3 T-V LINK compatible VCR (composite signal/S-VIDEO Before connecting anything: signal) •...
  • Seite 44: Connecting Headphones

    Additional preparation Equipment which can output the S-VIDEO Connecting Speakers/Amplifier signal (Y/C signal) such as an S-VHS VCR See the Audio equipment connection diagram, then connect the audio equipment you desire to the TV. Connect the equipment to an EXT terminal (but not the You can use external front speakers to listen to the TV EXT-1 terminal).
  • Seite 45: Ch/Cc Numbers

    CH/CC numbers When you want to use the INSERT function on page 37, find the CH/CC number corresponding to the Channel number of the TV channel from this table. Channel Channel Channel Channel CH 02 / CH 202 E2, R1, IR A CH 40 / CH 240 E40, R40 CC 01 / CC 201...
  • Seite 46: Troubleshooting

    Troubleshooting If a problem arises while you are using the TV, please read this troubleshooting guide carefully before you ask to have the TV repaired. You may be able to fix it easily by yourself. For example, if the mains plug is disconnected from the mains outlet, or the TV aerial has problems, you may think there is a problem with the TV itself.
  • Seite 47 Troubleshooting Other issues • When the SLEEP TIMER function operates, the TV is automatically turned off. If the TV suddenly turns off, try to press the # (standby) button to turn on the TV once again. If the TV goes back to normal, there is no problem.
  • Seite 48: Specifications

    Specifications Model PD-42D30ES PD-35D30ES Item Broadcasting systems CCIR B/G, I, D/K, L Colour systems PAL, SECAM • The EXT terminals also support the NTSC 3.58/4.43 MHz system. Channels and frequencies • E2-E12, E21-E69, S1-S41, X, Y, Z, Z+1, Z+2, ITALY A-H, ITALY H+1, ITALY H+2, F2-F10, F21-F69, R1-R12, R21-R69, IR A-J •...
  • Seite 49 Vielen Dank für den Erwerb dieses Farbfernsehers von JVC. Um sicherzustellen, dass Sie Ihr neues Fernsehgerät richtig bedienen können, lesen Sie diese Anleitung sorgfältig, bevor Sie beginnen. ACHTUNG: ZUR VERMEIDUNG VON FEUER ODER ELEKTRISCHEM SCHLAG SETZEN SIE DIESES GERÄT KEINEM REGEN ODER FEUCHTIGKEIT AUS.
  • Seite 50: Eingebranntes Bild

    Eingebranntes Bild Eine besondere Eigenschaft von Plasma Display Panels (PDPs) ist die, dass die Anzeige ein und desselben Bildes für längere Zeit dazu führt, dass Teile davon niemals mehr verschwinden (Einbrennen in die Phosphorschicht). Vermeiden Sie ein Einbrennen wie folgt. Lassen Sie keine Standbilder oder Textzeilen für längere Zeit anzeigen.
  • Seite 51: Auswirkung Auf Infrarot-Geräte

    Pixelfehler PDPs benutzen zur Darstellung der Bilder Gruppen von kleinen Pixeln (Picture Elements). Mehr als 99,99% all dieser Pixel funktionieren fehlerfrei, aber haben Sie bitte dafür Verständnis, dass eine kleine Zahl von Pixeln nicht oder nicht immer leuchten. Stellen Sie den Fernseher nicht in der Nähe von elektronischen Geräten auf, die empfindlich auf elektromagnetische Wellen reagieren.
  • Seite 52 Verwendung der PIP-Funktion ......20 Verwendung der ACI-Funktion......39 Verwendung der MULTI-BILD-Funktion...21 Herunterladen (Download) der Daten zum Bedienung eines Videorekorders (VCR) oder Videorekorder ..........39 DVD-Spielers von JVC........21 Ändern der LAND-Einstellung ......40 Verwendung der DECODER (EXT-2) Videotext-Funktion .......22 -Funktion............40 Allgemeine Bedienung ........22 Zusätzliche Vorbereitungen....
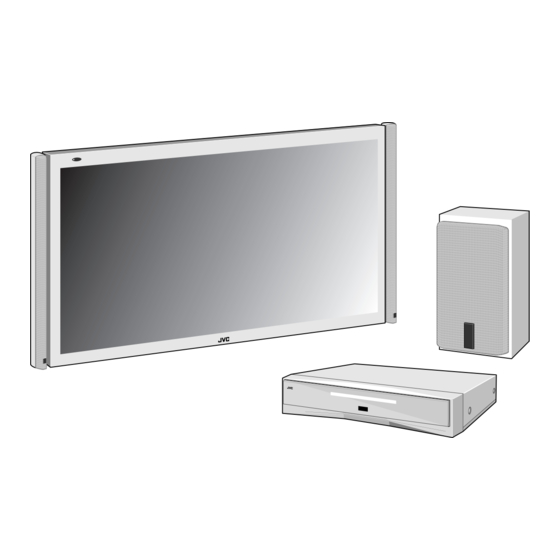
  • Seite 53: Paketinhalt Prüfen

    Ferritkern × 2 Empfänger Netzkabel Lautsprecher Lautsprecherkabel Lautsprecherkabel (für die vorderen Lautsprecher) × 2 (für den Subwoofer) × 1 Vordere linke und rechte Subwoofer Gummifüße für Subwoofer × 4 Kabel-Clip × 3 Befestigungsschraube × 6 Lautsprecher (DD-Lautsprecher) (nur für PD-35D30ES)
  • Seite 54: Aufbau Und Anschluss Ihres Fernsehgerätes

    Lautsprecher, und schieben Befestigungsschrauben für die Sie die Lautsprecher nach unten. Lautsprecher (drei auf jeder Seite), bis deren Köpfe etwa 3 mm heraus stehen. <PD-35D30ES> 1 Festdrehen der 2 Lautsprecher an der 3 Lautsprecher befestigen Befestigungsschrauben für Rückseite des Fernsehers...
  • Seite 55: Vorbereitung Des Subwoofers

    Aufbau und Anschluss Ihres Fernsehgerätes Vorbereitung des Subwoofers Stellen Sie den Subwoofer entweder senkrecht auf oder legen Sie ihn Subwoofer waagerecht hin, ziehen Sie das Schutzpapier von der Klebeseite der Gummifüße ab und platzieren Sie die Füße an den vier Ecken der Stand- oder Liegefläche.
  • Seite 56: Anschlüsse

    Anschlüsse Vorsicht • Schalten Sie alle beteiligten Geräte einschließlich des Fernsehers aus, bevor Sie irgendwelche Verbindungen herstellen. Anschlussbeispiel <PD-42D30ES> AC INPUT 110-240V Mit dem Gerät geliefertes Kabel • Lesen Sie auf Seite 13 für Näheres zu den Anschlüssen. Fernsehgerät (Rückseite) Lautsprecher Lautsprecher vorne rechts...
  • Seite 57 Anschlüsse <PD-35D30ES> AC INPUT 110-240V Mit dem Gerät geliefertes Kabel • Lesen Sie auf Seite 13 für Näheres zu den Anschlüssen. Fernsehgerät Lautsprecher (Rückseite) vorne links Lautsprecher vorne rechts DISPLAY INPUT CONNECT TO SYSTEM CABLE DISPLAY INPUT CONNECT TO SYSTEM CABLE...
  • Seite 58: Anschließen Der Vorderen Lautsprecher Und Des Subwoofers

    Anschlüsse Anschließen der vorderen Lautsprecher und des Subwoofers Benutzen Sie die mitgelieferten Lautsprecherkabel, um die Lautsprecher an den Anschlüssen an der Rückseite des Fernsehers anzuschließen. Anschließen des Lautsprecherkabels am Anschluss der vorderen Lautsprecher Stellen Sie die Verbindung mit den für die vorderen Lautsprecher mitgelieferten Kabeln her. 1 Drücken Sie den gefederten Hebel des 2 Stecken Sie die blanke Ader des Kabels in den Lautsprecheranschlusses in Pfeilrichtung...
  • Seite 59: Zusammenbinden Der Lautsprecherkabel

    Achten Sie darauf, dass die Pins am Stecker 1 richtig ausgerichtet sind, stecken Sie den Stecker in die Buchse, und ziehen Sie die Schrauben links und rechts fest, um den Anschluss zu fixieren. Stecken Sie den Stecker 2 fest auf, bis er einrastet. <PD-35D30ES> <PD-42D30ES> Abziehen des Systemkabels Ziehen Sie den Stecker 1 ab, indem Sie die Schrauben links und rechts lösen und ihn aus der Buchse herausziehen.
  • Seite 60: Anschließen Von Antenne Und Videorekorder

    Anschlüsse Anschließen von Antenne und Antenne Videorekorder Rückseite des 75-Ohm-Koaxialkabel • Die Anschlusskabel werden nicht mitgeliefert. Empfängers • Für weitere Einzelheiten lesen Sie auch die Anleitungen der anzuschließenden Geräte. EXT- EXT- Wenn Sie einen Videorekorder anschließen möchten, folgen Sie A A A A → B B B B → C C C C . EXT- EXT- Wenn Sie keinen Videorekorder anschließen,...
  • Seite 61: Anschließen Des Netzkabels An Der Netzsteckdose

    Anschlüsse Stecken Sie den Netzstecker in eine ordnungsgemäß Anschließen des Netzkabels an der geerdete Steckdose. Netzsteckdose Stecken Sie die Netzstecker der Netzkabel von Fernseher und Empfänger in zwei geeignete Netzsteckdosen. Vorsicht • Betreiben Sie das Gerät nur an einer Stromquelle der am Gerät angegebenen Spannung (110 –...
  • Seite 62: Grundeinstellungen

    ACI-Funktion” auf Seite 39. auf der Fernbedienung, um das Gerät einzuschalten. Wenn Sie die ACI-Funktion nicht verwenden möchten, • Das JVC-Logo erscheint nicht mehr, wenn das Gerät drücken Sie die Tasten 6 zum Wählen von ACI bereits einmal eingeschaltet wurde. Benutzen Sie in WEITER und drücken dann die Taste a.
  • Seite 63: T-V Link Funktionen

    Fernsehers aufnehmen, wenn der Sender am Fernseher sein. zu empfangen ist. Näheres erfahren Sie in der Anleitung “T-V LINK-kompatible Videorekorder” sind z. B. JVC- Ihres Videorekorders. Videorekorder mit dem Logo T-V LINK, oder ein Rekorder mit einem der folgenden Logos. Diese Rekorder können...
  • Seite 64: Die Tasten Am Fernsehgerät Und Deren Funktionen

    Drücken Sie die Taste A A A A oder Tasten P p p , um den Fernseher aus der Bereitschaft einzuschalten • Prüfen Sie, ob die Netzstecker der Netzkabel von <PD-35D30ES> Fernseher und Empfänger in zwei geeignete Netzsteckdosen eingesteckt sind. Programmnummer wählen Drücken Sie die Tasten P p...
  • Seite 65: Tasten Und Funktionen Der Fernbedienung

    Tasten und Funktionen der Fernbedienung 1 Stummschaltungstaste (Mute) 2 Ziffern-Tasten 3 c-Taste 3 Ton-Taste 5 Informationstaste 6 b-Taste 7 5-Tasten 8 Bereitschaftstaste (Standby) 9 Farbentasten 0 a-Taste - 6-Tasten = Bedienungstasten für VCR/DVD/Videotext ~ VCR P DVD-Schalter ! g (Text)-Taste @ P-Taste # F-Taste $ U p-Taste...
  • Seite 66: Lautstärke Einstellen

    Tasten und Funktionen der Fernbedienung Benutzen Sie PR LISTE: Mit der PR LISTE: 1 Drücken Sie die Taste h h (Information) zur 1 Drücken Sie die Taste h h (Information) zur Anzeige der PR LISTE Anzeige der PR LISTE Wenn Sie die Taste h (Information) drücken, ändert 2 Drücken Sie die Tasten 5 5 und 6 6 , um eine...
  • Seite 67: Zoom-Funktion

    Tasten und Funktionen der Fernbedienung Wählen Sie den ZOOM-Modus ZOOM-Funktion 1 Drücken Sie die Taste c c zur Anzeige des Sie können die Bildgröße entsprechend dem Menüs ZOOM Bildseitenverhältnis einstellen. Wählen Sie aus den folgenden ZOOM Modi die Beste aus. ZOOM AUTO AUTO:...
  • Seite 68: Anzeige Der Aktuellen Uhrzeit

    Tasten und Funktionen der Fernbedienung Anzeige der aktuellen Uhrzeit Verwendung der PIP-Funktion Sie können die aktuelle Uhrzeit auf dem Bildschirm Sie können zwei Bildsignale gleichzeitig betrachten darstellen lassen. (Hauptbild und Bild im Bild). Zwei verschiedene Fernsehprogramme, oder ein Drücken Sie zur Anzeige der aktuellen Uhrzeit die Fernsehprogramm und das Bild einer externen Video- Taste h h (Information)
  • Seite 69: Verwendung Der Multi-Bild-Funktion

    • Die Funktion BLAU-BILD arbeitet nicht im Sie können einen Videorekorder oder DVD-Spieler von Zwillingsbild- oder Bild-in-Bild-Modus. JVC fernbedienen. Wenn Sie eine Taste mit dem gleichen Symbol wie auf der geräteeigenen Fernbedienung drücken, • Ein progressive-scanning-Bild kann nicht als Bild im wird die entsprechende Funktion ausgelöst.
  • Seite 70: Videotext-Funktion

    Videotext-Funktion Verwendung des Listenmodus Sie können die Nummern Ihrer bevorzugten Videotext- MENU Seiten abspeichern und sie mit den Farbtasten abrufen. Seitennummern speichern: 1 Drücken Sie die Taste B B , um den Listenmodus zu aktivieren Die gespeicherten Seitennummern erscheinen unten auf dem Bildschirm.
  • Seite 71: Unter-Seiten

    Videotext-Funktion Unter-Seiten Abbrechen Einige Videotext-Seiten haben Unter-Seiten, die Sie können nach einer Videotext-Seite suchen lassen, automatisch angezeigt werden. während Sie fernsehen. Sie können Unter-Seiten beliebig halten bzw. jederzeit 1 Drücken Sie die Zifferntasten zur Eingabe der betrachten. Seitennummer, oder drücken Sie eine der 1 Drücken Sie die Taste D D (Unter-Seiten), um die Farbtasten...
  • Seite 72: Bedienung Des Menüs Des Fernsehers

    Bedienung des Menüs des Fernsehers Dieses Gerät hat viele Funktionen, die per Menü bedient 5 Drücken Sie die Taste a a , um die Einstellung werden. Um alle Funktionen Ihres Fernsehers nutzen zu abzuschließen können, sollten Sie die grundsätzliche Menübedienung Das Menü...
  • Seite 73: Bildeinst

    BILD EINSTELLUNG Lesen Sie “Bedienung des Menüs des Fernsehers” (siehe FARBTEMP. Seite 24) für Näheres zur Anzeige der Menüs. Sie können einen von drei FARBTEMP.-Modi BILD EINSTELLUNG (verschiedene Weißtöne) auswählen, um den Weißabgleich BILDEINST. für das Bild einzustellen. Da die Farbe Weiß als Referenz HELLIGKEIT KONTRAST HELLIGKEIT...
  • Seite 74: Bild Varianten

    BILD VARIANTEN Lesen Sie “Bedienung des Menüs des Fernsehers” (siehe Super DigiPure Seite 24) für Näheres zur Anzeige der Menüs. Die Funktion Super DigiPure verwendet neueste digitale BILD VARIANTEN Technologien, um ein natürlich wirkendes Bild zu DIGITAL VNR AUTO erzeugen. Die Funktion Super DigiPure enthält die Super DigiPure AUTO EMPFANGSSYSTEM...
  • Seite 75: 4:3 Auto Zoom

    BILD VARIANTEN EMPFANGSSYSTEM 4:3 AUTO ZOOM Die Fernsehnorm (bzw. das Farbsystem) wird automatisch Für das ZOOM Normalbild (Seitenverhältnis 4:3) können gewählt. Wenn das Bild jedoch nicht klar ist, oder keine Sie eine von drei ZOOM-Betriebsarten wählen, NORMAL, Farbe erscheint, wählen Sie die Fernsehnorm von Hand. PANORAMIC oder 14:9 ZOOM.
  • Seite 76: Pip

    BILD VARIANTEN PIP POSITION: Sie können eine von vier Positionen für das Nebenbild wählen. 1 Drücken Sie die Tasten 6 6 , um PIP zu wählen. Drücken Sie dann die Taste a Das Menü PIP erscheint. PIP POSITION MULTI-BILD ZURÜCK D0061-GE 2 Drücken Sie die Tasten 6 6 , um PIP POSITION...
  • Seite 77: Sound Einstellung

    SOUND EINSTELLUNG Lesen Sie “Bedienung des Menüs des Fernsehers” (siehe LAUTSPRECHER Seite 24) für Näheres zur Anzeige der Menüs. Sie können die Tonausgabe der TV-Lautsprecher SOUND EINSTELLUNG abschalten. Dies ist beispielsweise sinnvoll, wenn ein STEREO/ Audiosystem als Ersatz für die TV-Lautsprecher TIEFEN HÖHEN angeschlossen ist.
  • Seite 78: Kopfhörer

    SOUND EINSTELLUNG KOPFHÖRER Sie müssen das Menü KOPFHÖRER aufrufen, um die Kopfhörerlautstärke einstellen zu können. Im Menü KOPFHÖRER können Sie auch einstellen, ob der Ton aus den Lautsprechern kommen soll, wenn Kopfhörer angeschlossen werden, und Sie können weitere Einstellungen für das Signal vornehmen, das die Kopfhörer wiedergeben sollen.
  • Seite 79: Ext Einstellung

    EXT EINSTELLUNG Lesen Sie “Bedienung des Menüs des Fernsehers” (siehe ID LISTE Seite 24) für Näheres zur Anzeige der Menüs. Sie können die EXT-Eingänge je nach angeschlossenem EXT EINSTELLUNG Gerät benennen. Bei der Vergabe eines Namens für einen EXT-1 EXT-Anschluss erscheinen die EXT-Anschlussnummer ÜBERSPIELEN und der Name am Bildschirm.
  • Seite 80 EXT EINSTELLUNG 2 Drücken Sie die Tasten 6 6 , um eine EXT- Buchse oder TV zu wählen. Drücken Sie dann die Taste a Der Pfeil im Menü stellt den Signalfluss dar. Das linke Ende des Pfeils gibt einen Signalquellenausgang der Buchse EXT-2 an.
  • Seite 81: Funktionen

    FUNKTIONEN Einstellen der Funktion KINDERSICHERUNG Lesen Sie “Bedienung des Menüs des Fernsehers” (siehe Seite 24) für Näheres zur Anzeige der Menüs. 1 Wählen Sie KINDERSICHERUNG und drücken Sie dann die Taste o FUNKTIONEN “GEHEIM CODE” (ID-Nummer einstellen) erscheint. SLEEP TIMER BLAU-BILD KINDERSICHERUNG GEHEIM CODE...
  • Seite 82: Um Die Kindersicherung-Funktion

    FUNKTIONEN 3 Geben Sie Ihre ID-Nummer mit den Zifferntasten Die Sperrung wird vorübergehend aufgehoben, und Bild und Ton sind freigeschaltet. Wenn Sie die ID-Nummer vergessen haben: Führen Sie Schritt 1 von “Einstellen der Funktion KINDERSICHERUNG” aus. Nachdem Sie die ID- Nummer bestätigt haben, drücken Sie die Taste b zum Verlassen des Menüs.
  • Seite 83: Programmierung

    PROGRAMMIERUNG Lesen Sie “Bedienung des Menüs des Fernsehers” (siehe • Sie können jetzt mit der Bearbeitung der Seite 24) für Näheres zur Anzeige der Menüs. Programmnummern (PR) in der Funktion SENDER ORDNEN/MANUELL fortfahren. Für Einzelheiten lesen Sie bitte “SENDER ORDNEN/MANUELL” PROGRAMMIERUNG auf Seite 36.
  • Seite 84: Sender Ordnen/Manuell

    PROGRAMMIERUNG 3 Drücken Sie die Taste a a , um die Einstellung SENDER ORDNEN/MANUELL abzuschließen Die Funktionen SENDER ORDNEN/MANUELL sind in Das Menü T-V LINK erscheint. zwei Typen unterteilt: Bearbeitung der aktuellen Programmnummern (PR) (SENDER ORDNEN- T-V LINK Funktionen) und manuelle Speicherung von Fernsehkanälen DATENTRANSFER TV unter einer Programmnummer (PR) (MANUELL- Funktion).
  • Seite 85 PROGRAMMIERUNG EINFÜGEN Vorbereitung: 1 Wählen Sie mit den Tasten 6 6 einen • Es wird die CH/CC-Nummer benötigt, die Fernsehkanal ausschließlich in diesem Fernsehgerät existiert und der Mit jedem Druck auf die Tasten 6 ändert sich die Kanalnummer eines Fernsehkanals enspricht. Suchen Programmnummer (PR) und das Bild des Senders mit Sie die entsprechende CH/CC-Nummer in einer Tabelle dieser Programmnummer (PR) wird angezeigt.
  • Seite 86 PROGRAMMIERUNG LÖSCHEN 5 Drücken Sie so oft die grüne oder die rote Taste, bis Sie den gewünschten Sender 1 Wählen Sie mit den Tasten 6 6 einen gefunden haben Fernsehkanal Mit jedem Druck auf die Tasten 6 ändert sich die Bei schlechtem Empfang: Programmnummer (PR) und das Bild des Senders mit Drücken Sie die blaue oder die gelbe Taste, um den...
  • Seite 87: Zusätzliche Menüfunktionen

    Zusätzliche Menüfunktionen Verwendung der ACI-Funktion Herunterladen (Download) der Daten zum Videorekorder Dieses Fernsehgerät hat eine ACI-Funktion, die ACI- (automatische Programmierung) Daten dekodiert. Sie können die aktuellen Daten aller Programmnummern Mit der ACI-Funktion können alle Fernsehkanäle, die von (PR) mit der Funktion T-V LINK an den Videorekorder Kabelfernsehsendern übertragen werden, schnell und senden.
  • Seite 88: Ändern Der Land-Einstellung

    Zusätzliche Menüfunktionen 5 Drücken Sie die Tasten 6 6 , um DECODER Ändern der LAND-Einstellung (EXT-2) zu wählen. Drücken Sie dann die Tasten 5 , um EIN zu wählen Nachdem die Funktion AUTO abgeschlossen ist, können Sie mit der Funktion AUTO das bereits eingestellte Land Das dekodierte Bild erscheint.
  • Seite 89: Zusätzliche Vorbereitungen

    Zusätzliche Vorbereitungen Anschluss externer Geräte Schließen Sie die Geräte unter Beachtung der folgenden 1 Videorekorder (Composite-Signal) Anschlussdiagramme an Ihrem Fernseher an. 2 Videorekorder (Composite/S-VIDEO-Signal) 3 T-V LINK-kompatibler Videorekorder (Composite-/ Bevor Sie Verbindungen herstellen: S-VIDEO-Signal) • Lesen Sie die Anleitungen aller beteiligten Geräte. 4 Decoder Abhängig von den Geräten unterscheidet sich die 5 DVD-Spieler (Composite-/S-VIDEO-Signal)
  • Seite 90: Anschließen Von Lautsprechern/Verstärker

    Zusätzliche Vorbereitungen Geräte, die das S-VIDEO-Signal (Y/C-Signal) Anschließen von Lautsprechern/Verstärker z.B. von einem Videorekorder S-VHS Schließen Sie unter Beachtung der Anschlußzeichnung für Audiogeräte die gewünschten Audiogeräte am Fernsehgerät ausgeben können Schließen Sie das Gerät an einen EXT-Anschluss (mit Zur Tonwiedergabe können Sie anstelle der TV- Ausnahme des EXT-1-Anschlusses) an.
  • Seite 91: Ch/Cc-Nummern

    CH/CC-Nummern Wenn Sie die EINFÜGEN-Funktion (beschrieben unter Seite 37) benutzen möchten, finden Sie mit Hilfe dieser Tabelle die CH/CC- Nummer heraus, die der Kanalnummer des Fernsehkanals entspricht. Kanal Kanal Kanal Kanal CH 02 / CH 202 E2, R1 CH 40 / CH 240 E40, R40 CC 01 / CC 201 CC 31 / CC 231...
  • Seite 92: Problemlösungen

    Problemlösungen Wenn bei der Benutzung Ihres Fernsehgerätes ein Problem auftreten sollte, lesen Sie bitte sorgfältig diese “Problemlösungen” durch, bevor Sie das Gerät in Reparatur geben. Eventuell können Sie das Problem leicht selbst beheben. Wenn z. B. der Netzstecker nicht in der Steckdose steckt, oder, wenn es Probleme mit der Empfangsantenne gibt, könnten Sie irrtümlicherweise annehmen, dass der Fernseher defekt ist.
  • Seite 93 Problemlösungen Verschiedenes • Wenn die Funktion SLEEP TIMER aktiv ist, schaltet sich das Gerät automatisch aus. Wenn dies passiert, drücken Sie die Taste # (Standby), um den Fernseher wieder einzuschalten. Wenn sich das Gerät nun wieder normal verhält, liegt keine Fehlfunktion vor. •...
  • Seite 94: Technische Daten

    Technische Daten Modell PD-42D30ES PD-35D30ES Eintrag Sendesysteme CCIR B/G, I, D/K, L Fernsehnormen PAL, SECAM • Die Anschlüsse EXT unterstützen auch das NTSC 3.58/4.43 MHz-System. Kanäle und Frequenzen • E2-E12, E21-E69, S1-S41, X, Y, Z, Z+1, Z+2, ITALIEN A-H, ITALIEN H+1, ITALIEN H+2, F2-F10, F21-F69, R1-R12, R21-R69 •...
  • Seite 95 Merci d’avoir fait l’acquisition de ce téléviseur couleurs JVC. Pour être certain que vous comprenez comment utiliser votre nouveau téléviseur, nous vous conseillons de lire attentivement le présent manuel avant de commencer. AVERTISSEMENT: POUR EVITER TOUT RISQUE D’INCENDIE OU DE CHOC ELECTRIQUE, N’EXPOSEZ JAMAIS CET APPAREIL A LA PLUIE OU A L’HUMIDITE.
  • Seite 96 Rémanence Une des caractéristique des écrans plasma (PDP) est que l’affichage prolongé d’une même image grave une partie de cette image à l’écran (c’est ce que l’on appelle la rémanence). Pour éviter la rémanence: N’affichez pas d’images ou de caractères statiques pour des périodes prolongées. Pendant l’affichage d’une image Avec alimentation coupée 19:03...
  • Seite 97 Points défectueux Les écrans au plasma font appel à des ensembles de points (pixels) fins pour afficher les images. Si plus de 99,99% de ces pixels ne présentent aucun problème, il faut savoir qu’il est possible qu’un nombre infime de pixels puisse ne pas s’allumer ou rester allumé en permanence.
  • Seite 98 Modification du réglage PAYS ......40 MULTIPLES ..........21 Utilisation de la fonction DECODEUR Utilisation d’un VCR ou d’un lecteur DVD de (EXT-2)............40 marque JVC ..........21 Autres préparatifs ........ 41 Fonction télétexte.........22 Raccordement des appareils externes.... 41 Fonctionnement de base .........22 Numéros CH/CC ........
  • Seite 99: Vérification Du Contenu Des Conditionnements

    Câble de haut-parleur (pour les haut-parleurs avant) × 2 (pour le subwoofer) × 1 Haut-parleurs avant droit et Subwoofer Serre-câble × 3 Vis de montage × 6 Pied en caoutchouc pour gauche (haut-parleurs DD) le subwoofer × 4 (pour PD-35D30ES uniquement)
  • Seite 100: Installation Du Téléviseur

    (trois de chaque côté) faites glisser les haut-parleurs vers jusqu’à ce que leur tête dépasse le bas. d’environ 3 mm. <PD-35D30ES> 1 Fixez les vis de montage des 2 Attachez les haut-parleurs 3 Verrouillez les haut-parleurs haut-parleurs à l’arrière du avant à...
  • Seite 101: Installation

    Installation du téléviseur Préparation du subwoofer Placez le subwoofer verticalement ou couchez-le sur le côté, décollez le Subwoofer papier des pieds en caoutchouc fournis et collez ces derniers dans les quatre coins de la face utilisée comme base. Les pieds en caoutchouc empêchent glissement et résonance, tout en protégeant le câble du haut-parleur.
  • Seite 102: Raccordements

    Raccordements Attention • Avant d’effectuer tout raccordement, mettez tous les équipements hors tension, y compris le téléviseur. Schéma de raccordement <PD-42D30ES> AC INPUT 110-240V Câble fourni avec le téléviseur • Reportez-vous à la page page 13 pour plus de détails sur le raccordement.
  • Seite 103 Raccordements <PD-35D30ES> AC INPUT 110-240V Câble fourni avec le téléviseur • Reportez-vous à la page page 13 pour plus de détails sur le raccordement. Haut-parleur avant gauche Téléviseur (arrière) Haut-parleur avant droit DISPLAY INPUT CONNECT TO SYSTEM CABLE DISPLAY INPUT...
  • Seite 104: Connexion Des Haut-Parleurs Avant Et Du Subwoofer

    Raccordements Connexion des haut-parleurs avant et du subwoofer Utilisez les câbles de haut-parleurs fournis pour raccorder les haut-parleurs aux bornes de haut-parleurs à l’arrière du téléviseur. Raccordement du câble de haut-parleur à la borne de haut-parleur avant Effectuez le raccordement à l’aide des câbles de haut-parleurs avant fournis. 1 Appuyez sur le levier à...
  • Seite 105: Raccordement Du Téléviseur Et Du Récepteur

    Enfoncez fermement le connecteur 2 jusqu’à ce qu’il se verrouille. <PD-42D30ES> <PD-35D30ES> Débranchement du câble système Libérez le connecteur 1 en dévissant les vis gauche et droite et en l’extrayant de la prise. Libérez le connecteur 2 en l’extrayant de la prise en appuyant sur les boutons de dégagement situés de chaque côté.
  • Seite 106: Raccordement De L'antenne Et Du Magnétoscope

    Raccordements Raccordement de l’antenne et du Antenne magnétoscope Câble coaxial à 75 ohms • Les câbles de connexion ne sont pas fournis. Arrière du récepteur • Pour plus de détails, consultez les manuels livrés avec les appareils à raccorder. EXT- EXT- En cas de raccordement d’un magnétoscope, suivez les points A A A A →...
  • Seite 107: Raccordement Des Cordons D'alimentation Aux Prises Secteur

    Raccordements Insérez la fiche CA dans une prise correctement reliée à la Raccordement des cordons terre. d’alimentation aux prises secteur Insérez les fiches des cordons d’alimentation du téléviseur et du récepteur dans les prises secteur. Attention • Ne raccordez les appareils qu’à la source d’alimentation spécifiée (CA 110 –...
  • Seite 108: Réglages Initiaux

    A sa première mise sous tension, le téléviseur entre en mode 3 Appuyez sur les touches 5 5 et 6 6 pour de réglage initial et le logo JVC s’affiche. Suivez les sélectionner FRANÇAIS. Appuyez ensuite sur la instructions qui apparaissent à l’écran pour effectuer les touche a réglages initiaux.
  • Seite 109: Fonctions T-V Link

    Un magnétoscope compatible “T-V LINK” est un l’écran, même si le magnétoscope ne parvient pas à le magnétoscope JVC possédant le logo T-V LINK ou un recevoir clairement. Pour plus de détails, consultez le magnétoscope muni d’un des logos suivants. Ces manuel d’utilisation de votre magnétoscope.
  • Seite 110: Touches Et Fonctions Du Téléviseur

    Appuyez sur la touche A A A A ou sur la touche P p pour mettre le téléviseur en fonction à partir du mode de veille <PD-35D30ES> • Contrôlez que les fiches des cordons d’alimentation du téléviseur et du récepteur sont correctement raccordées aux prises secteur.
  • Seite 111: Touches De La Télécommande Et Leurs Fonctions

    Touches de la télécommande et leurs fonctions 1 Touche de coupure du son 2 Touches numériques 3 Touche c 4 Touche son 3 5 Touche d’informations 6 Touche b 7 Touches 5 8 Touche de veille (Standby) 9 Touches de couleur 0 Touche a - Touches 6 = Touche de commande VCR/DVD/Télétexte...
  • Seite 112: Réglage Du Volume

    Touches de la télécommande et leurs fonctions Utilisation de la LISTE PROG.: Utilisation de la LISTE PROG.: 1 Appuyez sur la touche h h (Informations) pour 1 Appuyez sur la touche h h (Informations) pour afficher la LISTE PROG. afficher la LISTE PROG. L’utilisation de la touche h (Informations) modifie 2 Appuyez sur les touches 5 5 et 6...
  • Seite 113: Fonction Zoom

    Touches de la télécommande et leurs fonctions Sélection du mode ZOOM Fonction ZOOM 1 Appuyez sur la touche c c pour afficher le Vous pouvez modifier la taille de l’écran en fonction du menu ZOOM format de l’image. Choisissez le réglage optimal parmi les modes ZOOM suivants.
  • Seite 114: Affichage De L'heure

    Touches de la télécommande et leurs fonctions Affichage de l’heure Utilisation de la fonction PIP Vous pouvez afficher l’heure à l’écran. Il est possible de visualiser deux images (l’image principale et une image secondaire). Appuyez sur la touche h h (Informations) pour Cette fonction permet de regarder deux programmes TV en afficher l’heure même temps, ou de regarder simultanément un programme...
  • Seite 115: Utilisation De La Fonction Images Multiples

    JVC. 1 Appuyez sur la touche X X pour afficher des • Même si votre appareil est de la marque JVC, il se images multiples peut que certaines de ces touches ne fonctionnent pas, Les canaux s’affichent dans leur ordre numérique.
  • Seite 116: Fonction Télétexte

    Fonction télétexte Utilisation du mode Liste Il est possible de mémoriser les numéros de vos pages de MENU télétexte favorites pour pouvoir les rappeler rapidement à l’aide des touches de couleur. Pour mémoriser les numéros des pages: 1 Appuyez sur la touche B B pour activer le mode Liste Les numéros de pages mémorisés s’affichent dans le bas...
  • Seite 117: Page Secondaire

    Fonction télétexte Page secondaire Annulation Certaines pages de télétexte comprennent des pages Vous pouvez rechercher une page de télétexte tout en secondaires qui s’affichent automatiquement. regardant la télévision. Vous pouvez garder affichée toute page secondaire ou la 1 Appuyez sur une touche numérique pour entrer visualiser à...
  • Seite 118: Utilisation Du Menu Du Téléviseur

    Utilisation du menu du téléviseur Ce téléviseur est équipé d’un certain nombre de fonctions 5 Appuyez sur la touche a a pour valider le que vous pouvez activer ou désactiver à l’aide de menus. réglage Pour tirer le meilleur parti de toutes ses fonctions, il vous Le menu disparaît.
  • Seite 119: Reglage Image

    REGLAGE IMAGE Reportez-vous à la section “Utilisation du menu du TEINTE téléviseur” (voir page 24) pour plus de détails sur l’affichage du menu. Il existe trois modes TEINTE (trois nuances de blanc) permettant de régler l’équilibre du blanc dans l’image. Etant REGLAGE IMAGE donné...
  • Seite 120: Options Image

    OPTIONS IMAGE Reportez-vous à la section “Utilisation du menu du Super DigiPure téléviseur” (voir page 24) pour plus de détails sur l’affichage du menu. La fonction Super DigiPure fait appel aux dernières techniques numériques pour vous fournir une image à OPTIONS IMAGE l’aspect naturel.
  • Seite 121: Effet Cinema

    OPTIONS IMAGE SYSTEME COULEUR EFFET CINEMA Le système couleurs est sélectionné automatiquement. La fonction EFFET CINEMA permet d’afficher de manière Cependant, si l’image n’est pas nette ou si aucune couleur plus douce et plus naturelle à l’écran les films au format n’apparaît, vous devez sélectionner manuellement le cinéma .
  • Seite 122: Pip

    OPTIONS IMAGE POSITION PIP: Quatre positions sont possibles pour l’image secondaire. 1 Appuyez sur les touches 6 6 pour sélectionner PIP. Appuyez ensuite sur la touche a Le menu PIP apparaît. POSITION PIP IMAGES MULTIPLES RETOUR D0061-FR 2 Appuyez sur les touches 6 6 pour sélectionner POSITION PIP 3 Appuyez sur les touches 5...
  • Seite 123: Reglage Audio

    REGLAGE AUDIO Reportez-vous à la section “Utilisation du menu du HAUT PARLEUR téléviseur” (voir page 24) pour plus de détails sur l’affichage du menu. Si un système audio est relié au téléviseur pour remplacer les haut-parleurs du téléviseur, vous pouvez couper le son REGLAGE AUDIO de ces derniers.
  • Seite 124: Casque

    REGLAGE AUDIO CASQUE Pour régler le volume du casque d’écoute, utilisez le menu CASQUE. Le menu CASQUE permet également de décider si oui ou non les haut-parleurs du téléviseur doivent continuer à fonctionner lorsque l’on utilise le casque d’écoute, et d’effectuer les différents réglages du casque.
  • Seite 125: Ext Reglages

    EXT REGLAGES Reportez-vous à la section “Utilisation du menu du LISTE NOMS téléviseur” (voir page 24) pour plus de détails sur l’affichage du menu. Vous pouvez assigner un nom aux appareils raccordés à chaque entrée EXT. L’attribution d’un nom à une borne EXT REGLAGES EXT entraîne l’affichage du numéro de la borne EXT et de EXT-1...
  • Seite 126 EXT REGLAGES 2 Appuyez sur les touches 6 6 pour sélectionner une borne EXT ou TV. Appuyez ensuite sur la touche a La flèche dans le menu représente le débit des signaux. Le côté gauche de la flèche indique la diffusion d’une source de signaux par la borne EXT-2.
  • Seite 127: Options

    OPTIONS Reportez-vous à la section “Utilisation du menu du VERROUILLAGE téléviseur” (voir page 24) pour plus de détails sur l’affichage du menu. Lorsque vous souhaitez que vos enfants ne regardent pas certains canaux, vous pouvez utiliser la fonction OPTIONS VERROUILLAGE pour verrouiller ces derniers. Si l’enfant SLEEP TIMER sélectionne un numéro de programme (PR) sous lequel est FOND BLEU...
  • Seite 128: Decodeur (Ext-2)

    OPTIONS Pour regarder une chaîne TV verrouillée CREATEUR DE PIXELS 1 À l’aide des touches numériques ou de la LISTE Lorsque la rémanence est minimale, la rémanence et les PROG., sélectionnez un numéro de programme images résiduelles peuvent être atténuées à l’aide de la (PR) correspondant à...
  • Seite 129 INSTALLATION Reportez-vous à la section “Utilisation du menu du • Pour annuler la fonction AUTO, appuyez sur la touche b. téléviseur” (voir page 24) pour plus de détails sur l’affichage du menu. AUTO EDITER NOMS CH / CC CH 10 INSTALLATION RETOUR LANGAGE...
  • Seite 130: Installation

    INSTALLATION 3 Appuyez sur la touche a a pour valider les EDITER/MANUEL réglages Les fonctions EDITER/MANUEL sont divisées en deux Le menu T-V LINK apparaît. types: l’édition des numéros de programme sélectionnés (PR) (fonctions EDITER) et l’enregistrement manuel d’un T-V LINK canal TV de votre choix sous un numéro de programme CHARGEMENT TV (PR) (fonction MANUEL).
  • Seite 131 INSTALLATION NOMS INSERER Préparation: 1 Appuyez sur les touches 6 6 pour sélectionner • Vous devez disposer pour ce téléviseur d’un numéro un canal TV CH/CC unique et correspondant au numéro de canal Chaque fois que vous appuyez sur les touches 6, le d’un émetteur TV.
  • Seite 132 INSTALLATION EFFACER 5 Appuyez de manière répétitive sur la touche verte ou rouge jusqu’à ce que le canal TV 1 Appuyez sur les touches 6 6 pour sélectionner souhaité apparaisse un canal TV Chaque fois que vous appuyez sur les touches 6, le Si la réception du canal est mauvaise: numéro de programme (PR) change et l’image du canal Appuyez sur la touche bleue ou jaune pour obtenir une...
  • Seite 133: Fonctions Supplémentaires Des Menus

    Fonctions supplémentaires des menus Utilisation de la fonction ACI Téléchargement de données vers un magnétoscope Ce téléviseur possède une fonction ACI qui décode les données ACI (Installation automatique des canaux). Vous pouvez transmettre les dernières informations de La fonction ACI permet d’enregistrer correctement et numéros de programmes (PR) au magnétoscope à...
  • Seite 134: Modification Du Réglage Pays

    Fonctions supplémentaires des menus Modification du réglage PAYS Utilisation de la fonction DECODEUR (EXT-2) Une fois la fonction AUTO terminée, vous pouvez changer le pays que vous avez déjà configuré à l’aide de la fonction Lorsque vous raccordez un décodeur à un magnétoscope AUTO.
  • Seite 135: Autres Préparatifs

    Autres préparatifs Raccordement des appareils externes Raccordez les appareils au téléviseur, en suivant 1 Magnétoscope (signal composite) attentivement les schémas de raccordement suivants. 2 Magnétoscope (signal composite/signal S-VIDEO) 3 Magnétoscope compatible T-V LINK (signal Avant de raccorder tout appareil: composite/signal S-VIDEO) •...
  • Seite 136 Autres préparatifs Appareils pouvant émettre le signal S-VIDEO Raccordement de haut-parleurs/d’un (signal Y/C), un magnétoscope S-VHS par amplificateur exemple Raccordez l’équipement audio souhaité au téléviseur en vous référant au schéma de raccordement de l’équipement Raccordez l’appareil à une entrée EXT autre que l’entrée audio.
  • Seite 137: Numéros Ch/Cc

    Numéros CH/CC Si vous souhaitez utiliser la fonction INSERER de la page 37, localisez dans le tableau suivant le numéro CH/CC correspondant au numéro de canal de l’émetteur TV. Canal Canal Canal Canal CH 02 / CH 202 E2, R1 CH 40 / CH 240 E40, R40 CC 01 / CC 201...
  • Seite 138: Guide De Dépannage

    Guide de dépannage En cas de problème pendant l’utilisation du téléviseur, veuillez lire attentivement ce “Guide de dépannage” avant de contacter le service technique. Vous pourrez probablement résoudre le problème par vous-même. Par exemple, si la fiche est débranchée de la prise secteur ou si l’antenne TV présente des problèmes, vous pourriez croire que l’anomalie provient du téléviseur.
  • Seite 139: Autres Problèmes

    Guide de dépannage Autres problèmes • Lorsque la fonction SLEEP TIMER est activée, le téléviseur se met automatiquement hors tension. Si le téléviseur s’éteint subitement, appuyez sur la touche # (veille) pour tenter de le rallumer. Si le téléviseur revient à...
  • Seite 140: Spécifications Techniques

    Spécifications techniques Modèle PD-42D30ES PD-35D30ES Elément Systèmes de radiodiffusion CCIR B/G, I, D/K, L Systèmes couleurs PAL, SECAM • Les bornes EXT acceptent également le système NTSC 3.58/4.43 MHz. Canaux et fréquences • E2-E12, E21-E69, S1-S41, X, Y, Z, Z+1, Z+2, ITALIE A-H, ITALIE H+1, ITALIE H+2, F2-F10, F21-F69, R1-R12, R21-R69 •...
  • Seite 141 Onze hartelijke dank voor het aanschaffen van deze JVC-kleurentelevisie. Lees deze gebruiksaanwijzing aandachtig door voordat u de TV in gebruik neemt, zodat u zeker weet dat u de TV goed bedient. WAARSCHUWING: OM GEVAAR VOOR BRAND OF ELEKTRISCHE SCHOKKEN TE VOORKOMEN, DIENT U ERVOOR TE ZORGEN DAT DIT APPARAAT NOOIT AAN REGEN OF VOCHTIGHEID WORDT BLOOTGESTELD.
  • Seite 142: Als Inbranden Heeft Plaatsgevonden

    Brandvlek Een kenmerk van plasmaschermen (PDP’s) is dat het weergeven van hetzelfde beeld gedurende een lange tijd tot gevolg heeft dat een gedeelte van het beeld op het scherm achterblijft (fosfor-brandvlek). Vermijd als volgt het inbranden. Toon niet gedurende lange tijd statische beelden of letters. Terwijl een beeld wordt getoond en de spanning uitgeschakeld is 19:03...
  • Seite 143 Puntstoringen PDP-schermen maken gebruik van hoeveelheden fijne pixels om beelden weer te geven. Als er geen probleem is met meer dan 99,99% van deze pixels, dan moet u er begrip voor hebben dat een zeer klein aantal van deze pixels wellicht niet oplichten of niet altijd oplichten.
  • Seite 144 Gebruik van de functie PIP ......20 videorecorder ..........39 Gebruik van de functie MULTI-BEELD ....21 Wijziging van de instelling LAND ....40 Een VCR of DVD-speler van het merk JVC Gebruik van de functie DECODER (EXT-2)..40 bedienen ............21 Verdere voorbereidingen ....41 Teletekst-functie ........22...
  • Seite 145: Het Controleren Van De Inhoud Van De Verpakkingen

    Ferrietkern × 2 Ontvanger Netsnoer Luidsprekers Luidsprekerkabel Luidsprekerkabel (voor de voorste luidsprekers) × 2 (voor de subwoofer) × 1 Voorste luidsprekers, links Subwoofer Kabelklem × 3 Montageschroef × 6 Rubberen voet voor de en rechts (DD-luidsprekers) subwoofer × 4 (alleen voor PD-35D30ES)
  • Seite 146: Uw Tv Installeren

    3 mm luidsprekers naar beneden. uitsteken. <PD-35D30ES> 1 Breng de montageschroeven 2 Bevestig de voorste 3 Zet de voorste luidsprekers voor de luidsprekers aan de luidsprekers aan de...
  • Seite 147: Installatie

    Uw TV installeren Het voorbereiden van de subwoofer Plaats de subwoofer verticaal of op de zijde, verwijder het papier van de Subwoofer meegeleverde rubberen voeten, en plak de voeten in de vier hoeken op de oppervlakte van de onderkant. De rubberen voeten dienen om glijden en resonanties te voorkomen, en om het luidsprekersnoer te beschermen.
  • Seite 148: Aansluitingen

    Aansluitingen Let op • Schakel alle apparatuur uit, inclusief de TV, voordat u iets aansluit. Aansluitschema <PD-42D30ES> AC INPUT 110-240V Met het toestel meegeleverde kabel • Zie pagina 13 voor aansluitgegevens. Televisietoestel (achterkant) Voorste Voorste luidspreker luidspreker links rechts DISPLAY INPUT CONNECT TO SYSTEM CABLE FRONT FRONT...
  • Seite 149 Aansluitingen <PD-35D30ES> AC INPUT 110-240V Met het toestel meegeleverde kabel • Zie pagina 13 voor aansluitgegevens. Voorste Televisietoestel luidspreker links (achterkant) Voorste luidspreker rechts DISPLAY INPUT CONNECT TO SYSTEM CABLE DISPLAY INPUT CONNECT TO SYSTEM CABLE AC INPUT 110-240V FRONT...
  • Seite 150: Het Aansluiten Van De Voorste Luidsprekers En De Subwoofer

    Aansluitingen Het aansluiten van de voorste luidsprekers en de subwoofer Gebruik de meegeleverde luidsprekerkabels om de luidsprekers aan de luidsprekeraansluitingen aan de achterkant van het televisietoestel aan te sluiten. Het aansluiten van de luidsprekerkabel aan de aansluitingen van de voorste luidspreker Sluit deze aan met gebruikmaking van de bijbehorende meegeleverde luidsprekerkabels.
  • Seite 151: Het Aansluiten Van Het Televisietoestel En De Ontvanger

    Let erop dat de pennen van de stekker 1 juist zijn georiënteerd, duw de stekker in de aansluiting, en draai de schroeven aan de linker- en rechterzijde aan om hem vast te zetten. Duw de stekker 2 stevig op zijn plaats totdat deze blokkeert. <PD-35D30ES> <PD-42D30ES> De systeeemkabel verwijderen Maak de stekker los 1 door de linker- en rechterschroeven los te draaien en vervolgens te verwijderen.
  • Seite 152: Aansluiten Van De Antenne En De Videorecorder

    Aansluitingen Aansluiten van de antenne en de Antenne videorecorder 75-ohms coaxiaalkabel Achterkant van de • De aansluitsnoeren worden niet bijgeleverd. ontvanger • Zie voor meer details hierover de gebruiksaanwijzingen van de apparatuur die u wilt aansluiten. EXT- EXT- Als u een videorecorder aansluit, volg dan A A A A →...
  • Seite 153: Aansluiten Van Het Netsnoer Op Het Stopcontact

    Aansluitingen Achterkant ontvanger Aansluiten van het netsnoer op het stopcontact Steek de stekkers van de netsnoeren van het televisietoestel en van de ontvanger in een stopcontact van het lichtnet. Let op DISPLAY OUT EXT- EXT- • Sluit het apparaat nooit aan op een andere voltage dan EXT- voorgeschreven (110 –...
  • Seite 154 (Stand-by) van de afstandsbediening om de TV aan te vervolgens op a. zetten. • Het JVC-logo verschijnt niet als de TV eenmaal is ingeschakeld. In dit geval gebruikt u de functies 6 Druk op de toets a a om het menu T-V LINK “TAAL”...
  • Seite 155: T-V Link Functies

    Met een “T-V LINK-compatibele videorecorder ” wordt videorecorders kunt u een uitzending opnemen via het een JVC-videorecorder bedoeld met het T-V LINK-logo of uitgangssignaal van de TV als die uitzending op de TV een videorecorder met een van de volgende logo's. Deze...
  • Seite 156: Tv-Knoppen En -Functies

    Druk op de A A A A -toets of P p p -toetsen om de TV vanuit de stand-by-stand in te schakelen. • Controleer of de stekkers van de netsnoeren van het <PD-35D30ES> televisietoestel en de ontvanger correct zijn aangesloten. Kies een TV-kanaal Gebruik de P p...
  • Seite 157: Afstandsbedieningstoetsen En Functies

    Afstandsbedieningstoetsen en functies 1 Dempingstoets 2 Nummertoetsen 3 Toets c 3 geluidstoets 5 Informatietoets 6 Toets b 7 5-toetsen 8 Stand-by-toets 9 Kleurtoetsen 0 Toets a - 6-toetsen = VCR/DVD/Teletekst-bedieningstoets ~ VCR P DVD schakelaar ! Toets g (Tekst) @ P-toets # F-toets $ U p-toets % Y-toets...
  • Seite 158: Het Volume Regelen

    Afstandsbedieningstoetsen en functies Gebruik de PR LIJST: Gebruik de PR LIJST: 1 Druk op de toets h h (Informatie) om de PR 1 Druk op de toets h h (Informatie) om de PR LIJST weer te geven LIJST weer te geven Bij iedere druk op de toets h (Informatie) verandert de 2 Druk op de 5 5 - en6...
  • Seite 159: Zoom-Functie

    Afstandsbedieningstoetsen en functies Kies de ZOOM-instelling ZOOM-functie 1 Druk op de toets c c om het menu ZOOM Het beeldformaat kan worden gewijzigd, om dit aan te weer te geven passen aan de beeldverhouding. Kies de beste optie uit een van de volgende ZOOM-instellingen.
  • Seite 160: De Huidige Tijd Weergeven

    Afstandsbedieningstoetsen en functies De huidige tijd weergeven Gebruik van de functie PIP U kunt de huidige tijd in beeld brengen. U kunt twee beelden bekijken (hoofdbeeld en subbeeld). Er kunnen twee verschillende televisieprogramma’s, of een Druk op de toets h h (Informatie) om de huidige tijd televisieprogramma en een videoprogramma van een extern weer te geven...
  • Seite 161: Gebruik Van De Functie Multi-Beeld

    • Als uw apparaat geen JVC-apparaat is, kunt u deze Gebruik van de functie MULTI-BEELD toetsen niet gebruiken. • Zelfs als uw apparaat door JVC is gemaakt, kan het U kunt multibeelden weergeven waarmee u in staat bent gebeuren dat sommige toetsen niet werken of zelfs gemakkelijk een programma op te zoeken dat u wilt zien.
  • Seite 162: Teletekst-Functie

    Teletekst-functie Gebruik van de Lijstfunctie U kunt de nummers van uw favoriete Teletekst-pagina’s in MENU het geheugen opslaan en deze later snel weer oproepen met behulp van de kleurtoetsen. Opslaan van paginanummers: 1 Druk op de toets B B om de Lijstfunctie in te schakelen De opgeslagen paginanummers worden onderin het scherm weergegeven.
  • Seite 163: Subpagina

    Teletekst-functie Subpagina Annuleren Sommige Teletekst-pagina's bevatten subpagina’s die U kunt zoeken naar een Teletekst-pagina terwijl u TV kijkt. automatisch in beeld worden gebracht. 1 Druk op de nummertoets om een U kunt iedere gewenste subpagina, op ieder gewenst paginanummer in te voeren of druk op een van moment in beeld houden of weer in beeld brengen.
  • Seite 164: Het Menu Van De Tv Gebruiken

    Het menu van de TV gebruiken Deze TV beschikt over een aantal functies die via menu’s 5 Druk op de toets a a om de instelling te bediend kunnen worden. Om ten volle gebruik te kunnen voltooien maken van alle functies van uw TV, dient u de Het menu verdwijnt.
  • Seite 165: Instelling

    BEELD INSTELLING Zie “Het menu van de TV gebruiken” (zie pagina 24) voor TINT meer gegevens over de menuweergave. U kunt een van de drie instellingsstanden TINT kiezen (drie BEELD INSTELLING verschillende wittonen) om de witbalans van het beeld af te stellen.
  • Seite 166: Beeld Mogelijkheden

    BEELD MOGELIJKHEDEN Zie “Het menu van de TV gebruiken” (zie pagina 24) voor Super DigiPure meer gegevens over de menuweergave. De Super DigiPure-functie maakt gebruik van de meest BEELD MOGELIJKHEDEN recente digitale technologie om een natuurlijk beeld te AUTO verkrijgen. De Super DigiPure-functie bevat de volgende Super DigiPure AUTO KLEURSYSTEEM...
  • Seite 167: Colour Management

    BEELD MOGELIJKHEDEN KLEURSYSTEEM 4:3 AUTO ZOOM Het kleursysteem wordt automatisch gekozen. Als het beeld U kunt een van de drie ZOOM-instellingen kiezen: echter niet helder is of er is geen kleur, stel het kleursysteem NORMAAL, PANORAMIC of 14:9 ZOOM als ZOOM- dan handmatig in.
  • Seite 168: Pip

    BEELD MOGELIJKHEDEN PIP POSITIE: U kunt een van de vier posities voor het subbeeld kiezen. 1 Gebruik de 6 6 -toetsen om PIP te kiezen. Druk hierna op de toets a Het menu PIP verschijnt. PIP POSITIE MULTI-BEELD TERUG D0061-NL 2 Gebruik de 6 6 -toetsen om PIP POSITIE te kiezen.
  • Seite 169: Geluid Instelling

    GELUID INSTELLING Zie “Het menu van de TV gebruiken” (zie pagina 24) voor LUIDSPREKER meer gegevens over de menuweergave. U kunt de geluidsweergave van de TV-luidsprekers GELUID INSTELLING uitschakelen, maar dit heeft natuurlijk alleen maar zin als er STEREO/ een geluidsinstallatie op de TV is aangesloten, via welke u LAGE TONEN HOGE TONEN het geluid kunt beluisteren.
  • Seite 170: Hoofdtelefoon

    GELUID INSTELLING HOOFDTELEFOON U moet het menu HOOFDTELEFOON gebruiken om het volume van de hoofdtelefoon aan te passen. Het menu HOOFDTELEFOON kan eveneens worden gebruikt om in te stellen of er geluid wordt weergegeven via de luidsprekers van de TV wanneer de hoofdtelefoon wordt gebruikt en om de instellingen uit te voeren voor het geluid dat wordt weergegeven via de hoofdtelefoon.
  • Seite 171: Ext. Instelling

    EXT. INSTELLING Zie “Het menu van de TV gebruiken” (zie pagina 24) voor ID LIJST meer gegevens over de menuweergave. U kunt iedere EXT-aansluiting een naam geven, die EXT. INSTELLING overeenkomt is met het apparaat dat er op is aangesloten. EXT-1 Als u een EXT-aansluiting een naam geeft, verschijnt het COPIEREN...
  • Seite 172 EXT. INSTELLING 2 Gebruik de 6 6 -toetsen om een EXT-aansluiting of TV te kiezen. Druk hierna op de toets a De pijl in het menu stelt een signaalstroom voor. De linkerkant van de pijl vertegenwoordigt een signaal dat wordt uitgestuurd door de EXT-2-aansluiting. EXT-1/EXT-3/EXT-5: Het uitgangssignaal van een apparaat dat is aangesloten op de EXT-aansluiting, gaat door de TV en wordt...
  • Seite 173: Mogelijkheden

    MOGELIJKHEDEN Zie “Het menu van de TV gebruiken” (zie pagina 24) voor KINDERSLOT meer gegevens over de menuweergave. Als er zenders zijn waarvan u niet wilt dat uw kinderen MOGELIJKHEDEN ernaar kijken, kunt u de functie KINDERSLOT gebruiken om dat TV-kanaal te vergrendelen. Als een kind nu een SLEEP TIMER BLAUW BEELD KINDERSLOT...
  • Seite 174: Decoder (Ext-2)

    MOGELIJKHEDEN Bekijken van een kanaal dat vergrendeld is SNEEUW EFFECT met de kinderslotfunctie Als het inbranden minimaal is, kunnen inbranden en 1 Kies met de nummertoetsen of met de PR LIJST beeldrestanten met de SNEEUW EFFECT-functie worden een programmanummer (PR) waaronder een verzwakt.
  • Seite 175: Automatisch

    INSTELLEN Zie “Het menu van de TV gebruiken” (zie pagina 24) voor • U kunt nu de programmanummers (PR) gaan meer gegevens over de menuweergave. bewerken met behulp van de functie SORTEREN/ MANUEEL. Voor meer details raadpleegt u “SORTEREN/MANUEEL” op pagina 36. INSTELLEN •...
  • Seite 176: Instellen

    INSTELLEN 3 Druk op de toets a a om de instellingen te SORTEREN/MANUEEL voltooien De functies SORTEREN/MANUEEL zijn verdeeld in twee Het menu T-V LINK verschijnt. types: bewerken van de programmanummers (PR) (SORTEREN-functies) en handmatig vastleggen van een T-V LINK TV-kanaal onder een programmanummer (PR) OVERDRAGEN TV (MANUEEL-functie).
  • Seite 177 INSTELLEN INVOEGEN Voorbereidingen: 1 Gebruik de 6 6 -toetsen om een TV-kanaal te • U dient een CH/CC-nummer te vinden dat uniek is voor kiezen deze TV en dat correspondeert met het kanaalnummer Iedere keer dat u een toets 6 indrukt, verandert het van de zender.
  • Seite 178 INSTELLEN UITWISSEN 5 Blijf op de groene of rode toets drukken tot de gewenste zender wordt weergegeven 1 Gebruik de 6 6 -toetsen om een TV-kanaal te kiezen Bij een slechte ontvangst: Iedere keer dat u een toets 6 indrukt, verandert het Druk op de blauwe of gele toets om de fijnafstelling voor programmanummer (PR) en verschijnt het beeld van de de zender uit te voeren.
  • Seite 179: Nog Meer Menu's

    Nog meer menu’s Gebruik van de functie ACI Versturen van de gegevens naar een videorecorder Deze TV is voorzien van een ACI-functie voor het decoderen van de ACI-gegevens (automatische U kunt de gegevens van de nieuwste programmanummers kanaalinstelling). (PR) naar een videorecorder versturen, met behulp van de Met behulp van de ACI-functie kunt u de TV-zenders die de functie T-V LINK.
  • Seite 180: Wijziging Van De Instelling Land

    Nog meer menu’s Wijziging van de instelling LAND Gebruik van de functie DECODER (EXT-2) Als de functie AUTOMATISCH is uitgevoerd, kunt u het Bij aansluiten van een decoder met een videorecorder compatibel met T-V LINK op de EXT-2-aansluiting, moet land dat u reeds had ingesteld met de functie u de functie DECODER (EXT-2) gebruiken om de AUTOMATISCH, wijzigen.
  • Seite 181: Verdere Voorbereidingen

    Verdere voorbereidingen Aansluiten van externe apparatuur Sluit de apparatuur op de TV aan zoals in de onderstaande 1 Videorecorder (samengesteld signaal) aansluitschema’s is aangegeven. 2 Videorecorder (samengesteld signaal/S-VIDEO- signaal) Voordat u een aansluiting maakt: 3 T-V LINK compatibele videorecorder (samengesteld •...
  • Seite 182 Verdere voorbereidingen Apparaten die een S-VIDEO-signaal (Y/C- Aansluiten van luidsprekers en/of een signaal) kunnen uitsturen, zoals een S-VHS- versterker videorecorder Zie het aansluitschema voor audio-apparatuur en sluit de gewenste geluidsapparatuur op de TV aan. Sluit het apparaat aan op een EXT-aansluiting, maar niet op U kunt perifere voorluidsprekers aansluiten om naar het de EXT-1-aansluiting.
  • Seite 183: Ch/Cc-Nummers

    CH/CC-nummers Als u de functie INVOEGEN op pagina 37 wilt gebruiken, zoek dan het CH/CC-nummer dat correspondeert met het TV-kanaal in deze tabel op. Kanaal Kanaal Kanaal Kanaal CH 02 / CH 202 E2, R1 CH 40 / CH 240 E40, R40 CC 01 / CC 201 CC 31 / CC 231...
  • Seite 184: Verhelpen Van Storingen

    Verhelpen van storingen Als er zich een probleem voordoet met de TV, lees dan eerst “Verhelpen van storingen” aandachtig door voordat u uw TV laat repareren. U kunt het probleem wellicht heel makkelijk zelf oplossen. Als de netstekker bijvoorbeeld niet in het stopcontact zit, of er is een probleem met de antenne, dan lijkt het misschien alsof de TV zelf kapot is.
  • Seite 185: Overige Problemen

    Verhelpen van storingen Overige problemen • Als de functie SLEEP TIMER is ingeschakeld, wordt de TV automatisch uitgeschakeld. Als de TV plotseling wordt uitgeschakeld, druk dan op de toets # (Stand- by) om te proberen de TV weer in te schakelen. Als de TV nu weer gewoon ingeschakeld kan worden, is er geen sprake van een storing.
  • Seite 186: Specificaties

    Specificaties Model PD-42D30ES PD-35D30ES Item TV RF-systemen CCIR B/G, I, D/K, L Kleursystemen PAL, SECAM • De EXT-aansluitingen ondersteunen ook het NTSC 3.58/4.43 MHz-systeem. Kanalen en frequenties • E2-E12, E21-E69, S1-S41, X, Y, Z, Z+1, Z+2, ITALIË A-H, ITALIË H+1, ITALIË H+2, F2-F10, F21-F69, R1-R12, R21-R69 •...
  • Seite 187 Gracias por comprar este televisor en color JVC. Lea atentamente este manual antes de empezar a utilizar el televisor para asegurarse de que lo usa correctamente. ADVERTENCIA: NO EXPONGA ESTE APARATO A LA LLUVIA O LA HUMEDAD, YA QUE PODRÍA PROVOCAR UN INCENDIO O SUFRIR UNA DESCARGA ELÉCTRICA.
  • Seite 188 Pantalla “quemada” Una característica de los paneles de pantalla de plasma (PDP) es que si se visualiza la misma imagen durante mucho tiempo provoca que parte de la imagen quede permanentemente en pantalla (quemadura de fósforo). Evite las quemaduras como sigue. No muestre imágenes estáticas ni caracteres durante mucho tiempo.
  • Seite 189 Defectos de punto Los PDP utilizan grupos de píxeles finos para visualizar las imágenes. Aunque no hay ningún problema con más del 99,99% de esos píxeles, tenga en cuenta que un pequeño número de píxeles puede que no se enciendan o que se enciendan permanentemente. No instale el televisor cerca de equipos electrónicos que puedan ser susceptibles de ondas electromagnéticas Podría producir interferencias en la imagen, el sonido, etc.
  • Seite 190 Cómo cambiar la configuración de PAIS ..40 Cómo configurar el IMAGEN MULTIPLE ..21 Cómo configurar el DECODER (EXT-2) ..40 Cómo utilizar un VCR JVC o un reproductor Otros pasos previos ......41 de DVD ............21 Cómo conectar equipos externos ....41 Función teletexto........22...
  • Seite 191: Verificar El Contenido De Los Paquetes

    (para los altavoces delanteros) × 2 (para el subwoofer) × 1 Altavoces delanteros Subwoofer Tornillo de montaje × 6 Pata de goma para el Abrazadera del izquierdo y derecho subwoofer × 4 cable × 3 (sólo para el PD-35D30ES) (altavoces DD)
  • Seite 192: Configuración Del Televisor

    3 mm. <PD-35D30ES> 1 Coloque los tornillos de 2 Instalar los altavoces 3 Bloquee los altavoces montaje de los altavoces de la delanteros en la parte...
  • Seite 193: Instalación

    Configuración del televisor Preparación del subwoofer Coloque el subwoofer de pie verticalmente o túmbelo lateralmente, quite el Subwoofer papel de protección de las patas de goma que se suministran y péguelas en las cuatro esquinas de la superficie que desea utilizar como base. Las patas de goma impiden que resbale y que tenga resonancia y protegen el cable Pata de goma del altavoz.
  • Seite 194: Conexiones

    Conexiones Precaución • Antes de realizar cualquier conexión, apague todos los equipos (incluido el televisor). Diagrama de conexiones <PD-42D30ES> AC INPUT 110-240V Cable suministrado con el televisor • Consulte página 13 para más información acerca de la conexión. Televisor (parte trasera) Altavoz delantero Altavoz delantero izquierdo...
  • Seite 195 Conexiones <PD-35D30ES> AC INPUT 110-240V Cable suministrado con el televisor • Consulte página 13 para más información acerca de la conexión. Altavoz delantero Televisor izquierdo (parte trasera) Altavoz delantero derecho DISPLAY INPUT CONNECT TO SYSTEM CABLE DISPLAY INPUT CONNECT TO SYSTEM CABLE...
  • Seite 196: Conexión De Los Altavoces Delanteros Y El Subwoofer

    Conexiones Conexión de los altavoces delanteros y el subwoofer Utilice los cables de altavoz que se suministran para conectar los altavoces a los terminales de altavoz de la parte posterior del televisor. Conexión del cable del altavoz al terminal del altavoz delantero Realice las conexiones utilizando los cables de altavoces delanteros que se suministran.
  • Seite 197: Conexión Del Televisor Y El Receptor

    Coloque firmemente el conector 2 en su sitio hasta que quede fijo. <PD-42D30ES> <PD-35D30ES> Desconexión del cable del sistema Quite el conector 1 desatornillando los tornillos de la izquierda y de la derecha de su ubicación.
  • Seite 198: Cómo Conectar La Antena Y El Vídeo

    Conexiones Cómo conectar la antena y el vídeo Antena • Los cables de conexión no van incluidos con el televisor. Parte trasera del • Si desea información más detallada, consulte los Cable coaxial de 75 ohmios receptor manuales suministrados con los dispositivos que vaya a conectar.
  • Seite 199: Conexión Del Cable De Alimentación A La Toma De Corriente De Ca

    Conexiones Inserte el enchufe de CA en una toma de corriente puesta a Conexión del cable de alimentación a la tierra correctamente. toma de corriente de CA Inserte las clavijas de AC de los cables de alimentación del televisor y del receptor en los enchufes de AC. Precaución •...
  • Seite 200: Ajuste Inicial

    La primera vez que se pone en marcha el televisor, se activa 2 Pulse el botón a el modo de ajuste inicial y aparece el logotipo de JVC. Para Se abre el menú LANGUAGE. proceder al ajuste inicial, siga las instrucciones de pantalla.
  • Seite 201: Funciones De T-V Link

    Son vídeos compatibles con T-V LINK los aparatos de información más detallada, consulte el manual de vídeo JVC que incorporan el logotipo T-V LINK o instrucciones de su aparato de vídeo. cualquier aparato de vídeo de otra marca que incorpore alguno de los siguientes logotipos.
  • Seite 202: Botones Y Funciones Del Televisor

    Pulse el botón A A A A o los botones P p p para encender el televisor cuando esté en modo de <PD-35D30ES> espera • Asegúrese de que las clavijas de AC de los cables de alimentación del televisor y del receptor están conectados a los enchufes correctos de AC.
  • Seite 203: Funciones Y Botones Del Mando A Distancia

    Funciones y botones del mando a distancia 1 Botón silenciador 2 Botones numéricos 3 Botón c 4 Botón de sonido 3 5 Botón de información 6 Botón b 7 Botones 5 8 Botón de modo en espera 9 Botones de color 0 Botón a - Botones 6 = Botón VCR/DVD/control del teletexto...
  • Seite 204: Cómo Ajustar El Volumen

    Funciones y botones del mando a distancia Utilice la LISTA PR: Utilice la LISTA PR: 1 Pulse el botón h h (Información) para ver la 1 Pulse el botón h h (Información) para ver la LISTA PR LISTA PR Pulse el botón h (Información) y la pantalla cambiará 2 Pulse los botones 5 5 y6 6 para seleccionar...
  • Seite 205: Función Zoom

    Funciones y botones del mando a distancia Cómo seleccionar el modo de ZOOM Función ZOOM 1 Pulse el botón c c para acceder al menú Este televisor le permite adaptar el formato de la pantalla al ZOOM formato de la imagen. Seleccione el mejor de entre los siguientes modos ZOOM.
  • Seite 206: Cómo Visualizar La Hora

    Funciones y botones del mando a distancia Cómo visualizar la hora Cómo configurar el PIP Es posible mostrar la hora en la pantalla. Puede visualizar dos imágenes (imagen principal e imagen secundaria). Pulse el botón h h (Información) para ver la hora Se pueden ver dos programas distintos de televisión al Pulse el botón h (Información) y la pantalla cambiará...
  • Seite 207: Cómo Configurar El Imagen Multiple

    DVD de doble imagen o en el modo imagen en imagen. Es posible utilizar un vídeo JVC o un reproductor de DVD. • Una imagen progressive-scanning no se puede Utilice los que tengan correspondencia en el mando a visualizar como imagen secundaria.
  • Seite 208: Función Teletexto

    Función teletexto Cómo utilizar la lista del teletexto Puede memorizar el número de las páginas de teletexto que MENU más le gusten y recuperarlas cuando quiera utilizando los botones de color. Para memorizar números de página: 1 Pulse el botón B B para acceder a la lista Los números de página memorizados aparecen en la parte inferior de la pantalla.
  • Seite 209: Página Secundaria

    Función teletexto Página secundaria Salir Algunas páginas de teletexto arrastran páginas secundarias Puede buscar una página de teletexto y, al mismo tiempo, que aparecen en pantalla automáticamente. ver la televisión. Las páginas secundarias se pueden bloquear o visualizar en 1 Introduzca el número de una página de cualquier momento.
  • Seite 210: Cómo Utilizar El Menú Del Televisor

    Cómo utilizar el menú del televisor Este televisor incorpora varias funciones controlables desde 5 Pulse el botón a a para confirmar la selección menús. Para sacarle el máximo partido al televisor, debe El menú desaparece. llegar a dominar el funcionamiento de los menús. •...
  • Seite 211: Ajuste De Imagen

    AJUSTE DE IMAGEN Consulte “Cómo utilizar el menú del televisor” (véase TEMP. COLOR página 24) para obtener más información acerca de cómo mostrar el menú. Puede escoger cualquiera de los tres modos de TEMP. COLOR (tres tonos de blanco) para que el televisor ajuste AJUSTE DE IMAGEN automáticamente el balance de blanco de la imagen.
  • Seite 212: Funciones De Imagen

    FUNCIONES DE IMAGEN Consulte “Cómo utilizar el menú del televisor” (véase Super DigiPure página 24) para obtener más información acerca de cómo mostrar el menú. La función Super DigiPure emplea lo último en tecnología digital para ofrecerle una imagen de aspecto natural. La función Super DigiPure incluye las dos funciones FUNCIONES DE IMAGEN siguientes.
  • Seite 213: Sistema De Color

    FUNCIONES DE IMAGEN SISTEMA DE COLOR MODO CINE El televisor selecciona automáticamente un sistema de La función MODO CINE muestra en la pantalla una imagen color, Pero si la imagen no sale nítida o fallan los colores, de película de cine más suave y natural. puede cambiar el sistema de color manualmente.
  • Seite 214: Pip

    FUNCIONES DE IMAGEN POSICION DE PIP: Puede elegir una de cuatro posiciones para la imagen secundaria. 1 Pulse los botones 6 6 para seleccionar PIP. A continuación, pulse el botón a Se abre el menú PIP. POSICION DE PIP IMAGEN MULTIPLE ATRAS D0061-SP 2 Pulse los botones 6...
  • Seite 215: Ajuste De Sonido

    AJUSTE DE SONIDO Consulte “Cómo utilizar el menú del televisor” (véase ALTAVOZ página 24) para obtener más información acerca de cómo mostrar el menú. Es posible apagar el sonido de los altavoces del televisor, aunque sólo debería hacerlo si tiene conectado al televisor AJUSTE DE SONIDO un sistema de audio como sustituto de los altavoces del ESTEREO/...
  • Seite 216: Auricular

    AJUSTE DE SONIDO AURICULAR Para ajustar el volumen de los auriculares debe emplear el menú AURICULAR. El menú AURICULAR también se puede usar para ajustar si el sonido se emite o no desde los altavoces del televisor cuando se utilizan los auriculares, y para realizar los ajustes del sonido que se emite desde los auriculares.
  • Seite 217: Ajuste Ext

    AJUSTE EXT. Consulte “Cómo utilizar el menú del televisor” (véase LISTA ID página 24) para obtener más información acerca de cómo mostrar el menú. La lista permite dar un nombre a los equipos conectados a cada terminal EXT. Al dar nombre a un terminal EXT el AJUSTE EXT.
  • Seite 218 AJUSTE EXT. 2 Pulse los botones 6 6 para seleccionar un terminal EXT o el TV. A continuación, pulse el botón a La flecha del menú informa de que se está transmitiendo la señal. A la izquierda de la flecha se indica la fuente de señal de salida del terminal EXT-2.
  • Seite 219: Otras Funciones

    OTRAS FUNCIONES Consulte “Cómo utilizar el menú del televisor” (véase PROTECCION INFANTIL página 24) para obtener más información acerca de cómo mostrar el menú. Si quiere evitar que sus hijos vean un canal de televisión, puede bloquearlo con la función PROTECCION OTRAS FUNCIONES INFANTIL.
  • Seite 220: Decoder (Ext-2)

    OTRAS FUNCIONES Para ver un canal de televisión bloqueado FONDO NIEVE 1 Seleccione un número de canal (PR) bloqueado Si la distorsión es mínima, las imágenes distorsionadas y utilizando los botones numéricos o la LISTA PR residuales pueden mejorarse con la función La pantalla se vuelve azul y aparece el símbolo n FONDO NIEVE.
  • Seite 221: Instalacion

    INSTALACION Consulte “Cómo utilizar el menú del televisor” (véase 3 Pulse el botón azul para activar la función página 24) para obtener más información acerca de cómo AUTO PROGRAMACION mostrar el menú. En pantalla aparecerá el menú AUTO PROGRAMACION y los canales de televisión se INSTALACION memorizarán automáticamente en los diferentes IDIOMA...
  • Seite 222: Edicion/Manual

    INSTALACION INSERTAR: • Cuando el televisor capta el nombre del canal (ID) a Agrega un nuevo canal de televisión a la lista de través de la señal de recepción, lo registra números de canal (PR) existentes utilizando un código automáticamente en el número de canal (PR) en el CH/CC.
  • Seite 223 INSTALACION INSERTAR Pasos previos: 1 Pulse los botones 6 6 para seleccionar un • Necesita un número CH/CC exclusivo del televisor, canal de televisión correspondiente a un número de canal de televisión. Cada vez que pulse los botones 6, retrocederá o Seleccione el número CH/CC en la tabla “Números CH/ avanzará...
  • Seite 224 INSTALACION BORRAR 5 Pulse el botón verde o rojo varias veces seguidas hasta que aparezca el canal de 1 Pulse los botones 6 6 para seleccionar un televisión que busca canal de televisión Cada vez que pulse los botones 6, retrocederá o Si el canal no se recibe bien: avanzará...
  • Seite 225: Otras Funciones Del Menú

    Otras funciones del menú Cómo configurar el ACI Cómo actualizar la información en el vídeo Este televisor tiene una función ACI que descodifica los datos ACI (Instalación Automática de Canales). La función T-V LINK le permite enviar al aparato de vídeo El empleo de la función ACI permite registrar de forma la información registrada más recientemente en los números apropiada y rápidamente todos los canales transmitidos por...
  • Seite 226: Cómo Cambiar La Configuración De Pais

    Otras funciones del menú Cómo cambiar la configuración de PAIS Cómo configurar el DECODER (EXT-2) Una vez realizada la AUTO PROGRAMACION, puede Si tiene un vídeo compatible con T-V LINK conectado al cambiar el país seleccionado utilizando esa misma función terminal EXT-2 y conecta un decodificador, utilizando la de AUTO PROGRAMACION.
  • Seite 227: Otros Pasos Previos

    Otros pasos previos Cómo conectar equipos externos Conecte los dispositivos al televisor, prestando atención a 1 Vídeo (señal compuesta) los siguientes diagramas de instalación. 2 Vídeo (señal compuesta/señal S-VIDEO) 3 Vídeo compatible con T-V LINK (señal compuesta/ Antes de realizar cualquier conexión: señal S-VIDEO) •...
  • Seite 228 Otros pasos previos Equipos que pueden enviar la señal de Conexión de los altavoces/amplificador S-VIDEO (señal Y/C) como un vídeo S-VHS Consulte el diagrama de conexión del equipo de audio y, a continuación, conecte al televisor el equipo de audio que Conecte el equipo a un terminal EXT excepto al terminal desee.
  • Seite 229: Números Ch/Cc

    Números CH/CC Para utilizar la función INSERTAR descrita en la página página 37, busque el número CH/CC que corresponda al número de canal del televisor de esta tabla. Canal Canal Canal Canal CH 02 / CH 202 E2, R1 CH 40 / CH 240 E40, R40 CC 01 / CC 201 CC 31 / CC 231...
  • Seite 230: Solución De Problemas

    Solución de problemas Si se le presenta algún problema al utilizar el televisor, lea este apartado de “Solución de problemas” antes de llevar a reparar el aparato. Es posible que pueda arreglarlo usted mismo. A veces, por ejemplo, el televisor está desenchufado de la toma de corriente o la antena está...
  • Seite 231 Solución de problemas Otras cuestiones que se deben tener en cuenta • Si el TEMPORIZADOR está activado, el televisor se apaga automáticamente. Si el televisor deja de funcionar repentinamente, pulse el botón # (modo en espera) para volverlo a encender. Si el televisor se enciende y empieza a funcionar con normalidad, no hay riesgo de avería.
  • Seite 232: Características Técnicas

    Características técnicas Modelo PD-42D30ES PD-35D30ES Parámetro de ajuste Sistemas de transmisión CCIR B/G, I, D/K, L Sistemas de color PAL, SECAM • Los terminales EXT también son compatibles con el sistema NTSC 3.58/4.43 MHz. Canales y frecuencias • E2-E12, E21-E69, S1-S41, X, Y, Z, Z+1, Z+2, ITALIA A-H, ITALIA H+1, ITALIA H+2, F2-F10, F21-F69, R1-R12, R21-R69 •...
  • Seite 233 Si ringrazia la gentile clientela per l’acquisto di un televisore a colori JVC. Per comprendere a fondo le funzionalità del televisore acquistato, si invita a leggere attentamente il presente manuale prima dell’uso. AVVERTENZA: PER EVITARE RISCHI DI INCENDIO O SCOSSA ELETTRICA, NON ESPORRE L’APPARECCHIATURA A LIQUIDI O UMIDITÀ.
  • Seite 234 Marcatura da invecchiamento Una caratteristica degli schermi al plasma (PDP, Plasma Display Panels) è il cosiddetto effetto “burn-in”, o invecchiamento del fosforo, che si verifica quando la visualizzazione della stessa immagine per un periodo prolungato di tempo provoca una permanenza sullo schermo di una parte dell’immagine.
  • Seite 235 Pixel difettosi La tecnologia degli schermi PDP fa uso di insiemi di pixel molto piccoli per riprodurre le immagini. Sebbene non si registrino problemi con il 99,99% dei pixel, è necessario essere consapevoli che un numero estremamente basso di pixel potrebbe non illuminarsi o illuminarsi solo saltuariamente.
  • Seite 236 Uso della funzione MULTI IMMAGINE ....21 Uso della funzione DECODER (EXT-2) ..40 Azionamento di un videoregistratore (VCR) o Preparazioni aggiuntive ...... 41 di un lettore DVD JVC ........21 Funzione televideo .......22 Collegamento di dispositivi esterni....41 Tabella dei numeri CH/CC ....43 Funzionamento generale .........22...
  • Seite 237: Controllo Del Contenuto Delle Confezioni

    Cavetto per altoparlante Cavetto per altoparlante (altoparlanti anteriori) × 2 (subwoofer) × 1 Altoparlanti anteriori destro Subwoofer Viti di montaggio × 6 Piedino in gomma per subwoofer × 4 Morsetto per cavi × 3 e sinistro (altoparlanti DD) (solo per PD-35D30ES)
  • Seite 238: Preparazione Del Televisore

    3 mm. quindi far scorrere l’altoparlante verso il basso. <PD-35D30ES> 1 Fissare le viti di montaggio 2 Montare gli altoparlanti 3 Serrare in posizione gli degli altoparlanti al retro del...
  • Seite 239: Installazione

    Preparazione del televisore Preparazione del subwoofer Collocare il subwoofer in posizione verticale o poggiato sul lato, rimuovere Subwoofer la carta dai piedini in gomma forniti e quindi attaccare i piedini ai quattro angoli della superficie da utilizzare come base. Il piedino in gomma impedisce scivolamenti ed effetti di risonanza e inoltre protegge il cavetto Piedini in dell’altoparlante.
  • Seite 240: Collegamenti

    Collegamenti Attenzione • Prima di effettuare qualsiasi collegamento, spegnere ogni apparecchiatura incluso il televisore. Schema di collegamento <PD-42D30ES> AC INPUT 110-240V Cavo fornito con il televisore • Per informazioni dettagliate sui collegamenti, fare riferimento a pagina 13. Televisore (retro) Altoparlante Altoparlante anteriore anteriore...
  • Seite 241 Collegamenti <PD-35D30ES> AC INPUT 110-240V Cavo fornito con il televisore • Per informazioni dettagliate sui collegamenti, fare riferimento a pagina 13. Altoparlante anteriore sinistro Televisore (retro) Altoparlante anteriore destro DISPLAY INPUT CONNECT TO SYSTEM CABLE DISPLAY INPUT CONNECT TO SYSTEM CABLE...
  • Seite 242: Collegamento Degli Altoparlanti Anteriori E Del Subwoofer

    Collegamenti Collegamento degli altoparlanti anteriori e del subwoofer Utilizzare i cavetti per altoparlante in dotazione per collegare gli altoparlanti ai terminali per altoparlante sul retro del televisore. Collegamento del cavetto per altoparlante al terminale per altoparlante anteriore Eseguire il collegamento utilizzando i cavetti per altoparlante anteriore in dotazione. 1 Premere la leva caricata a molla del terminale di 2 Introdurre l’interno del cavetto nel terminale e ingresso altoparlante nella direzione della...
  • Seite 243: Collegamento Del Televisore E Del Ricevitore

    Verificare che i piedini sul connettore 1 siano orientati correttamente, premere il connettore nella presa e serrare le viti a sinistra e a destra per bloccarlo in posizione. Premere saldamente il connettore 2 in posizione fino a bloccarlo. <PD-35D30ES> <PD-42D30ES> Scollegamento del cavo di sistema Staccare il connettore 1 svitando le viti a sinistra e a destra e rimuovendolo dalla presa.
  • Seite 244: Connessione Dell'antenna E Del Videoregistratore

    Collegamenti Antenna Connessione dell’antenna e del videoregistratore Cavo coassiale a 75 ohm • I cavi di collegamento non sono inclusi. Retro del ricevitore • Per ulteriori informazioni, fare riferimento ai manuali forniti con i dispositivi che si vogliono collegare. EXT- EXT- Se si connette un videoregistratore, seguire EXT-...
  • Seite 245: Collegamento Del Cavo Di Alimentazione Alla Presa Di Corrente

    Collegamenti Inserire la spina CA in una presa dotata di messa a terra Collegamento del cavo di alimentazione appropriata. alla presa di corrente Inserire le spine CA dei cavi di alimentazione dal televisore e dal ricevitore alle prese di corrente CA. Attenzione •...
  • Seite 246: Impostazioni Iniziali

    # (Riposo) per accendere il televisore. Se nel menu SINTONIA AUTOMATICA appare • Il logo della JVC non viene visualizzato se il “ACI INIZIO/ACI SALTO”: televisore è già stato acceso una volta. In questo caso, È possibile utilizzare la funzione ACI (Automatic utilizzare le funzioni “LINGUA”...
  • Seite 247: Funzioni T-V Link

    EXT-2 del televisore tramite un cavo SCART intatto. Accensione automatica del televisore/ Un “videoregistratore compatibile T-V LINK” è un Visualizzazione dell’immagine del videoregistratore JVC con il logo T-V LINK o un videoregistratore videoregistratore con uno dei simboli che seguono. Tuttavia, i videoregistratori di tali marchi potranno...
  • Seite 248: Tasti E Funzioni Del Televisore

    Premere il tasto A A A A o i tasti P p p per accendere il <PD-35D30ES> televisore quando si trova in modalità di riposo • Controllare che le spine CA dei cavi di alimentazione dal televisore e dal ricevitore siano collegate a prese di corrente CA appropriate.
  • Seite 249: Tasti E Funzioni Del Telecomando

    Tasti e funzioni del telecomando 1 Tasto di silenziamento 2 Tasti numerici 3 Tasto c 4 Tasto suono 3 5 Tasto Informazioni 6 Tasto b 7 Tasti 5 8 Tasto Riposo (Standby) 9 Tasti colorati 0 Tasto a - Tasti 6 = Tasti di comando VCR/DVD/Televideo ~ Interruttore VCR P DVD ! Tasto g (Testo)
  • Seite 250: Regolare Il Volume

    Tasti e funzioni del telecomando Utilizzare LISTA PROGR.: Utilizzare LISTA PROGR.: 1 Premere il tasto h h (Informazioni) per 1 Premere il tasto h h (Informazioni) per visualizzare la LISTA PROGR. visualizzare la LISTA PROGR. Continuando a premere il tasto h (Informazioni), 2 Premere i tasti 5 5 e 6 6 per scegliere un...
  • Seite 251: Funzione Zoom

    Tasti e funzioni del telecomando Scegliere la modalità ZOOM Funzione ZOOM 1 Premere il tasto c c per visualizzare il menu Consente di modificare le dimensioni dello schermo in base ZOOM all’immagine. Scegliere la modalità ottimale tra le modalità ZOOM che seguono. ZOOM AUTO AUTO:...
  • Seite 252: Visualizzazione Dell'ora Corrente

    Tasti e funzioni del telecomando Visualizzazione dell’ora corrente Uso della funzione PIP È possibile visualizzare l’ora corrente sullo schermo. È possibile visualizzare due immagini (immagine principale e immagine secondaria). Premere il tasto h h (Informazioni) per visualizzare È possibile guardare contemporaneamente due diversi l’ora corrente programmi TV oppure un programma TV e un programma Continuando a premere il tasto h (Informazioni),...
  • Seite 253: Uso Della Funzione Multi Immagine

    È possibile azionare un videoregistratore o un lettore DVD l’immagine EXT-4 è visualizzata come immagine di marca JVC. La pressione di un tasto con lo stesso aspetto secondaria, la funzione PIP viene annullata. del tasto del telecomando di un dispositivo consente di - Non è...
  • Seite 254: Funzione Televideo

    Funzione televideo Utilizzo della modalità Lista È possibile memorizzare i numeri delle pagine del televideo MENU preferite e richiamarle rapidamente utilizzando i tasti colorati. Per memorizzare i numeri di pagina: 1 Premere il tasto B B per attivare la modalità Lista I numeri di pagina memorizzati verranno visualizzati nella parte inferiore dello schermo.
  • Seite 255: Pagina Secondaria

    Funzione televideo Pagina secondaria Annulla Alcune pagine del televideo includono ulteriori pagine che È possibile cercare una pagina del televideo mentre si vengono visualizzate automaticamente. guarda l’immagine del canale TV. È possibile bloccare qualsiasi pagina secondaria o 1 Premere il tasto numerico per immettere un visualizzarla in qualsiasi momento.
  • Seite 256: Funzionamento Dei Menu Del Televisore

    Funzionamento dei menu del televisore Questo televisore dispone di una gamma di funzioni 5 Premere il tasto a a per completare attivabile tramite dei menu. Per utilizzare in modo completo l’impostazione tutte le funzioni del televisore, è necessario conoscere Il menu scomparirà dallo schermo. approfonditamente le tecniche di funzionamento generale •...
  • Seite 257: Immagine

    IMMAGINE Per ulteriori informazioni sulla visualizzazione del menu, TEMP. COLORE fare riferimento a “Funzionamento dei menu del televisore” (vedere pagina 24). È possibile scegliere tra tre modalità di TEMP. COLORE (tre toni di bianco) per regolare il bilanciamento del bianco dell’immagine.
  • Seite 258: Varie/Immagine

    VARIE/IMMAGINE Per ulteriori informazioni sulla visualizzazione del menu, Super DigiPure fare riferimento a “Funzionamento dei menu del televisore” (vedere pagina 24). La funzione Super DigiPure sfrutta la tecnologia digitale più recente in modo da fornire un'immagine estremamente VARIE/IMMAGINE naturale. La funzione Super DigiPure comprende le due funzioni che seguono.
  • Seite 259: Sistema

    VARIE/IMMAGINE SISTEMA EFFETTO CINEMA La funzione EFFETTO CINEMA consente di visualizzare Il sistema del colore viene scelto automaticamente. le immagini di pellicole cinematografiche in modo più Tuttavia, se l’immagine non è nitida o non appare il colore, uniforme e naturale sullo schermo. scegliere manualmente il sistema del colore.
  • Seite 260: Pip

    VARIE/IMMAGINE POSIZIONE PIP: È possibile scegliere una di quattro posizioni per l’immagine secondaria. 1 Premere i tasti 6 6 per scegliere PIP. Quindi premere il tasto a Verrà visualizzato il menu PIP. POSIZIONE PIP MULTI IMMAGINE PRECEDENTE D0061-IT 2 Premere i tasti 6 6 per scegliere POSIZIONE PIP 3 Premere i tasti 5...
  • Seite 261: Suono

    SUONO Per ulteriori informazioni sulla visualizzazione del menu, ALTOPARLANTI fare riferimento a “Funzionamento dei menu del televisore” (vedere pagina 24). È possibile disattivare l’audio dagli altoparlanti del televisore; è necessario tuttavia che un sistema audio sia SUONO collegato al televisore come sostituto degli altoparlanti del STEREO/ televisore.
  • Seite 262: Cuffia

    SUONO CUFFIA Per regolare il volume delle cuffie, è necessario utilizzare il menu CUFFIA. Il menu CUFFIA può inoltre essere utilizzato per attivare o disattivare l’audio degli altoparlanti TV durante l’uso delle cuffie e per eseguire le impostazioni relative all’audio delle cuffie.
  • Seite 263: Preselezione Ext

    PRESELEZIONE EXT Per ulteriori informazioni sulla visualizzazione del menu, LISTA ID fare riferimento a “Funzionamento dei menu del televisore” (vedere pagina 24). È possibile assegnare un nome, corrispondente ai dispositivi collegati, per ciascun terminale EXT. Se si assegna un nome PRESELEZIONE EXT a un terminale EXT, il numero del terminale EXT verrà...
  • Seite 264 PRESELEZIONE EXT 2 Premere i tasti 6 6 per scegliere un terminale EXT oppure TV. Quindi premere il tasto a La freccia nel menu rappresenta un flusso di segnale. Il lato sinistro della freccia indica una origine di segnale in uscita dal terminale EXT-2.
  • Seite 265: Opzioni

    OPZIONI Per impostare la funzione BLOCCO CANALI Per ulteriori informazioni sulla visualizzazione del menu, fare riferimento a “Funzionamento dei menu del televisore” 1 Selezionare BLOCCO CANALI e quindi premere (vedere pagina 24). il tasto o “CODICE NR.” (ID schermata di impostazione del OPZIONI numero ) viene visualizzata.
  • Seite 266: Decoder (Ext-2)

    OPZIONI 3 Premere i tasti numerici per immettere il numero ID Il blocco verrà temporaneamente rimosso in modo che sia possibile vedere il canale TV. Se non si ricorda il numero ID: Eseguire il passaggio 1 di “Per impostare la funzione BLOCCO CANALI”.
  • Seite 267: Installazione

    INSTALLAZIONE Per ulteriori informazioni sulla visualizzazione del menu, • È possibile proseguire con la modifica dei numeri fare riferimento a “Funzionamento dei menu del televisore” Programma (PR) utilizzando la funzione MODIFICA (vedere pagina 24). PR/MANUALE. Per ulteriori informazioni, vedere “MODIFICA PR/MANUALE” a pagina 36. •...
  • Seite 268: Modifica Pr/Manuale

    INSTALLAZIONE 3 Premere il tasto a a per completare MODIFICA PR/MANUALE l’impostazione Le funzioni MODIFICA PR/MANUALE sono di due tipi: Verrà visualizzato il menu T-V LINK. modifica dei numeri Programma correnti (PR) (funzioni MODIFICA PROGR.) e registrazione manuale di un canale T-V LINK TV da assegnare al numero Programma (PR) (funzione CARICA DATI...
  • Seite 269 INSTALLAZIONE INSER. Preparazione: 1 Premere i tasti 6 6 per scegliere un canale TV • È richiesto un numero CH/CC univoco per questo Ogni volta che si premono i tasti 6 il numero televisore e che corrisponda al numero di canale di un Programma (PR) cambia e l’immagine del canale TV canale TV.
  • Seite 270 INSTALLAZIONE ELIMINA 5 Premere ripetutamente il tasto verde o rosso fino a visualizzare il canale TV desiderato 1 Premere i tasti 6 6 per scegliere un canale TV Ogni volta che si premono i tasti 6 il numero Se la ricezione del canale TV è scadente: Programma (PR) cambia e l’immagine del canale TV Premere il tasto blu o giallo per sintonizzare con registrato nel numero Programma (PR) appare sullo...
  • Seite 271: Operazioni Aggiuntive Con I Menu

    Operazioni aggiuntive con i menu Uso della funzione ACI Scaricamento dei dati sul videoregistratore Questo televisore è dotato della funzione ACI che serve per decodificare i dati ACI (Automatic Channel Installation = È possibile inviare i dati più recenti dei numeri Programma Installazione automatica dei canali).
  • Seite 272: Modifica Dell'impostazione Nazione

    Operazioni aggiuntive con i menu Modifica dell’impostazione NAZIONE Uso della funzione DECODER (EXT-2) Dopo aver completato la funzione SINTONIA Quando si collega un decoder a un videoregistratore AUTOMATICA, è possibile cambiare la nazione compatibile T-V LINK collegato al terminale EXT-2, precedentemente impostata utilizzando la funzione utilizzare la funzione DECODER (EXT-2) per decodificare SINTONIA AUTOMATICA.
  • Seite 273: Preparazioni Aggiuntive

    Preparazioni aggiuntive Collegamento di dispositivi esterni Collegare i dispositivi al televisore, facendo attenzione ai 1 Videoregistratore (segnale composito) seguenti schemi di collegamento. 2 Videoregistratore (segnale composito/segnale S-VIDEO) Prima di iniziare i collegamenti: 3 Videoregistratore compatibile T-V LINK (segnale • Leggere i manuali forniti con i dispositivi. A seconda dei composito/segnale S-VIDEO) dispositivi, il metodo di collegamento potrebbe risultare 4 Decoder...
  • Seite 274: Collegamento Delle Cuffie

    Preparazioni aggiuntive Dispositivi che possono inviare in uscita il Collegamento di altoparlanti/amplificatore segnale S-VIDEO (segnale Y/C), ad esempio Facendo riferimento allo schema di collegamento dei dispositivi audio, collegare i dispositivi audio desiderati al un videoregistratore S-VHS televisore. Collegare il dispositivo a un terminale EXT diverso dal Per ascoltare l’audio del televisore, è...
  • Seite 275: Tabella Dei Numeri Ch/Cc

    Tabella dei numeri CH/CC Quando si desidera utilizzare la funzione INSER. a pagina 37, individuare il numero CH/CC corrispondente al numero di canale del canale TV nella tabella che segue. Canale Canale Canale Canale CH 02 / CH 202 E2, R1 CH 40 / CH 240 E40, R40 CC 01 / CC 201...
  • Seite 276: Risoluzione Dei Problemi

    Risoluzione dei problemi Se si verifica un problema durante l’uso del televisore, leggere attentamente la presente sezione sulla “Risoluzione dei problemi” prima di far riparare il televisore. È possibile che si sia in grado di risolvere agevolmente il problema autonomamente. Ad esempio, se la spina CA è...
  • Seite 277 Risoluzione dei problemi Altre considerazioni • Quando la funzione TIMER è attiva, il televisore viene automaticamente spento. Se il televisore si spegne improvvisamente, provare a premere il tasto # (Riposo) per riaccenderlo. Se il televisore viene ripristinato allo stato originale, il problema è stato risolto.
  • Seite 278: Specifiche Tecniche

    Specifiche tecniche Modello PD-42D30ES PD-35D30ES Elemento Sistemi di trasmissione CCIR B/G, I, D/K, L Sistemi del colore PAL, SECAM • I terminali EXT supportano anche il sistema NTSC 3.58/4.43 MHz. Canali e frequenze • E2-E12, E21-E69, S1-S41, X, Y, Z, Z+1, Z+2, ITALIA A-H, ITALIA H+1, ITALIA H+2, F2-F10, F21-F69, R1-R12, R21-R69 •...
  • Seite 279 Obrigado por ter adquirido este televisor a cores JVC. Para utilizar correctamente o seu novo televisor, leia atentamente este manual antes de começar. AVISO: PARA EVITAR INCÊNDIOS OU CHOQUES ELÉCTRICOS, NÃO EXPONHA ESTE APARELHO À CHUVA OU À HUMIDADE. AVISO Utilize sempre os cabos de alimentação fornecidos juntamente com o televisor e o receptor.
  • Seite 280 Queimar Uma característica dos Painéis de Visualização de Plasma (PDP) é que no caso da mesma imagem ser visualizada durante um longo período de tempo, a imagem fica parcialmente gravada no ecrã (queimada em fósforo). Evite a queimadura da seguinte forma. Não veja caracteres ou imagens estáticas durante longos períodos de tempo.
  • Seite 281 Defeitos de ponto Os PDP usam colecções de pixéis finos para visualizar imagens. Normalmente não há problemas com mais de 99,99% destes pixéis, mas compreenda que pode acontecer que um pequeno número de pixéis pode não iluminar ou ficar sempre iluminado. Não instale o televisor junto a equipamento electrónico susceptível a ondas electromagnéticas Pode provocar interferências em imagens, som, etc.
  • Seite 282 (multi-imagem)..........21 EDIT/MANUAL (Edição/Manual) ..... 36 Pôr a funcionar um VCR ou um leitor DVD da Operações adicionais do menu..39 marca JVC ............21 Utilizar a função ACI........39 Função de teletexto......22 Transferir dados para o videogravador ... 39 Operações básicas ..........22 Alterar a definição COUNTRY (país) ....
  • Seite 283 Cabo da coluna (para colunas frontais) × 2 Cabo da coluna (para subwoofer) × 1 Colunas frontais esquerda e Subwoofer Parafuso de montagem × 6 Pé de borracha para subwoofer × 4 Grampo do cabo × 3 direita (Colunas DD) (apenas para PD-35D30ES)
  • Seite 284: Instalar O Televisor

    (três de faça deslizar as colunas para trás. cada lado) até as cabeças saírem cerca de 3 mm. <PD-35D30ES> 1 Instale os parafusos de 2 Instale as colunas frontais na 3 Fixar as colunas frontais montagem das colunas na...
  • Seite 285: Instalação

    Instalar o televisor Preparar o subwoofer Coloque o suporte na vertical ou deite-o, retire o papel dos pés de borracha Subwoofer fornecidos e cole os pés nos quatro cantos da superfície a utilizar como base. Os pés de borracha impedem o deslizamento e a ressonância e também protegem o cabo da coluna.
  • Seite 286: Ligações

    Ligações Cuidado • Desligue todos os aparelhos (incluindo o televisor) antes de fazer qualquer ligação. Diagrama de ligação <PD-42D30ES> AC INPUT 110-240V Cabo fornecido com o televisor • Para mais informações sobre as ligações, consulte página 13. Televisor (parte traseira) Coluna frontal Coluna frontal direita...
  • Seite 287 Ligações <PD-35D30ES> AC INPUT 110-240V Cabo fornecido com o televisor • Para mais informações sobre as ligações, consulte página 13. Televisor Coluna frontal esquerda (parte traseira) Coluna frontal direita DISPLAY INPUT CONNECT TO SYSTEM CABLE DISPLAY INPUT CONNECT TO SYSTEM CABLE...
  • Seite 288: Ligar As Colunas Frontais E Subwoofer

    Ligações Ligar as colunas frontais e subwoofer Utilize os cabos das colunas fornecidos para ligar as colunas aos terminais das colunas existentes na parte traseira do televisor. Ligar o cabo da coluna ao terminal da coluna frontal Ligue os cabos das colunas frontais fornecidos. 1 Prima a alavanca do terminal de entrada da 2 Prima o núcleo do cabo no terminal e bloqueá- coluna com mola na direcção da seta...
  • Seite 289: Arrumar Os Cabos Das Colunas

    Prima o conector 2 até ficar bloqueado. <PD-42D30ES> <PD-35D30ES> Desligar o cabo do sistema Liberte o conector 1, desaparafusando os parafusos do lado direito e esquerdo e removendo-o da tomada. Liberte o conector 2, removendo-o da tomada enquanto prime os botões de libertação de ambos os lados.
  • Seite 290: Ligar A Antena E O Videogravador

    Ligações Ligar a antena e o videogravador Antena • Os cabos de ligação não são fornecidos. Parte traseira do • Para mais informações, consulte os manuais fornecidos Cabo coaxial de 75 ohm receptor com os dispositivos que deseja ligar. Se ligar um videogravador, siga A A A A → B B B B → C C C C . EXT- EXT- Se não ligar um videogravador, siga 1 1 1 1 .
  • Seite 291: Ligar O Cabo De Alimentação À Tomada Da Rede Ca

    Ligações Introduza a ficha Vca numa tomada correcta com ligação à Ligar o cabo de alimentação à tomada terra. da rede CA Insira as fichas CA dos cabos de alimentação do televisor e do receptor nas tomadas CA. Cuidado • Utilize apenas a fonte de alimentação especificada (110 –...
  • Seite 292: Definições Iniciais

    AUTO PROGRAM Depois de um pequeno intervalo, o indicador luminoso (programação automática). de activação do televisor pisca verde e o logótipo da JVC Existem dois menus de selecção do COUNTRY (país). aparece. Se premir o botão amarelo, altera o menu COUNTRY •...
  • Seite 293: Funções T-V Link

    Um “T-V LINK videogravador compatível” significa um sintonizador do videogravador, embora esse canal possa videogravador da JVC com o logótipo de T-V LINK ou um ser visto no televisor. No entanto, alguns videogravador com um dos seguintes logótipos. No entanto, videogravadores poderão gravar um canal através da...
  • Seite 294: Botões E Funções Do Televisor

    Prima o botão A A A A ou os botões P p p para ligar o televisor a partir do modo de espera <PD-35D30ES> • Verifique se as fichas CA dos cabos de alimentação do televisor e do receptor estão ligados às tomadas CA.
  • Seite 295: Botões E Funções Do Telecomando

    Botões e funções do telecomando 1 Botão de desactivação do som 2 Botões numéricos 3 Botão c 4 Botão de som 3 5 Botão de informação 6 Botão b 7 Botões 5 8 Botão de espera 9 Botões coloridos 0 Botão a - Botões 6 = Botão de controlo VCR/DVD/Teletexto ~ Interruptor VCR P DVD...
  • Seite 296: Ajuste Do Volume

    Botões e funções do telecomando Utilize a PR LIST (lista PR): Utilize a PR LIST (lista PR): 1 Prima o botão h h (Informação) para ver PR LIST 1 Prima o botão h h (Informação) para ver PR LIST (lista PR) (lista PR) Se premir o botão h (Informação) a visualização é...
  • Seite 297: Função Zoom

    Botões e funções do telecomando Selecção do modo de ZOOM Função ZOOM 1 Prima o botão c c para ver o menu ZOOM É possível alterar o tamanho do ecrã de acordo com o alongamento da imagem. Seleccione o melhor a partir dos ZOOM seguintes modos de ZOOM.
  • Seite 298: Ver A Hora Actual

    Botões e funções do telecomando Ver a hora actual Utilizar a função PIP Pode ver a hora actual no ecrã. Pode ver duas imagens (Imagem principal e a sub-imagem). Pode ver dois programas de televisão diferentes em Prima o botão h h (Informação) para ver a hora simultâneo ou um programa de televisão e um programa de actual...
  • Seite 299: Utilizar A Função Multi-Picture (Multi-Imagem)

    Pode pôr a funcionar um videogravador ou um leitor DVD • A função BLUE BACK (fundo azul) não funciona no da marca JVC. Se premir o botão com o mesmo aspecto que modo de duas imagens ou no modo de imagem em o botão original do telecomando de um dispositivo, faz a...
  • Seite 300: Função De Teletexto

    Função de teletexto Quando visualizar um programa de teletexto, o texto move-se periodicamente para a parte inferior ou superior do ecrã. Este procedimento impede a MENU queimadura do ecrã e não é uma avaria. Utilizar o modo de lista Pode guardar os números das suas páginas favoritas de teletexto na memória e chamá-las rapidamente com os botões coloridos.
  • Seite 301: Subpágina

    Função de teletexto Subpágina Cancelar Algumas páginas do teletexto incluem subpáginas que É possível procurar uma página do teletexto enquanto vê aparecem automaticamente. televisão. Pode reter qualquer subpágina ou vê-la em qualquer altura. 1 Prima o botão numérico para introduzir o 1 Prima o botão D D (Subpágina) para utilizar a número de uma página, ou prima um botão...
  • Seite 302: Utilizar O Menu Tv

    Utilizar o menu TV Este televisor possui várias funções que pode utilizar 5 Prima o botão a a para completar a definição através dos menus. Para utilizar completamente todas as O menu desaparece. funções do televisor, tem de compreender bem as técnicas •...
  • Seite 303: Picture Setting (Definição Da Imagem)

    PICTURE SETTING (definição da imagem) Para mais informações sobre a visualização do menu, COLOUR TEMP. (temp. cor) consulte “Utilizar o menu TV” (ver página 24). Pode seleccionar um dos três modos COLOUR TEMP. (temp. cor) (três tons de branco) para ajustar o equilíbrio do PICTURE SETTING branco da imagem.
  • Seite 304: Picture Features (Características Da Imagem)

    PICTURE FEATURES (características da imagem) Para mais informações sobre a visualização do menu, Super DigiPure consulte “Utilizar o menu TV” (ver página 24). A função Super DigiPure utiliza a mais recente tecnologia PICTURE FEATURES digital para proporcionar uma imagem de aspecto natural. A função Super DigiPure inclui as seguintes duas funções.
  • Seite 305: Colour System (Sistema De Cor)

    PICTURE FEATURES (características da imagem) COLOUR SYSTEM (sistema de cor) MOVIE THEATRE (cinema) O sistema de cor é escolhido automaticamente. Contudo, A função MOVIE THEATRE (cinema) mostra uma caso a imagem não seja nítida ou a cor não apareça, imagem de um filme mais suave e naturalmente no ecrã. seleccione manualmente o sistema de cor.
  • Seite 306: Pip

    PICTURE FEATURES (características da imagem) PIP POSITION (posição PIP): Pode escolher uma de quatro posições para a sub-imagem. 1 Prima os botões 6 6 para seleccionar PIP. Em seguida, prima o botão a Aparece o menu PIP. PIP POSITION MULTI-PICTURE BACK D0061-EN 2 Prima os botões 6...
  • Seite 307: Sound Setting (Definição Do Som)

    SOUND SETTING (definição do som) Para mais informações sobre a visualização do menu, SPEAKER (coluna) consulte “Utilizar o menu TV” (ver página 24). Pode desligar o som das colunas do televisor, mas apenas o SOUND SETTING deve fazer se tiver um sistema de áudio ligado ao televisor STEREO/ para substituir das colunas do televisor.
  • Seite 308 SOUND SETTING (definição do som) HEADPHONE Tem que utilizar o menu HEADPHONE para regular o volume dos auscultadores. Pode também utilizar o menu HEADPHONE para definir se o som é emitido ou não pelas colunas do televisor quando utilizar os auscultadores e efectuar as definições do som emitido pelos auscultadores.
  • Seite 309: Ext Setting (Configuração Ext)

    EXT SETTING (configuração EXT) Para mais informações sobre a visualização do menu, ID LIST consulte “Utilizar o menu TV” (ver página 24). Pode ter um nome correspondentes aos dispositivos ligados EXT SETTING a cada terminal EXT. Se atribuir um nome a um terminal EXT-1 EXT, faz com que o número do terminal EXT apareça no DUBBING...
  • Seite 310 EXT SETTING (configuração EXT) 2 Prima os botões 6 6 para seleccionar um terminal EXT ou TV Em seguida, prima o botão a A seta no menu representa um fluxo de sinal. O lado esquerdo da seta indica uma saída da origem de sinal a partir do terminal EXT-2.
  • Seite 311: Features (Características)

    FEATURES (características) Para mais informações sobre a visualização do menu, CHILD LOCK (interdição de acesso a consulte “Utilizar o menu TV” (ver página 24). programas) FEATURES Quando pretende que os seus filhos não vejam um canal de SLEEP TIMER TV, pode utilizar a função CHILD LOCK (interdição de BLUE BACK CHILD LOCK acesso a programas) para bloquear esse canal de TV.
  • Seite 312: Decoder (Descodificador) (Ext-2)

    FEATURES (características) 5 Prima o botão azul e active a função CHILD DECODER (descodificador) (EXT-2) LOCK (interdição de acesso a programas). Em seguida, prima o botão a Só pode utilizar esta função quando estiver a ligar um descodificador com um videogravador compatível com T-V n (CHILD LOCK (interdição de acesso a programas)) LINK ligado ao terminal EXT-2.
  • Seite 313: Language (Idioma)

    INSTALL (instalação) Para mais informações sobre a visualização do menu, • Pode proceder à edição dos números de programa consulte “Utilizar o menu TV” (ver página 24). (PR) com a função EDIT/MANUAL (Edição/ Manual). Para mais informações, consulte “EDIT/ MANUAL (Edição/Manual)” na página 36. INSTALL •...
  • Seite 314: Install (Instalação)

    INSTALL (instalação) DELETE (apagar): EDIT/MANUAL (Edição/Manual) Esta função elimina um canal de TV desnecessário. MANUAL: As funções EDIT/MANUAL (Edição/Manual) estão Esta função regista manualmente um novo canal de TV divididas em dois tipos: edição dos números de programa num número de programa (PR). actuais (PR) (funções EDIT (edição)) e registo manual de um canal de TV que deseja ver no número de programa 3 Prima o botão a...
  • Seite 315 INSTALL (instalação) INSERT (inserir) Preparação: 1 Prima os botões 6 6 para seleccionar um canal • É necessário um número CH/CC único deste televisor e de TV que corresponda ao número do canal de um canal de TV. Sempre que premir os botões 6, o número do Descubra o número CH/CC correspondente a partir da programa (PR) é...
  • Seite 316 INSTALL (instalação) DELETE (apagar) 5 Prima repetidamente o botão verde ou vermelho até que apareça o canal de TV que 1 Prima os botões 6 6 para seleccionar um canal deseja de TV Sempre que premir os botões 6, o número do Se a recepção do canal de TV for fraca: programa (PR) é...
  • Seite 317: Operações Adicionais Do Menu

    Operações adicionais do menu Utilizar a função ACI Transferir dados para o videogravador Este televisor possui uma função ACI para a descodificação Pode transmitir os dados dos números de programa (PR) dos dados ACI (Instalação Automática de Canais). mais recentes para o videogravador com a função T-V A utilização da função ACI possibilita o registo adequado e LINK.
  • Seite 318: Alterar A Definição Country (País)

    Operações adicionais do menu Alterar a definição COUNTRY (país) Utilizar a função DECODER (descodificador) (EXT-2) Depois da função AUTO PROGRAM (programação automática) ser concluída, pode mudar o país que já definiu Quando estiver a ligar um descodificador com um utilizando a função AUTO PROGRAM (programação videogravador compatível com T-V LINK ligado ao terminal automática).
  • Seite 319: Preparação Adicional

    Preparação adicional Ligação de aparelhos externos Ligue os dispositivos ao televisor, prestando atenção aos 1 VCR (sinal composto) seguintes diagramas de ligação. 2 VCR (sinal composto/sinal S-VIDEO) 3 VCR compatível com T-V LINK (sinal composto/sinal Antes de ligar qualquer aparelho: S-VIDEO) •...
  • Seite 320: Ligação Dos Auscultadores

    Preparação adicional Aparelhos que podem produzir o sinal Ligação de colunas/amplificador S-VIDEO (sinal Y/C) tal como de um Consulte o diagrama de ligação do equipamento de áudio e, em seguida, ligue o equipamento de áudio pretendido ao videogravador S-VHS televisor. Ligue o aparelho a um terminal EXT excepto ao terminal Pode utilizar colunas externas na frente para ouvir o som do EXT-1.
  • Seite 321: Números De Ch/Cc

    Números de CH/CC Quando utilizar a função INSERT (inserir) na página 37, procure o número CH/CC correspondente ao número do canal de TV desta tabela. Canal Canal Canal Canal CH 02 / CH 202 E2, R1 CH 40 / CH 240 E40, R40 CC 01 / CC 201 CC 31 / CC 231...
  • Seite 322: Resolução De Problemas

    Resolução de problemas Se surgir um problema enquanto estiver a utilizar o televisor, leia com atenção esta secção de “Resolução de problemas” antes de solicitar a reparação do televisor. Poderá conseguir resolver o problema facilmente por si próprio. Por exemplo, se a ficha CA estiver desligada da tomada CA, ou se a antena apresentar problemas, poderá...
  • Seite 323 Resolução de problemas Outros problemas • Quando a função SLEEP TIMER (temporizador “sleep”) funcionar, o televisor é desligado automaticamente. Se o televisor se desligar repentinamente, tente premir o botão # (em espera) para voltar a ligar o televisor. Nesta altura, se o televisor retomar um estado normal, não existe nenhum problema.
  • Seite 324: Especificações

    Especificações Modelo PD-42D30ES PD-35D30ES Item Sistemas de emissão CCIR B/G, I, D/K, L Sistemas de cor PAL, SECAM • Os terminais EXT também suportam o sistema NTSC 3.58/4.43 MHz. Canais e frequências • E2-E12, E21-E69, S1-S41, X, Y, Z, Z+1, Z+2, ITÁLIA A-H, ITÁLIA H+1, ITÁLIA H+2, F2-F10, F21-F69, R1-R12, R21-R69 •...
  • Seite 328 LCT1375-001A-U © 2003 VICTOR COMPANY OF JAPAN, LIMITED 0203-T-CR-JMUK...

Diese Anleitung auch für:

Pd-42d30es

Inhaltsverzeichnis