Herunterladen Inhalt Inhalt Diese Seite drucken
DETOMASO Firenze Bedienungsanleitung
Vorschau ausblenden Andere Handbücher für Firenze:

Werbung

Verfügbare Sprachen
  • DE

Verfügbare Sprachen

  • DEUTSCH, seite 1
DETOMASO
FIRENZE

Werbung

Inhaltsverzeichnis
loading

Inhaltszusammenfassung für DETOMASO Firenze

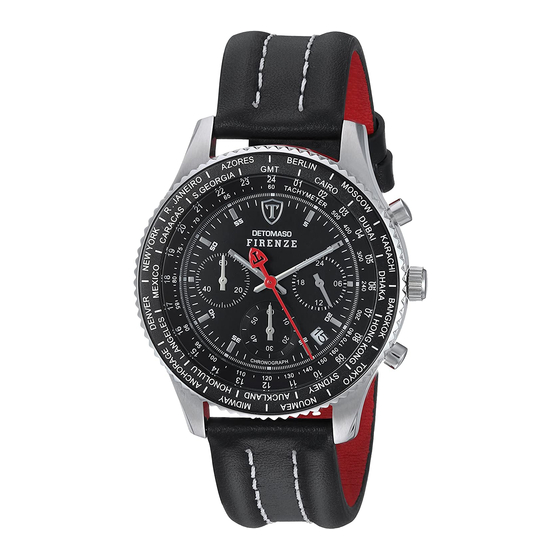
  • Seite 1 DETOMASO FIRENZE...
  • Seite 3: Inhaltsverzeichnis

    Inhaltsverzeichnis Vorwort .............. 4 Wasserdichtigkeit ..........5 Pfl egehinweise ............. 6 Bedienungsanleitung Multifunktionsuhr ....7 Bedienungsanleitung Chronograph ......9 Eichen des Chronographen ........11 Garantiebedingungen .......... 12...
  • Seite 4: Vorwort

    Vorwort Gratulation zum Kauf Ihrer neuen DETOMASO-Uhr. Sie sind jetzt Eigentümer eines Zeitgebers, der sich durch höchste Präzisi- on und innovativem Design auszeichnet. Für jede Uhr gilt, dass wir alle wichtigen Ersatzteile für viele Jahre bereit- halten und damit garantieren, dass jede Uhr über einen langen Zeitraum repariert werden kann.
  • Seite 5: Wasserdichtigkeit

    Wasserdichtigkeit Die Wasserdichtigkeit Ihrer DETOMASO–Uhr ist mit 10 ATM getestet. Das heißt, Ihre Uhr besteht unbeschadet Händewaschen, Baden, Regen- spritzer, Schwimmen und Duschen. Sie ist nicht geeignet zum Tauchen. Wasserdichtigkeit ist keine bleibende Eigenschaft; sie sollte jährlich und insbesondere vor besonderen Belastungen überprüft werden, da die einge- bauten Dichtungselemente in ihrer Funktion und im täglichen Gebrauch...
  • Seite 6: Pflegehinweise

    Pflegehinweise Ihre Uhr ist ein Meisterwerk der Elektronik und Feinmechanik von hoher Präzision. Sie soll Ihnen lange die richtige Zeit anzeigen. Schützen Sie Ihre Uhr vor Stößen, Magnetfeldern, starker Hitze, Wasser und Chemikalien, sowie vor mechanischem Abrieb. Zum Schlafen sollten Uhren grundsätz- lich abgelegt werden.
  • Seite 7: Bedienungsanleitung Multifunktionsuhr

    Bedienungsanleitung Multifunktionsuhr Einstellung des Wochentags 1. Ziehen Sie die Krone heraus, in die 1te Position. 2. Drehen Sie die Krone im Uhrzeigersinn, bis der Wochentag eingestellt ist. 3. Drücken Sie die Krone in die Normal-Position zurück, wenn der Wo- chentag eingestellt ist. Einstellung der Uhrzeit 1.
  • Seite 8 Minutenzeiger Knopf (A) Stundenzeiger Normal-Position 1te Position Wochentag Sekundenzeiger Datum 24 Stunden/ Knopf (B) 2te Zeitzone Schnelleinstellung des Datums 1. Lassen Sie die Krone in der Normal-Position. 2. Mit jedem Druck auf Knopf A läuft der Wochentagzeiger um einen Tag weiter.
  • Seite 9: Bedienungsanleitung Chronograph

    Bedienungsanleitung Chrononograph Einstellung des Datums 1. Ziehen Sie die Krone heraus, in die 1te Position. 2. Drehen Sie die Krone in Uhrzeigerrichtung bis das Datum eingestellt ist. 3. Drücken Sie die Krone in die Normal-Position zurück. Achtung: Datum nicht zwischen 21.00 Uhr und 1.00 Uhr einstellen. Einstellung der Uhrzeit 1.
  • Seite 10 Sekundenzeiger Minutenzeiger Knopf (A) Stundenzeiger Normal-Position 1te Position 2te Position Minutenzeiger 24-Stunden- Chronograph Anzeiger Sekundenzeiger Knopf (B) Chronograph Datum Messen von Zwischen- und Gesamtzeit 1. Drücken Sie Knopf A um den Chronographen zu starten. 2. Drücken Sie Knopf B um eine Zwischenzeit zu nehmen. 3.
  • Seite 11: Eichen Des Chronographen

    Eichen des Chronographen Sie sollten diesen Vorgang ausführen, wenn der Sekundenzeiger des Chronographen nicht auf die Nullposition zurückkehrt, nachdem der Chro- nograph zurückgestellt bzw. die Batterie ausgetauscht wurde. 1. Ziehen Sie die Krone auf Pos. 2 heraus. 2. Drücken Sie Knopf A oder B um eine Eichung (Rücksetzung) des Sekunden- und Minutenzeigers der Stoppuhr durchzuführen.
  • Seite 12: Monate Garantie

    24 Monate Garantie Wir garantieren, dass Ihre Uhr aus qualitativ hochwertigen Materialien gefertigt wurde. Aufwändige Qualitätskontrollen garantieren, dass die Uhr vor Verlassen der Fabrikation geprüft wurde. Trotzdem können Material- fehler leider nicht immer ausgeschlossen werden. Sollte Ihre neue Uhr nicht fehlerfrei sein, wenden Sie sich bitte innerhalb der Garantiefrist an unseren Kundendienst.
  • Seite 14 Contents Foreword ............15 Waterproof properties .........16 Instructions for care ..........17 Operating instructions for the multifunction watch ..18 Operating instructions for the chronograph .....20 Calibration (reset) of the Chronograph ....22 24 months warranty ..........23...
  • Seite 15: Foreword

    Foreword Congratulations on the purchase of your new DETOMASO watch. You are now the new owner of a high precision time keeper characterised by its innovative design. We keep a long term stock of the most important spare parts for all our watches, guaranteeing repair over a period of many years.
  • Seite 16: Waterproof Properties

    Waterproof properties The water resistance of your DETOMASO watch has been tested to be 10 ATM. This means that it is splashproof and that you may wash your hands or take a bath or a shower with it. You may also swim with it but it is not suitable for diving.
  • Seite 17: Instructions For Care

    Instructions for care Your watch is a high precision electronic and mechanical masterpiece and should serve you well for a long time. Please keep your watch away from magnetic fields, heat, water and chemicals. Do not submit it to sudden impact or abrasion. Watches should not be worn in bed.
  • Seite 18: Operating Instructions For The Multifunction Watch

    Operating instructions for the multifunction watch Setting the weekday 1. Pull out the crown into the 1st position 2. Set the weekday by turning the crown clockwise 3. Push back the crown into the normal position after the weekday has been adjusted.
  • Seite 19 Minute hand Button (A) Hour hand Normal position 1st Position Weekday Second hand Date Button (B) 24h/ 2nd time zone Quick setting the date 1. Leave the crown in the normal position. 2. With each push of button A the display of the weekday will advance 1 day.
  • Seite 20: Operating Instructions For The Chronograph

    Operating instructions for the chronograph Setting the date Caution: Do not set the date between 9 pm and 1 am. 1. Pull out the crown into the 1st position. 2. Set the date by turning the crown clockwise. 3. Push back the crown into the normal position after the date has been adjusted.
  • Seite 21 Minute hand Second hand Button (A) Hour hand Normal position 1st Position 2nd Position Minute hand of 24h display the chronograph Second hand of Button (B) the chronograph Date Taking split time and total time 1. Push button A to start the Chrono (stop watch) 2.
  • Seite 22: Calibration (Reset) Of The Chronograph

    Calibration (reset) of the Chronograph This procedure should only be performed if the second hand of the chro- nograph does not return to the zero position after the chronograph has been reset or after battery change. 1. Pull out the crown to position 2. 2.
  • Seite 23: Months Warranty

    24 month warranty We guarantee that your watch is made of high quality materials. Extensive quality controls guarantee that the watch is checked before being re- leased by the manufacturer. Nevertheless, material faults cannot always be avoided. Should your new watch show any faults, please consult our customer service department within the valid warranty period.
  • Seite 24 Table des matières Préambule ............25 Etanchéité ............26 Consignes d‘entretien .......... 27 Notice d’utilisation montre multifonction ....28 Notice d’utilisation Chronographe ......30 Réinitialisation du chronomètre (Chronographe) ..32 Garantie 24 mois ..........33...
  • Seite 25: Préambule

    Préambule Nous vous félicitons pour l‘achat de votre nouvelle montre DETOMASO. Vous êtes désormais propriétaire d‘une montre qui se distingue par son extrême précision et son design innovant. Pour chaque montre, nous mettons à disposition toutes les pièces de rechange pendant plusieurs années et nous garantissons leur réparation pendant une longue période.
  • Seite 26: Etanchéité

    Etanchéité 10 ATM L‘étanchéité de votre montre DETOMASO est testée avec 10 ATM. Cela signifie que votre montre peut être utilisée sans préjudice lors du lavage des mains ou lorsqu’il pleut. Toutefois, elle n‘est pas appropriée à la natati- on, à la douche, au bain ou à la plongée.
  • Seite 27: Consignes D'entretien

    Consignes d‘entretien Votre montre est un chef-d’œuvre d‘électronique et de mécanique fine d‘une grande précision. Elle doit vous donner l‘heure pendant longtemps. Protégez-la des coups, des champs magnétiques, des fortes chaleurs, de l‘eau, des produits chimiques et de l‘usure mécanique. Vous devez en principe retirer votre montre pour dormir.
  • Seite 28: Notice D'utilisation Montre Multifonction

    Notice d’utilisation montre multifonction Réglage du jour de la semaine 1. Tirez la couronne en 2ème position. 2. Tournez la couronne dans le sens des aiguilles d’une montre jusqu’à ce que le jour de la semaine soit correct. 3. Renfoncez la couronne en position normale Réglage de l’heure 1.
  • Seite 29 Aiguille des minutes Bouton (A) Aiguille des heures Position normale 2ème position Jour de la semaine Aiguille des secondes Date Affi chage 24h/ Bouton (B) 2ème fuseau horaire Correction rapide de la date 1. Laissez la couronne en position normale. 2.
  • Seite 30: Notice D'utilisation Chronographe

    Notice d’utilisation Chronographe Réglage de la date 1. Tirez la couronne en 1ère position.Tournez la couronne dans le sens des aiguilles d’une montre jusqu’à ce que la date soit correcte. 2. Renfoncez la couronne en position normale. *ne pas modifier la date entre 21h00 et 0h30. Réglage de l’heure 1.
  • Seite 31 Aiguille des Aiguille des minutes secondes Bouton (A) Aiguille des heures Position normale 1ère position Aiguille des minutes du 2ème position chronomètre Affi chage 24h Aiguille des secondes du Bouton (B) chronomètre Date Mesure des temps intermédiaires et temps total 1.
  • Seite 32: Réinitialisation Du Chronomètre (Chronographe)

    Réinitialisation du chronomètre (Chronographe) Cette opération doit être effectuée lorsque l’aiguille des secondes du chronographe ne revient pas à la position zéro après la remise à zéro du chronomètre, ou bien lorsque la pile a été remplacée. 1. Tirez la couronne en 2ème position. 2.
  • Seite 33: Garantie 24 Mois

    Garantie 24 mois Nous garantissons que votre montre a été fabriquée à partir de matéri- aux de grande qualité. Des contrôles de qualité importants garantissent que votre montre a été contrôlée avant de quitter l‘usine. Malgré cela, il n‘est malheureusement pas possible de toujours exclure des vices de fabrication.
  • Seite 34 Índice Prólogo ............35 Resistencia al agua ..........36 Instrucciones de mantenimiento ......37 Manual de instrucciones del reloj multifuncional ..38 Manual de instrucciones del cronógrafo ....40 Calibrar (el desplazamiento) del cronómetro (cronógrafo) ............42 24 meses de garantía ......
  • Seite 35: Prólogo

    Ahora es propietario de un reloj que se caracteriza por su gran precisión y por su diseño innovador. DETOMASO almacena durante muchos años las piezas de recambio más importantes de todos los relojes, de forma que cualquier reloj puede ser arreglado aunque haya pasado mucho tiempo.
  • Seite 36: Resistencia Al Agua

    ISO 2281 regula los criterios que deben cumplir los relojes de nueva const- rucción. La capacidad de resistencia al agua se expresa en ATM y aparece indicada en la base de la carcasa del reloj. Los relojes DETOMASO tiene una Resistencia al agua de 10 ATM.
  • Seite 37: Instrucciones De Mantenimiento

    Instrucciones de mantenimiento El reloj que ha adquirido es una obra maestra de la electrónica y la mecánica de gran precisión que puede indicarle la hora exacta durante mucho tiempo. Protéjalo pues de los golpes, los campos magnéticos, las altas temperaturas, el agua y productos químicos, así como del desgaste causado por el roce.
  • Seite 38: Manual De Instrucciones Del Reloj Multifuncional

    Manual de instrucciones del reloj multifuncional Configuración de los días de la semana 1. Tiré de la corona hacia fuera, en la 2da posición. 2. Gire la corona en la direcció del sentido de las agujas hasta que en- cuentre el día de la semana actual. 3.
  • Seite 39 La aguja de los minutos La aguja de Botón (A) las horas Posición normal Día de la 2da posición semana La aguja del secundero Fecha 24 Horas/ Botón (B) 2da Zona horaria Rápida confi guración de la fecha 1. Deje la corona en la posición normal. 2.
  • Seite 40: Manual De Instrucciones Del Cronógrafo

    Manual de instrucciones del cronógrafo Configuración de la fecha 1. Tiré de la corona hacia fuera, en la 1ra posición. Gire la corona en la dirección del sentido de las agujas hasta que encuentre la fecha actual. 2. Presione la corona para que vuelva a la posición normal. *No configuré...
  • Seite 41 La aguja de los La aguja del minutos segundero Botón (A) La aguja de las horas Posición normal 1era posición 2da posición La aguja de los minutos Indicador- 24- horas Cronómetro Botón (B) La aguja del Fecha segundero Cronómetro Medir intervalos y tiempo completo 1.
  • Seite 42: Calibrar (El Desplazamiento) Del Cronómetro (Cronógrafo)

    Calibrar (el desplazamiento) del cronómetro (cronógrafo) Usted debe de hacer este proceso cuando el secundero del cronógrafo no vuelva a la posición 0, por ejemplo, después de que usted haya cambiado una batería. 1. Tiré de la corona en la posición 2 2.
  • Seite 43: 24 Meses De Garantía

    24 meses de garantía Le garantizamos que se reloj ha sido fabricado con materiales de excelen- te calidad. Los exhaustivos controles de calidad efectuados, garantizan asimismo, que el reloj ha salido de la fábrica en perfecto estado. Aun así, desgraciadamente no se pueden descartar algunos fallos en los materiales.
  • Seite 44 Indice Premessa ............45 Impermeabilità all’acqua ........46 Istruzioni per la cura .......... 47 Istruzione per l’uso l’orologio multifunzionale ... 48 Istruzione per l’uso del cronografo ......50 Calibrare (resettare) il cronografo ......52 Garanzia di 24 mesi ..........53...
  • Seite 45: Premessa

    Premessa Congratulazioni per l‘acquisto del vostro nuovo orologio DETOMASO. Siete ora proprietari di un cronografo di altissima precisione e design innovativo. Per ogni orologio teniamo a disposizione tutti i pezzi di ricambio importanti per molti anni, garantendo così che ogni orologio possa essere riparato per un lungo arco di tempo.
  • Seite 46: Impermeabilità All'acqua

    Impermeabilità all‘acqua 10 ATM L‘impermeabilità del suo orologio DETOMASO e testata con 10 ATM. Vale a dire che il Suo orologio esiste nonostante lavandosi mani, farsi il bagno, gocci di pioggia , nuoto e la doccia. Non è adatto per tuffarsi L‘impermeabilità...
  • Seite 47: Istruzioni Per La Cura

    Istruzioni per la cura Il vostro orologio è un capolavoro di elettronica e meccanica di precisione di alta qualità. Vi indicherà l‘ora per molto tempo. Proteggete il vostro orologio da urti, campi magnetici, forte calore, acqua e sostanze chimi- che, nonché da sfregamento meccanico. In genere gli orologi dovrebbero essere tolti prima di andare a dormire.
  • Seite 48: Istruzione Per L'uso L'orologio Multifunzionale

    Istruzione per l’uso l’orologio multifunzionale Impostazione del giorno della settimana 1. Tira la corona nella seconda posizione. 2. Per cambiare il giorno della settimana si deve girare la corona in senso orario. 3. Premete la corona nella posizione normale, quando avete impostato il giorno della settimana.
  • Seite 49 Lancetta dei minuti Lancetta Pulsante (A) delle ore Posizione normale Giorno delle Seconda posi- settimana zione Lancetta dei secondi Indicazione della data Lancetta Pulsante (B) 24 ore Impostazione del secondo fuso orario risp. Indicazione 24 ore. 1. Lascia la corona nella posizione normale. 2.
  • Seite 50: Istruzione Per L'uso Del Cronografo

    Istruzione per l’uso del cronografo Impostazione della data 1. Tira la corona nella prima posizione. 2. Per cambiare la data si deve girare la corona in senso orario. 3. Premete la corona nella posizione normale, quando avete impostato la data. *Non impostare la data fra le 21.00 e le 1.00.
  • Seite 51 Lancetta dei secondi Lancetta dei minuti Pulsante (A) Lancetta delle ore Posizione normale 1te Position Seconda posizione Lancetta dei minu- Lancetta ti del cronografo 24 ore Pulsante (B) Lancetta dei secondi Data de cronografo Misurare l’intervallo e il tempo totale 1.
  • Seite 52: Calibrare (Resettare) Il Cronografo

    Calibrare (resettare) il cronografo È consigliabile eseguire questa procedura, quando la lancetta dei secondi del cronografo non si azzera dopo di aver cambiato la batteria risp. il cronografo e stato resettato. 1. Tirate la corona sulla seconda posizione. 2. Premete il pulsante B per calibrare(resettare)la lancetta dei secondi e dei minuti del cronografo.
  • Seite 53: Garanzia Di 24 Mesi

    Garanzia di 24 mesi Garantiamo che il vostro orologio è prodotto con materiali di alta qualità. Controlli di qualità impegnativi garantiscono che l‘orologio è stato controlla- to prima di lasciare lo stabilimento. Ciò nonostante, sfortunatamente, non sempre si possono escludere difetti di materiale. Nel caso in cui il vostro orologio non fosse senza difetti, vi preghiamo di rivolgervi al nostro servizio clienti entro il termine di garanzia.
  • Seite 54 RoHS WEEE-Reg-No. DE81400428 Gebrauchte Elektro- und Elektronikgeräte sowie Batterien dürfen gemäß europäischer Vorgaben [1] nicht zum umsor- tierten Siedlungsabfall gegeben werden, sondern müssen getrennt erfasst werden. Das Symbol der Abfalltonne auf Rädern weist auf die Notwendigkeit der getrennten Sammlung hin. Helfen auch Sie mit beim Umweltschutz. Sorgen Sie dafür, dass dieses Gerät, wenn Sie es nicht mehr weiter nutzen wollen, sowie Batterien in die hierfür vorgesehenen Systeme der Getrenntsammlung gegeben wird.
  • Seite 56 DETOMASO Service Center MAX Trader GmbH Wilhelm-Beckmann-Str. 19 D-45307 Essen Germany info@maxtrader.de www.facebook.com/DetomasoWatches...

Inhaltsverzeichnis