Herunterladen Inhalt Inhalt Diese Seite drucken
Inhaltsverzeichnis

Werbung

Verfügbare Sprachen

Verfügbare Sprachen

Betriebsanleitung Kompaktwaage
Operating instruction Compact balance
Mode d'emploi Balance compacte
KERN FKB_A
Version 1.5
04/2016
KERN & Sohn GmbH
Ziegelei 1
D-72336 Balingen
E-Mail: info@kern-sohn.com
Tel: +49-[0]7433- 9933-0
Fax: +49-[0]7433-9933-149
Internet: www.kern-sohn.com
FKB_A-BA-def-1615

Werbung

Inhaltsverzeichnis
loading

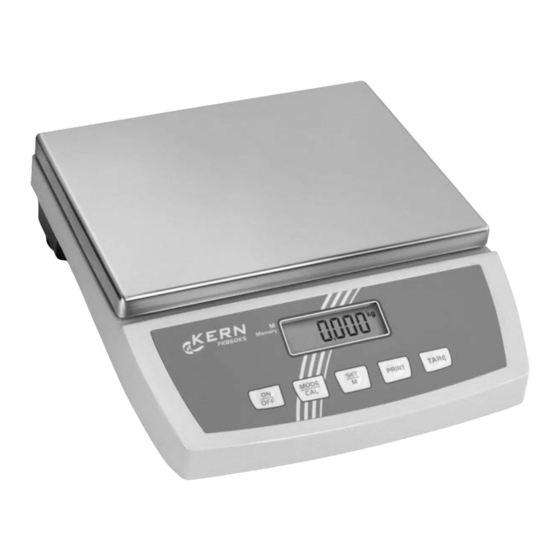
Inhaltszusammenfassung für KERN FKB_A-BA-def-1615

  • Seite 1 KERN & Sohn GmbH Ziegelei 1 Tel: +49-[0]7433- 9933-0 D-72336 Balingen Fax: +49-[0]7433-9933-149 E-Mail: info@kern-sohn.com Internet: www.kern-sohn.com Betriebsanleitung Kompaktwaage Operating instruction Compact balance Mode d’emploi Balance compacte KERN FKB_A Version 1.5 04/2016 FKB_A-BA-def-1615...
  • Seite 2 Vous trouverez d’autres versions de langue online sous www.kern-sohn.com/manuals Further language versions you will find online under www.kern-sohn.com/manuals A használati utasítás egyéb nyelveken a www.kern-sohn.com/manuals címről tölthető le Trovate altre versioni di lingue online inwww.kern-sohn.com/manuals Ytterligere språkversjoner finner du online under www.kern-sohn.com/manuals Bijkomende taalversies vindt u online op www.kern-sohn.com/manuals...
  • Seite 3: Inhaltsverzeichnis

    KERN FKB_A Version 1.5 04/2016 Betriebsanleitung Kompaktwaage Inhaltsverzeichnis Technische Daten ..................4 Konformitätserklärung .................. 6 Grundlegende Hinweise (Allgemeines) ............7 Bestimmungsgemäße Verwendung ..................7 Sachwidrige Verwendung ......................7 Gewährleistung ......................... 7 Prüfmittelüberwachung ......................7 Grundlegende Sicherheitshinweise ............. 8 Hinweise in der Betriebsanleitung beachten ................. 8 Ausbildung des Personals .......................
  • Seite 4 Basisbetrieb ....................14 Einschalten ............................14 Ausschalten ............................14 Wägen ..............................14 Tarieren ..............................14 PRE-TARE-Funktion ..........................15 Plus/Minus-Wägungen ........................16 Stückzählen ............................16 Netto-Total-Wägungen ........................17 Prozent-bestimmung ........................... 18 Menü ......................19 Navigation im Menü........................ 19 Menü-Übersicht ........................22 Beschreibung einzelner Menüpunkte ...................
  • Seite 5: Technische Daten

    Technische Daten KERN FKB 8K0.1A FKB 15K0.5A FKB 15K1A Ablesbarkeit (d) 0,1 g 0,5 g Wägebereich (Max) (d) 8 kg 15 kg 15 kg Tarierbereich (subtraktiv) 8 kg 15 kg 15 kg Reproduzierbarkeit 0,1 g 0,5 g Linearität 0,3 g 1,5 g Mindeststückgewicht bei...
  • Seite 6 KERN FKB 30K1A FKB 65K1A Ablesbarkeit (d) Wägebereich (Max) (d) 30 kg 65 kg Tarierbereich (subtraktiv) 30 kg 65 kg Reproduzierbarkeit Linearität Mindeststückgewicht bei Stückzählung Anwärmzeit 2 Stunden 2 Stunden Referenzstückzahlen bei 5, 10, 20, 25, 50 Stückzählung Wägeeinheiten Details „Wägeeinheiten“ siehe Kap. 9.3 Empfohlenes Justiergewicht, nicht beigegeben (Klasse).
  • Seite 7: Konformitätserklärung

    Konformitätserklärung Die aktuelle EG/EU-Konformitätserklärung finden Sie online unter: www.kern-sohn.com/ce FKB_A-BA-d-1615...
  • Seite 8: Grundlegende Hinweise (Allgemeines)

    Art und den Umfang dieser Prüfung zu definieren. Informationen bezüglich der Prüfmittelüberwachung von Waagen sowie die hierfür notwendigen Prüfgewichte sind auf der KERN- Homepage (www.kern-sohn.com) verfügbar. In seinem akkredi- tiertem DKD- Kalibrierlaboratorium können bei KERN schnell und kostengünstig Prüfgewichte und Waagen kalibriert werden (Rückführung auf das nationale Normal).
  • Seite 9: Grundlegende Sicherheitshinweise

    4.1 Hinweise in der Betriebsanleitung beachten Lesen Sie diese Betriebsanleitung vor der Aufstellung und Inbetriebnahme sorgfältig durch, selbst dann, wenn Sie bereits über Erfahrungen mit KERN-Waagen verfügen. 4.2 Ausbildung des Personals Das Gerät darf nur von geschulten Mitarbeitern bedient und gepflegt werden 5 Transport und Lagerung 5.1 Kontrolle bei Übernahme...
  • Seite 10: Auspacken/Aufstellen

    • Transportsicherung • Netzgerät • Arbeitsschutzhaube • Betriebsanleitung 6.3 Netzanschluss Die Stromversorgung erfolgt über das externe Netzgerät. Der aufgedruckte Span- nungswert muss mit der örtlichen Spannung übereinstimmen. Verwenden Sie nur KERN-Originalnetzgeräte. Die Verwendung anderer Fabrikate bedarf der Zustimmung von KERN. FKB_A-BA-d-1615...
  • Seite 11: Batteriebetrieb / Akkubetrieb ( Optional )

    6.5 Anschluss von Peripheriegeräten Vor Anschluss oder Trennen von Zusatzgeräten (Drucker, PC) an die Datenschnitt- stelle muss die Waage unbedingt vom Netz getrennt werden. Verwenden Sie zu Ihrer Waage ausschließlich Zubehör und Peripheriegeräte von KERN, diese sind optimal auf Ihre Waage abgestimmt. FKB_A-BA-d-1615...
  • Seite 12: Erstinbetriebnahme

    6.6 Erstinbetriebnahme Um bei elektronischen Waagen genaue Wägeergebnisse zu erhalten, muss die Waage ihre Betriebstemperatur ( siehe Anwärmzeit Kap.1 ) erreicht haben. Die Waage muss für diese Anwärmzeit an die Stromversorgung ( Netzanschluss, Akku oder Batterie ) angeschlossen sein. Die Genauigkeit der Waage ist abhängig von der örtlichen Fallbeschleunigung. Unbedingt die Hinweise im Kapitel Justierung beachten.
  • Seite 13: Unterflurwägung

    6.9 Unterflurwägung Mit Hilfe der Unterflurwägung können Gegenstände, welche aufgrund ihrer Größe oder Form nicht auf die Waagschale gestellt werden können, gewogen werden. Gehen Sie wie folgt vor: • Waage ausschalten. • Verschlussdeckel am Waagenboden öffnen. • Haken zur Unterflurwägung vorsichtig und vollständig einhängen. •...
  • Seite 14: Bedienungselemente

    Bedienungselemente 7.1 Anzeigenübersicht 7.2 Tastaturübersicht Taste Bezeichnung Funktion • Wägedaten über Schnittstelle übermitteln PRINT-Taste • Menü aufrufen (Taste gedrückt halten, bis UNIT er- scheint) • Einstellungen im Menü bestätigen SET-Taste • Speichern und Menü verlassen • Menüpunkte anwählen • MODE-Taste Einstellungen im Menü...
  • Seite 15: Basisbetrieb

    8 Basisbetrieb  ON-Taste drücken. Einschalten Die Waage führt einen Selbsttest durch. Sobald die Ge- wichtsanzeige erscheint, ist die Waage wägebereit. O F F 8888  OFF-Taste drücken, die Anzeige erlischt Ausschalten O F F  Wägegut auflegen Wägen  Stillstandskontrolle abwarten, nach erfolgter Stillstands- kontrolle wird rechts im Display die Wägeeinheit (z.
  • Seite 16: Pre-Tare-Funktion

     Wägegut einwiegen, das Nettogewicht wird angezeigt. 47.2 Der Tariervorgang kann beliebige Male wiederholt werden, beispielsweise beim Einwiegen von mehreren Komponen- ten zu einer Mischung (Zuwiegen). Die Grenze ist dann er- reicht, wenn der gesamte Wägebereich ausgelastet ist. Nach Abnehmen des Wägebehälter erscheint das Gewicht des Wägebehälter als Minus-Anzeige.
  • Seite 17: Plus/Minus-Wägungen

    Zum Beispiel zur Stückgewichtskontrolle, Fertigungskontrolle Plus/Minus- usw. Wägungen  Sollgewicht auf die Wägeplatte stellen und mit TARE-Taste tarieren. TA R E  Sollgewicht abnehmen  Prüflinge nacheinander auf die Wägeplatte stellen, jeweili- ge Abweichung zum Sollgewicht wird vorzeichenrichtig nach „+“ und „-“ angezeigt. Nach dem gleichen Verfahren können auch gewichtsglei- che Packungen, bezogen auf ein Sollgewicht, hergestellt werden.
  • Seite 18: Netto-Total-Wägungen

    • Zurück in den Wägemodus MODE-Taste drücken. • Fehlermeldung „Er 1“ Mindeststückgewicht unterschritten, siehe Kap. 1 „Techni- sche Daten“. MODE-Taste drücken und Referenzbildung erneut starten. • Tarieren Tarabehälter können auch bei der Stückzählung verwendet werden. Vor Beginn der Stückzählung Tarabehälter mit TARE- Taste austarieren.
  • Seite 19: Prozent-Bestimmung

    Die Prozentbestimmung ermöglicht die Gewichtsanzeige in Prozent- Prozent, bezogen auf ein Referenzgewicht, das 100 % ent- bestimmung spricht.  Im Wägemodus MODE-Taste wiederholt drücken, M O D E bis [100 %] angezeigt wird. C A L  Referenzgewicht, das 100 % entspricht auflegen. ...
  • Seite 20: Menü

    9 Menü 9.1 Navigation im Menü Einstieg ins Menü P R IN T Im Wägemodus PRINT-Taste gedrückt halten, bis [Unit] angezeigt wird. Vn� T Menüpunkte anwählen Vn� T Mit der MODE-Taste lassen sich die ein- M O D E C A L zelnen Menüpunkte der Reihe nach an- wählen.
  • Seite 21 2. Einstellung mehrerer Menüpunkte ändern Angewählten Menüpunkt mit SET-Taste PR� S E T bestätigen, die aktuelle Einstellung wird angezeigt. RE CR� Mit der MODE-Taste Einstellung ändern. M O D E C A L Pl PC� TARE-Taste drücken „Exit“ wird ange- TA R E zeigt.
  • Seite 22 Speichern/verwerfen und Menü verlassen E� T S E T STQRE Entweder  Speichern Durch Drücken der SET-Taste (Ja) die vorgenommenen Änderungen abspei- S E T chern. Die Waage kehrt automatisch in den Wägemodus zurück. oder  Verwerfen P R IN T Zum Verwerfen der Änderungen PRINT- Taste (Nein) drücken.
  • Seite 23: Menü-Übersicht

    9.2 Menü-Übersicht Funktionsbeschreibung Funktion Parameter Beschreibung der Auswahlmöglichkeiten Wägeeinheiten- UNIT Gramm umschaltung Kilogramm (modellabhängig) (siehe Kap. 9.3) Pound Unze Troy Unze Tael Hongkong Tael Taiwan Grain(modellabhängig) Pennyweight (modellabhängig) Momme Tola Carat (modellabhängig) Frei wählbarer Faktor Datenübertragungs- Datenausgabe über Fernsteu- rE CR* modus (siehe Kap.
  • Seite 24 Baudrate bAUd 19200 (siehe Kap. 9.4) 9600* 4800 2400 1200 Automatische Abschaltfunktion Auto off nach 3 min ohne Laständerung ein (Batteriebetrieb), siehe Kap. 6.4 Automatische Abschaltfunktion nach 3 min ohne Laständerung aus Auto Zero (siehe Kap. 9.3) Auswahl Justiergewicht (siehe Kap. 9.3) *modellabhängig Filterfunktion schnelle Anzeige...
  • Seite 25: Beschreibung Einzelner Menüpunkte

    9.3 Beschreibung einzelner Menüpunkte Wägeeinheiten  Im Wägemodus PRINT-Taste gedrückt halten, bis [Unit] ange- zeigt wird. Vn� T  SET-Taste drücken, die eingestellte Einheit wird angezeigt.  Mit der MODE-Taste kann zwischen den verschiedenen Einhei- ten (siehe nachfolgendeTabelle) gewählt werden. ...
  • Seite 26 Funktion deaktiviert tr off  Auswahl mit SET-Taste bestätigen. Auswahl Bei der Modellreihe KERN FKB_A kann das Justiergewicht aus drei vorgegebenen Nennwerten (ca.1/3; 2/3; Max) gewählt wer- Justiergewicht den (siehe nachfolgende Tabelle, Werkseinstellung grau unter- legt). Um messtechnisch hochwertige Wägeergebnisse zu erlan- gen, ist die Auswahl eines möglichst hohen Nennwertes zu emp-...
  • Seite 27 FKB 8K0.1A FKB15K0.5A FKB15K1A 2000 5000 5000 5000 10000 10000 8000 15000 15000 FKB30K1A FKB 65K1A 10000 20000 20000 40000 30000 60000 FKB_A-BA-d-1615...
  • Seite 28 Unter diesem Menüpunkt kann die Waage an bestimmte Um- Filter gebungsbedingungen und Messzwecke angepasst werden. nur Modelle: FKB 8K0.1A FKB 65K1A  Im Wägemodus PRINT-Taste gedrückt halten, bis [Unit] angezeigt wird.  MODE-Taste wiederholt drücken bis „StAbiL“ angezeigt wird.  Mit SET-Taste bestätigen, die aktuelle Einstellung wird an- gezeigt.
  • Seite 29 Hinterleuchtung der Anzeige  Im Wägemodus PRINT-Taste gedrückt halten, bis [Unit] an- gezeigt wird. Vn� T  MODE-Taste wiederholt drücken bis „bl“ angezeigt wird.  Mit SET-Taste bestätigen, die aktuelle Einstellung wird ange- zeigt.  Mit MODE-Taste gewünschte Einstellungen auswählen. Hinterleuchtung Kontrastreiche Anzeige, die bl on...
  • Seite 30 Tierwäge- Die Tierwägefunktion kann bei unruhigen Wägungen eingesetzt werden. Während einer festgelegten Zeitspanne wird der Mittelwert funktion der Wägeresultate gebildet. Je unruhiger das Wägegut ist, desto länger sollte die Zeitspanne gewählt werden.  Im Wägemodus PRINT-Taste gedrückt halten, bis [Unit] ange- zeigt wird.
  • Seite 31 Rücksetzen Mit dieser Funktion werden alle Waageneinstellungen auf Werks- auf Werksein- einstellungen zurückgesetzt. stellung  Im Wägemodus PRINT-Taste gedrückt halten, bis [Unit] an- gezeigt wird.  MODE-Taste wiederholt drücken bis „rSt“ angezeigt wird. Vn� T  Mit SET-Taste bestätigen, die aktuelle Einstellung wird ange- zeigt.
  • Seite 32: Schnittstellenparameter

    9.4 Schnittstellenparameter Die Datenausgabe erfolgt über Schnittstelle RS 232 C. Allgemeines Voraussetzung für die Datenübertragung zwischen Waage und einem Peripheriege- rät (z.B. Drucker, PC ...) ist, dass beide Geräte auf dieselben Schnittstellenparame- ter (z.B. Baudrate, Übertragungsmodus ...) eingestellt sind. Datenübertragungsmodus ...
  • Seite 33 Druckausgabe Mit dieser Funktion wird selektiert, welche Daten über die RS232C gesendet werden (gilt nicht für der Datenübertragungsmodus BAPr ).  Im Wägemodus PRINT-Taste gedrückt halten, bis [Unit] ange- zeigt wird.  MODE-Taste wiederholt drücken bis „LAPr“ angezeigt wird. Vn� T ...
  • Seite 34: Pinbelegung Der Waagenausgangsbuchse

     Baudrate wählbar auf 1200, 2400, 4800 , 9600 und 19200 Baud  Miniatur-Stecker notwendig (9 pol D-Sub)  Bei Betrieb mit Schnittstelle ist der fehlerfreie Betrieb nur mit dem entsprechen- den KERN- Schnittstellenkabel (max. 2m) sichergestellt 10.2 Pinbelegung der Waagenausgangsbuchse Frontansicht:...
  • Seite 35: Beschreibung Des Datentransfers

    10.3 Beschreibung des Datentransfers Pr PC: PRINT-Taste drücken, bei stabilem Gewicht wird das Format aus LAPR übertragen. a. Format für stabile Werte für Gewicht/Stückzahl/Prozentangabe 10 11 12 13 14 15 16 17 CR LF b. Format im Fehlerfall AU Pr: Sobald der Wägewert stabil ist, wird das Format aus LAPR automatisch übertragen.
  • Seite 36 rE Cr: Fernsteuerkommandos s/w/t werden von der Fernsteuereinheit zu der Waage als ASCII-Code gesendet. Nachdem die Waage die s/w/t-Kommandos erhalten hat, sendet sie die nachfolgenden Daten. Dabei ist zu beachten, dass die folgenden Fernsteuerkommandos ohne nachfol- gendes CR LF gesendet werden müssen. Funktion: Stabiler Wägewert für das Gewicht wird über RS232- Schnittstelle gesendet...
  • Seite 37: Ausgabe Auf Barcode-Drucker

    Das Druckformat ist im Drucker gespeichert. D.h. bei einem Defekt kann der Drucker nicht gegen einen fabrikneuen ausgetauscht werden, sondern es muss bei KERN zuvor die entsprechende Software aufgespielt werden. Der Zebra-Drucker und die Waage sind im ausgeschalteten Zustand mit dem mitge- lieferten Schnittstellenkabel zu verbinden.
  • Seite 38: Kleine Pannenhilfe

    12 Kleine Pannenhilfe Bei einer Störung im Programmablauf sollte die Waage kurz ausgeschaltet und vom Netz getrennt werden. Der Wägevorgang muss dann wieder von vorne begonnen werden. Hilfe: Störung Mögliche Ursache • Die Waage ist nicht eingeschaltet. Die Gewichtsanzeige leuchtet nicht. •...
  • Seite 40 KERN FKB_A Version 1.5 04/2016 Operating Manual Compact balance Table of Contents Technical Data ....................4 Declaration of conformity ................6 Basic Information (General) ................7 Proper use ..........................7 Improper Use..........................7 Warranty ............................ 7 Monitoring of Test Resources ....................7 Basic Safety Precautions ................
  • Seite 41 Basic Operation ................... 14 Start-up ..............................14 Switching Off ............................14 Weighing............................... 14 Taring ..............................14 PRE-TARE-Function ..........................15 Plus/minus weighings ......................... 16 Parts counting............................16 Net-total weighings ..........................17 Percent determination ......................... 18 Menu ......................19 Navigation in the menu ......................19 Menu overview ........................
  • Seite 42: Technical Data

    Technical Data KERN FKB 8K0.1A FKB 15K0.5A FKB 15K1A Readability (d) 0,1 g 0,5 g Weighing range (max) (d) 8 kg 15 kg 15 kg Taring range (subtractive) 8 kg 15 kg 15 kg Reproducibility 0,1 g 0,5 g Linearity...
  • Seite 43 KERN FKB 30K1A FKB 65K1A Readability (d) Weighing range (max) (d) 30 kg 65 kg Taring range (subtractive) 30 kg 65 kg Reproducibility Linearity Minimum unit weight at piece counting Warm-up time 2 hours 2 hours Reference quantities at 5, 10, 20, 25, 50...
  • Seite 44: Declaration Of Conformity

    Declaration of conformity To view the current EC/EU Declaration of Conformity go to: www.kern-sohn.com/ce FKB_A-BA-e-1615...
  • Seite 45: Basic Information (General)

    Information is available on KERN’s home page (www.kern-sohn.com) with regard to the monitoring of balance test substances and the test weights required for this. In KERN’s accredited DKD calibration laboratory test weights and balances may be calibrated (return to the national standard) fast and at moderate cost.
  • Seite 46: Basic Safety Precautions

    4.1 Pay attention to the instructions in the Operation Manual Carefully read this operation manual before setup and commissioning, even if you are already familiar with KERN balances. 4.2 Personnel training The appliance may only be operated and maintained by trained personnel.
  • Seite 47: Unpacking/Erection

    • Operating Manual 6.3 Mains connection Power is supplied via the external mains adapter. The stated voltage value must be the same as the local voltage. Only use original KERN mains adapters. Using other makes requires consent by KERN. FKB_A-BA-e-1615...
  • Seite 48: Operation Using A (Rechargeable) Battery (Optional)

    Before connecting or disconnecting of additional devices (printer, PC) to the data interface, always disconnect the balance from the power supply. With your balance, only use accessories and peripheral devices by KERN, as they are ideally tuned to your balance.
  • Seite 49: Initial Commissioning

    6.6 Initial Commissioning In order to obtain exact results with the electronic balances, your balance must have reached the operating temperature (see warming up time chap. 1). During this warming up time the balance must be connected to the power supply (mains, accumulator or battery).
  • Seite 50: Underfloor Weighing

    6.9 Underfloor weighing Objects unsuitable for placing on the weighing scale due to size or shape may be weighed with the help of the flush-mounted platform. Proceed as follows: • Switch off the balance • Open closing cover at the balance bottom. •...
  • Seite 51: Operation Elements

    Operation elements 7.1 Overview of display 7.2 Keyboard overview Designation Function • Calculate weighing data via interface PRINT-key • Call up menu (keep key pressed until UNIT appears) • Confirm settings in the menu SET key • Save and exit menu •...
  • Seite 52: Basic Operation

    8 Basic Operation  Press ON button. Start-up The balance will carry out a self-test The balance is ready for weighing when the weight display appears. O F F 8888  Press OFF button, the display disappears Switching Off O F F ...
  • Seite 53: Pre-Tare-Function

     Weigh the material, the net weight will be indicated. 47.2 The taring process can be repeated any number of times, e.g. when adding several components for a mixture (adding). The limit is reached when the whole weighing range is exhausted. The weight of the weighing container will be displayed as a minus number after removing the weighing container.
  • Seite 54: Plus/Minus Weighings

    For example unit weight control, fabrication control etc. Plus/minus weighings  Put the nominal weight on the weighing plate and tare using the TARE button. TA R E  Remove the nominal weight  Put the test objects subsequently on the weighing plate, the respective deviation from the nominal weight is displayed with the respective sign to „+“...
  • Seite 55: Net-Total Weighings

    • Back to weighing mode by pressing the MODE button. • Error message „Er 1“ Piece below minimum weight of piece (See chpt. 1 “Technical specifications“): Press MODE key and restart reference determination. • Taring The tare vessels can also be used for piece counting. Before starting piece counting use the TARE button to tare out the container.
  • Seite 56: Percent Determination

    Percentage calculation facilitates weight display in percent Percent related to a reference weight equivalent to 100 %. determination  In weighing mode press MODE key repeatedly, until [100 %] is displayed. M O D E C A L  Put a reference weight which corresponds to 100 %. ...
  • Seite 57: Menu

    9 Menu 9.1 Navigation in the menu Access to menu P R IN T In weighing mode keep the PRINT key pressed until [Unit] appears. Vn� T How to select menu items Vn� T Using the MODE key the individual menu M O D E C A L items can be selected one after the...
  • Seite 58 2. Change settings of several menu items Acknowledge selected menu item using PR� S E T SET key, the current setting is displayed. Use the MODE key to change settings. RE CR� M O D E C A L Pl PC� Press the TARE key, „Exit“...
  • Seite 59 Save/reject and exit the menu E� T S E T STQRE Either  Save Any changes carried out are stored by S E T pressing the SET key (yes). The balance returns automatically into weighing mode.  Reject P R IN T To cancel changes, press the PRINT key (no).
  • Seite 60: Menu Overview

    9.2 Menu overview Description of function Function Parameter Description of options Weighing units switching UNIT Gram over (see chapter 9.3). Kilogram (dependent on model) Pound Ounce Troy ounce Tael Hongkong Tael Taiwan Grain (dependent on model) Pennyweight (dependent model) Momme Tola Carat (dependent on model) Freely selectable factor...
  • Seite 61: Selection Adjustment Weight

    Baud rate bAUd 19200 (see chapter 9.4). 9600* 4800 2400 1200 Automatic switch-off function after Auto off 3 min without changing load ON (battery operation), see chap. 6.4 Automatic switch-off function after 3 min without changing load OFF Auto Zero (see chapter 9.3) Selection adjustment weight (see chapter 9.3)
  • Seite 62: Description Of Individual Menu Items

    9.3 Description of individual menu items Weighing Units  In weighing mode keep the PRINT key pressed until [Unit] appears. Vn� T  Press SET key, the selected unit is displayed.  Use the MODE key to select between the different units (see following table).
  • Seite 63 Function activated tr off Function deactivated  Use the SET key to confirm selection. In the model series KERN FKB_A, the adjustment weight can be Selection selected from three pre-set nominal values (approx.1/3; 2/3; max) adjustment (refer also to following table, factory setting with grey weight background).
  • Seite 64 FKB 8K0.1A FKB15K0.5A FKB15K1A 2000 5000 5000 5000 10000 10000 8000 15000 15000 FKB30K1A FKB 65K1A 10000 20000 20000 40000 30000 60000 FKB_A-BA-e-1615...
  • Seite 65 This menu item allows the balance to be set according to Filter specific ambient conditions and measuring purposes. only models: FKB 8K0.1A FKB 65K1A  In weighing mode keep the PRINT key pressed until [Unit] appears.  Press the MODE button several times until „StAbiL“ is displayed.
  • Seite 66 Display background illumination  In weighing mode keep the PRINT key pressed until [Unit] appears.  Press the MODE button several times until „bl“ is displayed. Vn� T  Acknowledge using SET key, the current setting is displayed.  Select the desired settings by pressing the MODE key. Background illumination Contrastful display which can bl on...
  • Seite 67 Animal The animal weighing function can be applied for busy weighing. During a defined period the average value of the weighing results weighing is formed. function The more unquiet the weighed item, the longer the period should be selected.  In weighing mode keep the PRINT key pressed until [Unit] appears.
  • Seite 68 Reset to This function resets all balance settings to factory setting. factory setting  In weighing mode keep the PRINT key pressed until [Unit] appears.  Press the MODE button several times until „rSt“ is displayed. Vn� T  Acknowledge using SET key, the current setting is displayed. RST�...
  • Seite 69: Interface Parameters

    9.4 Interface parameters Data output is carried out via interface RS 232 C. General The previous condition for the data transfer between balance and a peripherical device (e.g. printer, PC ...) is that the appliances are set to the same interface parameters (e.g.
  • Seite 70: Printout

    printout Using this function data are selected which are to be sent via the RS232C (not valid for data transfer mode BAPr ).  In weighing mode keep the PRINT key pressed until [Unit] appears.  Press the MODE key several times until „LAPr“ is displayed. Vn�...
  • Seite 71: Baud Rate

    Baud rate selectable at 1200, 2400, 4800 , 9600 and 19200 baud • Miniature plug-in necessary (9 pole D-Sub) • For operation with interface faultless operation is only ensured with the correct KERN – interface cable (max. 2m) 10.2 Pin allocation of balance output bushing: Front view: Pin 2: Transmit data...
  • Seite 72: Explanation Of The Data Transfer

    10.3 Explanation of the data transfer Pr PC: Press the PRINT key, at stable weight the format is transferred from LAPR. a. Format for stable values for weight/quantity/percentage 10 11 12 13 14 15 16 17 18 CR LF b. Format in case of fault AU Pr: As soon as the weighing value is stable, the format is automatically transferred from LAPR.
  • Seite 73 rE Cr: The remote control commands s/w/t are sent from the remote control unit to the balance as ASCII code. After the balance having received the s/w/t commands, it will send the following data. Take into account that the following remote control commands must be sent without a subsequent CR LF.
  • Seite 74: Output On Bar Code Printer

    The printer format is stored in the printer, i.e. in case of a failure the printer cannot be changed with a new one from factory, previously it is necessary that KERN installs the respective software. The Zebra printer and the balance must be connected to the delivered interface cable when they are switched off.
  • Seite 75: Instant Help

    12 Instant help In case of an error in the program process, briefly turn off the balance and disconnect from power supply. The weighing process must then be restarted from the beginning. Help: Fault Possible cause • The balance is not switched on. The displayed weight does not glow.
  • Seite 76 KERN FKB_A Version 1.5 04/2016 Mode d’emploi Balance compacte Sommaire Caractéristiques techniques ................. 4 Déclaration de conformité ................6 Indications fondamentales (généralités) ............. 7 Utilisation conforme aux prescriptions .................. 7 Utilisation inadéquate ......................7 Garantie ............................. 7 Vérification des moyens de contrôle ..................7 Indications de sécurité...
  • Seite 77 Opérations de base ..................14 Enclenchement ............................ 14 Arrêt ..............................14 Pesage ..............................14 Tarage ..............................14 PRE-TARE-Funktion ..........................15 Pesées plus / moins ..........................16 Comptage de pièces ..........................16 Pesées nettes total ..........................17 Détermination du pourcentage ......................18 Menu ......................
  • Seite 78: Caractéristiques Techniques

    Caractéristiques techniques KERN FKB 8K0.1A FKB 15K0.5A FKB 15K1A Lisibilité (d) 0,1 g 0,5 g Plage de pesée (max) (d) 8 kg 15 kg 15 kg Plage de tarage (par soustraction) 8 kg 15 kg 15 kg Reproductibilité 0,1 g 0,5 g Linéarité...
  • Seite 79 KERN FKB 30K1A FKB 65K1A Lisibilité (d) Plage de pesée (max) (d) 30 kg 65 kg Plage de tarage (par soustraction) 30 kg 65 kg Reproductibilité Linéarité Poids minimum à la pièce en comptage Temps de préchauffage 2 heures 2 heures Quantité...
  • Seite 80: Déclaration De Conformité

    Déclaration de conformité Vous trouvez la déclaration de conformité CE- UE actuelle online sous: www.kern-sohn.com/ce FKB_A-BA-f-1615...
  • Seite 81: Indications Fondamentales (Généralités)

    à cette opération sont disponibles sur le site KERN (www.kern-sohn.com). Grâce à son laboratoire de calibrage accrédité DKD, KERN propose un calibrage rapide et économique pour les poids d´ajustage et les balances (sur la base du standard national).
  • Seite 82: Indications De Sécurité Générales

    4.1 Observez les indications du mode d´emploi Lisez attentivement la totalité de ce mode d´emploi avant l´installation et la mise en service de la balance, et ce même si vous avez déjà utilisé des balances KERN. 4.2 Formation du personnel L´appareil ne doit être utilisé...
  • Seite 83: Déballage / Implantation

    L´alimentation en courant s´effectue au moyen du bloc externe d´alimentation secteur. La valeur de tension imprimée sur l´appareil doit concorder avec la tension locale. N´utilisez que des blocs d´alimentation secteur livrés par KERN. L´utilisation d´autres marques n´est possible qu´avec l´autorisation de KERN. FKB_A-BA-f-1615...
  • Seite 84: Fonctionnement Sur Piles / Sur Accu (En Option)

    Avant le raccordement ou le débranchement d´appareils supplémentaires (imprimante, PC) à l´interface de données, la balance doit impérativement être coupée du secteur. N´utilisez avec votre balance que des accessoires et des périphériques livrés par KERN, ces derniers étant adaptés de manière optimale à votre balance. FKB_A-BA-f-1615...
  • Seite 85: Première Mise En Service

    6.6 Première mise en service Pour obtenir des résultats exacts de pesée avec les balances électroniques, elles doivent avoir atteint leur température de service (voir temps d’échauffement au chap. 1). Pour ce temps de chauffe, la balance doit être branché à l’alimentation de courant (secteur, accumulateur ou batterie).
  • Seite 86: Pesage En Sous-Sol

    6.9 Pesage en sous-sol Grâce au pesage en sous-sol il est possible de peser des objets, qui par suite de leurs dimensions ou de leur forme ne peuvent pas être posés sur le plateau de la balance. Procédez de la manière suivante: •...
  • Seite 87: Organes De Commande

    Organes de commande 7.1 Vue d’ensemble des affichages 7.2 Vue d’ensemble du clavier Touche Description Fonction • Rechercher les données de pesée par l’interface Touche PRINT • Appeler le menu (garder la touche enclenchée jusqu’à ce qu’apparaisse UNIT) • Confirmer les réglages dans le menu Touche SET •...
  • Seite 88: Opérations De Base

    8 Opérations de base  Appuyer sur la touche ON Enclenchement La balance effectue un contrôle automatique. Dès que l’affichage du poids apparaît la balance est prête à peser. O F F 8888  Appuyer sur la touche OFF, l’affichage s’éteint Arrêt O F F ...
  • Seite 89: Pre-Tare-Funktion

     Peser les matières à peser, le poids net est affiché. 47.2 La procédure de tarage peut être répétée à volonté, par exemple pour le pesage de plusieurs composants constituant un mélange (ajout). La limite est atteinte, lorsque toute la gamme de pesage est sollicitée. Une fois le contenant de tare enlevé, le poids total apparaît en affichage négatif.
  • Seite 90: Pesées Plus / Moins

    Par exemple pour le contrôle du poids à la pièce, le contrôle Pesées plus / de fabrication etc. moins  Posez le poids de gouverne sur le plateau de pesée et calibrez-le au moyen de la touche TARE par rapport à „0“. TA R E ...
  • Seite 91: Pesées Nettes Total

    • Retour en mode de pesée Appuyer sur la touche MODE. • Message d’erreur „Er 1“ Poids minimal de la pièce (voir au chap. 1 „caractéristiques techniques“) non atteint. Appuyer sur la touche MODE et redémarrer la formation de référence. •...
  • Seite 92: Détermination Du Pourcentage

    La détermination du pourcentage permet d’afficher le poids en Détermination pourcent, rapporté à un poids de référence à 100 %. du pourcentage  En mode pesée appuyer sur la touche MODE plusieurs fois jusqu’à ce que soit affiché [100 %]. M O D E C A L ...
  • Seite 93: Menu

    9 Menu 9.1 Navigation dans le menu Entrée au menu En mode pesée maintenir la touche P R IN T PRINTenclenchée jusqu’à ce que soit affiché [Unit]. Vn� T Sélectionner les points de menu Vn� T La touche MODE permet de sélectionner M O D E C A L successivement les différents points du...
  • Seite 94 2. Modifier le réglage de plusieurs points du menu Valider sur la touche SET le point de PR� S E T menu appelé, le réglage actuel est affiché. RE CR� Modifier le réglage sur la touche MODE. M O D E C A L Pl PC�...
  • Seite 95 Mémoriser / quitter et quitter le menu E� T S E T STQRE Soit : Enregistrer Les modifications apportées sont mémorisées par l’appel de la touche S E T SET (oui). La balance revient automatiquement en mode de pesée. Rejet P R IN T Appuyez sur la touche PRINT (non) pour rejeter les modifications.
  • Seite 96: Aperçu Des Menus

    9.2 Aperçu des menus Description de Fonction Paramètre Description des fonctionnement possibilités de sélection Commutation entre les UNIT Gramme unités de pesée Kilogramme (en fonction du modèle) (voir chapitre 9.3) Pound Once Troy once Tael Hongkong Tael Taiwan Grain (en fonction du modèle) Pennyweight fonction modèle)
  • Seite 97 Taux Baud bAUd 19200 (voir chapitre 9,4) 9600* 4800 2400 1200 Fonction de coupure automatique Auto off après 3 min sans variation de la (fonctionnement par charge en marche piles), voir au chap. 6.4 Fonction de coupure automatique après 3 min sans variation de la charge à...
  • Seite 98: Description De Quelques Points De Menu

    9.3 Description de quelques points de menu Unités de  En mode pesée maintenir la touche PRINTenclenchée jusqu’à pesage ce que soit affiché [Unit]. Vn� T   Appuyer sur la touche SET, l’unité réglée est affichée.  A l’aide de la touche MODE il est possible de choisir entre différentes unités (voir le tableau suivant).
  • Seite 99 Dosage et mise Cette fonction zéro automatique permet de calibrer automatiquement de petites fluctuations de poids. au point du zéro Dans le cas où de petites quantités des matières à peser sont retirées ou ajoutées, le dispositif de « compensation de stabilité » intégré...
  • Seite 100: Sélection Poids D'ajustage

    Sélection Sur la série de modèles KERN FKB_A le poids d’ajustage peut être sélectionné parmi trois valeurs nominales préétablies (à peu poids près1/3; 2/3; max) (voir le tableau suivant, les réglages à l’usine d’ajustage sont surincrustés sur fond gris). Pour parvenir à des résultats de métrologie de qualité, nous recommandons de sélectionner une...
  • Seite 101 FKB 8K0.1A FKB15K0.5A FKB15K1A 2000 5000 5000 5000 10000 10000 8000 15000 15000 FKB30K1A FKB 65K1A 10000 20000 20000 40000 30000 60000 FKB_A-BA-f-1615...
  • Seite 102: Filtre 1

    Sous ce point du menu il est possible d’adapter la balance à Filtre certaines conditions environnementales et à certains objectifs uniquement de mesure. modèles: FKB 8K0.1A FKB 65K1A  En mode pesée maintenir la touche PRINTenclenchée jusqu’à ce que soit affiché [Unit]. ...
  • Seite 103: Eclairage Du Fond De L'écran D'affichage

    Eclairage du fond de l’écran d’affichage  En mode pesée maintenir la touche PRINTenclenchée jusqu’à ce que soit affiché [Unit].  Appeler de façon répétée la touche MODE jusqu’à ce que „bI“ Vn� T apparaisse.  Valider sur la touche SET le point de menu appelé, le réglage actuel est affiché.
  • Seite 104: Fonction De Pesée D'animaux

    Fonction de On peut appliquer la fonction de pesée des animaux lors de pesées instables. Pendant un laps de temps donné est extrapolée pesée la moyenne des résultats de pesée. d’animaux Plus l’animal à peser est remuant, plus longue devrait être choisi le laps de temps.
  • Seite 105 Remise à l’état Cette fonction permet de rétrograder tous les réglages de la de réglage à balance en état de réglage à l’usine. l’usine  En mode pesée maintenir la touche PRINTenclenchée jusqu’à ce que soit affiché [Unit].  Appeler de façon répétée la touche MODE jusqu’à ce que „rSt“ Vn�...
  • Seite 106: Paramètres D'interfaces

    9.4 Paramètres d’interfaces Edition de données par le truchement de l’interface RS 232 C Généralités Le transfert entre la balance et un appareil périphérique (p. ex. imprimante, PC ...) suppose que les deux appareils soient réglés en fonction des mêmes paramètres d’interface (p.
  • Seite 107: Edition Imprimée Automatique

    Edition Cette fonction permet de sélectionner, quelles données vont être transmises par RS232C (ceci ne concerne pas le mode de imprimée transmission BAPr) . automatique  En mode pesée maintenir la touche PRINTenclenchée jusqu’à ce que soit affiché [Unit].  Appeler de façon répétée la touche MODE jusqu’à ce que „LAPr“ apparaisse.
  • Seite 108: Taux Baud

    Fiche miniature nécessaire (D-Sub 9 pôles) • pour la mise en œuvre d’un interface seul le recours à un câble d’interface KERN respectif de max. 2 m permet un fonctionnement irréprochable 10.2 Attribution des broches de la douille de sortie de la balance...
  • Seite 109: Description Du Transfert Des Données

    10.3 Description du transfert des données Pr PC: Appelez la touche PRINT, si la valeur est stable le format est transmis à partir de LAPR. a. Format pour les valeurs stables de poids / quantité / pourcentage 10 11 12 13 14 15 16 17 18 CR LF b.
  • Seite 110 rE Cr: Les ordres de télécommande s/w/t sont transmis par l’unité de télécommande à la balance sous forme de code ASCII. Après que la balance a reçu les ordres s/w/t, elle émet les données suivantes. Il convient d’observer ici, que les ordres de télécommande suivants doivent être émis sans CR LF à...
  • Seite 111: Edition Sur Imprimante À Code À Barres

    Retirer immédiatement les matières à peser renversées sur la balance. 11.2 Maintenance, entretien L´appareil ne doit être ouvert que par des dépanneurs formés à cette fin et ayant reçu l´autorisation de KERN. Avant d´ouvrir l´appareil, couper ce dernier du secteur. 11.3 Elimination L´élimination de l´emballage et de l´appareil doit être effectuée par l´utilisateur selon...
  • Seite 112: Aide Succincte En Cas De Panne

    12 Aide succincte en cas de panne En cas d´anomalie dans le déroulement du programme, la balance doit être arrêtée pendant un court laps de temps et coupée du secteur. Le processus de pesée doit alors être recommencé depuis le début. Aide: Défaut Cause possible...

Inhaltsverzeichnis