Herunterladen Inhalt Inhalt Diese Seite drucken
Inhaltsverzeichnis

Werbung

Verfügbare Sprachen

Verfügbare Sprachen

40005176Eng.qxd
18/07/2007
11:00
Page 1
®
Instruction Book
GO DC 38T-88S
Condenser Tumble Dryer
English
Français
Deutsch
Italiano

Werbung

Inhaltsverzeichnis

Fehlerbehebung

loading

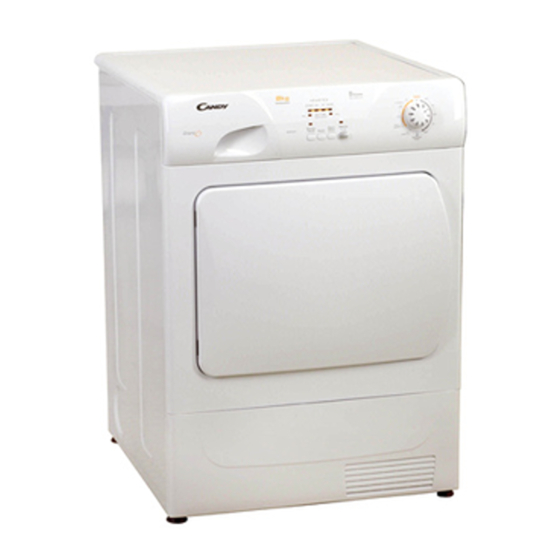
Inhaltszusammenfassung für Candy GO DC 38T

  • Seite 1 40005176Eng.qxd 18/07/2007 11:00 Page 1 ® Instruction Book GO DC 38T-88S Condenser Tumble Dryer English Français Deutsch Italiano...
  • Seite 2: Inhaltsverzeichnis

    40005176Eng.qxd 18/07/2007 11:00 Page 2 English ....2 Deutsch ....38 Français .
  • Seite 3: Delivery Information

    40005176Eng.qxd 19/07/2007 12:59 Page 3 Introduction Check that no damage has occurred to the Please read and follow these instructions carefully and operate the machine accordingly. machine during This booklet provides important guidelines for transit. If it has, safe use, installation, maintenance and some call for service by useful advice for best results when using your GIAS.
  • Seite 4: Safety Reminders

    40005176Eng.qxd 18/07/2007 11:00 Page 4 Safety reminders Installation ● Check that the product has no visible signs of damage before use. If damaged do not use and please call GIAS Service. ● Do not use adapters, multiple connectors and/or extensions. ●...
  • Seite 5: Environmental Issues

    40005176Eng.qxd 18/07/2007 11:01 Page 5 ● Clothes should be spin dried or thoroughly wrung before they are put into the tumble dryer. Clothes that are dripping wet should NOT be put into the dryer. ● Lighters and matches must not be left in pockets and NEVER use flammable liquids near the machine.
  • Seite 6: Installation

    40005176Eng.qxd 18/07/2007 11:01 Page 6 Installation Electrical requirements You may be charged for a Tumble dryers are supplied to operate at a service call if a voltage of 230V, 50 Hz single phase. Check that the supply circuit is rated to at least 10A. problem with Electricity can be extremely dangerous.
  • Seite 7: Ventilation

    40005176Eng.qxd 18/07/2007 11:01 Page 7 Ventilation Adequate ventilation must be provided in the room where the tumble dryer is located to prevent gases from appliances burning other fuels, including open fires, being drawn into the room during operation of the tumble dryer. ●...
  • Seite 8: Preparing The Load

    40005176Eng.qxd 18/07/2007 11:01 Page 8 Preparing the load Before using the tumble dryer for the first time: ● Please read this instruction book thoroughly. ● Remove all items packed inside drum. ● Wipe the inside of the drum and door with a damp cloth to remove any dust which may have settled in transit.
  • Seite 9: Sorting The Load

    40005176Eng.qxd 18/07/2007 11:01 Page 9 Sort the load as follows: ● By care symbols These can be found on the collar or inside seam: Suitable for tumble drying. Tumble drying at high temperature. Tumble drying at low temperature only. Do not tumble dry. If the item does not have a care label it must be assumed that it is not suitable for tumble drying.
  • Seite 10: Drying Advice

    40005176Eng.qxd 18/07/2007 11:01 Page 10 Drying advice Do not tumble dry: IMPORTANT: Do not dry articles Woollens, silk, delicate fabrics, nylon stockings, which have been delicate embroidery, fabrics with metallic decorations, garments with PVC or leather treated with a trimmings, training shoes, bulky items such as dry cleaning fluid sleeping bags, etc.
  • Seite 11: Controls And Indicators

    40005176Eng.qxd 18/07/2007 11:01 Page 11 Controls and indicators FILTER CARE COUNTDOWN DISPLAY INDICATOR EMPTY START ON/OFF PROGRAMME ACRYLICS/ START WATER DELAY BUTTON SELECTOR SYNTHETICS BUTTON INDICATOR BUTTON BUTTON Control panel and indicator lights Programme Selector – Select the required programme On/Off button and indicator –...
  • Seite 12: Door And Filter

    40005176Eng.qxd 18/07/2007 11:01 Page 12 Door and Filter Opening the door Pull on handle to open the door. To restart the dryer, close the door and press Start. WARNING! When the tumble dryer is in use the drum and door may be VERY HOT. Never stop a tumble dryer before the end of the drying cycle unless all items are quickly removed and...
  • Seite 13: Water Container

    40005176Eng.qxd 19/07/2007 13:00 Page 13 Water Container The water removed from the laundry during the drying cycle is collected in a container at the bottom of the dryer. When the container is full the indicator on the control panel will light, and the container MUST be emptied.
  • Seite 14: Condenser

    40005176Eng.qxd 18/07/2007 11:01 Page 14 Condenser Important: Always switch off and remove the plug from the electricity supply before cleaning the condenser. To maintain the efficiency of the dryer regularly check that the condenser is clean. To remove the condenser Gently pull the bottom of the kickplate so that it unclips from the dryer.
  • Seite 15: Selecting The Programme

    40005176Eng.qxd 18/07/2007 11:01 Page 15 Selecting the Programme The Sensor Dry machine gives many options for drying the laundry to suit all circumstances. The table below lists the programmes and the function of each programme. Description Programme Select the degree of dryness that you require. Bone Dry This ranges from Bone Dry for bath towels and Extra Dry...
  • Seite 16: Operation

    40005176Eng.qxd 18/07/2007 11:01 Page 16 Operation Open the door and load the drum with laundry. Ensure that garments do not hinder closure of the door. Gently close the door pushing it slowly until you hear the door 'click' shut. Press the button to switch on the dryer.
  • Seite 17: Cleaning And Routine Maintenance

    40005176Eng.qxd 18/07/2007 11:01 Page 17 To commence the programme press Start and the WARNING! appliance will complete the drying cycle at the end of this time. The 6 or 9 hour indicator light The drum, door will flash to indicate that the start delay is in and load may be progress.
  • Seite 18: Troubleshooting

    40005176Eng.qxd 18/07/2007 11:01 Page 18 Troubleshooting What might be the cause of... Defects you can remedy yourself Before calling GIAS Service for technical advice please run through the following checklist. A charge will be made if the machine is found to be working or has been installed incorrectly or used incorrectly.
  • Seite 19: Customer Service

    40005176Eng.qxd 18/07/2007 11:01 Page 19 Customer Service Should there still be a problem with your dryer after completing all the recommended checks, please call GIAS Service for advice. They may be able to assist you over the telephone or arrange for a suitable appointment for an engineer to call under the terms of your guarantee.
  • Seite 20: Français

    40005176Fre.qxd 18/07/2007 12:14 Page 20 Introduction ..........21 Informations sur la livraison .
  • Seite 21: Introduction

    40005176Fre.qxd 19/07/2007 13:02 Page 21 Introduction Vérifiez que la machine ne s'est pas détériorée en Veuillez lire et suivre ces instructions avec soin et utiliser la machine en conséquence. Ce livret contient transit. Si c'est le des instructions importantes sur la sécurité d'utilisation, cas, contactez GIAS l'installation et l'entretien de la machine, ainsi que des pour une opération...
  • Seite 22: Rappels De Sécurité

    40005176Fre.qxd 18/07/2007 12:00 Page 22 Rappels de sécurité Installation ● Vérifiez que la machine ne présente aucun signe visible de détérioration avant de l’utiliser. En cas de détérioration, assurez-vous de ne pas l’utiliser et de contacter le service GIAS. ● N'utilisez pas d'adaptateurs, de multi-prises et/ou de rallonges.
  • Seite 23: Protection De L'environnement

    40005176Fre.qxd 18/07/2007 12:02 Page 23 sèche-linge. Les vêtements qui dégoulinent NE DOIVENT PAS être mis dans le sèche-linge. ● Enlevez les briquets et les allumettes des poches et veillez à ne JAMAIS utiliser de liquides inflammables à proximité de la machine. ●...
  • Seite 24: Installation

    40005176Fre.qxd 18/07/2007 12:02 Page 24 Installation Besoins électriques Un appel de service peut vous Les sèche-linges sont prévues pour une tension être facturé si la monophasée de 230 V, 50 Hz. Vérifiez que la tension nominale du circuit d'alimentation est réglée sur 10 A défaillance de minimum.
  • Seite 25: Ventilation

    40005176Fre.qxd 18/07/2007 12:02 Page 25 Ventilation La pièce où se trouve le sèche-linge doit avoir une ventilation adéquate de manière à ce que les gaz des appareils qui brûlent d’autres combustibles, y compris les cheminées, ne soient pas attirés dans la pièce pendant que le sèche-linge est en marche.
  • Seite 26: Préparation De La Charge

    40005176Fre.qxd 18/07/2007 12:02 Page 26 Préparation de la charge Avant d’utiliser le sèche-linge pour la première fois : ● Veuillez lire ce manuel d’instruction en détail. ● Retirez tous les articles qui se trouvent à l’intérieur du tambour. ● Essuyez l’intérieur du tambour et de la porte avec un chiffon humide pour éliminer la poussière éventuelle qui aurait pu s’y infiltrer en transit.
  • Seite 27: Tri De La Charge

    40005176Fre.qxd 18/07/2007 12:02 Page 27 Triez la charge comme suit : ● Par symbole de soin d’entretien Vous les trouverez sur le col ou la couture intérieure : Convient pour séchage en machine. Séchage à haute température. Séchage à basse température uniquement. Ne séchez pas en machine.
  • Seite 28: Conseils De Séchage

    40005176Fre.qxd 18/07/2007 12:15 Page 28 Conseils de séchage Ne séchez pas en IMPORTANT : Ne machine : séchez pas les articles qui ont été Les lainages, la soie, les tissus délicats, les bas de nylon, traités avec un les broderies délicates, les tissus ayant des décorations liquide de métalliques, les vêtements avec des bordures en PVC ou nettoyage à...
  • Seite 29: Commandes Et Indicateurs

    40005176Fre.qxd 18/07/2007 12:15 Page 29 Commandes et indicateurs INDICATEUR AFFICHEUR COUNTDOWN ENTRETIEN FILTRE BOUTON ON/OFF (MARCHE- ARRÊT) INDICATEUR BOUTON BOUTON BOUTON SÉLECTEUR DE RÉSERVOIR ACRYLIQUES/ START START DELAY PROGRAMMES PLEIN SYNTHÉTIQUES (MARCHE) (DEPART DIFFÉRÉ) Panneau de commande et témoins indicateurs Sélecteur de programmes –...
  • Seite 30: Porte Et Filtre

    40005176Fre.qxd 18/07/2007 12:02 Page 30 Porte et filtre Ouverture de la porte Tirez sur la poignée pour ouvrir la porte. Pour remettre le sèche-linge en marche, fermez la porte et appuyez Start. ATTENTION ! Lorsque le seche-linge est en cours d’utilisation, il se peut que le tambour et la porte soient TRES CHAUDS.
  • Seite 31: Réservoir D'eau

    40005176Fre.qxd 19/07/2007 13:03 Page 31 Réservoir d’eau L’eau récupérée du linge pendant le cycle de séchage est recueillie dans un bac situé en bas du sèche-linge. Quand le réservoir est plein, l’indicateur s’allume sur le panneau de commande et le réservoir DOIT ABSOLUMENT être vidé.
  • Seite 32: Condenseur

    40005176Fre.qxd 18/07/2007 12:02 Page 32 Condenseur Important : Coupez toujours le courant et débranchez la prise avant de nettoyer le condenseur. Pour maintenir l’efficacité du sèche-linge, vérifiez régulièrement la propreté du condenseur. Pour retirer le condenseur Tirez doucement le bas de la plaque de protection pour la décrocher du sèche-linge.
  • Seite 33: Sélection Du Programme

    40005176Fre.qxd 18/07/2007 12:02 Page 33 Sélection du programme La machine Sensor Dry propose diverses options de séchage du linge répondant à tous les besoins. Le tableau ci-après répertorie les programmes et leurs fonctions correspondantes. Description Programme Sélectionnez le degré de séchage souhaité. Complètement sec Celui-ci s'étend de Complètement sec pour le linge de bain et les Extra Sec...
  • Seite 34: Fonctionnement

    40005176Fre.qxd 18/07/2007 12:02 Page 34 Fonctionnement Ouvrez la porte et chargez le sèche-linge de linge. Vérifiez qu’aucun vêtement n’entrave la fermeture de la porte. Fermez doucement la porte en la poussant lentement jusqu’à ce que vous entendiez un déclic. Appuyez sur le bouton pour mettre le sèche-linge en marche.
  • Seite 35: Nettoyage Et Entretien De Routine

    40005176Fre.qxd 18/07/2007 12:02 Page 35 Pour lancer le programme, appuyez sur Start (Marche). Le cycle de séchage débutera à l'issue de ce délai. Le ATTENTION ! témoin lumineux de 6 ou 9 heures clignote alors pour indiquer que la temporisation est activée. Il est possible que le tambour, la porte et la charge...
  • Seite 36: Dépistage De Pannes

    40005176Fre.qxd 18/07/2007 12:02 Page 36 Dépistage de pannes Qu'est-ce qui peut être à l'origine de... Défauts que vous pouvez rectifier vous-même Avant d’appeler le service GIAS pour obtenir des conseils, veuillez suivre la liste des vérifications ci-dessous. L’intervention sera facturée si la machine fonctionne correctement ou si elle a été...
  • Seite 37: Service Clientèle

    40005176Fre.qxd 18/07/2007 12:16 Page 37 Service clientèle En cas de problème après avoir effectué toutes les inspections recommandées, veuillez contacter le Service. Il pourra vous aider par téléphone ou organiser la visite d'un technicien, en vertu des conditions de votre garantie.
  • Seite 38: Deutsch

    40005176Ger.qxd 18/07/2007 13:04 Page 38 Einführung ..........39 Lieferinformationen.
  • Seite 39: Einführung

    40005176Ger.qxd 19/07/2007 13:05 Page 39 Einführung Kontrollieren Sie, ob die Maschine durch den Bitte lesen Sie diese Anleitung sorgfältig durch und richten Sie sich bei der Bedienung der Waschmaschine Transport an die Anleitung. Dieses Handbuch enthält wichtige beschädigt wurde. Hinweise für die sichere Installation, Anwendung und Falls dies der Fall Wartung sowie einige nützliche Hinweise für optimale ist, wenden Sie...
  • Seite 40: Sicherheitshinweise

    40005176Ger.qxd 18/07/2007 12:46 Page 40 Sicherheitshinweise Installation ● Überprüfen Sie vor dem Gebrauch, ob das Produkt sichtbare Schäden aufweist. Verwenden Sie es nicht, wenn es beschädigt ist, und wenden Sie sich an den GIAS-Service. ● Verwenden Sie keine Adapter, Mehrfachsteckdosen und/oder Verlängerungskabel. ●...
  • Seite 41: Umweltschutz

    40005176Ger.qxd 18/07/2007 13:05 Page 41 ● Textilien vor dem Einfüllen in den Trockner erst schleudern oder gründlich auswringen. Füllen Sie KEINE tropfnassen Textilien in den Trockner. ● Feuerzeuge und Streichhölzer unbedingt aus den Taschen entfernen und AUF KEINEN FALL mit feuergefährlichen Flüssigkeiten in der Nähe der Maschine hantieren. ●...
  • Seite 42: Installation

    40005176Ger.qxd 18/07/2007 12:48 Page 42 Installation Elektro-Anschluss Falls ein Problem mit Ihrer Maschine Dieser Trockner ist für eine Netzspannung von 230 V und 50 Hz (Einphasenstrom) ausgelegt. Stellen Sie durch falsche sicher, dass der Stromkreis eine Nennleistung von 10 A Installation hat.
  • Seite 43: Entlüftung

    40005176Ger.qxd 18/07/2007 12:48 Page 43 Entlüftung In dem Raum, in dem sich der Trockner befindet, muss eine ausreichende Entlüftung vorhanden sein, um zu verhindern, dass Gase aus der Verbrennung anderer Brennstoffe, zum Beispiel offene Feuer, während des Trocknerbetriebs in den Raum gesogen werden. ●...
  • Seite 44: Vorbereitung Der Füllung

    40005176Ger.qxd 18/07/2007 12:48 Page 44 Vorbereitung der Füllung Bevor Sie den Trockner das erste Mal benutzen: ● Lesen Sie die Gebrauchsanleitung bitte sorgfältig durch! ● Entfernen Sie alle in der Trommel befindlichen Gegenstände! ● Wischen Sie die Innenseiten der Trommel und Tür mit einem feuchten Tuch aus, um den beim Transport eventuell dort angesammelten Staub zu entfernen.
  • Seite 45: Sortieren Sie Die Füllung Folgendermaßen

    40005176Ger.qxd 18/07/2007 12:48 Page 45 Sortieren Sie die Füllung folgendermaßen: ● Anhand der Pflegeanleitungssymbole Diese finden Sie am Kragen oder der Sauminnenseite: Für Trockner geeignet. Im Trockner bei hoher Temperatur. Im Trockner nur bei geringer Temperatur. Nicht für den Trockner geeignet. Falls ein Wäschestück keine Pflegeanleitung hat, muss angenommen werden, dass es nicht für das Trocknen im Trockner geeignet ist.
  • Seite 46: Tipps Zum Trocknen

    40005176Ger.qxd 18/07/2007 12:48 Page 46 Tipps zum Trocknen Nicht für den Trockner WICHTIG: geeignet: Kleidungsstücke, die mit einem Wollsachen, Seide, empfindliche Stoffe, Nylonstrümpfe, chemischen gewirkte Textilien, Stoffe mit Metall-Dekor, Reinigungsmittel Kleidungsstücke mit PVC- oder Lederbesatz, behandelt worden Trainingsschuhe, voluminöse Wäschestücke wie sind, oder Schlafsäcke usw.
  • Seite 47: Schalterblende Und Anzeigen

    40005176Ger.qxd 18/07/2007 13:08 Page 47 Schalterblende und Anzeigen FLUSENSIEB- ZEITANZEIGE ANZEIGE TASTE AN/AUS KONDENSWASSER TASTE STARTTASTE START DELAY PROGRAMM- LEEREN-ANZEIGE ACRYL/SYNTHETIK- (STARTVERZÖGERUNGS-) WÄHLER WÄSCHE TASTE Schalterblende: Kontroll- und Lichtanzeige Programmwähler – Für die Wahl des gewünschten Programms Taste An/Aus – Zum Anstellen drücken, die Anzeige leuchtet auf Start-Taste –...
  • Seite 48: Tür Und Sieb

    40005176Ger.qxd 18/07/2007 12:48 Page 48 Tür und Sieb Öffnen der Tür Ziehen Sie am Griff, um die Tür zu öffnen. Um den Trocknungsvorgang wieder in Gang zu setzen, schließen Sie die Tür und drücken Start. WARNUNG! Während des Trocknungsvorgangs können Trommel und Tür SEHR HEISS werden.
  • Seite 49: Kondenswasser-Behälter

    40005176Ger.qxd 19/07/2007 13:05 Page 49 Kondenswasser-Behälter Das während des Trocknungsvorgangs aus der Wäsche entzogene Wasser wird in einem Behälter unten im Trockner gesammelt. Wenn der Behälter voll ist, leuchtet die Anzeige auf der Bedienfläche auf. Dann MUSS der Behälter geleert werden. Wir empfehlen jedoch, den Behälter nach jedem Trockengang zu leeren.
  • Seite 50: Kondensator

    40005176Ger.qxd 18/07/2007 12:48 Page 50 Kondensator Wichtig: Immer das Gerät ausschalten und den Stecker aus der Steckdose ziehen, bevor der Kondensator gereinigt wird. Damit der Trockner immer optimale Leistung erbringen kann, überprüfen Sie regelmäßig, ob der Kondensator sauber ist. Entfernen des Kondensators Ziehen Sie vorsichtig am Boden der Wartungsklappe, bis diese sich aus der...
  • Seite 51: Auswählen Des Programms

    40005176Ger.qxd 18/07/2007 13:08 Page 51 Auswählen des Programms Der Sensortrockner liefert Ihnen viele Möglichkeiten für das Trocknen der Wäsche. In der folgenden Tabelle sind die Programme und die Funktionen der einzelnen Programme aufgeführt. Beschreibung Programm Wählen Sie den gewünschten Trockenheitsgrad. Supertrocken Diese reichen von Supertrocken für Badehandtücher und Extra trocken...
  • Seite 52: Betrieb

    40005176Ger.qxd 18/07/2007 13:08 Page 52 Betrieb Öffnen Sie die Tür, und füllen Sie die Wäsche in die Trommel. Achten Sie darauf, dass keine Kleidungsstücke von der Tür eingeklemmt werden. Die Tür mit einem sanften Druck schließen, bis Sie ein ‘Klick’-Geräusch hören. Drücken Sie die Taste zum Anstellen des Trockners.
  • Seite 53: Reinigung Und Routinewartungen

    40005176Ger.qxd 18/07/2007 12:48 Page 53 Drücken Sie Start, um das Programm zu beginnen, und das Gerät wird den Trocknungsvorgang am Ende dieses WARNUNG! Zeitraums durchführen. Die Lichtanzeige für 6 oder 9 Stunden blinkt, um anzuzeigen, dass die Trommel, Tür und Startverzögerung aktiviert wurde.
  • Seite 54: Fehlersuche

    40005176Ger.qxd 18/07/2007 12:48 Page 54 Fehlersuche Mögliche Gründe für... Fehler, die Sie selbst beheben können Prüfen Sie alle Punkte in der folgenden Checkliste, bevor Sie sich an den GIAS-Service wenden. Sollte die Waschmaschine funktionstüchtig sein oder unsachgemäß installiert oder verwendet worden sein, wird Ihnen der Besuch des Kundendiensttechnikers in Rechnung gestellt.
  • Seite 55: Kundendienst

    40005176Ger.qxd 18/07/2007 12:48 Page 55 Kundendienst Sollten trotz obengenannter Kontrollen weiterhin Störungen bei Ihrem Trockner auftreten, wenden Sie sich bitte an den GIAS-Service, der Sie beraten kann. Der Kundendienst kann Sie möglicherweise telefonisch beraten oder mit Ihnen einen geeigneten Termin für einem Techniker im Rahmen der Garantie vereinbaren.
  • Seite 56: Italiano

    40005176Ita.qxd 18/07/2007 13:36 Page 56 Introduzione ..........57 Informazioni sulla consegna .
  • Seite 57: Introduzione

    40005176Ita.qxd 19/07/2007 13:07 Page 57 Introduzione Verificare che durante il Leggere attentamente le istruzioni per un corretto trasporto la funzionamento della macchina. Questo opuscolo macchina non fornisce importanti linee guida per una manutenzione, abbia subito danni. un uso e un'installazione sicuri. Esso contiene inoltre In caso contrario, utili consigli che consentiranno di sfruttare al meglio le rivolgersi al Centro...
  • Seite 58: Consigli Di Sicurezza

    40005176Ita.qxd 18/07/2007 13:36 Page 58 Consigli di sicurezza Installazione ● Prima dell’uso, controllare che il prodotto non presenti segni visibili di danni. Non usare in caso di danni e contattare il Servizio Assistenza GIAS. ● Non utilizzare adattatori, connettori multipli e/o prolunghe. ●...
  • Seite 59: Tutela Dell'ambiente

    40005176Ita.qxd 18/07/2007 13:37 Page 59 opportunamente centrifugati in lavatrice o strizzati a mano. EVITARE di caricare nel cestello indumenti ancora gocciolanti. ● Controllare accuratamente che nelle tasche degli indumenti da asciugare non siano presenti accendini o fiammiferi ed EVITARE ASSOLUTAMENTE l’uso di prodotti infiammabili in prossimità...
  • Seite 60: Installazione

    40005176Ita.qxd 18/07/2007 13:37 Page 60 Installazione Requisiti elettrici La chiamata può essere soggetta a Le asciugatrici sono state progettate per funzionare ad pagamento, se le una tensione di 230V, 50 Hz monofase. Controllare che il circuito dell’alimentazione sia idoneo per valori di cause di corrente di almeno 10A.
  • Seite 61: Ventilazione

    40005176Ita.qxd 18/07/2007 13:37 Page 61 Ventilazione Il locale in cui viene installata l’asciugatrice deve essere adeguatamente ventilato onde evitare che i gas provenienti da apparecchiature funzionanti con altri combustibili, comprese fiamme libere, siano aspirati nel locale dove l’asciugatrice è in funzione. ●...
  • Seite 62: Preparazione Della Biancheria

    40005176Ita.qxd 18/07/2007 14:05 Page 62 Preparazione della biancheria Prima di utilizzare l’asciugatrice per la prima volta: ● Leggere attentamente il presente libretto d’istruzioni. ● Togliere tutti gli articoli presenti all’interno del cestello. ● Pulire l’interno del cestello e il portellone con un panno umido in modo da eliminare l’eventuale polvere depositata durante il trasporto.
  • Seite 63: Selezione Della Biancheria

    40005176Ita.qxd 18/07/2007 13:37 Page 63 Selezionare la biancheria nel modo seguente: ● In base ai simboli delle etichette di lavaggio Le etichette di lavaggio sono apposte sul collo o sulle cuciture interne: Articolo idoneo per l’asciugatura meccanica. Asciugatura ad alta temperatura. Solo asciugatura a bassa temperatura.
  • Seite 64: Consigli Per L'asciugatura

    40005176Ita.qxd 18/07/2007 13:37 Page 64 Consigli per l’asciugatura Evitare di asciugare: IMPORTANTE: Evitare di asciugare Articoli di lana, seta, tessuti delicati, calze di nylon, articoli ricami delicati, tessuti con decorazioni metalliche, indumenti con guarnizioni in PVC o in pelle, scarpe da preventivamente ginnastica, articoli pesanti come sacchi a pelo ecc.
  • Seite 65: Comandi E Spie Di Segnalazione

    40005176Ita.qxd 18/07/2007 13:37 Page 65 Comandi e spie di segnalazione SPIA DI PULIZIA DISPLAY TEMPO RESIDUO FILTRO SPIA ELIMINA PULSANTE PULSANTE PULSANTE PULSANTE SELETTORE DEI ACQUA ACRILICI/SINTETICI AVVIO PARTENZA ON/OFF PROGRAMMI RITARDATA Pannello di comando e spie luminose Selettore dei programmi – Consente di selezionare il programma desiderato Tasto e spia On/Off –...
  • Seite 66: Portellone E Filtro

    40005176Ita.qxd 18/07/2007 13:37 Page 66 Portellone e filtro Apertura del portellone Tirare la maniglia per aprire lo sportello. Per avviare la macchina, richiudere il portellone e premere il tasto Start (Avvio). AVVERTENZA! Si ricorda che quando la macchina è in funzione il cestello e il portellone possono essere MOLTO CALDI.
  • Seite 67: Vaschetta Dell'acqua

    40005176Ita.qxd 19/07/2007 13:08 Page 67 Vaschetta dell’acqua L’acqua eliminata dalla biancheria durante il ciclo di asciugatura viene raccolta in una vaschetta posta in fondo alla macchina. Quando la vaschetta è piena si accende la spia sul pannello dei comandi, segnalando che si DEVE vuotare la vaschetta.
  • Seite 68: Condensatore

    40005176Ita.qxd 18/07/2007 13:37 Page 68 Condensatore IMPORTANTE: Prima di procedere alla pulizia del condensatore, disattivare sempre l’apparecchio e staccare la spina dalla presa elettrica. Ai fini delle prestazione dell’apparecchio, è opportuno verificare regolarmente lo stato di pulizia del condensatore. Per togliere il condensatore Tirare delicatamente la parte inferiore dello zoccolo, che si sgancia dalla macchina.
  • Seite 69: Selezione Del Programma

    40005176Ita.qxd 18/07/2007 14:07 Page 69 Selezione del programma La macchina, dotata di sensore di asciugatura, offre opzioni di asciugatura in grado di rispondere alle più svariate esigenze. Nella tabella che segue viene riportato un elenco dei programmi con la relativa funzione. Descrizione Programma Selezionare il grado di asciugatura desiderato.
  • Seite 70: Funzionamento

    40005176Ita.qxd 18/07/2007 14:07 Page 70 Funzionamento Aprire il portellone e caricare la biancheria nel cestello. Verificare che i capi non impediscano la chiusura del portellone. Chiudere delicatamente il portellone spingendolo lentamente fino ad avvertirne lo scatto di chiusura. Premere il tasto per attivare l’asciugatrice.
  • Seite 71: Pulizia E Manutenzione Ordinaria

    40005176Ita.qxd 18/07/2007 13:37 Page 71 Per far partire il programma, premere il tasto Start. Trascorso il tempo di ritardo impostato, la macchina AVVERTENZA! completerà il ciclo di asciugatura. Lampeggerà la spia delle 6 ore o delle 9 ore, per indicare che è in funzione Il cestello, il la partenza ritardata.
  • Seite 72: Ricerca Guasti

    40005176Ita.qxd 18/07/2007 13:37 Page 72 Ricerca guasti Quale può essere la causa... Problemi che può risolvere l’utente Prima di rivolgersi al Centro Assistenza GIAS, consultare la seguente checklist. La chiamata verrà addebitata all'utente nel caso in cui risulti che la macchina funziona o è stata installata o utilizzata in maniera errata.
  • Seite 73: Servizio Assistenza Clienti

    40005176Ita.qxd 18/07/2007 13:37 Page 73 Servizio assistenza clienti Se il problema persiste anche dopo aver effettuato tutti i controlli consigliati, rivolgersi al Servizio Assistenza GIAS. Sarà a disposizione per suggerire eventuali soluzioni per telefono o per fissare la visita del tecnico in base alle condizioni di garanzia.
  • Seite 74 40005176Eng.qxd 18/07/2007 11:01 Page 20 40005176...

Diese Anleitung auch für:

Go dc 88s

Inhaltsverzeichnis