
Verwandte Anleitungen für Candy EVOH 971NA2T Grand Evo


Inhaltszusammenfassung für Candy EVOH 971NA2T Grand Evo
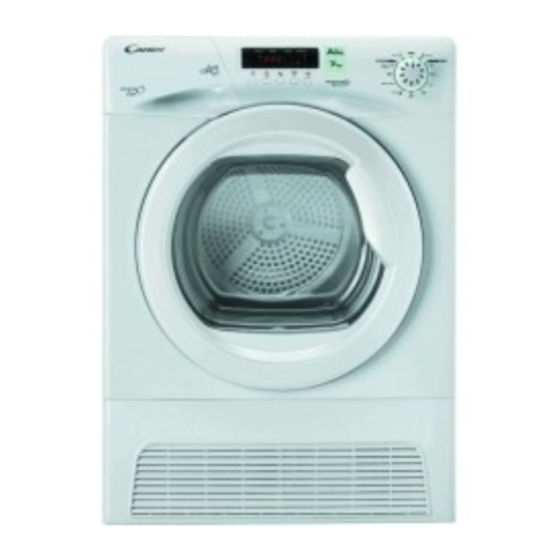
- Seite 1 INSTRUCTION BOOK EVOH 971NA2T Heat Pump Tumble Dryer English Deutsch Slovensko Italiano...
-
Seite 2: Inhaltsverzeichnis
INDEX Introduction Delivery Information Unpacking the Product Safety Reminders Installation The Laundry Environmental Issues Gias Service Installation Electrical Requirements Adjusting the Feet Drain Hose Kit: Fitting Instructions Preparing the Load Clothes Preparation Do Not Tumble Dry Energy Saving Sorting the Load Controls and Indicators Selecting the Programme Door and Filter... -
Seite 3: Introduction
INTRODUCTION Please read and follow these instructions carefully and operate the machine accordingly. This booklet provides important guidelines for safe use, installation, maintenance and some useful advice for best results when using your machine. Keep all documentation in a safe place for future reference or for any future owners. Delivery nformation UNPACKING THE PRODUCT Remove the machine from... -
Seite 4: Installation
SAFETY REMINDERS Installation Environmental Issues ● Check that the product has no visible signs of ● All packaging materials used are damage before use. If damaged do not use and environmentally-friendly and recyclable. please call GIAS Service. Please help dispose of the packaging via environmentally-friendly means. -
Seite 5: Installation
INSTALLATION Electrical Requirements VENTILATION Adequate ventilation must be provided in the Tumble dryers are supplied to operate at a room where the tumble dryer is located to voltage of 220-240V, 50 Hz single phase. Check prevent gases from appliances burning other that the supply circuit is rated to at least 6 A. -
Seite 6: Drain Hose Kit: Fitting Instructions
DRAIN HOSE KIT: FITTING INSTRUCTIONS 6. Take off the water To avoid having to empty the water container container cover from after each drying cycle, the water normally the rear of the machine collected during the drying cycle can be by removing the two discharged directly to a waste water drain pipe screws and unclipping... -
Seite 7: Preparing The Load
PREPARING THE LOAD Before using the tumble dryer for the first time: Maximum Drying Weight ● Cottons Max. 7 kg ● Please read this instruction book thoroughly. ● Synthetics Max. 3,5 kg ● Remove all items packed inside drum. ● Wipe the inside of the drum and door with a damp cloth to remove any dust which may Do not overload the drum, large items when have settled in transit. -
Seite 8: Controls And Indicators
CONTROLS AND INDICATORS Empty Water Filter Care Program Programme Indicator Indicator Display Selector Time Selection Delay Start Acrylic Synthetic Anti-Crease Start/Pause Button Button Button Button Button Control Panel and Indicator Lights Knob: You can turn it in both directions to choose the required programme. Time selection :To modify the drying timing of required programme;... -
Seite 9: Selecting The Programme
SELECTING THE PROGRAMME PROGRAMME IDEAL FOR Perfect Home Clothes you want completely dryed, e.g. towels, bathrobes, table clothes or sheet. Time: around 3h. Store Dry Clothes you want to fold and store without ironing, e.g. shirts in mixed fabrics, socks, baby clothes. Time: around 2h and 45 min. Hang Dry Clothes you don’t need to iron, but just hang after the drying cycle. -
Seite 10: Door And Filter
DOOR and FILTER Opening the Door To Clean the Condenser Filter Pull on handle to open the door. To restart the dryer, close the door and R e m o v e t h e press kickplate. 2. Turn the two locking WARNING! When the tumble dryer is in levers anti-clockwise use the drum and door may be VERY HOT. -
Seite 11: Water Container
WATER CONTAINER The water removed from the laundry during OPERATION the drying cycle is collected in a container Open the door and load the drum with inside the door of the dryer. When the laundry. Ensure that garments do not hinder container is full the indicator on the control closure of the door. -
Seite 12: Delay Start Function
OPERATION Delay Start Function The Delay Start Function allows the user to delay the start of the drying cycle by 1 to 24 hours. When the function is first selected the display will show a delay of 1 hour, subsequent presses of the button will increase the delay with 1 hour steps. -
Seite 13: Troubleshooting
TROUBLESHOOTING What Might be the Cause of... The dryer is noisy… Defects you can remedy yourself ● Switch off the dryer and contact GIAS Service Before calling GIAS Service for technical for advice. advice please run through the following checklist. A charge will be made if the machine is found to be working or has been installed Indicator is on…... - Seite 14 INDEX Einführung Lieferinformationen Auspacken des Produkts Sicherheitshinweise Gebrauch Installation Die Wäsche Umweltschutz GIAS-Service Installation Elektro-Anschluss Einstellen der Füße Ablaufschlauchbausatz: Installationsanleitung Vorbereitung der Füllung Vorbereitung der Textilien Nicht für den Trockner geeignet Energiesparen Sortierung der Füllung Trocknungswerte Schalterblende und Anzeigen Auswählen des Programms Tür und Sieb Öffnen der Tür Sieb...
-
Seite 15: Einführung
EINFÜHRUNG Bitte lesen Sie diese Anleitung sorgfältig durch und richten Sie sich bei der Bedienung der Waschmaschine an die Anleitung. Dieses Handbuch enthält wichtige Hinweise für die sichere Installation, Anwendung und Wartung sowie einige nützliche Hinweise für optimale Ergebnisse beim Gebrauch Ihrer Maschine. -
Seite 16: Sicherheitshinweise
SICHERHEITSHINWEISE Installation Umweltschutz ● Das gesamte Verpackungsmaterial besteht ● Überprüfen Sie vor dem Gebrauch, ob das aus umwelt-freundlichen, wiederverwertbaren Produkt sichtbare Schäden aufweist. Verwenden Materialien. Bitte helfen Sie mit, diese umwelt- Sie es nicht, wenn es beschädigt ist, und wenden freundlich zu entsorgen. -
Seite 17: Entlüftung
INSTALLATION Elektro-Anschluss ENTLÜFTUNG In dem Raum, in dem sich der Trockner befindet, Dieser Trockner ist für eine Netzspannung von muss eine ausreichende Entlüftung vorhanden sein, 220-240 V und 50 Hz (Einphasenstrom) um zu verhindern, dass Gase aus der Verbrennung ausgelegt. Stellen Sie sicher, dass der anderer Brennstoffe, zum Beispiel offene Feuer, während desTroc-knerbetriebs in den Raum gesogen Stromkreis eine Nennleistung von 6 A hat. - Seite 18 ABLAUFSCHLAUCHBAUSATZ: INSTALLATIONSANLEITUNG Um zu vermeiden, dass der Wasserbehälter nach 7. Brechen Sie die jedem Trocknungsvorgang geleert werden muss, Lasche an der Seite der kann das Wasser, dass sich normalerweise A b d e c k u n g a b u n d während des Trocknungsvorgangs ansammelt, s e t z e n S i e...
-
Seite 19: Vorbereitung Der Füllung
VORBEREITUNG DER FÜLLUNG Bevor Sie den Trockner das erste Mal benutzen: Maximales Fassungsvermögen ● Lesen Sie die Gebrauchsanleitung bitte ● Baumwolle max.7 kg sorgfältig durch! ● Synthetische Stoffe max. 3,5 kg ● Entfernen Sie alle in der Trommel befindlichen Gegenstände! Überladen Sie die Trommel nicht, große ●... -
Seite 20: Schalterblende Und Anzeigen
SCHALTERBLENDE UND ANZEIGEN Spia Pulizia Auto- Programm Programmwähler Wasseranzeige Filtro Anzeige Startzeit- Start/Pause Knitterschutz Trockendauer Schontrocknen Vorwahl Taste Taste Schalterblende: Kontroll- und Leuchtanzeigen Programmwahlschalter: Der Programmwahlschalter kann in beide Richtungen gedreht werden, um das gewünschte Programm auszuwählen. Trockendauer : Ermöglicht die individuelle Einstellung der Programmdauer in einigen Programmen. Diese Funktion ist nicht in allen Programmen verfügbar. -
Seite 21: Auswählen Des Programms
AUSWÄHLEN DES PROGRAMMS Programm Geeignet Für Perfect Home Intensives Trocknen von dicken oder mehrlagigen Textilien, wie Handtüchern etc.; Programmdauer ca. 3 Stunden. Schranktrocken Intensives Trocknen von normal dicken und einlagigen Textilien; Programmdauer 2:45 Stunden. Bügeltrocken Für Textilien, die noch gebügelt werden sollen; Programmdauer ca. 2:30 Stunden. -
Seite 22: Tür Und Sieb
TÜR SIEB Öffnen der Tür Reinigung des Kondensatorfilters Ziehen Sie am Griff, Entfernen Sie die um die Tür zu öffnen. Wartungsklappe Um den Trocknungs- vorgang wieder in 2. Drehen Sie die zwei Gang zu setzen, Verschlusshebel gegen schließen Sie die Tür den Uhrzeigersinn und und drücken . - Seite 23 KONDENSATOR KONDENSWASSER-BEHÄLTER BETRIEB Das während des Trocknungsvorgangs aus der Wäsche entzogene Wasser wird in einem Öffnen Sie die Tür des Gerätes und füllen die Behälter unten im Trockner gesammelt. Trommel mit der zu trocknenden Wäsche. Wenn der Behälter voll ist, leuchtet die Anzeige Vergewissern Sie sich, dass heraushängende auf der Bedienfläche auf.
-
Seite 24: Betrieb
BETRIEB Startzeitvorwahl Mit der Startzeitvorwahlfunktion können Sie den Beginn des Trocknungsvorgangs um 1 bis 24 Stunde verzögern. Wenn diese Funktion erstmalig ausgewählt wird, zeigt das Display eine Verzögerung von 1 Stunden. Durch nachfolgendes mehrmaliges Drücken der Taste, wird die Verzögerung auf 24 Stunden verlängert. -
Seite 25: Kundendienst
FEHLERSUCHE Mögliche Gründe für... Mögliche Gründe für... Der Trockner ist zu laut… Fehler, die Sie selbst beheben können ● Schalten Sie den Trockner aus und wenden Sie Prüfen Sie alle Punkte in der folgenden Checkliste, sich an den GIAS-Service. bevor Sie sich an den GIAS-Service wenden. Sollte die Waschmaschine funktionstüchtig sein leuchtet…... - Seite 26 INDEKS Uvod Podatki O Dobavi Odstranjevanje Embalaže Opombe Za Varnost Uporaba Namestitev Perilo Varovanje Okolja Pooblaščeni Servis Namestitev Zahteve Za Električno Napeljavo Nastavitev Nivelirnih Nog Pretok Zraka Komplet Z Odtočno Cevjo: Navodila Za Namestitev Priprava Na Polnjenje Stroja Priprava Oblačil Sortiranje Perila V Sušilnem Stroju Ne Sušiti Varčevanje Z Energijo...
-
Seite 27: Odstranjevanje Embalaže
UVOD Prosimo vas, da ta navodila pozorno preberete in stroj uporabljate v skladu z njimi. Ta knjižica vsebuje pomembna navodila za varno uporabo, namestitev in vzdrževanje vašega stroja ter tudi uporabne napotke za doseganje najboljših rezultatov. Vso dokumentacijo, ki ste jo dobili s strojem, skrbno shranite, saj jo boste morda še potrebovali ali pa jo boste Predali drugemu lastniku. -
Seite 28: Opombe Za Varnost
OPOMBE ZA VARNOST Namestitev Varovanje kolja ● Preden stroj uporabite, se prepričajte, da ni ● Vsi materiali, iz katerih je izdelana embalaža, vidno poškodovan. Če je poškodovan, ga ne so okolju prijazni in jih je mogoče reciklirati. uporabljajte, temveč pokličite pooblaščeni Prosimo, odvrzite embalažo na okolju prijazen servis. -
Seite 29: Pretok Zraka
NAMESTITEV Zahteve a Električno Napeljavo PRETOK ZRAKA V prostoru, kjer stoji sušilni stroj, je treba zagotoviti zadostno zračenje, zato da stroj med Sušilni stroji delujejo na enofazni izmenični tok delovanjem v prostor ne bi potegnil plinov, ki jih s 50 Hz in napetostjo 230 240 V. Prepričajte se, pri izgorevanju izločajo nekatere naprave, na da je nazivna zmogljivost priključka vsaj 10 A. - Seite 30 KOMPLET Z ODTOČNO CEVJO: NAVODILA ZA NAMESTITEV Da bi se izognili praznjenju posode za vodo po 6. Snemite pokrov vsakem sušilnem ciklu, lahko vodo, ki se posode za vodo z normalno zbira med sušilnim ciklom, izpustite zadnjega dela stroja, neposredno v odtok za odpadno vodo (odtočni tako da odstranite dva Sistem je enak kot pri kuhinjskih koritih).
-
Seite 31: Priprava Na Polnjenje Stroja
PRIPRAVA NA POLNJENJE STROJA Preden prvič uporabite sušilni stroj: Maksimalna Teža a Sušenje ● Bombaž največ 7 kg ● Skrbno preberite navodila za uporabo; ● Sintetika največ 3,5 kg ● Odstranite vse dele, ki so v bobnu; ● Z vlažno krpo obrišite notranjost bobna in vrat, Bobna ne smete preveč... -
Seite 32: Tipke Za Upravljanje In Signalne Lučke
TIPKE ZA UPRAVLJANJE IN SIGNALNE LUČKE Gump za Prikaz avto Indikator za Indikator za Programe vodo Programa filter Tipka Tipka za nast Tipka za Tipka za Tipka proti časa Start/Pavza mečkanju Akril-sint Zamik Stikalna Plošča In Kontrolne Lučke Gumb za izbiranje programov –... -
Seite 33: Izbira Programa
IZBIRA PROGRAMA PROGRAMME IDEALNO ZA Perfect Home Perilo, ki ga želite posu šiti do konca, npr. brisa če, kopalne halje, prti, rjuhe. Program traja pribl. 3 ure. Za v omaro Perilo, ki ga želite zložiti in shraniti brez likanja, npr. srajce iz me šanice vlaken, nogavice, otroška oblačila. -
Seite 34: Vrata In Filter
VRATA IN FILTER Odpiranje Vrat Či čenje filtra kondenzatorja š Za odpiranje vrat potegnite ročico. Za ponovni zagon s u š i l n e g a s t r o j a z a p r i t e v r a t a i n .Snemite podno žje. -
Seite 35: Posoda Za Vodo
KONDENZATOR Pomembno: Pred iš enjem kondenzatorja vedno č č izklopite stroj in izvlecite kabel iz vtičnice. UPORABA SUŠILNEGA STROJA 1.Odprite vrata in vložite perilo v boben. Pazite, Da ohranite učinkovitost sušilnega stroja, redno da perilo ne ovira zapiranje vrat. preverjajte, Ali je kondenzator očiščen POSODA ZA VODO 2.Nežno zaprite vrata –... -
Seite 36: Čiščenje In Vzdrževanje
Obratovanje Časovni Zamik Vklopa Funkcija za časovni zamik vklopa uporabniku omogoča, da zamakne začetek sušenja za od 1 do 24 ur. Ko izberete to funkcijo, se na prikazovalniku prikaže vrednost 1 ure, z vsakim pritiskom na tipko pa se časovni zamik poveča v korakih po 1 uro. Program zaženete s pritiskom na tipko ;... -
Seite 37: Odpravljanje Napak
ODPRAVLJANJE NAPAK Kaj e Lahko Vzrok, a ... POMOČ STRANKAM Napake, ki jih lahko odpravite sami Če vaš sušilni stroj še vedno ne dela niti potem, Preden pokličete pooblaščeni servis za nasvet, ko ste preverili vse točke na tem seznamu, vas vas prosimo, da pregledate ta seznam. - Seite 38 40008078...