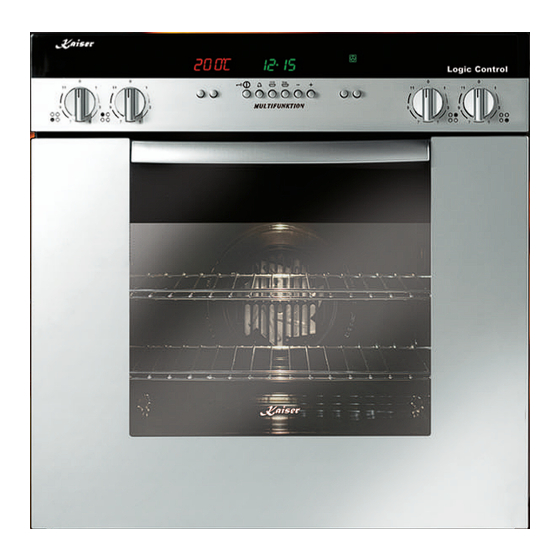
Kaiser EH Serie Bedienungsanleitung
Vorschau ausblenden
Andere Handbücher für EH Serie:
- Gebrauchsanweisung (176 Seiten) ,
- Gebrauchsanweisungen (60 Seiten) ,
- Handbuch (36 Seiten)
Inhaltsverzeichnis
Verfügbare Sprachen
Verfügbare Sprachen
Inhaltsverzeichnis

Verwandte Anleitungen für Kaiser EH Serie


Inhaltszusammenfassung für Kaiser EH Serie
- Seite 2 DEAR CUSTOMER, We thank you and congratulate you on your choice. This new carefully designed product, manufactured with the highest quality materials, has been carefully tested to satisfy all your cooking demands. We would therefore request you to read and follow these easy instructions which will allow you to obtain ex- cellent results right from the start.
- Seite 3 SEHR GEEHRTER KUNDE, Edf;ftvsq gjregfntkm> Edf;ftvsq gjregfntkm> Edf;ftvsq gjregfntkm> Edf;ftvsq gjregfntkm> Edf;ftvsq gjregfntkm> wir danken Ihnen und beglückwünschen Sie zu Ihrer vs ,kfujlfhbv Dfc pf Dfi ds,jh b gjplhfdkztv c Wahl. elfxyjq gjregrjq. "njn yjdsq ghjlern> nofntkmyj Dieses neue Produkt, sorgfältig entworfen und mit hfphf,jnfyysq b bpujnjdktyysq bp gthdjrkfccys[ erstklassigen Materialien hergestellt, wurde genau vfnthbfkjd>...
-
Seite 4: Inhaltsverzeichnis
CONTENTS First use Respect for the environment Control panel Cooking instructions: - fan cooking - defrosting - grill cooking Replacing the oven light Removing the oven door INSTALLATION INSTRUCTIONS Flush fitting Electrical connections... - Seite 5 INDEX JUKFDKTYBT JUKFDKTYBT JUKFDKTYBT JUKFDKTYBT JUKFDKTYBT Erstmalige Benutzung Gthdjt bcgjkmpjdfybt Umweltverträglichkeit J[hfyf jrhe;f/otq chtls Bedienblende Gthtrk/xfntkm aeyrwbq Backempfehlungen: Ghfrnbxtcrbt cjdtns% - Umluftbacken - Ghbujnjdktybt c j,ledjv - Auftauen - Jnnfbdfybt - Grillen - Uhbkm Auswechslung der Ofenbeleuchtung Pfvtyf kfvgjxrb Ausbauen der Ofentür Ltvjynf;...
-
Seite 6: The First Time You Use The Oven
THE FIRST TIME YOU USE THE OVEN Clean the oven thoroughly with soapy water and rinse well. Operate the oven for about 30 minutes at maximum temperature to burn off all traces of grease which might otherwise create unpleasant smells when cooking. Important: As a safety precaution, before cleaning the oven, always disconnect the plug from the power socket or the power... -
Seite 7: Erstmalige Benutzung
ERSTMALIGE BENUTZUNG GTHDJT BCGJKMPJDFYBT GTHDJT BCGJKMPJDFYBT GTHDJT BCGJKMPJDFYBT GTHDJT BCGJKMPJDFYBT GTHDJT BCGJKMPJDFYBT Der Backofen muss gründlich mit Seifenwasser ge- Nofntkmyj jxbcnbnm le[jdre vskmysv hfcndjhjv b säubert werden. [jhjij ghjvsnm ljcnfnjxysv rjkbxtcndjv djls. Den Backofen für etwa 30 Minuten auf Höchsttempe- D ntxtybt ghbvthyj 30 vbyen ghjuhtnm le[jdre lj ratur aufheizen;... -
Seite 8: Control Panel
THE CONTROL PANEL FUNCTION SYMBOLS ON THE SELECTOR Oven light (stays on while oven is in use). Circular heating element with fan. Thermostat setting from 50°C to MAX. Fan for defrosting. Thermostat setting at 0°C. Double top heating element (large area grill). Thermostat setting from 50°C to 200°C. -
Seite 9: Bedienblende
SCHEMA DER DREHGRIFFE AN GTHTRK?XFNTKM GTHTRK?XFNTKM GTHTRK?XFNTKM GTHTRK?XFNTKM GTHTRK?XFNTKM DER BEDIENBLENDE AEYRWBQ AEYRWBQ AEYRWBQ AEYRWBQ AEYRWBQ FUNKTIONSSYMBOLE AM SCHALTER CBVDJKS AEYRWBQ YF GTHTRK?XFNTKT CBVDJKS AEYRWBQ YF GTHTRK?XFNTKT CBVDJKS AEYRWBQ YF GTHTRK?XFNTKT CBVDJKS AEYRWBQ YF GTHTRK?XFNTKT CBVDJKS AEYRWBQ YF GTHTRK?XFNTKT Ofenbeleuchtung (bleibt während des Betriebs immer Jcdtotybt le[jdrb !jcnftncz drk/xtyysv dj dhtvz tt eingeschaltet). -
Seite 10: Cooking Instructions
COOKING INSTRUCTIONS FAN COOKING For this type of cooking a fan positioned at the back allows the circulation of hot air inside the oven, creating uniform heat. In this way cooking is more rapid than conventional cooking. It is a suitable method for cooking dishes on more than one shelf, especially when the food is of different types (fish, meat etc.) DEFROSTING... -
Seite 11: Backempfehlungen
BACKEMPFEHLUNGEN GHFRNBXTCRBT CJDTNS GHFRNBXTCRBT CJDTNS GHFRNBXTCRBT CJDTNS GHFRNBXTCRBT CJDTNS GHFRNBXTCRBT CJDTNS UMLUFTBACKEN GHBUJNJDKTYBT C J<LEDJV GHBUJNJDKTYBT C J<LEDJV GHBUJNJDKTYBT C J<LEDJV GHBUJNJDKTYBT C J<LEDJV GHBUJNJDKTYBT C J<LEDJV Bei dieser Garart bringt der Ventilator, der sich im Ghb 'njv ht;bvt ghbujnjdktybz yf[jlzobqcz d hinteren Ofenteil befindet, heiße Umluft in den Ofen und lfkmytq xfcnb le[jdrb dtynbkznjh jceotcndkztn verteilt diese gleichmäßig, wobei die Garzeit geringer... -
Seite 12: Replacing The Oven Light
THERMOSTAT Use the thermostat to set the cooking temperature you need. The thermostat can be adjusted from 50° to 250° C. REPLACING THE OVEN LIGHT IMPORTANT: The oven light must have these precise features: a) it must be able to resist high temperatures (up to 300°C) b) power supply: see V/Hz indicated on data plate. -
Seite 13: Auswechslung Der Ofenbeleuchtung
NTHVJCNFN NTHVJCNFN THERMOSTAT NTHVJCNFN NTHVJCNFN NTHVJCNFN Temperaturregler, mit dem die je nach Gargut geeignete Htuekznjh ntvgthfnehs> ghb gjvjob rjnjhjuj> d Gartemperatur eingestellt wird, und der auf Tem- pfdbcbvjcnb jn dblf ghjlernf> ecnfyfdkbdftncz ° peraturen zwischen 50° und 250° C eingestellt werden ntvgthfnehf ghbujnjdktybz d bynthdfkf[ jn 50 C lj °... -
Seite 14: Removing The Oven Door
REMOVING THE OVEN DOOR The oven door can be removed quickly and easily. To do so, proceed as follows: - Open the door fully. - Lift the two levers shown in fig. - Close the door as far as the first stop (caused by the raised levers). -
Seite 15: Ausbauen Der Ofentür
AUSBAUEN DER OFENTÜR LTVJYNF: LDTHWS LE{JDRB LTVJYNF: LDTHWS LE{JDRB LTVJYNF: LDTHWS LE{JDRB LTVJYNF: LDTHWS LE{JDRB LTVJYNF: LDTHWS LE{JDRB Die Backofentür kann mühelos ausgebaut werden. Dazu Ldthwf le[jdrb vj;tn ,snm jxtym kturj ltvjynbhjdfyf. folgendermaßen vorgehen: Lkz 'njuj ytj,[jlbvj% - die Tür ganz öffnen; - gjkyjcnm/ jnrhsnm ldthwe&...