Inhaltsverzeichnis
Werbung
Verfügbare Sprachen
Verfügbare Sprachen
Quicklinks
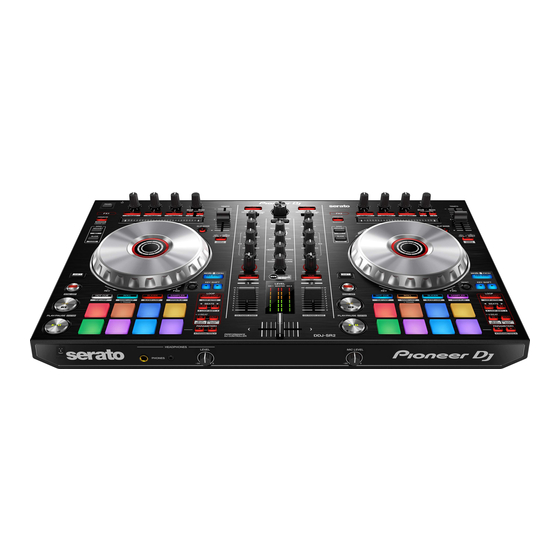
DDJ-SR2
pioneerdj.com/support/
http://serato.com/
For FAQs and other support information for this product, visit the above site.
Pour les FAQ et autres informations de support sur ce produit, consultez le site ci-dessus.
Häufig gestellte Fragen und weitere Support-Informationen für dieses Produkt finden Sie auf der oben
genannten Seite.
Per la sezione FAQ e altre informazioni di supporto per questo prodotto, visitare il sito indicato sopra.
Bezoek de bovenstaande website voor vaak gestelde vragen en andere informatie over ondersteuning voor dit
product.
Para consultar las preguntas más frecuentes y otras informaciones de asistencia para este producto, visite el
sitio indicado anteriormente.
Para obter informações sobre as FAQs e outras informações de apoio relativas a este produto, consulte o site
indicado acima.
Ответы на часто задаваемые вопросы и другую дополнительную информацию о данном изделии см.
на указанном выше сайте.
Operating Instructions (Quick Start Guide)
Mode d'emploi (Guide de démarrage rapide)
Bedienungsanleitung (Kurzanleitung)
Istruzioni per l'uso (Guida di avvio veloce)
Handleiding (Snelstartgids)
Manual de instrucciones (Guía de inicio rápido)
Manual de instruções (Guia de início rápido)
Инструкции по эксплуатации
(Краткое руководство пользователя)
DJ Controller
Contrôleur pour DJ
DJ Controller
DJ Controller
DJ Controller
Controlador DJ
Controlador para DJ
Werbung
Kapitel
Inhaltsverzeichnis
Fehlerbehebung

Verwandte Anleitungen für PIONEER DJ DDJ-SR2


Inhaltszusammenfassung für PIONEER DJ DDJ-SR2
- Seite 1 DJ Controller Contrôleur pour DJ DJ Controller DJ Controller DDJ-SR2 DJ Controller Controlador DJ Controlador para DJ pioneerdj.com/support/ http://serato.com/ For FAQs and other support information for this product, visit the above site. Pour les FAQ et autres informations de support sur ce produit, consultez le site ci-dessus.
-
Seite 26: Betriebsumgebung
Vielen Dank, dass Sie sich für dieses Pioneer-Produkt entschieden haben. Bitte lesen Sie diese Bedienungsanleitung gründlich durch, um sich mit der Bedienung des Geräts vertraut zu machen. Nachdem Sie die Bedienungsanleitung gelesen haben, legen Sie sie griffbereit zum Nachschlagen ab. In manchen Ländern oder Regionen können sich die Formen von Netzstecker und Netzsteckdose von denen in den Erklärungszeichnungen unterschei- den. - Seite 27 Inhalt Zum Lesen dieser Anleitung Vielen Dank für den Erwerb dieses Pioneer DJ-Produkts. Lesen Sie vor der Verwendung des Produkts diese Anleitung und die auf der Pioneer DJ-Website verfügbare Bedienungsanleitung. Beide enthalten wichtige Informationen, die Sie zur ordnungsgemäßen Verwendung des Produkts verstehen sollten.
-
Seite 28: Vor Der Inbetriebnahme
Der in der Audioausgangsschaltung implementierte Low-Jitter- Taktgeber und Hochleistungs-DAU gewährleisten die originalgetreue Tonwiedergabe zum Erzielen eines klaren Clubsounds. Die für die Profi- Anzeige der neuesten Version der Serie von Pioneer DJ entwickelte Klangqualitätstechnologie sorgt für das höchste Klangniveau bei einem DJ-Controller. Bedienungsanleitung Mehrere Anschlüsse 1 Starten Sie einen Webbrowser auf dem Computer und rufen Sie folgende Pioneer DJ-Website auf. -
Seite 29: Installieren Der Software
3 Klicken Sie auf [FIND TUTORIAL & MANUALS]. Sonstiges Ein USB 2.0-Port ist zum Anschluss des Computers an 4 Klicken Sie auf [DDJ-SR2] in der [DJ USB-Anschluss dieses Gerät erforderlich. CONTROLLER]-Kategorie. Display-Auflösung 1280 x 720 oder höher 5 Klicken Sie auf der Download-Seite auf die Zum Registrieren des „Serato.com“-Benutzerkontos... -
Seite 30: Bezeichnungen Der Teile
Melden Sie sich vor der Installation als Administrator am Computer an. 1 Extrahieren Sie die heruntergeladene Treibersoftware Falls andere Programme auf dem Computer laufen, beenden Sie diese. (DDJ-SR2_M_X.X.X.zip). 1 Extrahieren Sie die heruntergeladene Treibersoftware 2 Doppelklicken Sie auf [DDJ-SR2_M_X.X.X.dmg]. (DDJ-SR2_X.XXX.zip). 3 Doppelklicken Sie [DDJ-SR2_AudioDriver.pkg]. - Seite 31 1 Browser-Sektion 1 Jog-Scheibe 2 Deck-Sektionen 2 NEEDLE SEARCH-Pad 3 Mixer-Sektion 3 SLIP (VINYL)-Taste 4 Effekt-Sektion 4 TEMPO-Schieber 5 KEY LOCK/TEMPO RESET (TEMPO RANGE)-Taste Browser-Sektion 6 KEY SYNC-Taste 7 KEY SHIFT -Taste, KEY SHIFT -Taste 8 RESET-Taste 9 AUTO LOOP-Taste a LOOP 2X-Taste b LOOP 1/2X-Taste c LOOP OUT-Taste...
-
Seite 32: Mixer-Sektion
c Kanalpegelanzeige Mixer-Sektion d Master-Pegelanzeige Effekt-Sektion Die Effekt-Sektion dient zur Steuerung der beiden Effekteinheiten (FX1 und FX2). Die Tasten und Regler für die Bedienung der FX1-Einheit befin- den sich auf der linken Seite des Controllers und die für die Bedienung der FX2-Einheit befinden sich auf der rechten Seite des Controllers. -
Seite 33: Bedienung
5 Schließen Sie das Netzteil an Bedienung Netzteil (mitgeliefert) Zur Netzsteckdose Anschlüsse 1 Schließen Sie Kopfhörer an der [PHONES]-Buchse an. 6 Drücken Sie den [STANDBY/ON]-Schalter an der Rückseite dieses Geräts, um es einzuschalten. 2 Schließen Sie Aktivlautsprecher, Leistungsverstärker, Komponenten usw. an der [MASTER 1]- oder [MASTER 2]-Buchse an. -
Seite 34: Starten Des Systems
1 Das [BUY/ACTIVATE]-Icon erscheint möglicherweise an der rechten Seite des Bildschirms, der erscheint, wenn Serato DJ zum ersten Mal gestar- tet wird, aber ist nicht nötig, eine Aktivierung auszuführen oder eine Lizenz zur Verwendung von DDJ-SR2 zu erwerben. 2 Klicken Sie auf [Online], um die Einheit in ihrem aktuellen Zustand zu verwenden. -
Seite 35: Importieren Von Tracks
Importieren von Tracks Tracks werden im Prinzip wie folgt importiert. Es gibt verschiedene Möglichkeiten zum Importieren von Tracks mit der Serato DJ-Software. Einzelheiten siehe Anleitung für die Serato DJ-Software. Sie können die Track-Bibliotheken verwenden, die Sie mit den Serato-DJ-Funktionen erstellt haben (Scratch Live, ITCH oder Serato DJ Intro). Zur Verwendung der Track-Bibliotheken, die Sie mithilfe der Serato DJ Intro-Funktion erstellt haben, ist unter Umständen eine erneute Analyse von Tracks erforderlich. -
Seite 36: Mithören Von Ton Mit Kopfhörern
2 Drücken Sie die Taste [ ] zum Abspielen des Abspielen von Tracks und Ausgabe des Tracks. Sounds Das folgende Beispiel beschreibt das Verfahren zum Ausgaben des Sounds von Kanal 1 als Beispiel. Stellen Sie die Lautstärke der Komponenten (Leistungsverstärker, Aktivlautsprecher usw.), die an der [MASTER 1]- und [MASTER 2]-Buchse angeschlossen sind, auf einen angemessenen Pegel ein. -
Seite 37: Zusätzliche Informationen
Falls eine Störung dieses Geräts vorliegt, überprüfen Sie die unter Abtastrate ..................44,1 kHz „Störungssuche“ der Bedienungsanleitung für dieses Gerät ange- A/D-, D/A-Wandler .................24 bit gebenen Punkte und lesen Sie auch auf der Pioneer DJ-Support- Frequenzeigenschaften Website unter [FAQ] für [DDJ-SR2] nach. USB, LINE ...............20 Hz bis 20 kHz... - Seite 87 Files...
- Seite 88 ® ®...
- Seite 89 ® ™ ® ™ ® Support ® ® ® ™ FIND TUTORIAL & MANUALS DDJ-SR2 DJ CONTROLLER Software Info DDJ-SR2 DJ PRODUCTS Serato DJ DOWNLOAD SERATO DJ — Support Software & Firmware Updates — E-mail me Serato DDJ-SR2 DJ CONTROLLER...
- Seite 91 NEEDLE SEARCH SLIP (VINYL) TEMPO KEY LOCK/TEMPO RESET (TEMPO RANGE) KEY SYNC KEY SHIFT KEY SHIFT RESET AUTO LOOP LOOP 2X LOOP 1/2X LOOP OUT LOOP IN LOAD (BPM) e PARAMETER PARAMETER LOAD (ARTIST) HOT CUE BACK (VIEW) ROLL LOAD PREPARE (AREA) SLICER SAMPLER PLAY/PAUSE...
- Seite 92 FX BEATS FX 1 FX 2 INPUT SELECT TRIM EQ HI MID LOW) FILTER MASTER LEVEL PHONES BOOTH MONITOR HEADPHONES LEVEL HEADPHONES MIXING MIC LEVEL SAMPLER VOLUME SIGNAL GND BOOTH MASTER 2 MASTER 1 MASTER 1 DC IN MASTER 1 PHONO/LINE STANDBY/ON PHONO/LINE...
- Seite 94 Start All Programs Serato Serato DJ Serato DJ Apps view Serato DJ Applications Serato DJ BUY/ACTIVATE DDJ-SR2 Online Library Vertical Horizontal...
- Seite 95 Files Files Files Files Files] LOAD BACK (VIEW) LOAD BACK (VIEW) Serato DJ...
- Seite 96 MASTER 1 MASTER 2 TRIM TRIM MASTER LEVEL MASTER 1 MASTER 2 INPUT SELECT TRIM HEADPHONES MIXING EQ HI MID LOW) HEADPHONES LEVEL HEADPHONES LEVEL MASTER LEVEL BOOTH MONITOR HEADPHONES MIXING MASTER LEVEL INPUT SELECT DECK TRIM EQ HI MID LOW STANDBY/ON...
- Seite 97 USB LINE DDJ-SR2 LINE PHONO LINE LINE PHONO MASTER 1 MASTER 2 BOOTH PHONES MASTER 1 MASTER 2 LINE PHONO/LINE MASTER 1 MASTER 2 BOOTH PHONES MASTER 1 MASTER 2...