Inhaltsverzeichnis
Werbung
Verfügbare Sprachen
Verfügbare Sprachen
Quicklinks
Quick Start Guide
Guide rapide
Kurzanleitung
Guida di avvio rapido
Snelstartgids
Guía de inicio rápido
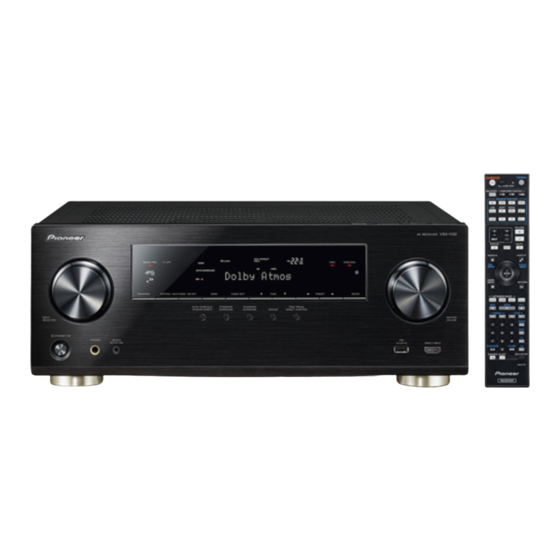
AV Receiver
Amplificateur AV
AV Receiver
Sintoamplificatore AV
AV Receiver
Receptor AV
AV-
Register your product at
http://www.pioneerelectronics.com (US)
http://www.pioneerelectronics.ca (Canada)
1 130
VSX-
930
VSX-
-K
-K/-S
Werbung
Inhaltsverzeichnis

Verwandte Anleitungen für Pioneer VSX-1130-K


Inhaltszusammenfassung für Pioneer VSX-1130-K
- Seite 1 Quick Start Guide Guide rapide Kurzanleitung Guida di avvio rapido Register your product at http://www.pioneerelectronics.com (US) Snelstartgids http://www.pioneerelectronics.ca (Canada) Guía de inicio rápido 1 130 VSX- AV Receiver Amplificateur AV AV Receiver Sintoamplificatore AV AV Receiver Receptor AV VSX- -K/-S...
-
Seite 2: What's In The Box
English VENTILATION CAUTION Thank you for buying this Pioneer product. This Quick Start Guide includes instructions for basic connections and operations to When installing this unit, make sure to leave space allow simple use of the receiver. For detailed descriptions of the receiver, see the “Operating Instructions” provided on the... - Seite 3 Connection and initial setup Perform connection and initial settings in any of the ways listed below. Follow the guidance of the built-in Follow the instructions in the Use “Start-up Navi” app to perform AVNavigator to perform connection booklet to perform connection connection and initial settings and initial settings and initial settings...
-
Seite 4: Connecting To The Network Through Lan Interface
If you have a Mac/PC Connecting to the network through LAN interface Plugging in the receiver After connecting to a LAN, connect the power cord of the Internet receiver to a power outlet. Modem Plug the supplied power cord into the AC IN socket on the Router back of the receiver. -
Seite 5: Operating Environment
Enter number in 2 above in the field in Operating environment Launching the built-in AVNavigator Internet Explorer shown below and then press • AVNavigator can be used in the following environments. Operate AVNavigator by following the screen prompts of your the ENTER key. - Seite 6 Follow the booklet instructions to perform connection and initial settings Connecting up Placing the Speakers L – Front Left C – Center TMdL TMdR R – Front Right SL – Surround Left SR – Surround Right SBL – Surround back Left SBR –...
-
Seite 7: Connecting The Speakers
Connecting up Connecting the speakers Center Front Right Subwoofer Front Left (SW) Be sure to complete all connections before connecting this unit to the AC power source. LINE LEVEL You can use speakers with a nominal INPUT impedance between 6 Ω and 16 Ω. Connecting the speakers. -
Seite 8: Connecting A Tv And Playback Components
Check the power cord once in a setting screen from the TV unless this while. When you find it damaged, ask your nearest Pioneer OPTICAL cable is connected. authorized service center or your dealer for a replacement. -
Seite 9: Initial Setup
Initial Setup Before you start Automatically setting up for surround sound (MCACC) Press MAIN RECEIVER on the remote control, Put the batteries in the remote control. The Auto Multi-Channel ACoustic Calibration (MCACC) setup uses the supplied setup microphone to measure and analyze then press the ENTER button. -
Seite 10: Basic Playback
Basic playback Switch on the playback component. Multichannel playback To enjoy the many functions of the E.g.) Turn the Blu-ray Disc player connected to the HDMI BD IN terminal on. unit to the fullest extent STANDBY/ON SOURCE Switch the input of the receiver. ALL ZONE STBY E.g.) Press BD to select the BD input. -
Seite 11: Frequently Asked Questions
(The power turns off in 5 seconds after the power is devices are unresponsive. the protection circuit is turned on. The receiver’s setting will be maintained.) activated. Also try replugging the power cord of the connecting devices. © 2015 PIONEER HOME ELECTRONICS CORPORATION. All rights reserved. -
Seite 12: Contenu Du Carton D'emballage
Français PRÉCAUTION DE VENTILATION Merci pour l’achat de ce produit Pioneer. Ce guide rapide contient les instructions relatives aux raccordements et opérations de Lors de l’installation de l’appareil, veillez à laisser un base permettant une utilisation simple de ce récepteur. Pour des descriptions plus détaillées du récepteur, référez-vous au espace suffisant autour de ses parois de manière à... - Seite 13 Raccordement et configuration initiale Procédez à la connexion et aux réglages initiaux selon l’une des méthodes énumérées ci-dessous. Suivez les directives du AVNavigator Utilisez l application Start-up Navi ’ “ ” Suivez les instructions dans le livret intégré pour procéder à la connexion et pour effectuer la connexion et les pour procéder à...
-
Seite 14: Raccordement Au Réseau Par L'interface Lan
Si vous avez un Mac ou un PC Raccordement au réseau par l’interface LAN Branchement du récepteur Après la connexion à un réseau LAN, branchez le cordon Internet d’alimentation du récepteur à une prise électrique. Modem Branchez le cordon d’alimentation fourni à la prise AC IN Routeur située à... -
Seite 15: Environnement D'exploitation
Saisissez le numéro de l’étape 2 ci-dessus Environnement d’exploitation Lancement de l’AVNavigator dans le champ d’Internet Explorer indiqué ci- • L’AVNavigator peut être utilisé dans les environnements intégré dessous, puis appuyez sur la touche ENTER. suivants. Utilisez AVNavigator en suivant les invites sur l’écran de votre ®... -
Seite 16: Installation Des Enceintes
Suivez les instructions dans le livret pour procéder à la connexion et aux réglages initiaux Raccordement Installation des enceintes L – Avant Gauche C – Centre TMdL TMdR R – Avant Droite SL – Surround Gauche SR – Surround Droite SBL –... -
Seite 17: Raccordement Des Enceintes
Raccordement Raccordement des enceintes Centre Avant Droite Caisson de grave Avant Gauche (SW) Assurez-vous que tous les branchements ont été effectués correctement avant de raccorder cet appareil au secteur. LINE LEVEL INPUT Vous pouvez utiliser des enceintes ayant une impédance nominale comprise entre 6 Ω et 16 Ω. Raccordement des enceintes. -
Seite 18: Raccordement D'un Téléviseur Et De Périphériques De Lecture
électrique. Vérifier le câble d’alimentation de temps HDMI IN configuration sur le DIGITAL AUDIO OUT en temps. Contacter le service après-vente Pioneer le plus téléviseur. proche ou le revendeur pour un remplacement. • Lorsque le récepteur n’est pas utilisé régulièrement Téléviseur compatible HDMI/DVI... -
Seite 19: Configuration Initiale
Configuration initiale Préparatifs Confi guration automatique du son surround (MCACC) Appuyez sur MAIN RECEIVER de la télécommande, Insérez les piles dans la télécommande. Le système de calibrage acoustique multicanaux (Multi- Channel ACoustic Calibration, MCACC) utilise le microphone puis appuyez sur la touche ENTER. de configuration fourni pour mesurer et analyser la tonalité... -
Seite 20: Lecture De Base
Lecture de base Allumez le lecteur. Lecture multicanaux Pour profiter au maximum des Ex.) Allumez le lecteur de disque Blu-ray raccordé à la prise HDMI BD IN. nombreuses fonctions de l’appareil STANDBY/ON SOURCE Sélectionnez l’entrée du récepteur. ALL ZONE STBY Ex.) Appuyez sur BD pour sélectionner l’entrée BD. -
Seite 21: Foire Aux Questions
5 secondes après la mise sous tension. Les réglages du le circuit de protection est récepteur seront conservés.) activé. Essayez également de rebrancher le cordon d’alimentation des appareils connectés. © 2015 PIONEER HOME ELECTRONICS CORPORATION. Tous droits de reproduction et de traduction réservés. - Seite 22 Deutsch VORSICHTSHINWEIS ZUR BELÜFTUNG Vielen Dank, dass Sie sich für dieses Pioneer-Produkt entschieden haben. Die Kurzanleitung enthält Anweisungen für grundlegende Verbindun- Bei der Aufstellung dieses Gerätes muss für einen gen und Bedienvorgänge, um eine einfache Bedienung des Receivers zu ermöglichen. Detaillierte Beschreibungen des Receivers finden Sie in der ausreichenden Freiraum gesorgt werden, um eine „Bedienungsanleitung“...
- Seite 23 Anschluss und Anfangseinstellungen Anschluss und Grundeinstellungen in der nachfolgend aufgeführten Weise vornehmen. Verwenden Sie zum Einrichten Befolgen Sie die Anweisungen Befolgen Sie die Anweisungen in von Verbindung und des integrierten AVNavigator, der Broschüre, um den Anschluss Grundeinstellungen die App „Start- um den Anschluss und die und die Grundeinstellungen up Navi“...
-
Seite 24: Herstellen Der Verbindung Zum Netzwerk Über Die Lan-Schnittstelle
Wenn Sie einen Mac/PC haben Herstellen der Verbindung zum Netzwerk über die LAN-Schnittstelle Anschluss des Receivers an das Stromnetz Internet Stellen Sie eine LAN-Verbindung her und verbinden Sie das Modem Netzkabel des Receivers mit einer Steckdose. Router Schließen Sie das mitgelieferte Netzkabel an die AC IN- Buchse auf der Rückseite des Receivers an. -
Seite 25: Starten Des Integrierten Avnavigator
Geben Sie in den Internet Explorer, im unten Betriebsumgebung Starten des integrierten AVNavigator angezeigten Feld, die Nummer von Schritt • Der AVNavigator kann in den folgenden Umgebungen Bedienen Sie AVNavigator entsprechend den Anweisungen 2 ein, und drücken Sie dann auf die ENTER- verwendet werden. -
Seite 26: Lautsprecher Aufstellen
Befolgen Sie die Anweisungen in der Broschüre, um den Anschluss und die Grundeinstellungen vorzunehmen Anschlüsse Lautsprecher aufstellen L – Vorne links C – Center TMdL TMdR R – Vorne rechts SL – Surround links SR – Surround rechts SBL – Surround hinten links SBR –... -
Seite 27: Anschluss Der Lautsprecher
Anschlüsse Anschluss der Lautsprecher Center Vorne rechts Subwoofer Vorne links (SW) Achten Sie darauf, dass alle Verbindungen angeschlossen sind, bevor Sie das Gerät an die Netzstromquelle anschließen. LINE LEVEL INPUT Sie können Lautsprecher mit einer Nennimpedanz von 6 Ω bis 16 Ω verwenden. Lautsprecher anschließen. -
Seite 28: Anschluss Eines Fernsehgeräts Und Von Wiedergabe-Komponenten
Sie das Netzkabel von Zeit zu Zeit. Sollte es beschädigt HDMI IN DIGITAL AUDIO OUT sein, wenden Sie sich an Ihre nächste autorisierte Pioneer- Kundendienststelle oder Ihren Händler, um es zu ersetzen. HDMI/DVI kompatibles TV • Wenn dieser Receiver über einen längeren Zeitraum nicht verwendet werden soll (z. -
Seite 29: Anfangseinstellungen
Anfangseinstellungen Vor der Inbetriebnahme Automatische Einstellung des Surround-Klangs (MCACC) Auf der Fernbedienung MAIN RECEIVER Legen Sie die Batterien in die Fernbedienung Die Auto Multi-Channel ACoustic Calibration (MCACC) Einrichtung verwendet das mitgelieferte Setup-Mikrofon, um drücken, anschließend die ENTER Taste. ein. den von den Lautsprechern ausgegebenen Testton zu messen •... -
Seite 30: Grundlegende Wiedergabe
Grundlegende Wiedergabe Schalten Sie die Wiedergabekomponente ein. Mehrkanalwiedergabe Um die zahlreichen Funktionen des Z.B.) Schalten Sie den Blu-ray Disc-Player, der an den HDMI BD IN-Anschluss angeschlossen ist, ein. Geräts zum größten Umfang zu genießen STANDBY/ON SOURCE Schalten Sie den Eingang des Receivers ein. ALL ZONE STBY Z.B.) Drücken Sie BD, um den BD-Eingang zu wählen. -
Seite 31: Häufig Gestellte Fragen
Geräte Minuten nachdem der Strom eingeschaltet wurde abgeschaltet. und die Schutzschaltung ist antwortet nicht. Die Einstellungen des Empfängers werden beibehalten.) eingeschaltet. Versuchen Sie auch, das Netzkabel der angeschlossenen © 2015 PIONEER HOME ELECTRONICS CORPORATION. Geräte umzustecken. Alle Rechte vorbehalten. -
Seite 32: Contenuto Della Confezione
Italiano AVVERTENZA PER LA VENTILAZIONE Vi ringraziamo per avere acquistato questo prodotto Pioneer. Questa Guida di avvio rapido comprende istruzioni per i collegamenti fondamen- Installare l’apparecchio avendo cura di lasciare un tali e per le operazioni essenziali di questo ricevitore. Per una descrizione dettagliata del ricevitore, vedere le “Istruzioni per l’uso” contenute nel certo spazio all’intorno dello stesso per consentire una... - Seite 33 Collegamento ed impostazione iniziali Effettuare il collegamento e le impostazioni iniziali in uno dei modi elencati di seguito. Seguire la guida dell’AVNavigator Seguire le istruzioni nell’opuscolo Utilizzare l’applicazione “Start-up incorporato per eseguire il per effettuare il collegamento e Navi” per eseguire il collegamento collegamento e le impostazioni le impostazioni iniziali e le impostazioni iniziali...
-
Seite 34: Collegamento Alla Rete Lan Via L'interfaccia Lan
Se si possiede un Mac/PC Collegamento alla rete LAN via l’interfaccia LAN Collegamento del ricevitore Dopo aver stabilito la connessione a una rete LAN, collegare il Internet cavo di alimentazione del ricevitore a una presa di corrente. Modem Collegare il cavo di alimentazione in dotazione alla presa Router AC IN nella parte posteriore del ricevitore. -
Seite 35: Ambiente Operativo
Immettere il numero del punto 2 sopra descritto Ambiente operativo Avvio dell’applicazione nel campo del browser Internet Explorer • AVNavigator può essere utilizzato negli ambienti elencati AVNavigator incorporata indicato sotto, quindi premere il tasto INVIO. di seguito. Utilizzare AVNavigator seguendo le schermate del computer. ®... -
Seite 36: Posizionamento Dei Diffusori
Seguire le istruzioni dell’opuscolo per effettuare il collegamento e le impostazioni iniziali Collegamenti Posizionamento dei diffusori L – Anteriore sinistro C – Centrale TMdL TMdR R – Anteriore destro SL – Surround sinistro SR – Surround destro SBL – Surround posteriore sinistro SBR –... -
Seite 37: Collegamento Dei Diffusori
Collegamenti Collegamento dei diffusori Centrale Anteriore destro Subwoofer Anteriore sinistro (SW) Assicurarsi di completare tutti i collegamenti prima di collegare questa unità alla presa elettrica CA. LINE LEVEL INPUT È possibile utilizzare diffusori con un'impedenza nominale compresa tra 6 Ω e 16 Ω. Collegamento dei diffusori. -
Seite 38: Collegamento Delle Antenne
TV a meno HDMI IN DIGITAL AUDIO OUT autorizzato della Pioneer oppure al vostro rivenditore per la che il cavo non sia collegato. sostituzione del filo di alimentazione. • Il ricevitore deve essere scollegato estraendo la spina dalla... -
Seite 39: Impostazione Iniziale
Impostazione iniziale Prima di iniziare Impostazione automatica dell’audio surround (MCACC) Premere MAIN RECEIVER sul telecomando, Mettere le batterie nel telecomando. L’impostazione Auto Multi-Channel ACoustic Calibration (MCACC) usa il microfono di impostazione allegato per quindi premere il pulsante ENTER. misurare ed analizzare il tono di prova emesso dai diffusori. •... -
Seite 40: Riproduzione Di Base
Riproduzione di base Attivare il componente di riproduzione. Riproduzione multicanale Per godere al massimo delle molto Ad es.) Accendere il lettore Blu-ray Disc collegato al terminale HDMI BD IN. funzioni di questa unità STANDBY/ON SOURCE Cambiare l’ingresso del ricevitore. ALL ZONE STBY Ad es.) Premere BD per scegliere l’ingresso BD. -
Seite 41: Domande Frequenti
5 secondi dopo il collegamento dell’alimentazione. rispondono. protezione viene attivato. Le impostazioni del ricevitore verranno mantenute.) Inoltre, provare a ricollegare il cavo di alimentazione dei © 2015 PIONEER HOME ELECTRONICS CORPORATION. dispositivi di collegamento. Tutti i diritti riservati. -
Seite 42: Inhoud Van De Doos
Nederlands BELANGRIJKE INFORMATIE BETREFFENDE Hartelijk dank voor de aanschaf van dit Pioneer product. In deze snelstartgids vindt u de instructies voor de basisaansluitingen en de basisbedien- DE VENTILATIE ing voor een eenvoudig gebruik van de receiver. Voor meer gedetailleerde informatie wordt u verwezen naar de “Handleiding” die op de... - Seite 43 Aansluitingen en eerste instellingen Voer de verbindings- en begininstellingen uit op een van de onderstaande manieren. Volg de richtlijnen van de Volg de instructies in het Gebruik de app “Start-up Navi” om ingebouwde AVNavigator om de boekje om de verbindings- en de verbindings- en begininstellingen verbindings- en begininstellingen uit begininstellingen uit te voeren...
-
Seite 44: Aansluiten Op Het Netwerk Via De Lan-Interface
Als u een Mac/PC hebt Aansluiten op het netwerk via de LAN-interface De receiver aansluiten op het stopcontact Internet Nadat u de receiver op het LAN hebt aangesloten, steekt u de Modem stekker van het netsnoer in het stopcontact. Router Sluit het geleverde netsnoer aan op de AC IN-aansluiting aan de achterkant van de receiver. - Seite 45 Voer het adres uit stap 2 in het veld in Internet Gebruiksomgeving De ingebouwde AVNavigator Explorer in zoals hieronder wordt getoond, en • AVNavigator is beschikbaar op de volgende systemen. starten druk op de ENTER-toets. ® ® ® – Windows-PC: Microsoft Windows Vista /Windows Bedien AVNavigator door de instructies op het scherm van uw...
-
Seite 46: De Luidsprekers Opstellen
Volg de instructies in het boekje om de verbindings- en begininstellingen uit te voeren Aansluitingen De luidsprekers opstellen L – Linksvoor C – Midden TMdL TMdR R – Rechtsvoor SL – Surround links SR – Surround rechts SBL – Surround linksachter SBR –... -
Seite 47: De Luidsprekers Aansluiten
Aansluitingen De luidsprekers aansluiten Midden Rechtsvoor Subwoofer Linksvoor (SW) Zorg dat alle aansluitingen zijn voltooid voordat u dit toestel aansluit op de netvoedingsbron. LINE LEVEL INPUT U kunt luidsprekers met een nominale impedantie tussen 6 Ω en 16 Ω gebruiken. De luidsprekers aansluiten. -
Seite 48: De Antennes Aansluiten
Kontroleer het netsnoer af en toe. Wanneer weergeven via de u de indruk krijgt dat het beschadigd is, dient u bij uw TV als deze kabel is dichtstbijzijnde erkende Pioneer onderhoudscentrum of uw OPTICAL aangesloten. dealer een nieuw snoer te kopen. -
Seite 49: Eerste Instellingen
Eerste instellingen Voordat u begint De instellingen voor surroundgeluid automatisch maken (MCACC) Druk op MAIN RECEIVER op de Plaats batterijen in de afstandsbediening. De automatische meerkanaals akoestische kalibratie (MCACC) instelling maakt gebruik van de bijgeleverde instelmicrofoon om afstandsbediening en druk vervolgens op de de testtoon die door de luidsprekers wordt uitgevoerd te meten ENTER-knop. -
Seite 50: Basisbediening Voor Afspelen
Basisbediening voor afspelen Schakel het weergave-apparaat in. Meerkanaals weergave Om optimaal te genieten van de vele Bijv.: Schakel de Blu-ray disc-speler in die op de HDMI BD IN-aansluiting is aangesloten. functies van het apparaat STANDBY/ON SOURCE Schakel de ingangsfunctie van de receiver om. ALL ZONE STBY Bijv.: Druk op BD om de BD-ingang te selecteren. -
Seite 51: Veelgestelde Vragen
De instellingen van de beschermingscircuit is receiver blijven behouden.) geactiveerd. U kunt ook de stekker van het netsnoer van de aangesloten apparaten uit het stopcontact halen en er weer insteken. © 2015 PIONEER HOME ELECTRONICS CORPORATION. Alle rechten voorbehouden. -
Seite 52: Contenido De La Caja
Español PRECAUCIÓN PARA LA VENTILACIÓN Muchas gracias por haber adquirido este producto de Pioneer. Esta Guía de inicio rápido incluye instrucciones para hacer las Cuando instale este aparato, asegúrese de dejar conexiones y operaciones básicas que le permitirán hacer un uso sencillo del receptor. Para conocer una descripción detallada espacio en torno al mismo para la ventilación con el fin... - Seite 53 Conexión y configuración inicial Realice la conexión y la configuración inicial de cualquiera de las siguientes formas. Siga las instrucciones de AVNavigator Use la aplicación para “Start-up Navi” Siga las instrucciones del folleto incorporado para realizar la conexión y realizar la conexión y la configuración para realizar la conexión y la la configuración inicial inicial...
-
Seite 54: Conexión A La Red Mediante La Interfaz Lan
Si tiene un Mac/PC Conexión a la red mediante la interfaz LAN Conexión del receptor Tras la conexión a una LAN, conecte el cable de alimentación Internet del receptor a una toma de corriente. Modem Conecte el cable de alimentación suministrado a la toma Enrutador AC IN de la parte posterior del receptor. - Seite 55 Introduzca el número indicado en el paso 2 Entorno de funcionamiento Inicio del AVNavigator integrado anterior en el campo de Internet Explorer • AVNavigator se puede utilizar en los siguientes entornos. Controle AVNavigator siguiendo las instrucciones de la mostrado abajo y pulse a continuación la tecla ®...
- Seite 56 Siga las instrucciones del folleto para realizar la conexión y la configuración inicial Conexiones Disposición de los altavoces L – Delantero izquierdo C – Central TMdL TMdR R – Delantero derecho SL – Sonido envolvente izquierdo SR – Sonido envolvente derecho SBL –...
-
Seite 57: Conexión De Los Altavoces
Conexiones Conexión de los altavoces Central Delantero derecho Subwoofer Delantero izquierdo (SW) Asegúrese de completar todas las conexiones antes de conectar este equipo a la fuente de alimentación de CA. LINE LEVEL INPUT Puede utilizar los altavoces con una impedancia nominal de entre 6 Ω y 16 Ω. Conexión de los altavoces. -
Seite 58: Conexión De Antenas
HDMI IN DIGITAL AUDIO OUT conectado. Pioneer más cercano, o a su distribuidor. • Cuando no vaya a usar el receptor durante un período de Televisor compatible con HDMI/DVI tiempo prolongado (por ejemplo, durante las vacaciones), •... -
Seite 59: Configuración Inicial
Configuración inicial Antes de comenzar Confi guración automática para sonido envolvente (MCACC) Pulse MAIN RECEIVER en el mando a distancia Ponga las pilas en el mando a distancia. La configuración de calibración acústica automática multicanal (MCACC) utiliza el micrófono incluido de y luego pulse el botón ENTER. -
Seite 60: Reproducción Básica
Reproducción básica Encienda el componente de reproducción. Reproducción multicanal Para disfrutar al máximo de las Ej.) Encienda el reproductor de discos Blu-ray conectado al terminal HDMI BD IN. muchas funciones de la unidad STANDBY/ON SOURCE Cambie la entrada del receptor. ALL ZONE STBY Ej.) Pulse BD para seleccionar la entrada BD. -
Seite 61: Preguntas Frecuentes
Se mantendrá la configuración del receptor.) protección está activado. Pruebe a volver a conectar el cable de alimentación de los dispositivos de conexión. © 2015 PIONEER HOME ELECTRONICS CORPORATION. Todos los derechos reservados. - Seite 62 Русский ОБЯЗАТЕЛЬНАЯ ВЕНТИЛЯЦИЯ Б а а а а а Pioneer. В а К а а а П а а а а а а. П а а а а а а а а а CD-ROM ( «И », а а ( , 10 а...
- Seite 63 Подключение и первоначальная настройка Выполните подключение и начальные настройки одним из приведенных ниже способов. Для выполнения подключения Для выполнения подключения Для выполнения подключения и и начальных настроек и начальных настроек следуйте начальных настроек используйте следуйте инструкциям, инструкциям встроенного приложение «Start-up Navi» приведенным...
- Seite 64 Если у вас есть ПК/Mac Подключение к сети через интерфейс LAN Подключение ресивера к розетке После подключения к беспроводной сети LAN подсоедините Интернет кабель питания ресивера к сети питания. Модем одключите поставляемый кабель питания к П Router разъему AC IN на задней стороне ресивера. одключите...
- Seite 65 Введите цифры, показанные на дисплее Рабочее Окружение Запуск встроенного AVNavigator в шаге 2, в командной строке Internet • AVNavigator можно использовать в следующих средах. Explorer, как показано ниже, и нажмите Используйте AVNavigator в соответствии с подсказками на – Windows: Microsoft Windows Vista /Windows ®...
- Seite 66 Для выполнения подключения и начальных настроек следуйте инструкциям, приведенным в буклете Подключение Расположение громкоговорителей L – Передний левый громкоговоритель C – Центральный громкоговоритель R – Передний правый громкоговоритель SL – Левый громкоговоритель объемного TMdL TMdR звучания SR – Правый громкоговоритель объемного...
- Seite 67 Подключение Передний правый Низкочастотный Центральный Передний левый Подключение громкоговорителей громкоговоритель громкоговоритель громкоговоритель громкоговоритель (SW) Перед подключением этого блока к источнику питания переменного тока обязательно завершите все подключения. LINE LEVEL INPUT Можно использовать громкоговорители с номинальным полным сопротивлением от 6 Ω до 16 Ω. Подключение...
- Seite 68 OPTICAL HDMI IN DIGITAL AUDIO OUT заменой в ближайший официальный сервисный центр фирмы Pioneer или к Вашему дилеру. • Если ресивер не используется постоянно (например, вы Совместимый с HDMI/DVI телевизор уезжаете в отпуск), вытащите вилку кабеля питания из розетки. • Если телевизор поддерживает функцию Канала возврата аудиосигнала на HDMI, звучание телевизора поступает на ресивер через...
-
Seite 69: Первоначальная Настройка
Первоначальная настройка Перед началом работы Автоматическая настройка объемного звучания (МСАСС) Установите батарейки в пульт ДУ. Нажмите кнопку MAIN RECEIVER на пульте Настройка Auto Multi-Channel ACoustic Calibration (MCACC) с помощью поставляемого микрофона настройки измеряет ДУ, а затем нажмите кнопку ENTER. и анализирует тестовые тональные сигналы, выводимые •... -
Seite 70: Основные Операции Воспроизведения
Основные операции воспроизведения Включите компонент воспроизведения. Многоканальное воспроизведение Максимальное использование все- Например, включите проигрыватель Blu-ray Disc, подключенный к терминалу HDMI BD IN. возможных функций аппарата STANDBY/ON SOURCE Переключите вход на ресивере. ALL ZONE STBY Например, нажмите BD и выберите вход BD. Установите... -
Seite 71: Вопросы И Ответы
Вопросы и ответы Нет звука из центрального или заднего громкоговорителя Вывод звука с телевизора Причина Решение Порядок подключения и настройки см. на стр. 8 буклета. Для воспроизведения нажмите кнопку TV, чтобы переключиться на вход от телевизора. Для воспроизведения стерео при многоканальном Для... -
Seite 72: Дополнительная Информация
используемые компоненты и электроприборы. Если неполадку не удается устранить даже после выполнения указанных ниже действий, обратитесь в ближайшую независимую сервисную компанию, уполномоченную компанией Pioneer для выполнения ремонта. • В случае некорректной работы аппарата, вызванной внешними источниками, например статическим электричеством, выньте вилку из розетки и подключите ее снова, чтобы... -
Seite 73: Технические Характеристики
Разъем для iPod ............................USB Раздел интегрированного управления Терминал управления (IR) ..................ø 3,5 мини-джек (MONO) Сигнал IR ......................(Максимальный уровень: 2,0 В) Раздел сети (проводная) Терминал LAN ......................10 BASE-T/100 BASE-TX © PIONEER HOME ELECTRONICS CORPORATION, 2015. Все права защищены. - Seite 74 Да а а а. С Да а а P1 - Г Г 2001 2002 2003 2004 2005 2006 2007 2008 2009 2010 С Г 2011 2012 2013 2014 2015 2016 2017 2018 2019 2020 С P2 - М М С D3-7-10-7_A1_Ru...
- Seite 75 Português: Slovenščina: Declaration of Conformity with regard to the R&TTE Directive 1999/5/EC Pioneer declara que este [*] está Pioneer izjavlja, da je ta [*] v skladu z Manufacturer: EU Representative’s: conforme os requisitos essenciais e bistvenimi zahtevami in ostalimi outras disposições da Directiva relevantnimi določili direktive...
- Seite 76 (for Europe) http://www.pioneer.eu/uk (for U.K.) http://www.pioneer.com.sg (for Southeast Asia) http://www.pioneer.com.au (for Australia) http://www.pioneernz.co.nz (for New Zealand) http://www.pioneer-mea.com (for the Middle East and Africa) http://www.pioneerisrael.co.il (for Israel) PIONEER HOME ELECTRONICS CORPORATION 1-1, Shin-ogura, Saiwai-ku, Kawasaki-shi, Kanagawa 212-0031, Japan К а...