Herunterladen Inhalt Inhalt Diese Seite drucken

Werbung

Verfügbare Sprachen

Verfügbare Sprachen

BEDIENUNGSANLEITUNG
USER MANUAL
MODE D'EMPLOI
D-4
4-Channel
Dimmer Controller
Für weiteren Gebrauch aufbewahren!
Keep this manual for further needs!
Gardez ces instructions pour des utilisations ultérieurs!
© COPYRIGHT
Nachdruck verboten!
All rights reserved!
Réproduction interdite!

Werbung

Inhaltsverzeichnis
loading

Inhaltszusammenfassung für EuroLite D-4

  • Seite 1 BEDIENUNGSANLEITUNG USER MANUAL MODE D'EMPLOI 4-Channel Dimmer Controller Für weiteren Gebrauch aufbewahren! Keep this manual for further needs! Gardez ces instructions pour des utilisations ultérieurs! © COPYRIGHT Nachdruck verboten! All rights reserved! Réproduction interdite!
  • Seite 2: Sicherheitshinweise

    - diese Bedienungsanleitung genau beachten. EINFÜHRUNG Wir freuen uns, dass Sie sich für ein EUROLITE D-4 entschieden haben. Sie haben hiermit ein leistungs- starkes und vielseitiges Gerät erworben. Wenn Sie nachfolgende Hinweise beachten, sind wir sicher, dass Sie lange Zeit Freude an Ihrem Kauf haben werden.
  • Seite 3: Bestimmungsgemässe Verwendung

    Das Gerät darf nicht in Betrieb genommen werden, nachdem es von einem kalten in einen warmen Raum gebracht wurde. Das dabei entstehende Kondenswasser kann unter Umständen Ihr Gerät zerstören. Lassen Sie das Gerät solange uneingeschaltet, bis es Zimmertemperatur erreicht hat! Bitte achten Sie darauf, dass das Gerät jederzeit allpolig vom Netz zu trennen ist.
  • Seite 4: Gerätebeschreibung

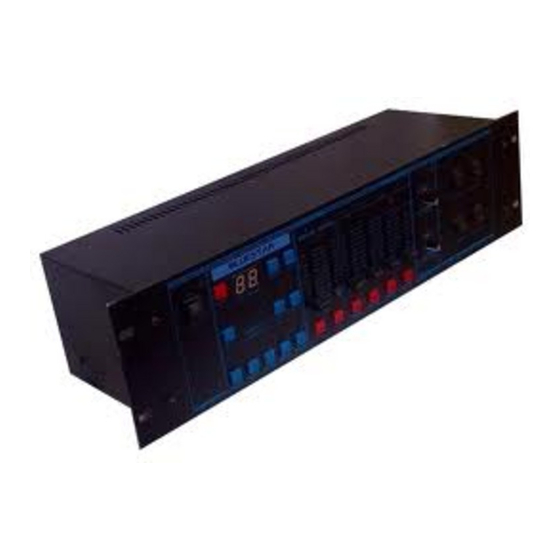
    GERÄTEBESCHREIBUNG Vorderseite: 1) Netzschalter 2) DIMMER-Taste 3) ORGAN-Taste 4) SHOW-Taste 5) P.AUTO-Taste 6) AUDIO-Taste 7) MASTER-Fader Mit dem Masterfader lässt sich der Gesamtausgangspegel der vier Kanäle einstellen. 8) BACKGROUND-Fader Mit dem Backgroundfader kann der Minimalausgangspegel der vier Kanäle (Hintergrundhelligkeit) eingestellt werden. 9) FULL-Taste Mit dieser Taste werden alle Kanäle gleichzeitig angeschaltet (geflasht) solange der Taster gedrückt bleibt.
  • Seite 5 Rückseite: ANSCHLÜSSE Eingänge Verbinden Sie Ihr Audiosignal vom Mischpult (z. B. Master 2-Ausgang) mit der 6,3 mm Monoklinkenbuchse an der Geräterückseite (Eingangsempfindlichkeit 0,2 V - 1,5 V). Anschluss ans Netz LEBENSGEFAHR! Lassen Sie den elektrischen Anschluss nur vom autorisierten Fachhandel ausführen! Um das Gerät ans Netz anzuschließen, müssen Sie zuvor einen Schuko-Stecker an die Netzleitung anbringen.
  • Seite 6: Übersicht Über Die Verschiedenen Modi

    Wird die Musikquelle an den Eingang an der Geräterückseite angeschlossen, können Sie mit der AUDIO- Taste die Soundsteuerung aktivieren (AUDIO-LED leuchtet). Das D-4 steuert dann nach dem Basstakt der Musik. Sie können die Empfindlichkeit des Gerätes über den AUDIO LEVEL-Regler einstellen.
  • Seite 7: Reinigung Und Wartung

    - B.OUT-Taste: Alle Kanäle werden abgeschaltet (Programm läuft weiter). Befindet sich das Gerät im Blackout-Modus ist die Master-LED aus. Visuelle Kontrolle Über die LEDs können Sie jederzeit die aktuellen Modi des D-4 kontrollieren. REINIGUNG UND WARTUNG LEBENSGEFAHR! Vor Wartungsarbeiten unbedingt allpolig vom Netz trennen! Das Gerät sollte regelmäßig von Verunreinigungen wie Staub usw.
  • Seite 8: Technische Daten

    TECHNISCHE DATEN Spannungsversorgung: 230 V AC, 50 Hz ~ Max. Gesamtleistung: 4600 W Max. Gesamtstrom: 20 A Ohmsche Last/Kanal: 1150 W Induktive Last/Kanal: 600 W Integrierte Programme: Steps je Programm: max. 64 Fußschalter-Eingangsbuchsen: Zwei 6,3 mm Mono-Klinke Audio-Eingangsbuchse: 6,3 mm Mono-Klinke Audio-Eingangsempfindlichkeit: 0,2 - 1,5 V Ausgangsbuchsen:...
  • Seite 9: Safety Instructions

    - follow the instructions of this manual INTRODUCTION Thank you for having chosen a EUROLITE D-4. You will see you acquired a powerful and versatile device. Unpack your D-4. Before you initial start-up, please make sure that there is no damage caused by transportation. Should there be any, consult your dealer and do not use the device.
  • Seite 10: Operating Determinations

    DANGER TO LIFE! The electric connection must only be carried out by a qualified electrician! Please make sure that the device can always be disconnected from the mains. This device falls under protection-class I. Make sure that the power-switch is set to OFF position before you connect the device to the mains. Never let the power-cord come into contact with other cables! Handle the power-cord and all connections with the mains with particular caution! Make sure that the available voltage is not higher than stated on the rear panel.
  • Seite 11 DESCRIPTION Frontpanel: 1) Power switch 2) DIMMER-button 3) ORGAN-button 4) SHOW-button 5) P.AUTO-button 6) AUDIO-button 7) MASTER-fader With the master-fader you can adjust the total output level of all four channels 8) BACKGROUND-fader With the background-fader you can adjust the minimum output level of all four channels (background). 9) FULL-button With this button, all channels are flashed as long as the button is pressed.
  • Seite 12 Rearpanel: CONNECTIONS Sound input Connect the sound-signal from the mixer (e.g. Master 2) with the ¼“ mono jack on the rear panel (input sensitivity 0.2 V - 1.5 V). Connection with the mains DANGER TO LIFE! The electric connection must only be carried out by a qualified electrician! In order to connect the device to the mains, you have to install a power-plug.
  • Seite 13: Operation

    If you have connected the music source to the input on the rearpanel, you can activate the sound control by pressing the AUDIO-button (AUDIO LED lit). The D-4 will chase to the bass-beat of the music. You can adjust the sensitivity of the D-4 by turning the AUDIO LEVEL-control.
  • Seite 14: Cleaning And Maintenance

    Display The LEDs provide steady control over the outputs. CLEANING AND MAINTENANCE DANGER TO LIFE! Disconnect from mains before starting maintenance operation! We recommend a frequent cleaning of the device. Please use a soft lint-free and moistened cloth. Never use alcohol or solvents! There are no servicable parts inside the device except for the fuse.
  • Seite 15: Instructions De Sécurité

    - être suffisamment qualifiée - suivre strictement les instructions de service suivantes. INTRODUCTION Nous vous remercions d'avoir choisi un EUROLITE D-4. Vous êtes en possession d'un appareil très performant. Sortez le D-4 de son emballage. Avant tout, assurez vous que l'appareil n'a pas subi de dommages lors de son transport. Si tel était le cas, contactez immédiatement votre revendeur.
  • Seite 16: Emploi Selon Les Prescriptions

    DANGER DE MORT! Les connexions électriques sont à faire effectuer par un installateur agrée! Assurez-vous que c'est toujour possible de débrancher l'appareil. La construction de l'appareil est conforme aux normes de sécurité de catégorie I. Assurez-vous que l'interrupteur ON/OFF de l'appareil est en position OFF avant d'effectuer ce branchement. Ne laissez pas les câbles d'alimentation en contact avec d'autres câbles.
  • Seite 17 DESCRIPTION Face: 1) Commutateur ON/OFF 2) Touche DIMMER 3) Touche ORGAN 4) Touche SHOW 5) Touche P.AUTO 6) Touche AUDIO 7) Fader MASTER Grâce au fader Master, vous pouvez ajuster le niveau total de les quatre canaux. 8) Fader BACKGROUND Grâce au fader Background, vous pouvez ajuster le niveau de la luminosité...
  • Seite 18 BRANCHEMENTS Entrée son Connecter la source son du mixer (p. ex. la sortie Master 2) à la prise mono 6,3 mm au dos de l'appareil (sensibilité 0,2 V - 1,5 V). Alimentation DANGER DE MORT! Les connexions électriques sont à faire effectuer par un installateur agrée! Pour brancher l’appareil, vous deviez installer une fiche au secteur.
  • Seite 19: Nettoyage Et Maintenance

    LED Audio n’est pas allumé, la vitesse peut être contrôlée par le régulateur Running Speed. MANIEMENT Le D-4 est prêt à l'usage dès que vous le brancherez au secteur. Contrôle de vitesse En coupant la contrôle son (AUDIO LED n'est pas allumé), vous pouvez controler la vitesse avec le régulateur RUNNING SPEED.
  • Seite 20: Caractéristiques Techniques

    L'appareil doit être nettoyée régulièrement. Utilisez un torchon non pelucheux humide. Ne pas utiliser de l’alcool ou des détergents pour le nettoyage! L'intérieur de l'appareil ne contient pas de partys nécéssitant un entretien sauf le fusible. L'entretien et les réparations doivent être effectuées par un technicien compétent! Remplacer le fusible Toujours remplacer un fusible par un autre de modèle identique.

Inhaltsverzeichnis